Pages

Dont Bug Me


Hi Friends!
Donna here with you today sharing the last post for May.
I can't believe the month is over...couldn't have done it without 
my crafting and my coffee that's for sure.  

My card today features the Buggy for Caffeine Stamp and Die Set. I colored with Copic Markers and added some gel pen accents along with some funkadelic paper that I had hiding in my stash. 
I love the crisp outline when using the matching die. 


Thank you for letting me share today.
I hope you are having the most beautiful day!

For more inspiration, updates, and news make sure to check out these places.


Holographic Ribbon Star Stencil

Hello! Alison here! Today I have a card that features the new Ribbon Star Stencil. I am so in love with it! I knew immediately that I need to experiment with different foils, and today's card features a holographic one.

I applied a stencil medium that works with foils to a panel of black cardstock. After it dried, I foiled it in my laminator.
I love the sentiments and the cow from the new Infinity & Beyond stamp set, so I heat embossed them with silver. Take a look at those beautiful flashes of color on the foil!
I mounted my panel on to a black card base, and added a piece of metallic washi tape to the right side.
This card is pretty clean and simple, but I think that the holographic foil speaks volumes. I really love this new stencil and I look forward to experimenting with it using other techniques. If you'd like more information, please head over to my blog HERE. Thanks so much for stopping by. Have an inspiring day!
Products used:


For more inspiration, updates, and news make sure to check out these awesome places! 

June Inspiration Hop Winners

Good Morning,
Today's post is real quick as we know you have been stalking the blog to see if  the winners were posted. 

Announcing the winners from the June release Facebook Fanpage and Instagram post's


using Random.org our winner from the Fan Page post is: Robyn Simon Running


and using AppSorteos our winner from the Instagram post is: @jordanbev5

email info@therabbitholedesigns.com to claim.  Please include what post you won. Winners have until 06-05-2020 to claim or prize is forfeited

Be sure to join us June 29th for our next release and another chance to win. If you have not already done so may we suggest joining our Facebook Fan Page where you will always be the first to know of any upcoming releases, and offers.

For more inspiration, updates, and news make sure to check out these places.

Thank you for falling down The Rabbit Hole for a few minutes!

June Release Inspiration Hop ~ Day 3


Hello and welcome to Day 3 of the Inspiration Hop. We are so excited for you to join us as we present to you our June release. Our fabulous Design Team has sharing their projects over the last couple of days, so be sure to visit their blogs and leave them some crafty love.


 The 2 new stamps sets and 2 new stencil are all available to purchase right now in the shop.


The stamp set that is being highlighted today is


Space - Miss You


Thank you so much for hopping along with us and the team for our June Inspiration Hop.


Here is the line up for the hop:

The Rabbit Hole Designs

Tangii
Von Marie
Kelly
Amanda

___________________


**Giveaway**


To celebrate the June release, The Rabbit Hole Designs is giving away two gift certificates; one to a lucky Instagram Follower and one to a lucky Fan Page follower.  Winner will be chosen at random from the comments left on the INSTAGRAM post, and tagging friends, and also from commenting on the Fan Page post.  So make sure to head on over to INSTAGRAM and look for the giveaway post @therabbitholedesignsllc and look for the post at The Rabbit Hole Designs Fan Page by 11:59 p.m. PST 05-28-2020.  Winner will be announced on The Rabbit Hole Designs blog 05-29-2020.

This is the graphic you are looking for on our IG and FB


___________________


For more inspiration, updates, and news make sure to check out these awesome places! 


Thank you so much for stopping by today!

June Release Inspiration Hop ~ Day 2


Hello and welcome to Day 2 of the Inspiration Hop. We are so excited for you to join us as we present to you our June release. Our fabulous Design Team will be sharing their projects over the next couple of days, so be sure to visit their blogs and leave them some crafty love.


 The 2 new stamps sets and 2 new stencil are all available to purchase right now in the shop.


The two new stencils that are being highlighted today are

Aim For The Stars Stencil

Ribbon Star Stencil
Make sure you come back tomorrow for Day 3 of our Inspiration Hop.


___________________


**Giveaway**


To celebrate the June release, The Rabbit Hole Designs is giving away two gift certificates; one to a lucky Instagram Follower and one to a lucky Fan Page follower.  Winner will be chosen at random from the comments left on the INSTAGRAM post, and tagging friends, and also from commenting on the Fan Page post.  So make sure to head on over to INSTAGRAM and look for the giveaway post @therabbitholedesignsllc and look for the post at The Rabbit Hole Designs Fan Page by 11:59 p.m. PST 05-28-2020.  Winner will be announced on The Rabbit Hole Designs blog 05-29-2020.

This is the graphic you are looking for on our IG and FB


___________________


For more inspiration, updates, and news make sure to check out these awesome places! 


Thank you so much for stopping by today!

June Release Inspiration Hop ~ Day 1


Hello and welcome to Day 1 of the Inspiration Hop. We are so excited for you to join us as we present to you our June release. Our fabulous Design Team will be sharing their projects over the next 3 days, so be sure to visit their blogs and leave them some crafty love.


 The 2 new stamps sets and 2 new stencil are all available to purchase right now in the shop.


The stamp set that is being highlighted today is

Infinity & Beyond


Make sure you come back tomorrow for Day 2 of our Inspiration Hop.


Here is the line up for the hop:

The Rabbit Hole Designs

Michelle
Justin
Jenn
Lisa
Alison
Amanda

___________________


**Giveaway**


To celebrate the June release, The Rabbit Hole Designs is giving away two gift certificates; one to a lucky Instagram Follower and one to a lucky Fan Page follower.  Winner will be chosen at random from the comments left on the INSTAGRAM post, and tagging friends, and also from commenting on the Fan Page post.  So make sure to head on over to INSTAGRAM and look for the giveaway post @therabbitholedesignsllc and look for the post at The Rabbit Hole Designs Fan Page by 11:59 p.m. PST 05-28-2020.  Winner will be announced on The Rabbit Hole Designs blog 05-29-2020.

This is the graphic you are looking for on our IG and FB


___________________


For more inspiration, updates, and news make sure to check out these awesome places! 


Thank you so much for stopping by today!

C-Ant Before Coffee


Good morning Rabbit Hole fans, it's Lisa from Oh So Cute By Lisa and today I 
have a card to share with you using the recently released Buggy For Caffeine stamp set and the Broken Glass stencil from The Rabbit Hole Designs.   
Here's a look at these 2 fun products:


I started by coloring up my little ant with my Copic markers on a small rectangular panel and notching the 4 corners just for a little extra detail.  I inked the edges of the panel to make it stand out against the background.  For the background of the card I used a Distressed Edge Rectangle die and did some ink blending over the Broken Glass stencil with some brown ink. I love the way the brown ink on kraft colored card stock gave the card an underground feeling. After the stenciling was done I stamped the caffeine symbol all over the background for some extra fun.
It's no secret that bugs are not my favorite thing in life but this stamp set really was fun to play with.  

🐜 🐜 🐜 🐜 🐜 🐜 🐜 🐜 🐜 🐜 🐜 🐜 🐜 🐜 🐜 

I hope this coffee loving Ant puts a little smile on your face today.
Make sure to visit The Rabbit Hole Design's shop and take a look around. You'll find a lot more caffeinated critters to make you smile, I guarantee it!
You can also find The Rabbit Hole products at Simon Says Stamp!

For more inspiration, updates, and news make sure to check out these places ...


Have a great day, I already am!
🐜 🐜 🐜 Lisa  🐜 🐜 🐜  

Coffee Loving Shaker Card

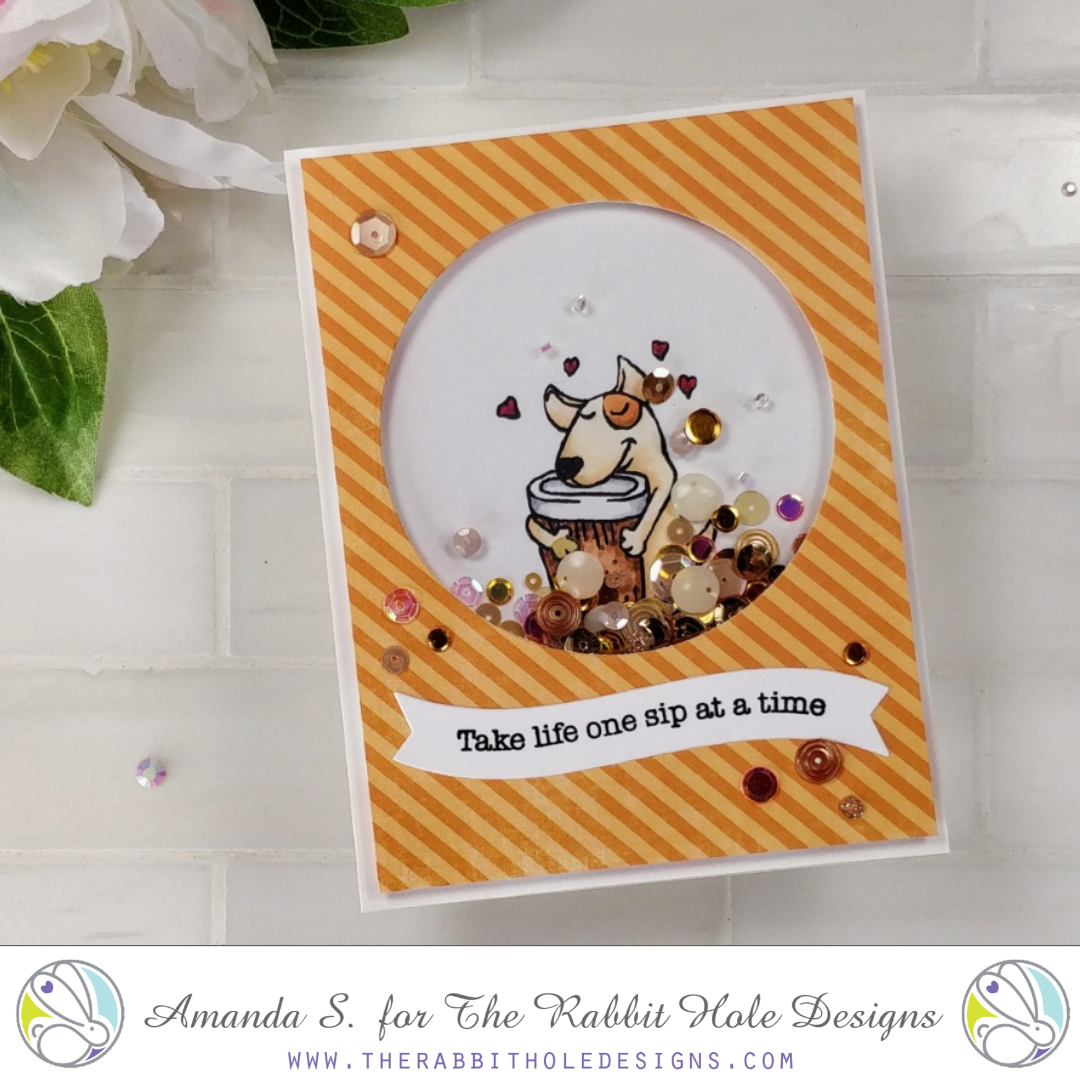
Caffeinated Terrier Shaker Card Coffee Card

Hello my crafty friend. Amanda here, from Pear Blossom Press again. Grab a cup of joe, and I'll tell you all about this fun shaker card...

I really love the new Caffeinated Terrier. Unlike many of the other caffeinated critters in the series, this little guy has a very satisfied expression on his face. Don't get me wrong, the tired eyes on the other critters crack me up, but the terrier helps you create a different mood. 

Having no idea what I was going to do with him when I stamped him, I played it safe and placed him in the middle of an A2 panel, then I colored him with Copic markers. I often stamp out one or more images on a panel and take them to the couch to color while I'm watching TV, or helping my daughter with schoolwork. 

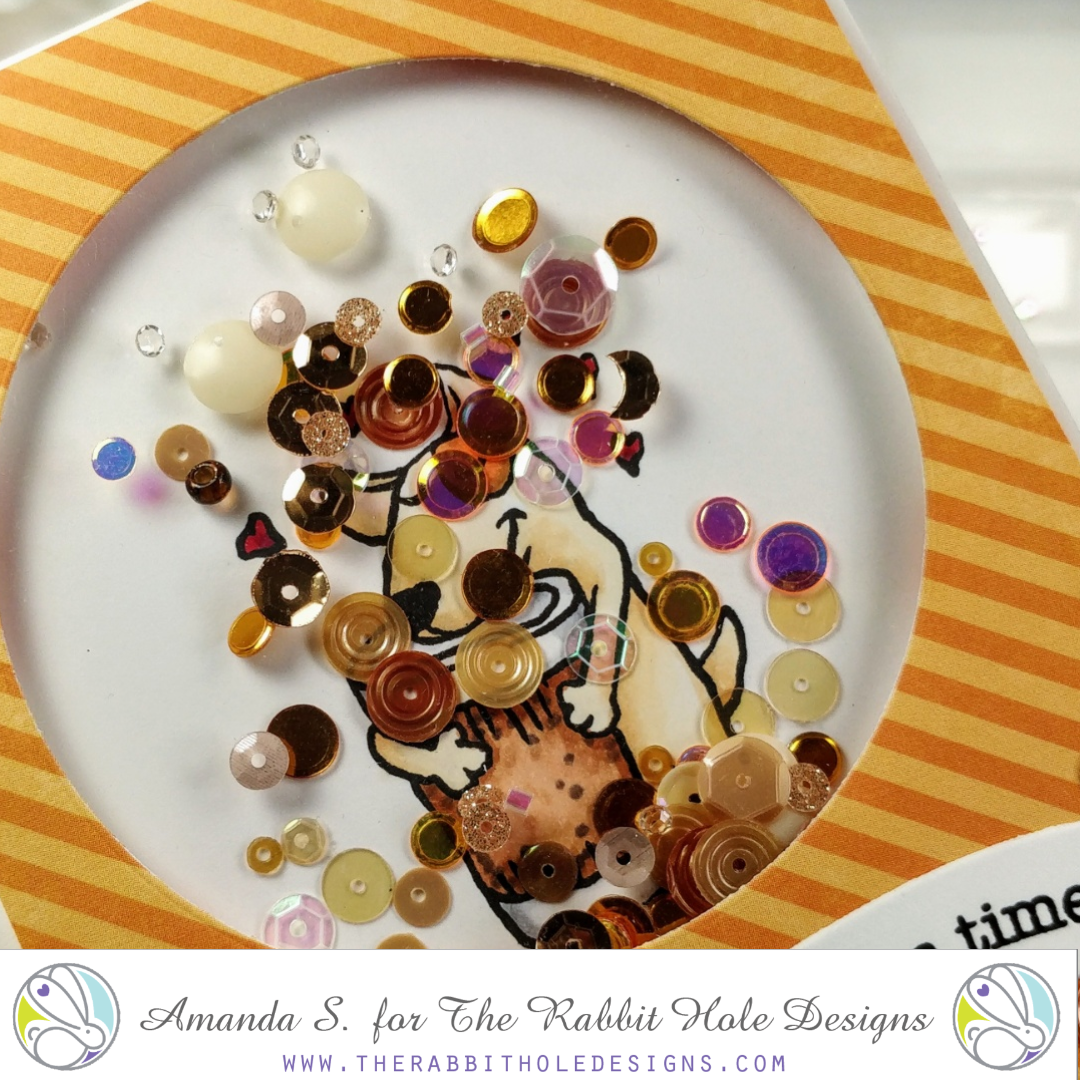
As I colored him, I thought about masking him off and ink blending a background behind him. But, if I'm being completely honest, I didn't want to fussy cut a mask when I sat down to complete the card the next day. And I've had a beautiful pack of Sparkle Blends in my stash for a long time, that are perfect for coffee themed shakers, so I decided to pair them up. I rummaged through my scraps and found orange stripe pattern paper, trimmed it down, and die cut a window with a circle die. (If I had cut the window first, then trimmed the panel down, it would have been easier. But that's what I'm here for, to make the mistakes and let you know how to avoid them, right?) I also pulled out the new orange sequins that came for free with my Rabbit Hole order. I figured I'd mix them in with the coffee blend, to pull all of my colors together. 

I used Scor-tape to adhere acetate behind the window; double stick tapes seem to work better than any of my wet glues for acetate. I used double thick foam tape to frame the back of the window and the border of the orange panel. A quick pass of the powder tool around the edges of the foam (before I removed the release paper) keeps the shaker bits from sticking to the sides. Then I peeled up the release paper, added the shaker bits, (got the order right there) and stuck the terrier panel to the frame. 

Caffeinated Terrier Shaker Card

Since I had trimmed the orange panel smaller than A2, and wanted to leave the stamped panel whole, I used a neat trick I learned in my friend Roslyn's video. I simply placed the frame face down on another A2 panel, lined it up, and used the outer edges of the second panel to line up the stamped panel. This is such a great idea for lining up larger pieces on top of smaller ones! Normally, I pile up the shaker bits in the center of the larger panel and place the smaller frame on top, but if you bump it, you can send that pile all over the place. 

To finish the card, I glued a sentiment banner along the bottom and a card base to the back. A few more sequins scattered on top add more interest and pull the whole thing together. I love the way it turned out, and the fun interactive element. What do you think? There's something so satisfying about the sound of a shaker...


Well, I hope I've inspired you to shake things up a little, and make some shaker cards of your own. And I hope your coffee didn't get cold while you were reading this. You can find the sister article to this on my blog. Hop on over for more inspiration. And be sure to come back on Monday, as we kick off the new release; it's outta this world! See you then...

For more inspiration, updates, and news make sure to check out these awesome places!


Don't Bug Me!

Hi everyone! Von Marie here and I'm so happy to be on the blog today, I have a fun Buggy card to share with you.


Isn't this Buggy cute?  I think so.  I used Buggy For Caffeine and the Broken Glass Stencil for my card today. I first stamped him onto some Neenah Classic Crest Cardstock and colored him with my Copic markers.  I then fussy cut him out and put him aside to work on my background.  I used the Broken Glass Stencil with Vintage Photo Distress Oxide ink and a blending brush over my rectangle. I then used a stitched rectangle die do make my panel.


I also cut out a small decorative rectangle and used Mowed Lawn Distress Oxide Ink and ink blended it. I then added some glittery green paste all over it.  I added the rectangle onto my stenciled panel and added my buggy with foam tape.  I stamped my sentiment and cut it out with my paper trimmer and added a little green distress oxide on it.  I then added it with foam tape and added enamel dots to match.  I hope you like my buggy card today?.  Thank you for stopping by!


Supplies I used:


For more inspiration, updates, and news make sure to check out these awesome places!

Thank you so much for stopping by today!

Don't Bug the Beetle Card

Hey Everyone! Justin here and today I am sharing a project using the new Buggy for Caffeine set! This adorable beetle was the last bug in the set I wanted to make sure I used, and I wanted to take a different approach to this one. My last 2 bug cards were more earthier tones, so I decided that, for the beetle, I would go in a vibrant color direction!

For this card, I didn't do my coloring first. I took a scrap piece of white cardstock with the Candy Twist stencil and applied a thin layer of an electric purple glitter gel. I removed my stencil immediately to be cleaned, and then set my piece aside to dry.

I colored up my beetle with Copic markers and fussy cut them out. Next, I took an A2-sized piece of white cardstock and placed the Square Illusion stencil on top. I blended a red-to-pink-to-purple ombré using dye inks, since I knew they would give me more of that vibrant look I was going for! While the stencil was still on my panel, I spritzed it with some water to get that dappled effect, along with helping the colors blend together more.

Next, I took out some nesting square dies and cut a diamond directly from the upper middle part of the panel. Then, I cut out a diamond frame using the nesting dies from a purple glitter cardstock. I adhered this frame directly over my main panel diamond cut out.

I stamped the sentiment "Don't bug me I haven't had my coffee yet" from the Buggy for Caffeine set in red ink on white cardstock, cut it into a box, and framed it in that same purple glitter cardstock. I wanted to make this into a band, and I used the leftover scrap die cut from my diamond window. I cut it into 2 pieces, adhered them to my card, and adhered my actual sentiment over the top.

All I had left to do was some adhering, and my project was done. I took some clear acrylic bubble embellishments and adhered them to my project. I then took an A2-sized card base, and found where my diamond cut out window would be, and adhered my purple glittery Candy Twist piece directly behind it. I took some foam tape and adhered my main panel onto the card base to give the cut out window some depth. To finish my card, I used foam tape to adhered my beetle to the front of my card, and I was done!

I used the following products in this card:


For more inspiration with your The Rabbit Hole Designs Creations, be sure to follow along at these other locations:


For more details about products used in this post, you may also follow along at my personal blog, Just a Note by Justin, as well!

I hope you enjoyed my project and that it sparks some buggy inspiration for your next creation!

Happy Crafting!