Pages

Saturday, February 29, 2020

There's Nobunny Like You


Good morning and welcome to The Rabbit Hole Designs blog! It's Lisa here with a new card featuring the recently released All Ears stamp set. How cute are those bunnies all stacked up? There are so many different ways to color them and they always look so cute! During the hop the design team colored them in pastels, greys, browns, and just fluffy white. For my card today I decided to leave them mostly white with a light grey border around the edges just to accentuate the white.  I of course colored their ears pink and gave them pink cheeks with polka dots.  One of my favorite things to do with critter stamps is to give them pink cheeks with 3 white dots in a triangle with my white gel pen.  I just think it adds a lot of charm to them.

I decided to use a kraft color card base and start with a 4x4 square card.
This was a super easy card to make once the coloring was done.  I used some pretty Spring themed Doodlebug design paper and cut it down using a zig zag border die.  I created a half circle for the bunnies to sit on. For the base of the card I created some texture on the base of the card using a polka dot embossing folder. The bunnies were popped up on foam tape and the sentiment from the same stamp set was stamped onto white paper, trimmed and matted with kraft paper.

Although it's a simple card design I just love how all the colors go together so well!

So glad you could join me today!

For more inspiration, updates, and news make sure to check out these places ...


Have a great day, I already am!
🐰 Lisa  🐰 


Wednesday, February 26, 2020

March Release Inspiration Hop ~ Day 3

Hello and welcome to Day 3 of the Inspiration Hop. We are so excited for you to join us as we present to you our March release.  Our fabulous Design Team will be sharing their projects, so be sure to visit their blogs and leave them some crafty love.


 The 3 new stamps sets are available to purchase right now in the shop.


The stamp set that is being highlighted today is


Tank you for joining us for March our Inspiration Hop.


Here is the line up for the hop:

_________________________


**Giveaway**


To celebrate the March release,  The Rabbit Hole Designs is giving away two gift certificates; one to a lucky Instagram Follower and one to a lucky Fan Page follower.  Winner will be chosen at random from the comments left on the INSTAGRAM post, and tagging friends, and also from commenting on the Fan Page post.  So make sure to head on over to INSTAGRAM and look for the giveaway post @therabbitholedesignsllc and look for the post at The Rabbit Hole Designs Fan Page by 11:59 p.m. PST 02-27-2020.  Winner will be announced on The Rabbit Hole Designs blog 02-28-2020.

This is the graphic you are looking for on our IG and FB

___________________


For more inspiration, updates, and news make sure to check out these awesome places! 


Thank you so much for stopping by today!

Tuesday, February 25, 2020

March Release Inspiration Hop ~ Day 2

Hello and welcome to Day 2 of the Inspiration Hop. We are so excited for you to join us as we present to you our March release.  Our fabulous Design Team will be sharing their projects, so be sure to visit their blogs and leave them some crafty love.


 The 3 new stamps sets are available to purchase right now in the shop.


The stamp set that is being highlighted today is


Make sure you come back tomorrow for Day 3 of our Inspiration Hop.


Here is the line up for the hop:
_________________________


**Giveaway**


To celebrate the March release,  The Rabbit Hole Designs is giving away two gift certificates; one to a lucky Instagram Follower and one to a lucky Fan Page follower.  Winner will be chosen at random from the comments left on the INSTAGRAM post, and tagging friends, and also from commenting on the Fan Page post.  So make sure to head on over to INSTAGRAM and look for the giveaway post @therabbitholedesignsllc and look for the post at The Rabbit Hole Designs Fan Page by 11:59 p.m. PST 02-27-2020.  Winner will be announced on The Rabbit Hole Designs blog 02-28-2020.

This is the graphic you are looking for on our IG and FB

___________________


For more inspiration, updates, and news make sure to check out these awesome places! 


Thank you so much for stopping by today!

Monday, February 24, 2020

March Release Inspiration Hop ~ Day 1

Hello and welcome to Day 1 of the Inspiration Hop. We are so excited for you to join us as we present to you our March release.  Our fabulous Design Team will be sharing their projects over the next 3 days, so be sure to visit their blogs and leave them some crafty love.


 The 3 new stamps sets are available to purchase right now in the shop.


The stamp set that is being highlighted today is


Make sure you come back tomorrow for Day 2 of our Inspiration Hop.


Here is the line up for the hop:

The Rabbit Hole Designs
Michelle
Cassie
Amanda
Lisa
Donna
Jammie
_______________________


**Giveaway**


To celebrate the March release,  The Rabbit Hole Designs is giving away two gift certificates; one to a lucky Instagram Follower and one to a lucky Fan Page follower.  Winner will be chosen at random from the comments left on the INSTAGRAM post, and tagging friends, and also from commenting on the Fan Page post.  So make sure to head on over to INSTAGRAM and look for the giveaway post @therabbitholedesignsllc and look for the post at The Rabbit Hole Designs Fan Page by 11:59 p.m. PST 02-27-2020.  Winner will be announced on The Rabbit Hole Designs blog 02-28-2020.

This is the graphic you are looking for on our IG and FB

___________________


For more inspiration, updates, and news make sure to check out these awesome places! 


Thank you so much for stopping by today!

Sunday, February 23, 2020

Partial Die Cutting to Create Easel Cards


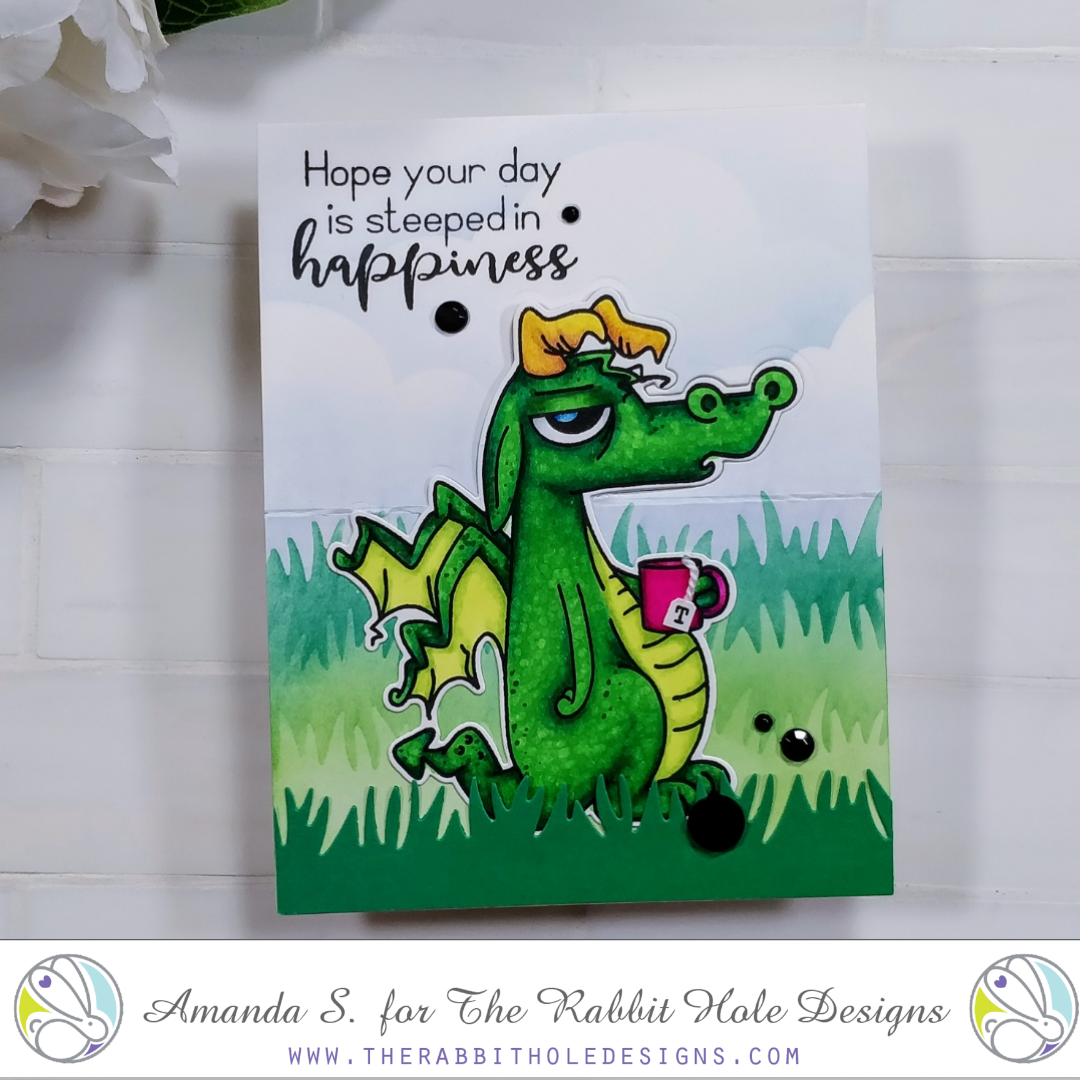
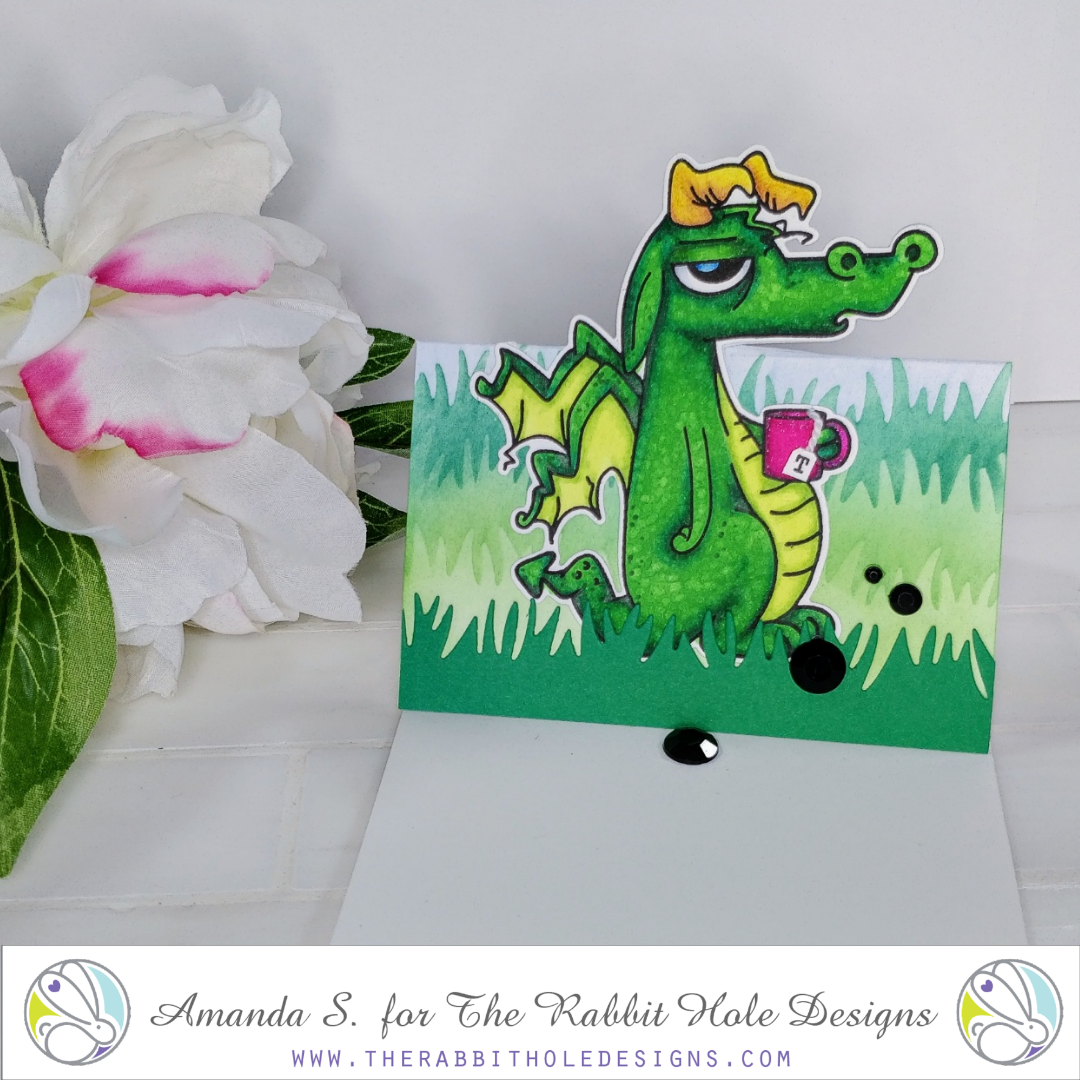
Hey crafty friend, it's Amanda from Pear Blossom Press again. In my last video, I explored several different ways to use your dies. I showed a lot of samples, so I've been breaking the different cards out into separate posts to go into a little more detail on each one. Today's card is the Caffeinated Dragon Easel card.

For this technique, you'll want to start with a top folding card base. Stamp and color a scene, then take a coordinating die from your focal image and line it up. You'll position it in your die cutting machine with the top plate only covering the top half of the die. After you run it through, the portion of the die that was under the plate will be cut out, leaving the bottom still connected to the scene.


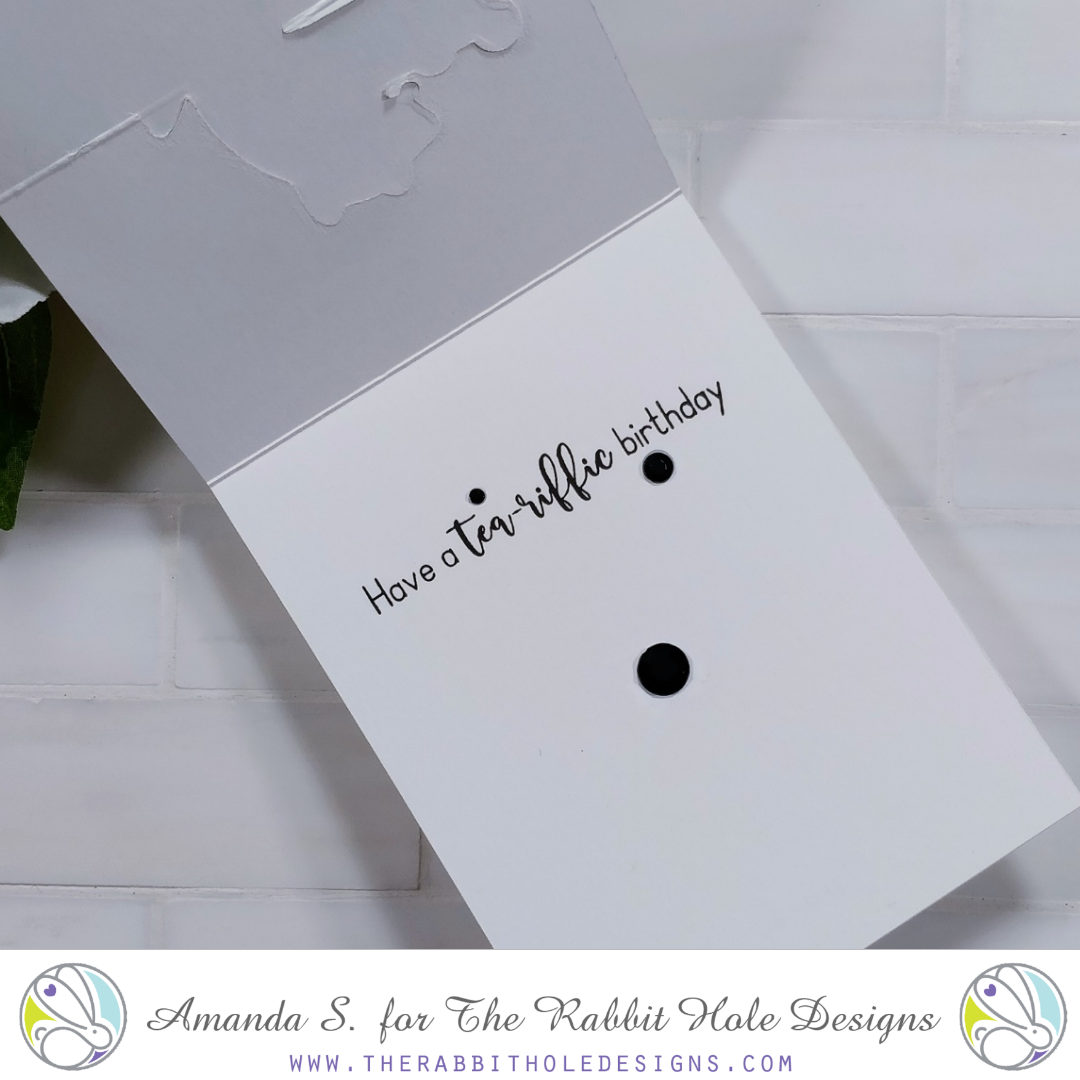
Next, line the card up in your Scor-Pal and score a line on either side of where your cut stops. You don't want to score the image you partially cut. Now, when you fold the front of your card in half, the top of the image will pop up! You need to add something inside to catch the bottom of the card when it's popped up. You can add a sentiment strip with foam tape, or like I did for this card, a large flat-backed gem.


Check out the video, if you want to see exactly what I mean...


For this card, I just created the background scene on my card base. I stamped and cut out the Caffeinated Dragon separately and layered it on top, lining it up with my partial cut. This was because I wanted to color him with Copic markers and they bleed through. The technique works exactly the same way though. I also added sentiments inside and out from the Steeped in Happiness set

Speaking of the background scene I created, I used a second die cutting trick for that. Since I don't have cloud or grass stencils, I used border dies to create my own. This is a great way to stretch your supplies, and it also gives you both the positive and negative halves to use as masks, if needed. I taped my grass and cloud borders down, but did you know that you can use Pixie Spray on the back of your homemade stencils too? It's much less expensive than masking paper. 😉

Thanks for stopping by today; I hope you'll give these techniques a try and let me know what you think. You can find the sister article to this on my blog, along with product links and more inspiration.

Tomorrow kicks off the new release inspiration hop. If you like to color, you're definitely going to want to come back all week! (Also, the next 30 Day Coloring Challenge starts March 1st, so get ready!)

Follow The Rabbit Hole Designs for more inspiration:


Saturday, February 22, 2020

Baaaaad Decisions

Hello Rabbit Hole Designs Fans!! DTM Shanna here today with my final post as a design team member for The Rabbit Hole Designs..  I appreciate the opportunity both Heather and MaryAnn gave me, and all of the encouraging and inspirational teamies I got to play along side throughout this journey!  It has been an unforgettable experience, Thank You!


Today I am sharing a card featuring the hilariously grumpy Caffeinated Goat.  If you have yet to notice, my favorite coloring medium here lately has been my Zig Real Brush pens, and this goat was an absolute joy to color!!  I paired it with a background I made using the Spell It stencil!!  Baaaaaad Goat!!


I chose a slimline card size, using some dies in my stash for the card base.  Masking off the letters on the stencil, I worked right to left to keep my spacing accurate.  I added the sentiment from the Caffeinated Goat directly under my stenciled lettering.  My Goat was then fussy cut and adhered using some foam tape to the left side of the card base.  
Final touches included a smattering of sequins for a bit of texture and shine!


Well folks, that wraps up my post....
 You will still be able to find me over on my blog, Caffeinated Craftiness or over on Instagram


Real life Caffeinated Goat!!!!  


It's been fun, keep on crafting friends!!
~Shanna
For even more inspiration, updates, and news make sure to check out these links.

Friday, February 21, 2020

Bear-ly Conscious


Welcome back to The Rabbit Hole Designs blog!
It's Lisa here with you today and I have a card using the recently released Caffeinated Bear


One of my favorite things to do with the caffeinated critters is to customize their bathrobes with paper piecing. I just love how the bathrobe came out on this bear in all its floral print glory. And come on, who can resist those adorable bunny slippers! 


I decided to put miss BEAR-LY conscious on a large coffee cup.  
I used a large die so I could create a scene on it.  I used a cloud stencil and some Tumbled Glass Distress Oxide Ink to make some light puffy clouds in the background. Next I created some pretty green grass for the bottom of the cup. I inked the tips of the grassy border with Cracked Pistachio Distress Oxide Ink for a little bit of contrast. 
I stamped the sentiment from the Caffeinated Bear stamp set in brown ink on an angle to give the card a little bit of extra interest and added some brown sequins for fun.
I adhered my coffee cup to a kraft base panel that I ran through a cloud embossing folder.

I love how this card came out and I really enjoyed creating a mini scene for my tired bear!


For more inspiration, updates, and news make sure to check out these places ...


Have a great day, I already am!
🐻Lisa 🐻

Wednesday, February 19, 2020

Kiss My Grass Card


Hey Rabbit Hole Crafters! Justin here with another project using a set from the latest The Rabbit Hole Designs Release! This Caffeinated- Goat set is so fun, and I'm not "kid"-ding!

For this card, I was inspired by farm life. Pretty simple, right? I felt like this goat is one of the first Caffeinated Critters that you would expect to find on a farm, so I wanted to make this fella right at home.

As always, I started my project with coloring up my goat with alcohol markers and cutting them out. I also wrote a fun little sentiment on their mug, reading "Kiss My Grass". Get It? Because goats eat... oh never mind!

Next I used oxide inks to blend up a daytime blue sky on a 4" x 5.25" white cardstock panel. Once finished, I set it aside.

Because I ink blended the entire sky, I wanted to do something different with the grass. One thing I love to do is use inks on colored cardstock. It's such a different effect from using solely white cardstock! So I grabbed a piece of grassy green cardstock, and trimmed it down to 4" x 5.25" as well, as I want the bottom length to be the same on both panels for when I layer. Next, I used a light tack adhesive to place my Diamond Flower Stencil on top, and ink blended over the stencil with a darker green ink. When I removed the Diamond Flower Stencil, I had a subtle floral pattern on what would soon become my grass! To finish this panel off, I used a grassy border die to give it that grassy top edge at the length I wanted. With my grass done, I set it aside until I needed it next.

I knew that, to give this card the barnyard effect I was going for, I wanted to include a rustic looking wooden fence. I have to be honest, I didn't even look for any sort of fence die. I just took paper bag colored cardstock and cut it into .5" wide strips for the vertical posts and .375" wide strips for the horizontal pieces. I cut all the vertical posts to be the same length, but I could have really skipped this part because a) I was going to tuck the posts under the grass layer to create depth of field and b) if you wanted this farm to look really rustic, different sized posts would totally add to that look!

Next, I needed to do a little bit of figuring out how my elements would be placed for my final result. I took my fence posts and laid them out so they were evenly spaced at the right height. Then, I placed the grass layer on top, as I had planned, to ensure my fence had the proper placement. Once I found out where my fence was going to be, I adhered my fence pieces together so they were 1 unit, and also masked my card to reveal the sections of the fence between the wood slats, as I was going to add some detail there. I took black ink and stamped the Caffeine Molecule included with the Caffeinated- Goat set to make it look like the fence had a chicken wire layer to it as well! I also took some black ink to my blending brush and distressed the edges of my fence to give it some shading. Once the Caffeine Molecule Chicken Wire was dry, I adhered my fence on top, and then applied my grass layer.

I then matted my grass and sky layered panel with an A2-sized cream patterned paper to continue the farmhouse effect. I placed where I wanted my goat, without adhering them yet. Once I knew where I wanted my goat, I was able to find the best spot for my sentiment strip. I took a strip of paper bag cardstock, trimmed it to 4.25" wide, and matted it with brown paper. I stamped the fun sentiment "Caffeine releases my inner kid" and adhered it towards the top of my card. 

I then adhered my goat and wanted to add a few more embellishments. I used a stitched cloud die to get a white cloud, and distressed the edges with a light gray ink and adhered my cloud in the sky. I also used some blue and green TRHD sequins and added those for additional embellishment!

Here are my products I used to make this card:

Caffeinated- Goat


For more inspiration with your The Rabbit Hole Designs Creations, be sure to follow along at these other locations:


For more details about products used in this post, you may also follow along at my personal blog, Just a Note by Justin, as well!

I hope you're loving these new Caffeinated Critters as much as I am, and I hope this card sparked some ideas and inspiration for your next caffeinated project!


Tuesday, February 18, 2020

Make a Window Card with Coordinating Dies


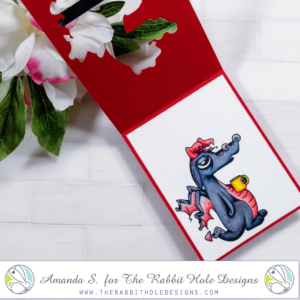
Hey crafty friend, it's Amanda with Pear Blossom Press, and I'm back to spotlight the Caffeinated Dragon window card I made in my last video. This is a fun technique that you can use with any stamp and die combination, but it is especially effective with coordinating sets. 

Caffeinated Dragon Window Card The Rabbit Hole Designs Caffeinated Dragon Window Card The Rabbit Hole Designs

The idea is simple. Stamp your image inside your card, then use a die to cut a window from the front of the card to see the stamped image inside. There is trick to getting the window lined up correctly. Line your stamp up in your Misti, then stamp the inside panel. Close your card, stamp the image again, and use that to line up the die before cutting the window. 

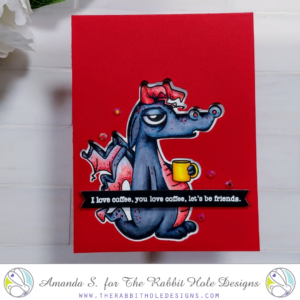
For this card, I stamped the Caffeinated Dragon on an A2 white panel and colored it with Copic markers. I stamped the image again on the front of a red card, lined up the coordinating die and cut the window. Then, I trimmed the white panel down on all four sides and glued it inside the red card. I finished it up with a Perfectly Blended sentiment on a die cut banner, and a few red gems on front. 

You can see the process, along with several other unique ways to use your dies in this video...


Thanks for stopping by today! You can find the sister article to this post on my blog, along with links to the specific products I used. If you'd like to see more cards featuring this stamp set, check out this article

For even more inspiration, updates, and news make sure to check out these links.

Monday, February 17, 2020

Bear-ly Conscious Before Caffeine

Hi Rabbit Hole Fans!
It's Kelly on the blog today sharing a card I made using "Caffeinated Bear" from the Rabbit Hole's latest release.

I made the background using alcohol inks, both regular and pearl.
I feel like it is a cup of coffee ready to be stirred! 
I stamped, colored and fussy cut Ms. Bear.
She is attached with foam tape.

I added some thin strips of paper to pull the colors of the card together and stamped the sentiment from the set on the kraft piece.   

She's getting ready to face the day in her pink bunny slippers 
and her matching pink mug.  


For more inspiration, updates, and news make sure to check out these links.


Bear-ly Conscious Before Caffeine!
Me too, Ms. Bear, me too!
Thanks for visiting!
Kelly


Sunday, February 16, 2020

Gimme My Elixir! Interactive Pop-Up Card


Hello my crafty friend!  Today I am on the blog with Gimme my Elixir card featuring the fun and barely there Caffeinated Dragon!  I have him in pop up mode coming to the top of his castle when you open this interactive card card

The castle was created with printed paper pieces. Do you recognize the window shapes?  These are created using the small light bulbs from the Light Me Up Stencil.  They are the perfect shape, right?
I used a 85# dark blue cardstock for the card base, added the grass and drawbridge creating a moat around the castle. On the front of the card base, I use printed paper and die cut letters. 

To color the dragon, I chose pinks red and golds from my TriBlend alcohol markers.  I start by coloring the dragon body with the lightest pink and then using a stippling/dotting technique. I add a graduation of lighter to darker pinks and red dots to create the shading. I love the stippling look.  Not only does it add an interesting look to the dragon,it give it almost scale like texture.  The wings and horns are colored in the yellow golds to give look smoother look.


Here are The Rabbit hole Design products used in this card:


I hope this inspires you to try the stippling/dotting technique on your next creation. Remember it does not have to be alcohol markers (that is my preference),  you can use any type of coloring medium such as colored pencils, watercolors, and other types of pigments to color your image.

Thank you so much for stopping by the blog!

Be Creative ~ Stay Inspired
Jenn Gross
@journeycoachjenn

For more inspiration, updates, and news make sure to check out these places