Pages

June Inspiration Winners

   Happy Friday!

Announcing the June Inspiration Hop winners. 

The winners from the Facebook Fan Page and the Instagram post are:

Cari Canderle Scharping from the Facebook Fan Page post 
(Chosen via Random.org)


&
@createdtocraft from the Instagram post 
(chosen via Random.org)


Please email info@therabbitholedesigns.com to claim.  Please include which post you won.
 Winners have until 06-04-2021 at Midnight to claim, or prize is forfeited

Be sure to join us June 28th for our next release. If you have not already done so may we suggest joining our Facebook Fan Page where you will always be the first to know of any upcoming releases, and offers.
For more inspiration, updates, and news make sure to check out these places.

Thank you for falling down The Rabbit Hole 

June 2021 Inspiration Hop - Day 3


Hello and welcome to Day 3 of the Inspiration Hop. We are so excited for you to join us as we present to you our June release. Our fabulous Design Team have been sharing their projects over the last couple of days, so be sure to visit their blogs and leave them some crafty love.

 The 4 new stamps sets, 3 die sets, and 1 new stencil are all available to purchase right now in the shop.

The two new stamp sets being highlighted today are ...

Caffeinated Meerkat 


Thank you for being part of our June Inspiration Hop.

Here is the line up for the hop:

___________________

**Giveaway**

To celebrate the June release, The Rabbit Hole Designs is giving away two savings vouchers; one to a lucky Instagram follower and one to a lucky Fan Page follower.  Winner will be chosen at random from the comments left on the INSTAGRAM post, and tagging friends, and also from commenting on the Fan Page post.  So make sure to head on over to INSTAGRAM and look for the giveaway post @therabbitholedesignsllc and look for the post at
by 11:59 p.m. PST 05-27-2021. 
Winner will be announced on The Rabbit Hole Designs blog 05-28-2021.

This is the graphic you are looking for on our IG and FB

___________________

For more inspiration, updates, and news make sure to check out these awesome places! 


Thank you so much for stopping by today!

June 2021 Inspiration Hop - Day 2


Hello and welcome to Day 2 of the Inspiration Hop. We are so excited for you to join us as we present to you our June release. Our fabulous Design Team will be sharing their projects over the next couple days, so be sure to visit their blogs and leave them some crafty love.

 The 4 new stamps sets, 3 die ses, and1 new stencil are all available to purchase right now in the shop.

The new stamp set being highlighted today is ...

Caffeinated Chameleon

Make Sure you stop back tomorrow for our last day of our inspiration hop.

Here is the line up for the hop:

_________________

**Giveaway**

To celebrate the June release, The Rabbit Hole Designs is giving away two savings vouchers; one to a lucky Instagram follower and one to a lucky Fan Page follower.  Winner will be chosen at random from the comments left on the INSTAGRAM post, and tagging friends, and also from commenting on the Fan Page post.  So make sure to head on over to INSTAGRAM and look for the giveaway post @therabbitholedesignsllc and look for the post at
by 11:59 p.m. PST 05-27-2021. 
Winner will be announced on The Rabbit Hole Designs blog 05-28-2021.

This is the graphic you are looking for on our IG and FB

__________________

For more inspiration, updates, and news make sure to check out these awesome places! 


Thank you so much for stopping by today!

June 2021 Inspiration Hop - Day 1


Hello and welcome to Day 1 of the Inspiration Hop. We are so excited for you to join us as we present to you our June release. Our fabulous Design Team will be sharing their projects over the next few days, so be sure to visit their blogs and leave them some crafty love.

 The 4 new stamps sets, 3 die sets, and 1 new stencil are all available to purchase right now in the shop.

The new stamp set and stencil being highlighted today are ...

Butterfly Kiss


Make Sure you stop back tomorrow for Day 2 of our inspiration hop.

Here is the line up for the hop:

___________________

**Giveaway**

To celebrate the June release, The Rabbit Hole Designs is giving away two savings vouchers; one to a lucky Instagram follower and one to a lucky Fan Page follower.  Winner will be chosen at random from the comments left on the INSTAGRAM post, and tagging friends, and also from commenting on the Fan Page post.  So make sure to head on over to INSTAGRAM and look for the giveaway post @therabbitholedesignsllc and look for the post at
by 11:59 p.m. PST 05-27-2021. 
Winner will be announced on The Rabbit Hole Designs blog 05-28-2021.

This is the graphic you are looking for on our IG and FB

___________________

For more inspiration, updates, and news make sure to check out these awesome places! 


Thank you so much for stopping by today!

Quick Watercolor Backgrounds

Hey crafty friend, it's Amanda from Pear Blossom Press again. Do you have any stamps in your collection that you just don't know how to color? Or maybe you're looking for an easy way to add color to a card, without actually having to color? Try this!

Simply paint a little watercolor onto a panel in roughly the same size and shape as your stamp. If you paint on clear water first, you can achieve a nice wispy look. I like to add concentrated splatter for more interest. After it dries, stamp your image on top and emboss it with white powder. If your sentiment will stand out enough, you can emboss it too. Or you can stamp it in coordinating dye ink like I did with these panels.
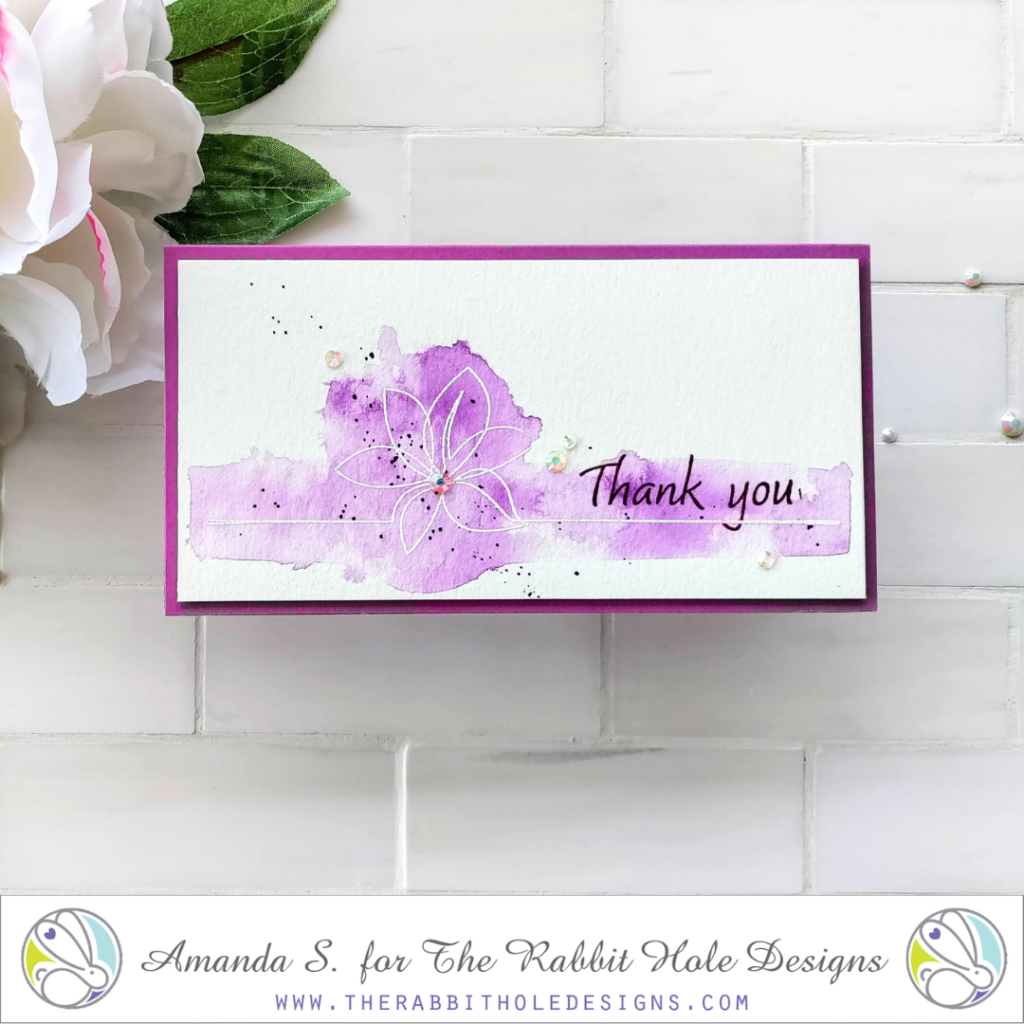
This is a great way to create quick and easy cards, without having to actually color. It works for clean and elegant images like the 1 Line Flower I used in today's cards, as well as intricate images (that would take hours to color). Once your panels are dry, turning them into cards only takes a few minutes. Simply trim them down and pop them up on coordinating card bases with foam tape. Add a few gems for sparkle. I love the way these mini-slimlines turned out, and I always need thank you cards, so these are great to have on hand.

Thanks so much for stopping by today. Head on over to my blog for more photos and links to all of the supplies I used in these cards... pearblossompress.com And make sure to swing by tomorrow for the new release celebration! See you then!

For more inspiration you can go to these places:

Snail Mail Floral!

 Hello, my crafty friends! Today I have used 2 of the newest May releases the 2x3 Snail Mail Floral Stamp Set and the Build your Garden - 6x6 Stencil


I did use the Build your Garden 6x6 stencil to add a few floral images using kitsch flamingo for the flowers, for the sky I wanted it to look like it was cloudy so instead of pulling out a cloud stencil I used the new salvaged patina to randomly blend a few clouds. I picked up my zig real brush markers to fill in the flowers on his sweet shell. I also took a glitter pen to add a little shine.


I also wanted to add a bit of bling and had these super cute gems in my stash to just add a bit of a pop and keep with all the floral goodness throughout the card. I also added a bit of glossy accents to the shell as well just to give it a little dimension.


Life Is Short Get The Extra Scoop!

 Hi everyone! Von Marie here and I am so happy to be on the blog today and I have a fun card to share with you using some of my favorite products from the latest release!


I adore this bunny from Tastes Like Summer. I also used the Tastes Like Summer Dies and the Scooped Three Layers Stencil which I love so much for my card today. I had so much fun making this card. I first stamped this image onto Neenah Solar White cardstock with Jellyfish ink from Lawn Fawn and colored it in with my Copic Markers using a no line coloring method. When I was done I cut my bunny image out with the Tastes Like Summer Dies.

I then cut out some white cardstock and used the cone stencil first with brown ink and my Cotton Tail Blending Brushes. Next, I used the scoop stencil with rainbow colors for my scoop colors. I used my brown ink and water to flick some splatters with a paint brush for interest. When that was dry I cut it out with a scalloped rectangle A2 die. I added my panel with foam tape to a Kraft card base and added my bunny image with foam tape. I stamped the sentiment from the same stamp set onto white cardstock using my Misti. I then used my paper trimmer to make a fishtail banner which was then added with foam tape too. I then added sequins to match. I hope you enjoyed my card. Thank you for stopping by!

TRHD Products used:

Tastes Like Summer Stamp

Tastes Like Summer Dies


Scooped Three Layers Stencil

Cotton Tail Blending Brushes

For more inspiration, updates, and news make sure to check out these awesome places! 

The Rabbit Hole Designs 

The Rabbit Hole Designs Instagram

The Rabbit Hole Designs Facebook Fan Page

The Rabbit Hole Designs Pinterest

The Rabbit Hole Designs YouTube

Thank you for stopping by and Happy Crafting!

Von Marie


Wherever You Go, Go With All Your Heart

 Hi and welcome back, Joy here today with a quick card to share.   One of my favorite things to do is send cards, or Snail Mail to friends and family, so this little guy screamed my name!!!  Snail mail is a 2x3 inch stamp available in The Rabbit Hole Designs shop, and is so much fun to color.   

Let's take a look...


My card today features a simple Copic scene where this little snail is the star of the show.  I stamped it with alcohol marker friendly ink and then colored it up.  But if you're like me, you love a clean crisp black outline, so placed my paper back into my repositioning tool and stamped it again with Versafine Clair Nocturne ink. I took it on step further and heat embossed it with clear powder.  The fun sentiment that I chose to compliment the snail, is from the Adventure Awaits stamp set.  To finish off my card I placed it onto an inked and embossed panel that I had previously made.  


Okay, that wraps it up for me!  

For more inspiration you can go to these places:

Bye for now!!!  


Snail Mail with a sparkle!

Hello, Kimberly here with a card featuring Snail Mail Flower from the latest release. I love this cute little snail and wanted a way to easily jazz up this image.


To make this card, I stamped the snail from Snail Mail Flower on white cardstock. I covered it with a mask (image stamped on paper, cut out and placed the image) and then layered a long post it note over it where I wanted the skyline and grass to meet. I blended Mowed Grass distress ink over the exposed bottom of the cardstock. Next I flipped the post it note to expose the top of the cardstock and blended Tumbled Glass distress ink over the top. Once I removed the post it note, I had my background! 

I colored in the snail with Copics and decided I was not crazy about how I colored the shell. So I stamped the image on another piece of cardstock and colored the shell with new colors. I fussy cut the shell out and popped it up with foam tape on the snail on my original panel. Then I blinged it out using some sequins I had in my stash. I really loved this sentiment from Sassy Sentiments and thought it fit perfect with this card so I stamped it directly on the card. I put foam tape on the back of the snail panel and added it to a card base I had prepared for it. I hope you like it!

Thanks for stopping by!
Kimberly

For more inspiration, updates, and news make sure to check out these places


You are be-YOU-tiful!


Hey yall!  Happy Friday!!!  Happy, happy almost weekend!!!  Tangii here, hope you all had a great week!  Any fun plans for the weekend?  For my card today I inked up the 1 Line Flower stamp set and paired it up with some Spring Florals #2 paper!

This was a quick and fun card to put together.  I stamped out the flower several times leaving out the "1 line" part. I colored each of the flowers in and then hand-cut them out (I did go over the cut edges in a black marker (I use the chisel tip of my 100 Copic), this gives me a cleaner looking edge.  I stamped the sentiment in the upper right corner and then adhered the flowers to my smaller panel.  I left out "yellow" in my flower colors and used, instead, the yellow floral page from the Spring Florals #2 paper pack.

You can also read about this card on my blog, here with links to the products I used, etc.  Thanks for popping by, come back again soon!

Snail Mail Delivery


Greetings, Rabbit Hole Fans!
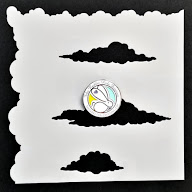
Kelly here and I am sharing this spring inspired card featuring the  "Snail Mail" stamp set, "Amanda" stencil and "Clouds in my Coffee" stencil.
 
I started by stamping the snail on white cardstock, coloring him and die cutting it to get the stitching.  I decided to add the grass and clouds. I used 
"Clouds in my Coffee" stencil with Cotton tail Blending brushes.  I put paper over my snail to keep off the blue ink.  I decided to stamp him again and color the flower section, cut it out and raise it with dimensional foam. I put that panel aside and worked on the top card panel.

I took a piece of smooth white card stock and adhered the "Amanda" stencil with sticky spray.  I inked the panel using a Cotton Tail Blending brush with green ink.  

I adhered my snail panel on top and then put the "hello" on which is covered in glaze.
  
  
Dimension:


 Clouds in My Coffee