Pages

Announcing Our New Design Team Members!!

Good Evening! Niccole; the DT Coordinator here and I have some exciting news that we have been waiting to get out in the open and tonight is finally the night!! 
We would like to formally announce 5 new Design Team members to The Rabbit Hole Designs family.  While many of you have seen their postings on social media and in our Fan Page Group on Facebook sporting their DT Banners from us, their official start date will be with the April Release Inspiration Hop happening right here on The Rabbit Hole Designs Blog March 30th, 2020. 

We hope you all will take a moment to pop over to their Blogs, Instagram Accounts, and YouTube Channels and give them a follow.
Please find their links to the various social media outlets they will be sharing their work from below their pictures.

Alison Heikkila
Donna K Baes

Lauren Zertuche


Tangii Crain


Von Marie Cervantes

~


Thank you so much for stopping by today and welcomming our new DT members!
-Nic-


Birds of a Feather


Hello, it's Lisa here with you today on The Rabbit Hole Designs blog with a fun card featuring the cute stack of owls from the recently released OWL-Right stamp set!
This crazy bunch of owls make me smile every time I see them! I combined them with the 
Circles and Stars stencil in the background for a fun and colorful card.
Here are the supplies I used:


I started with a white card base and I stenciled a solid rectangle shape in Twisted Citron Distress Oxide ink.  Then I took the Circles and Stars stencil and layered it over my rectangle and sponged over it in Tumbled Glass Distress Oxide Ink. I just love the ways the stars look against the solid rectangle. The cutie patootie owls from the OWL-Right stamp set were colored with Copic markers and some of you might notice The Rabbit Hole signature colors in their wings.
I popped those silly birds up on some foam tape and stamped a sentiment from the same stamp set at the top.  I adhered it all to a purple card base to match the colors and my card was done.
What a fun colorful card to make and those owls are sure to make you smile!

So glad you could join me today!

For more inspiration, updates, and news make sure to check out these places ...


Have a great day, I already am!
🦉Lisa 🦉  

The Perfect Blend


Sometimes you just don't feel like coloring, but you want to make a card, am I right?!  It's Cassie back with another card to share with you all.  Today I'm using the new Beautiful Disaster stamp set, and I think the she is just gorgeous!  Instead of coloring her, I inked her up with a couple of Distress Oxide inks in blues and purples.  


Because those are a form of pigment ink, I embossed her with a clear embossing powder.  My background was made using spray inks and the beautiful Twisted Sunshine stencil.  I also have a video to share with you, if that is something you'd be interested in watching.  You can watch it here, or over on my YouTube channel.


And here's a closer look at the products I used today.


I hope you enjoyed what I made for you today and that you were inspired to go out and get a little crafty.  

For more inspiration, updates, and news make sure to check out these links.

Thank you so much for stopping by!
Cassie

Pulling Rabbits Out of a Hat


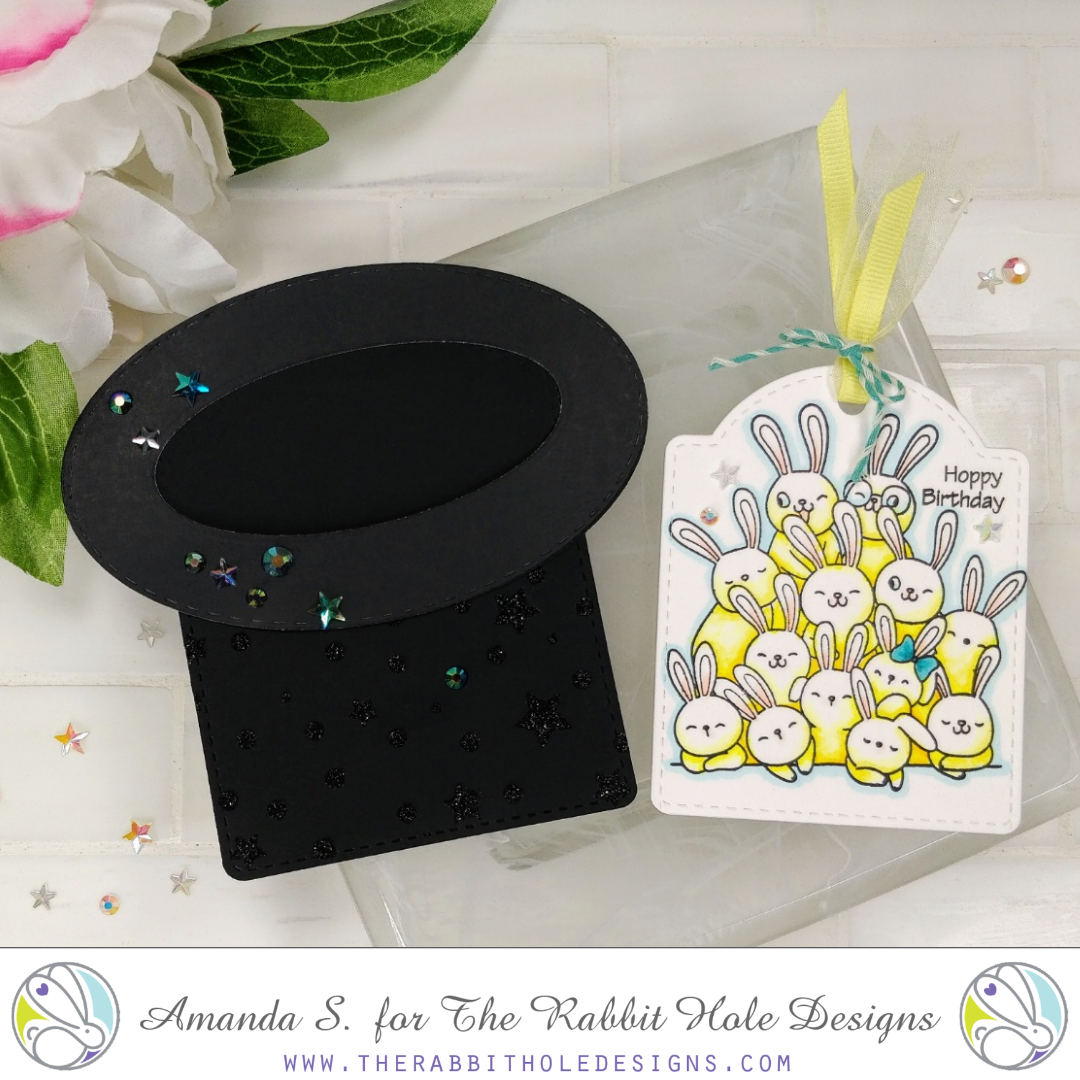
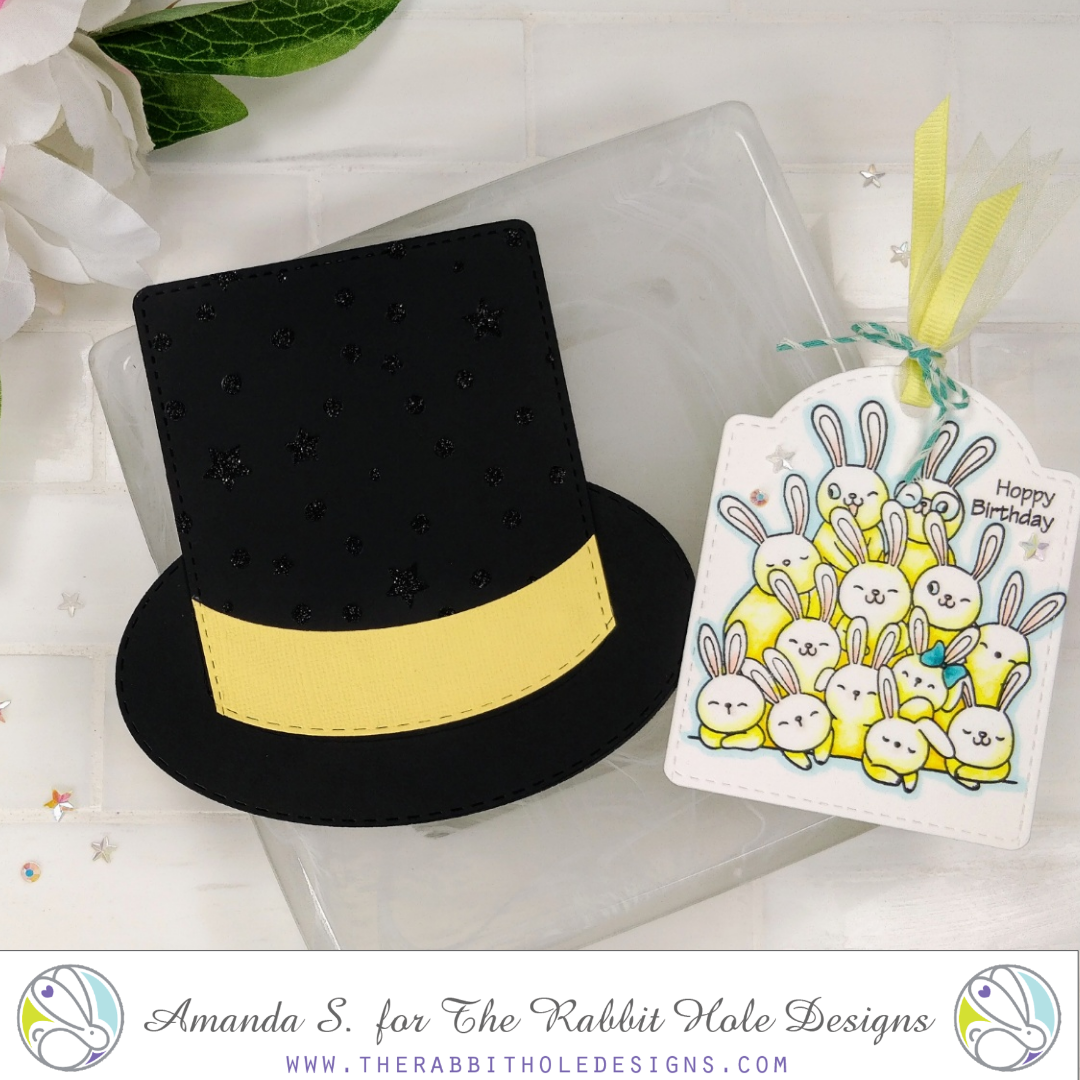
Hey crafty friend, it's Amanda from Pear Blossom Press again with a fun new interactive card! I haven't been shy about saying the All Ears set is my favorite of the new release. As soon as I saw the image, I knew I wanted to create a pocket card shaped like a top hat and have the cute little bunnies pull out. And I'm happy to report, this card came out as cute in real life as it was in my head! (Lol, that isn't always the case.)


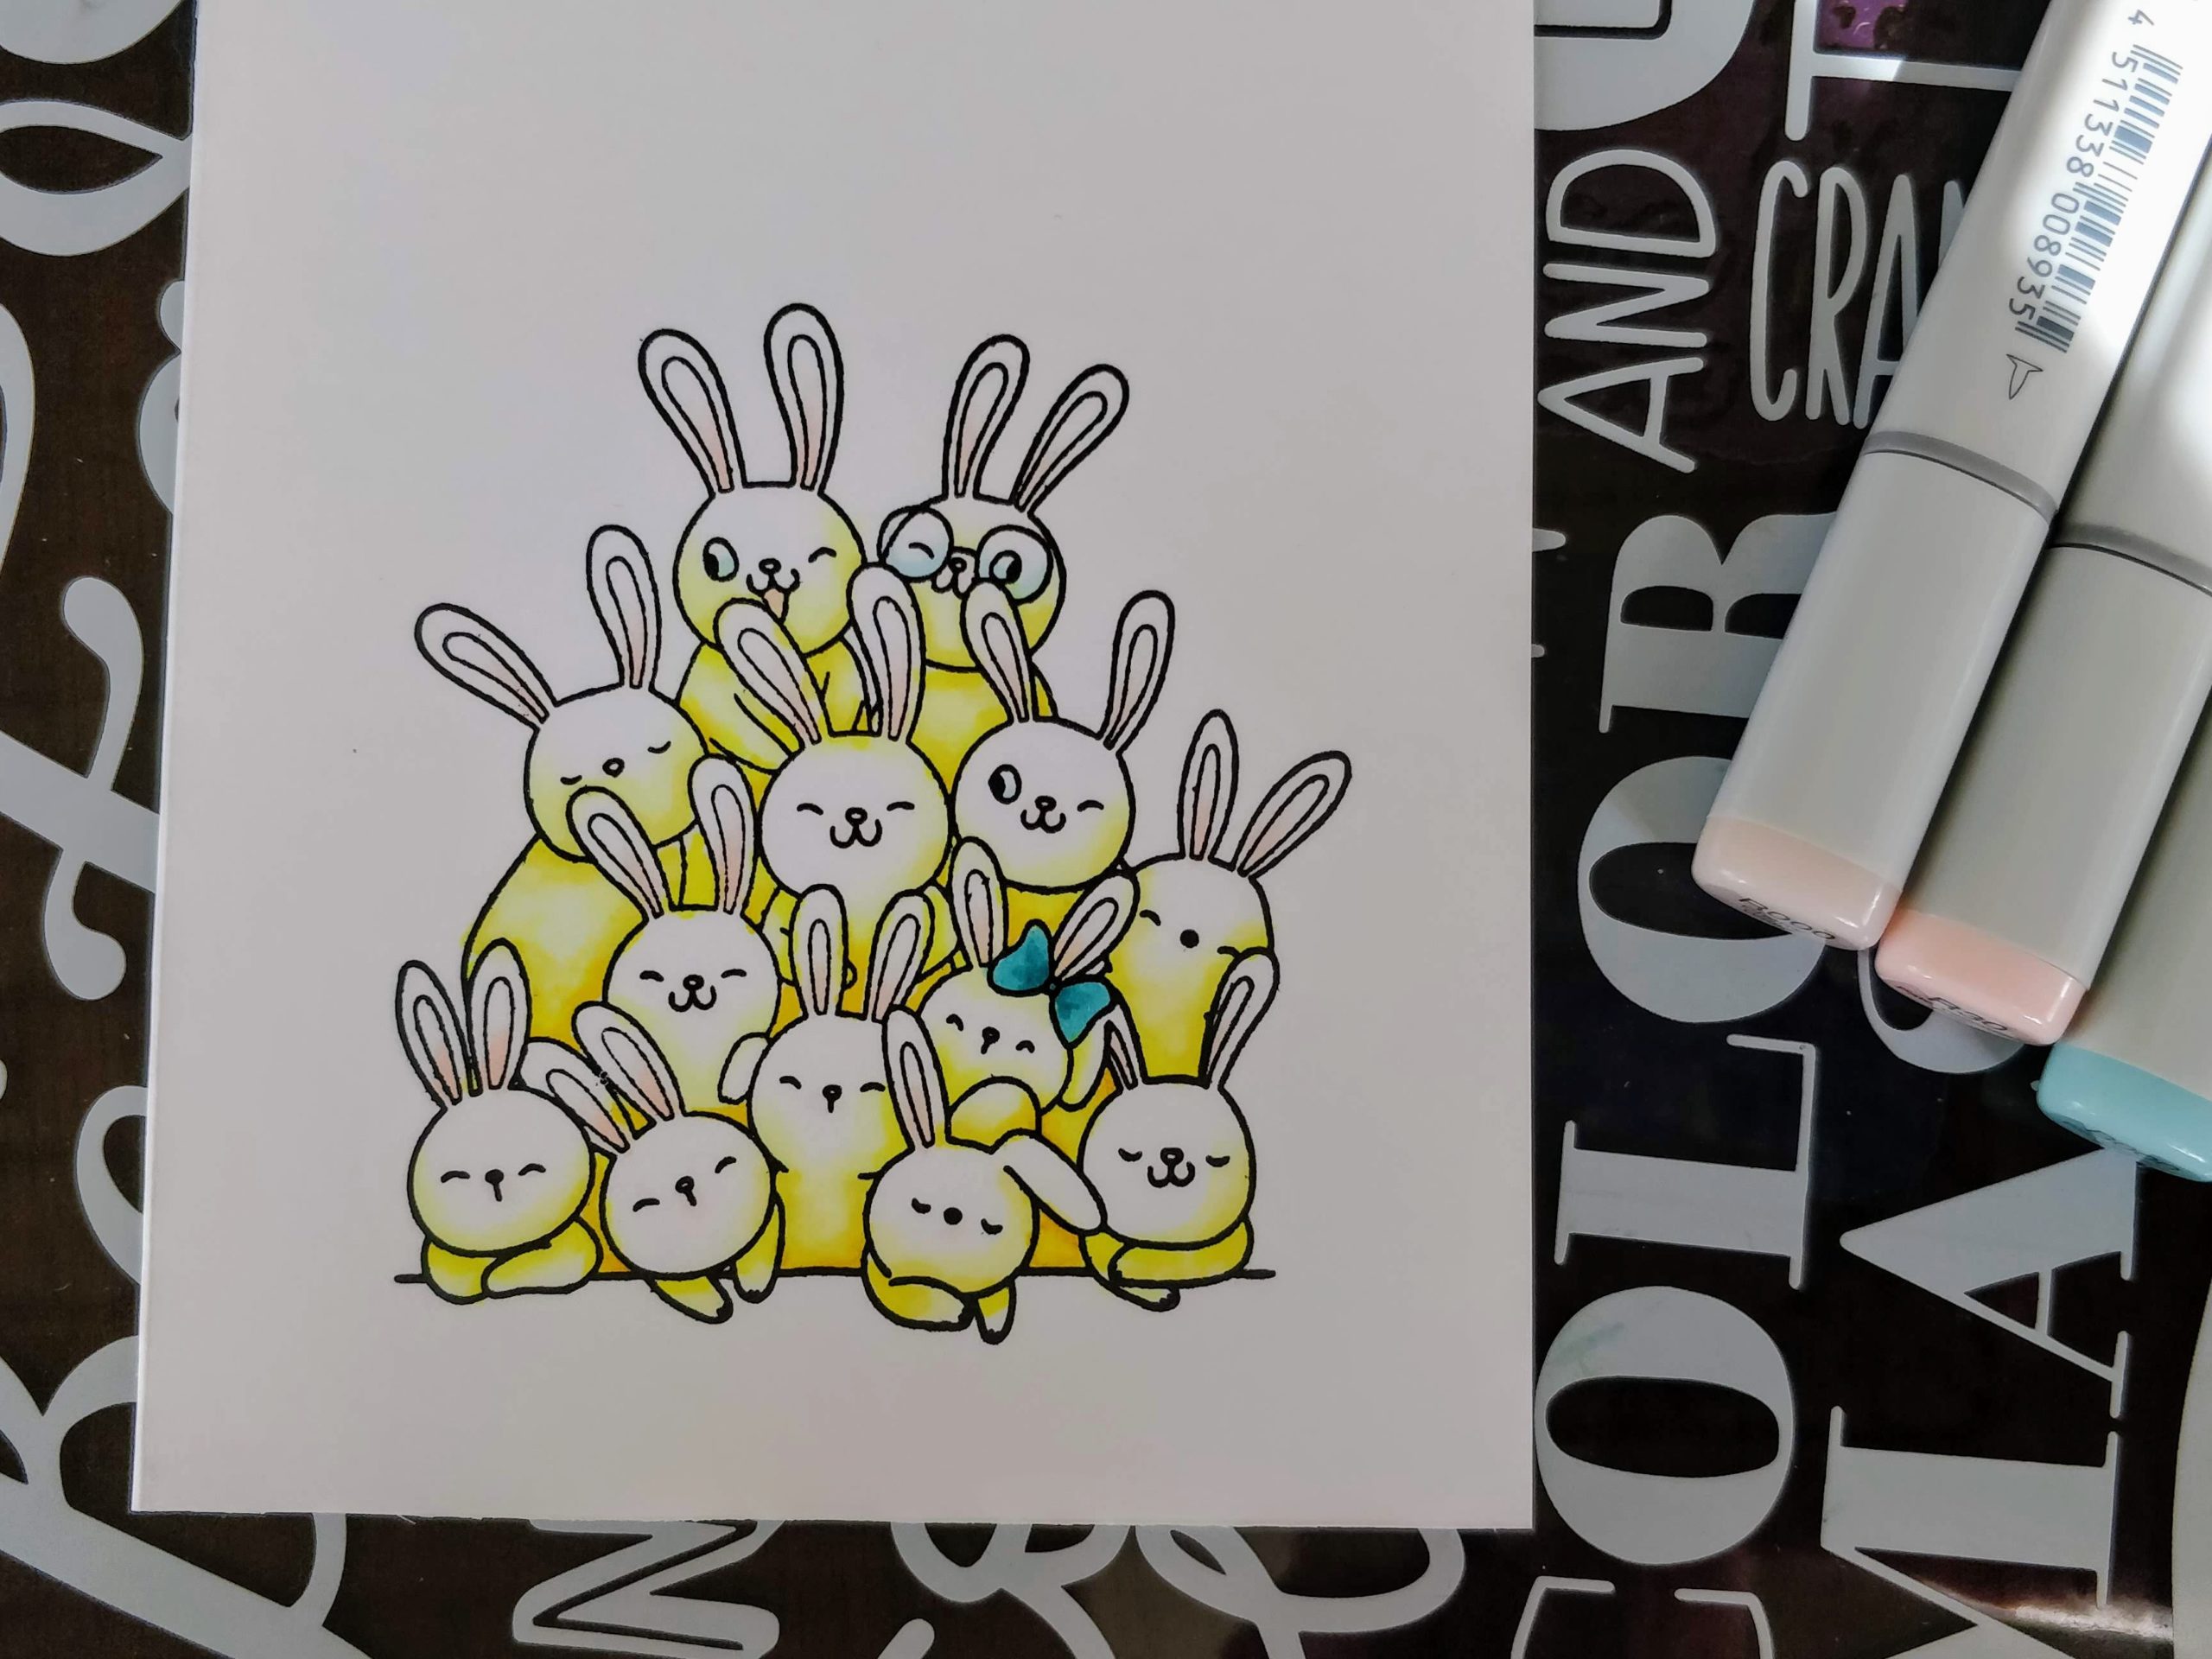
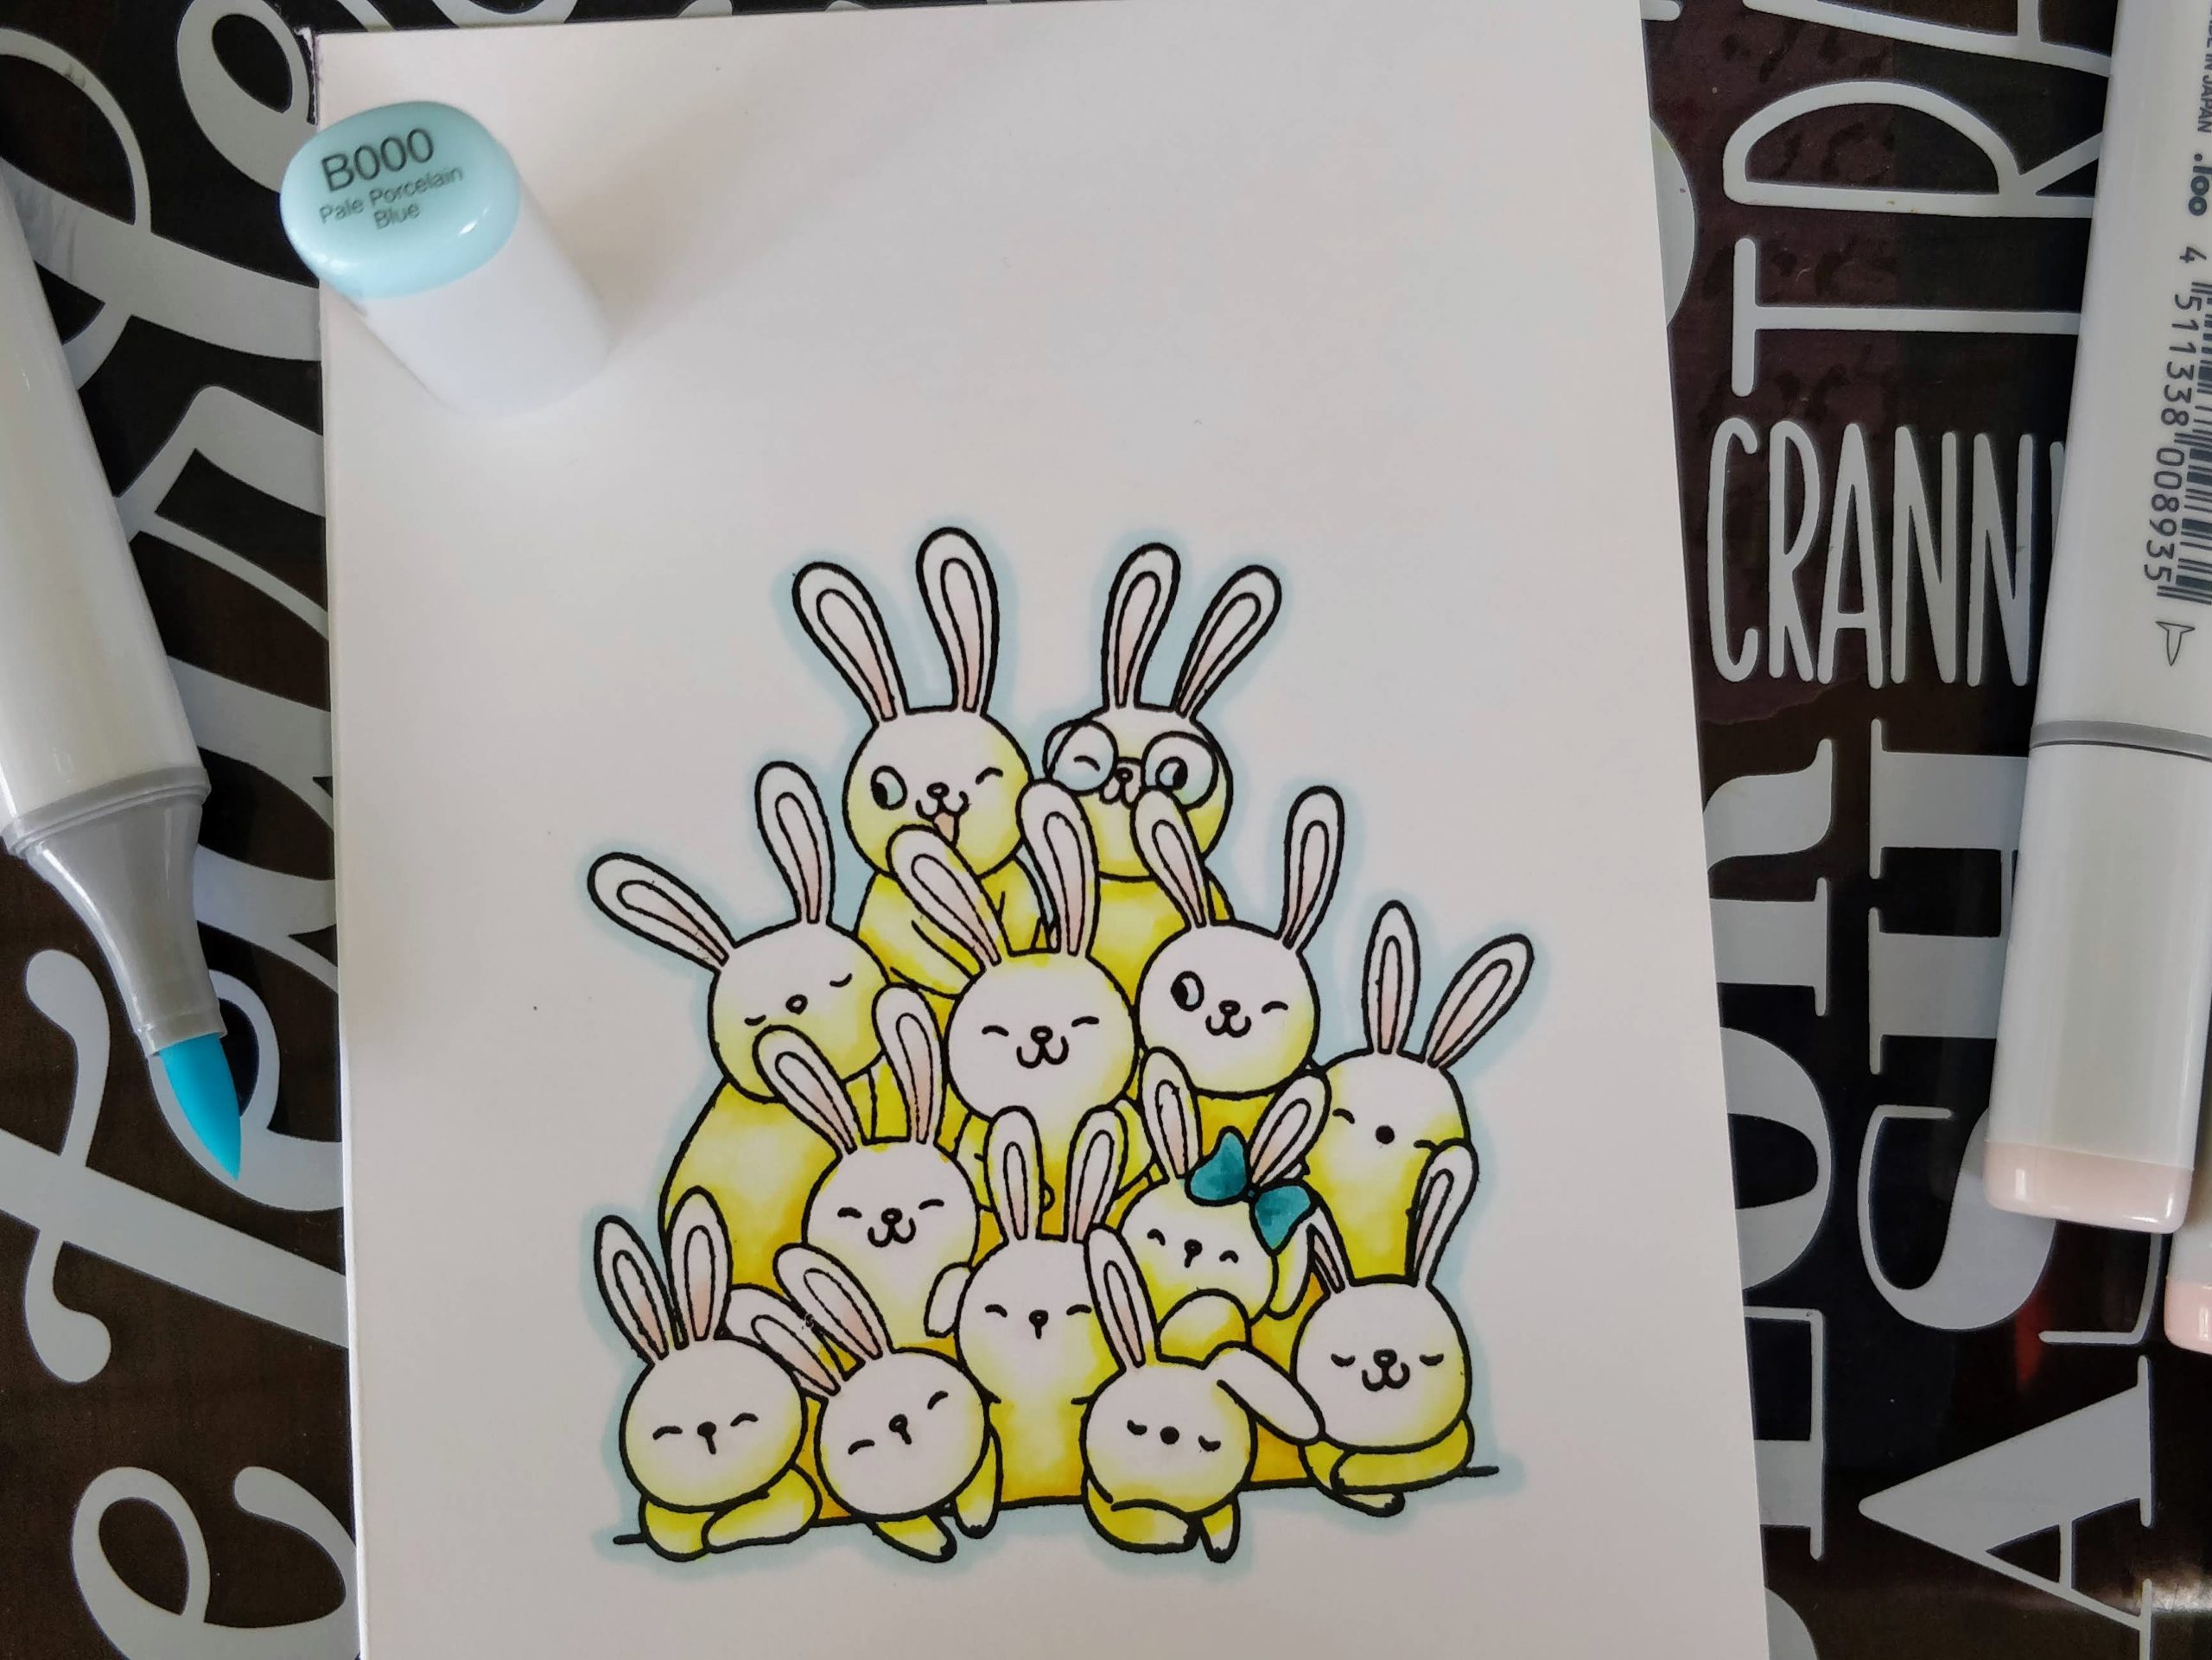
I stamped the bunny pile onto a panel and channeled my inner Mona Toth for coloring inspiration (she does yellow and turquoise like nobody's business!) I used Copic markers to color the bunnies, then added a drop shadow around the outer edge with a pale blue marker. You can see how that little bit of color helps the image not look so flat. (By the way, it's day 2 of the new 30 Day Coloring Challenge; are you coloring along with us?)

Rabbit Out of a Hat Pocket Card Rabbit Out of a Hat Pocket Card

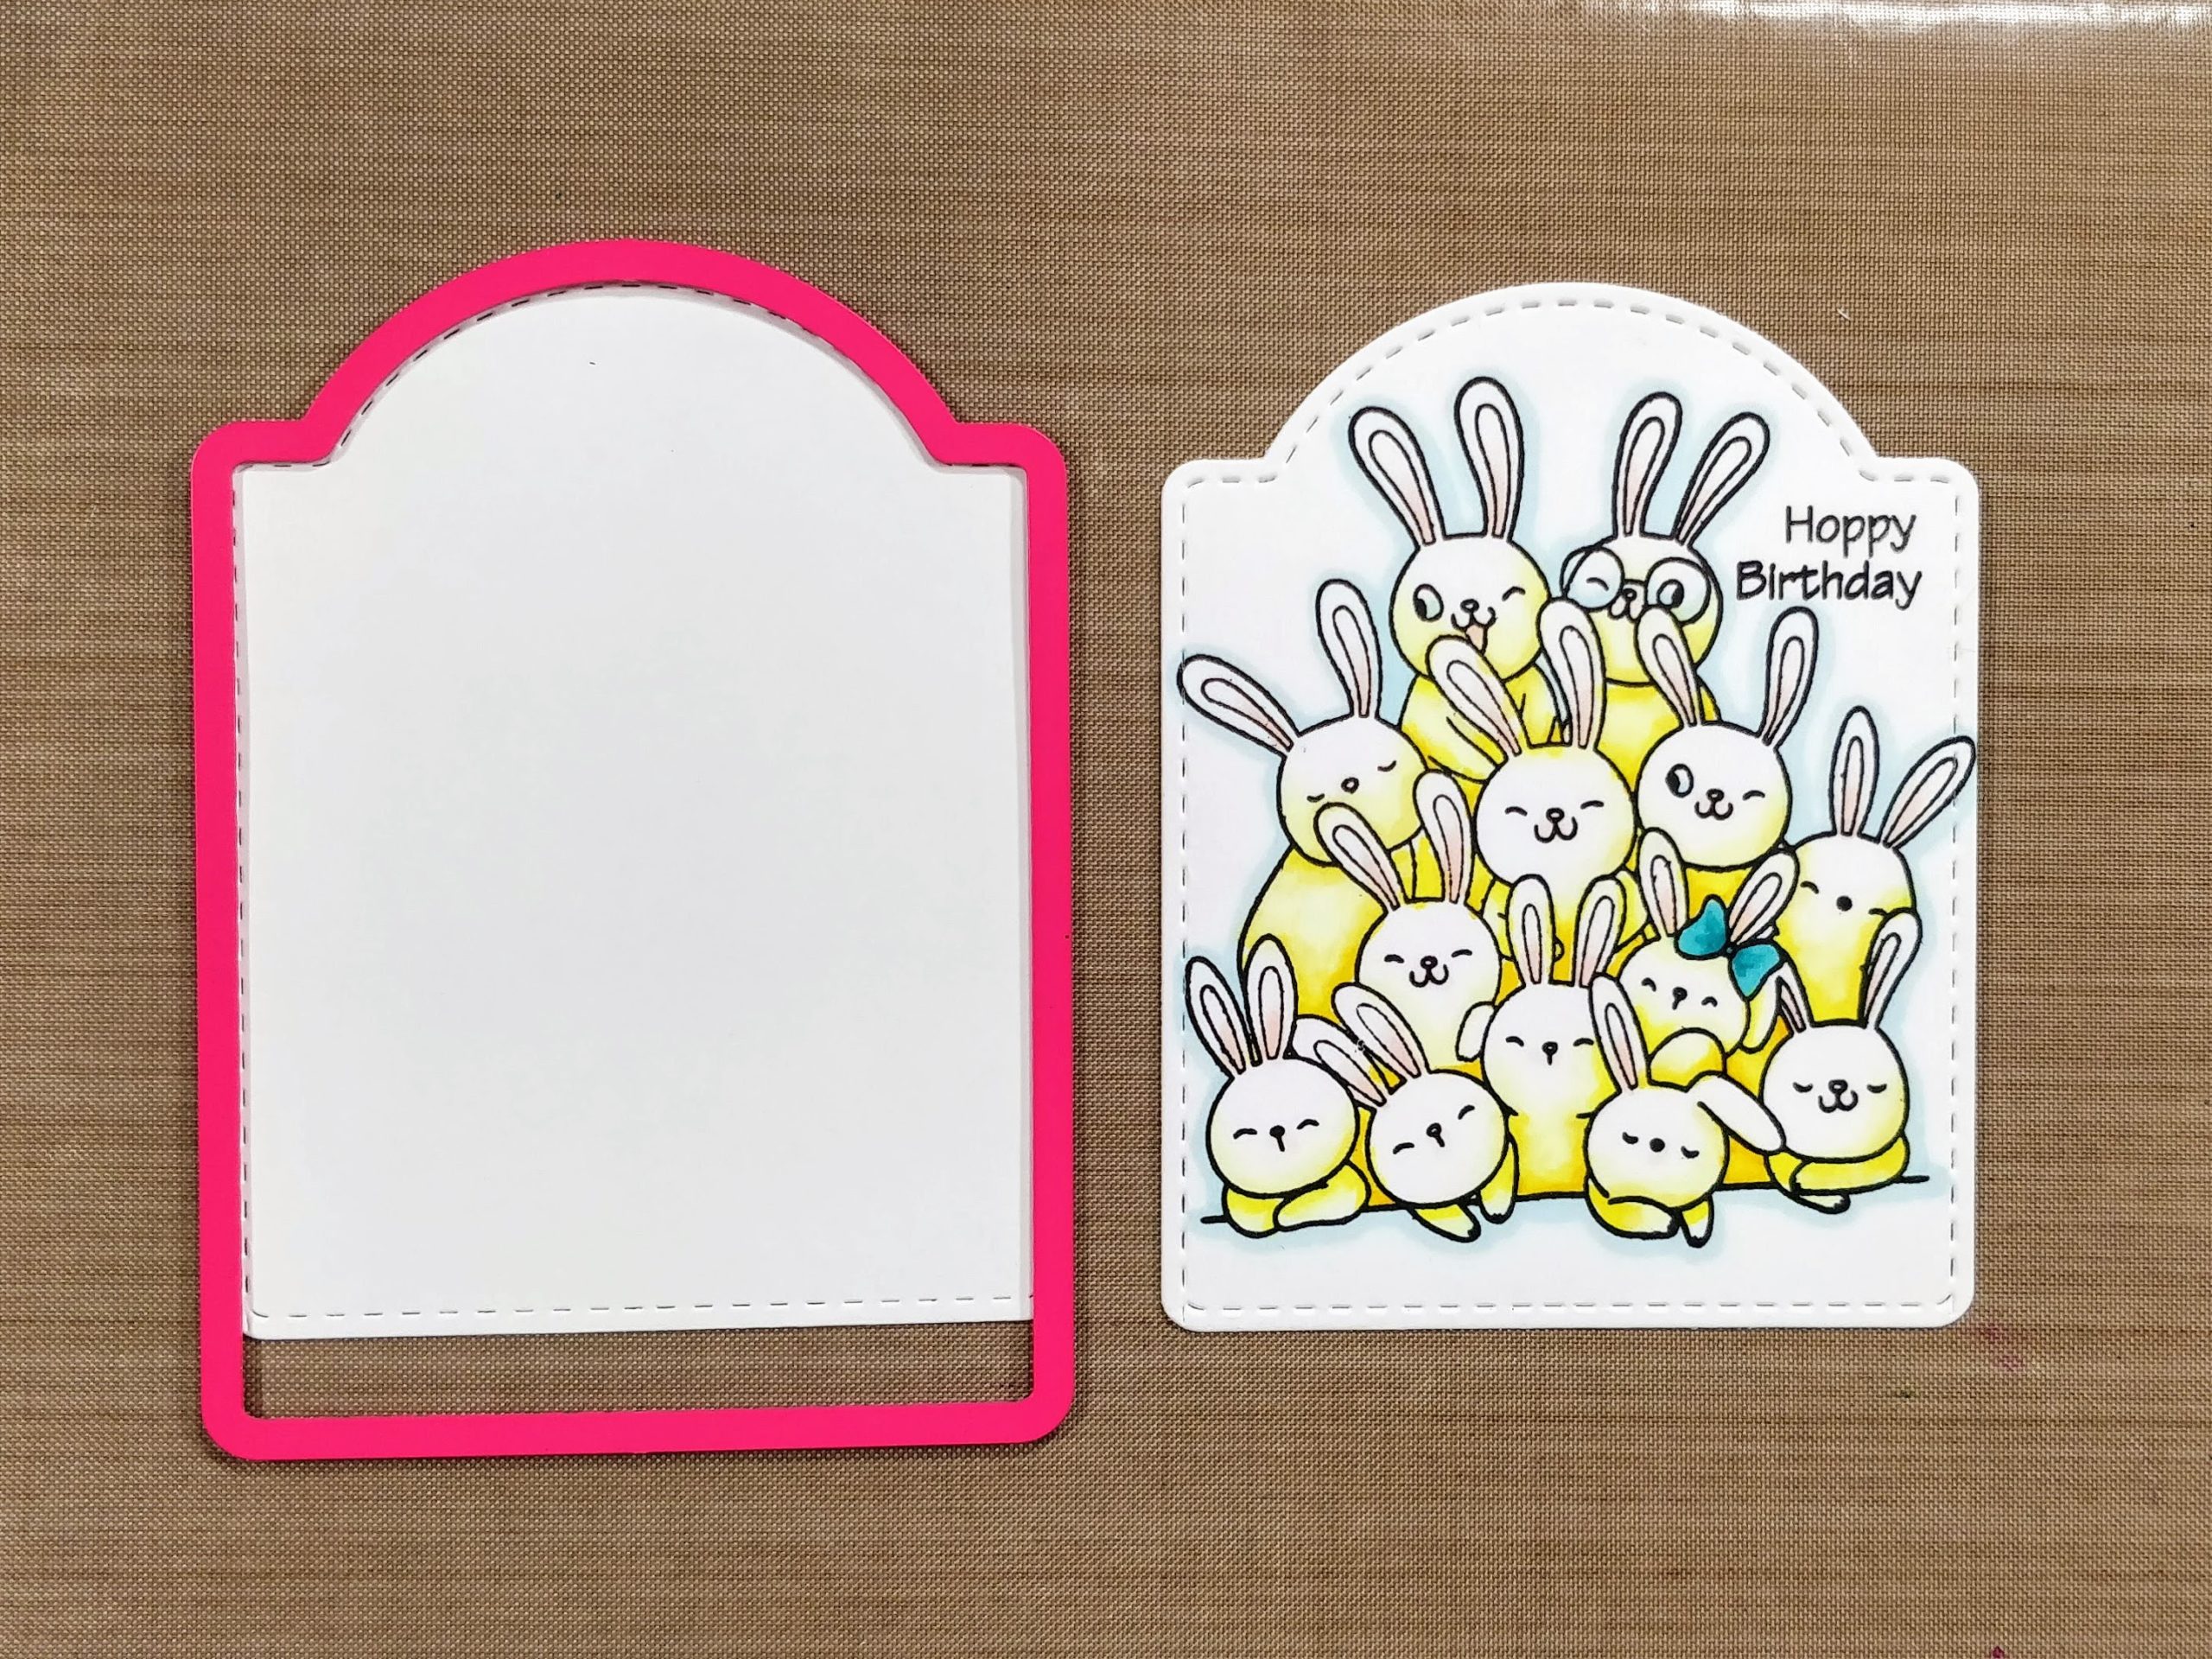
I stamped my sentiment and cut the panel out with a tag die. Because I used Copic markers, I cut a second tag to layer behind to cover the bleed through. The tag I used was a little long for my image, so I slid the die up and re-cut the bottom to shorten it.

Rabbit Out of a Hat Pocket Card

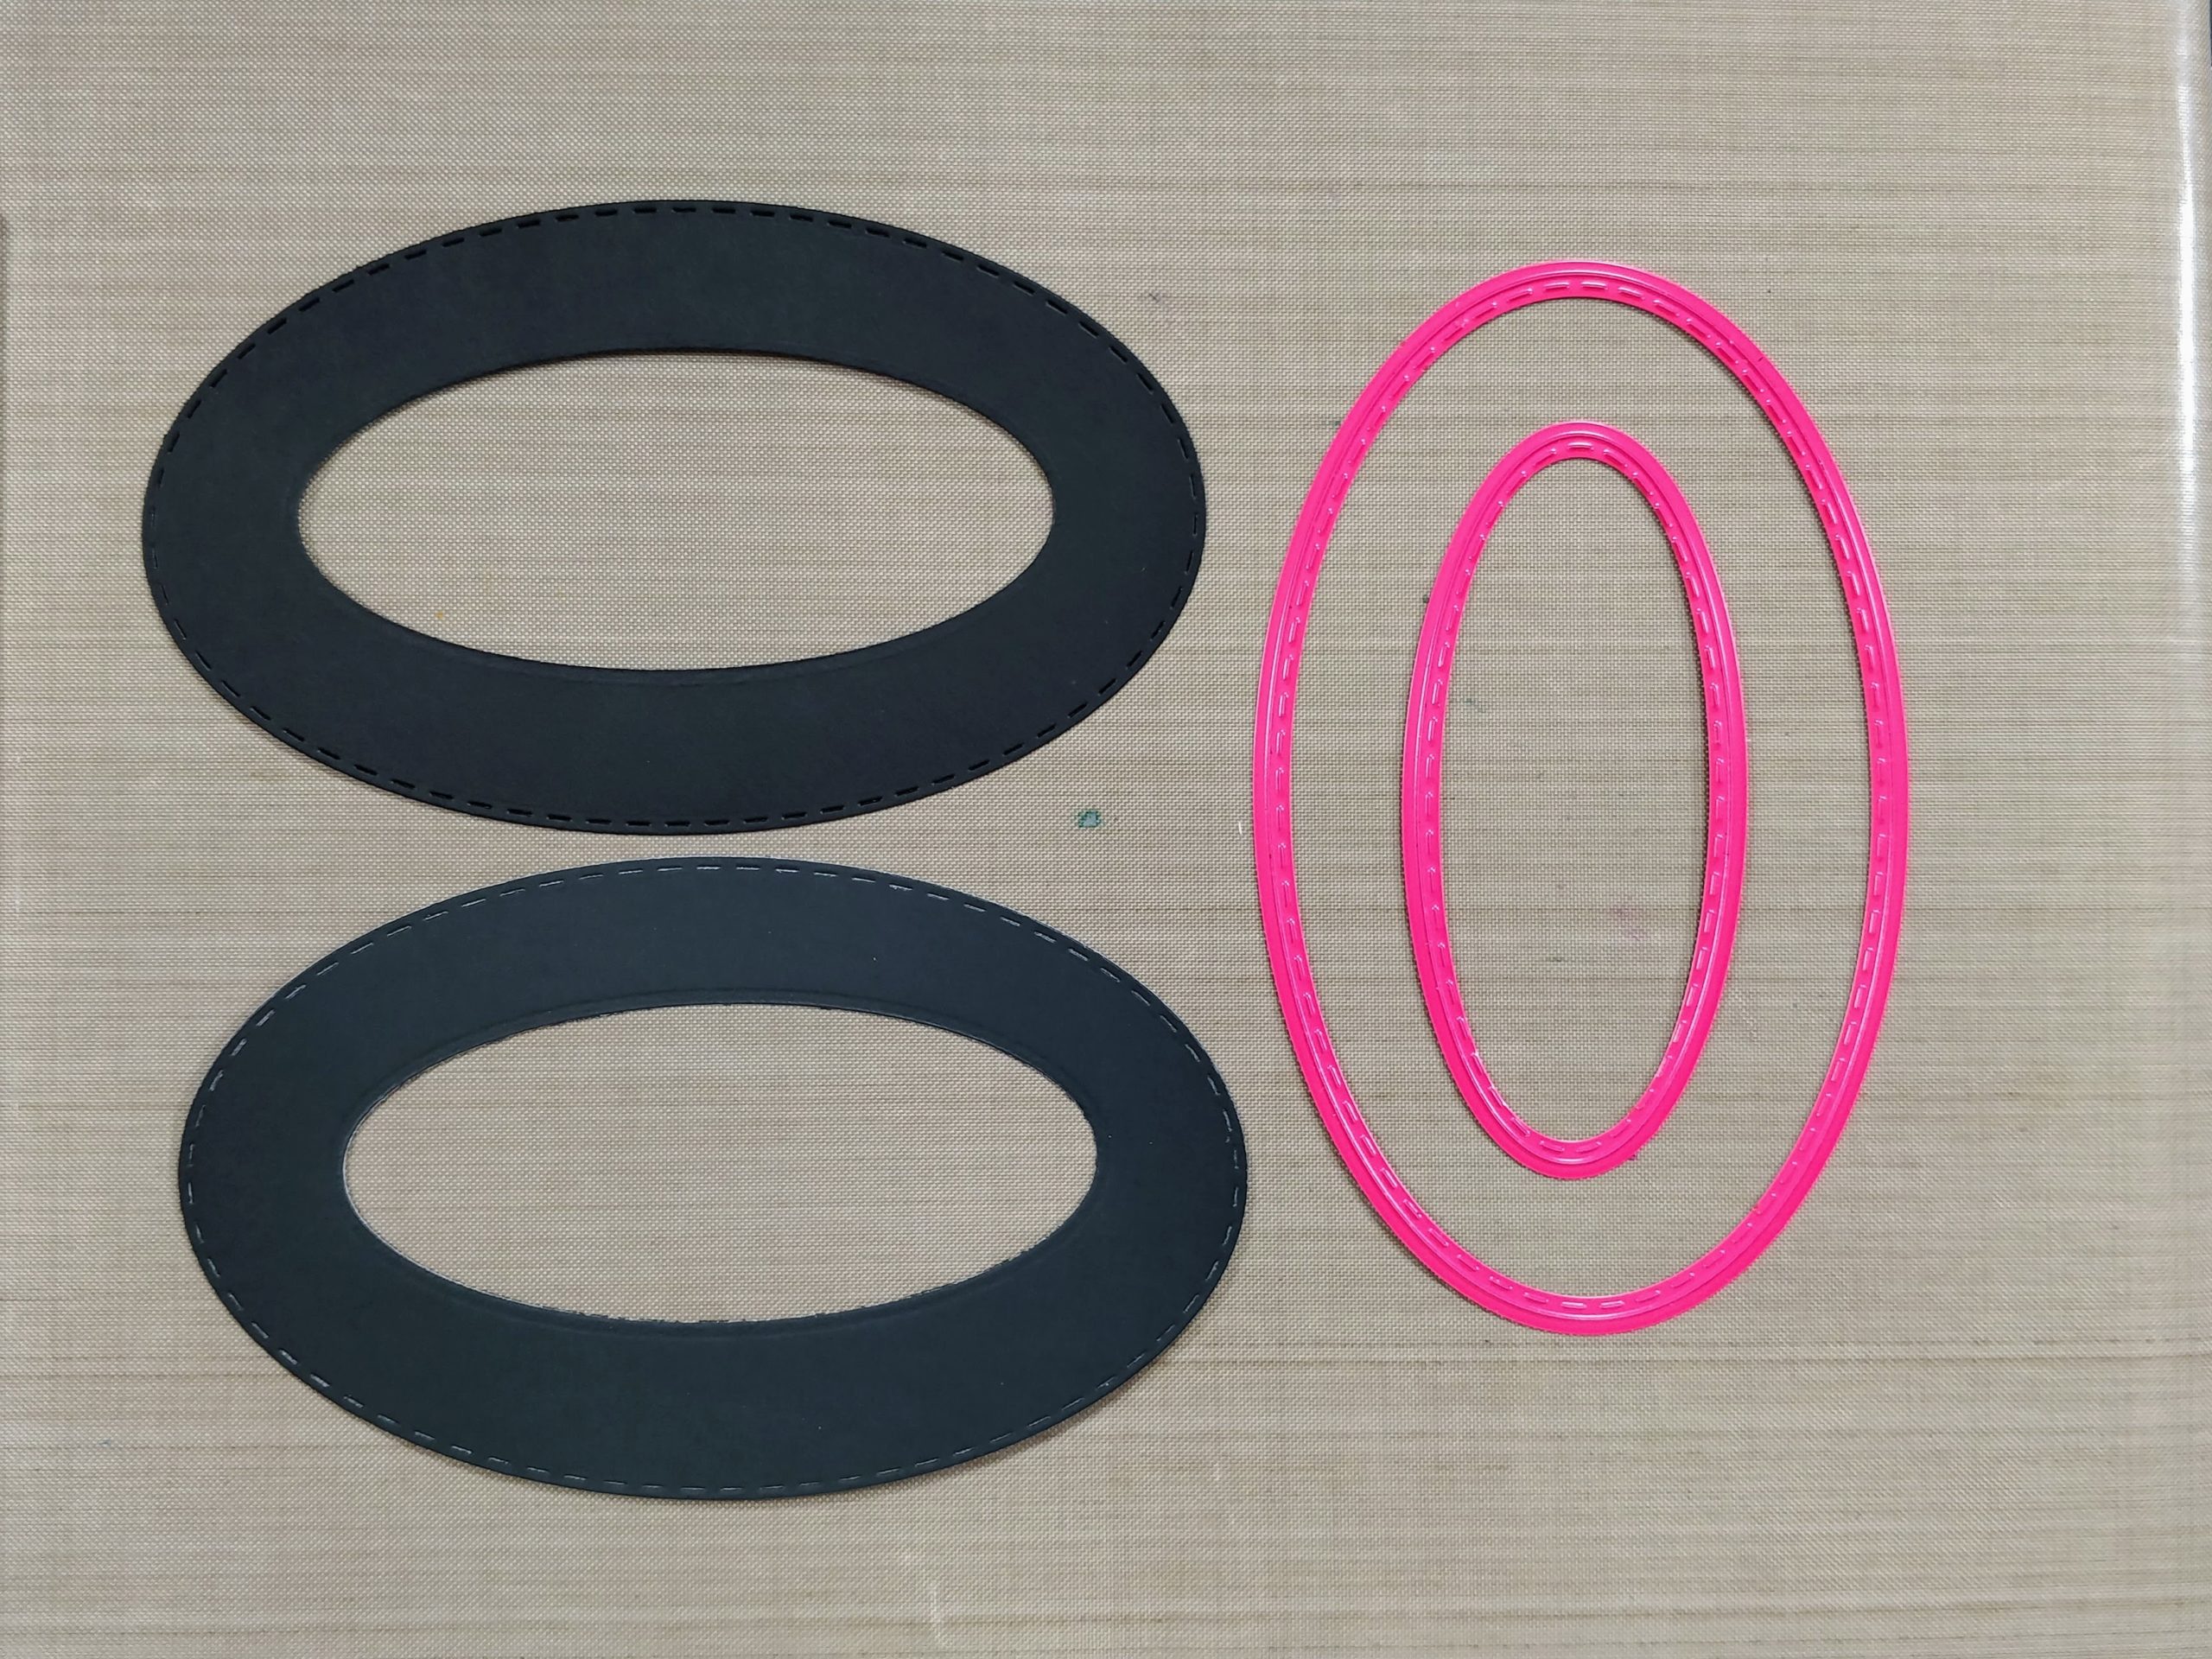
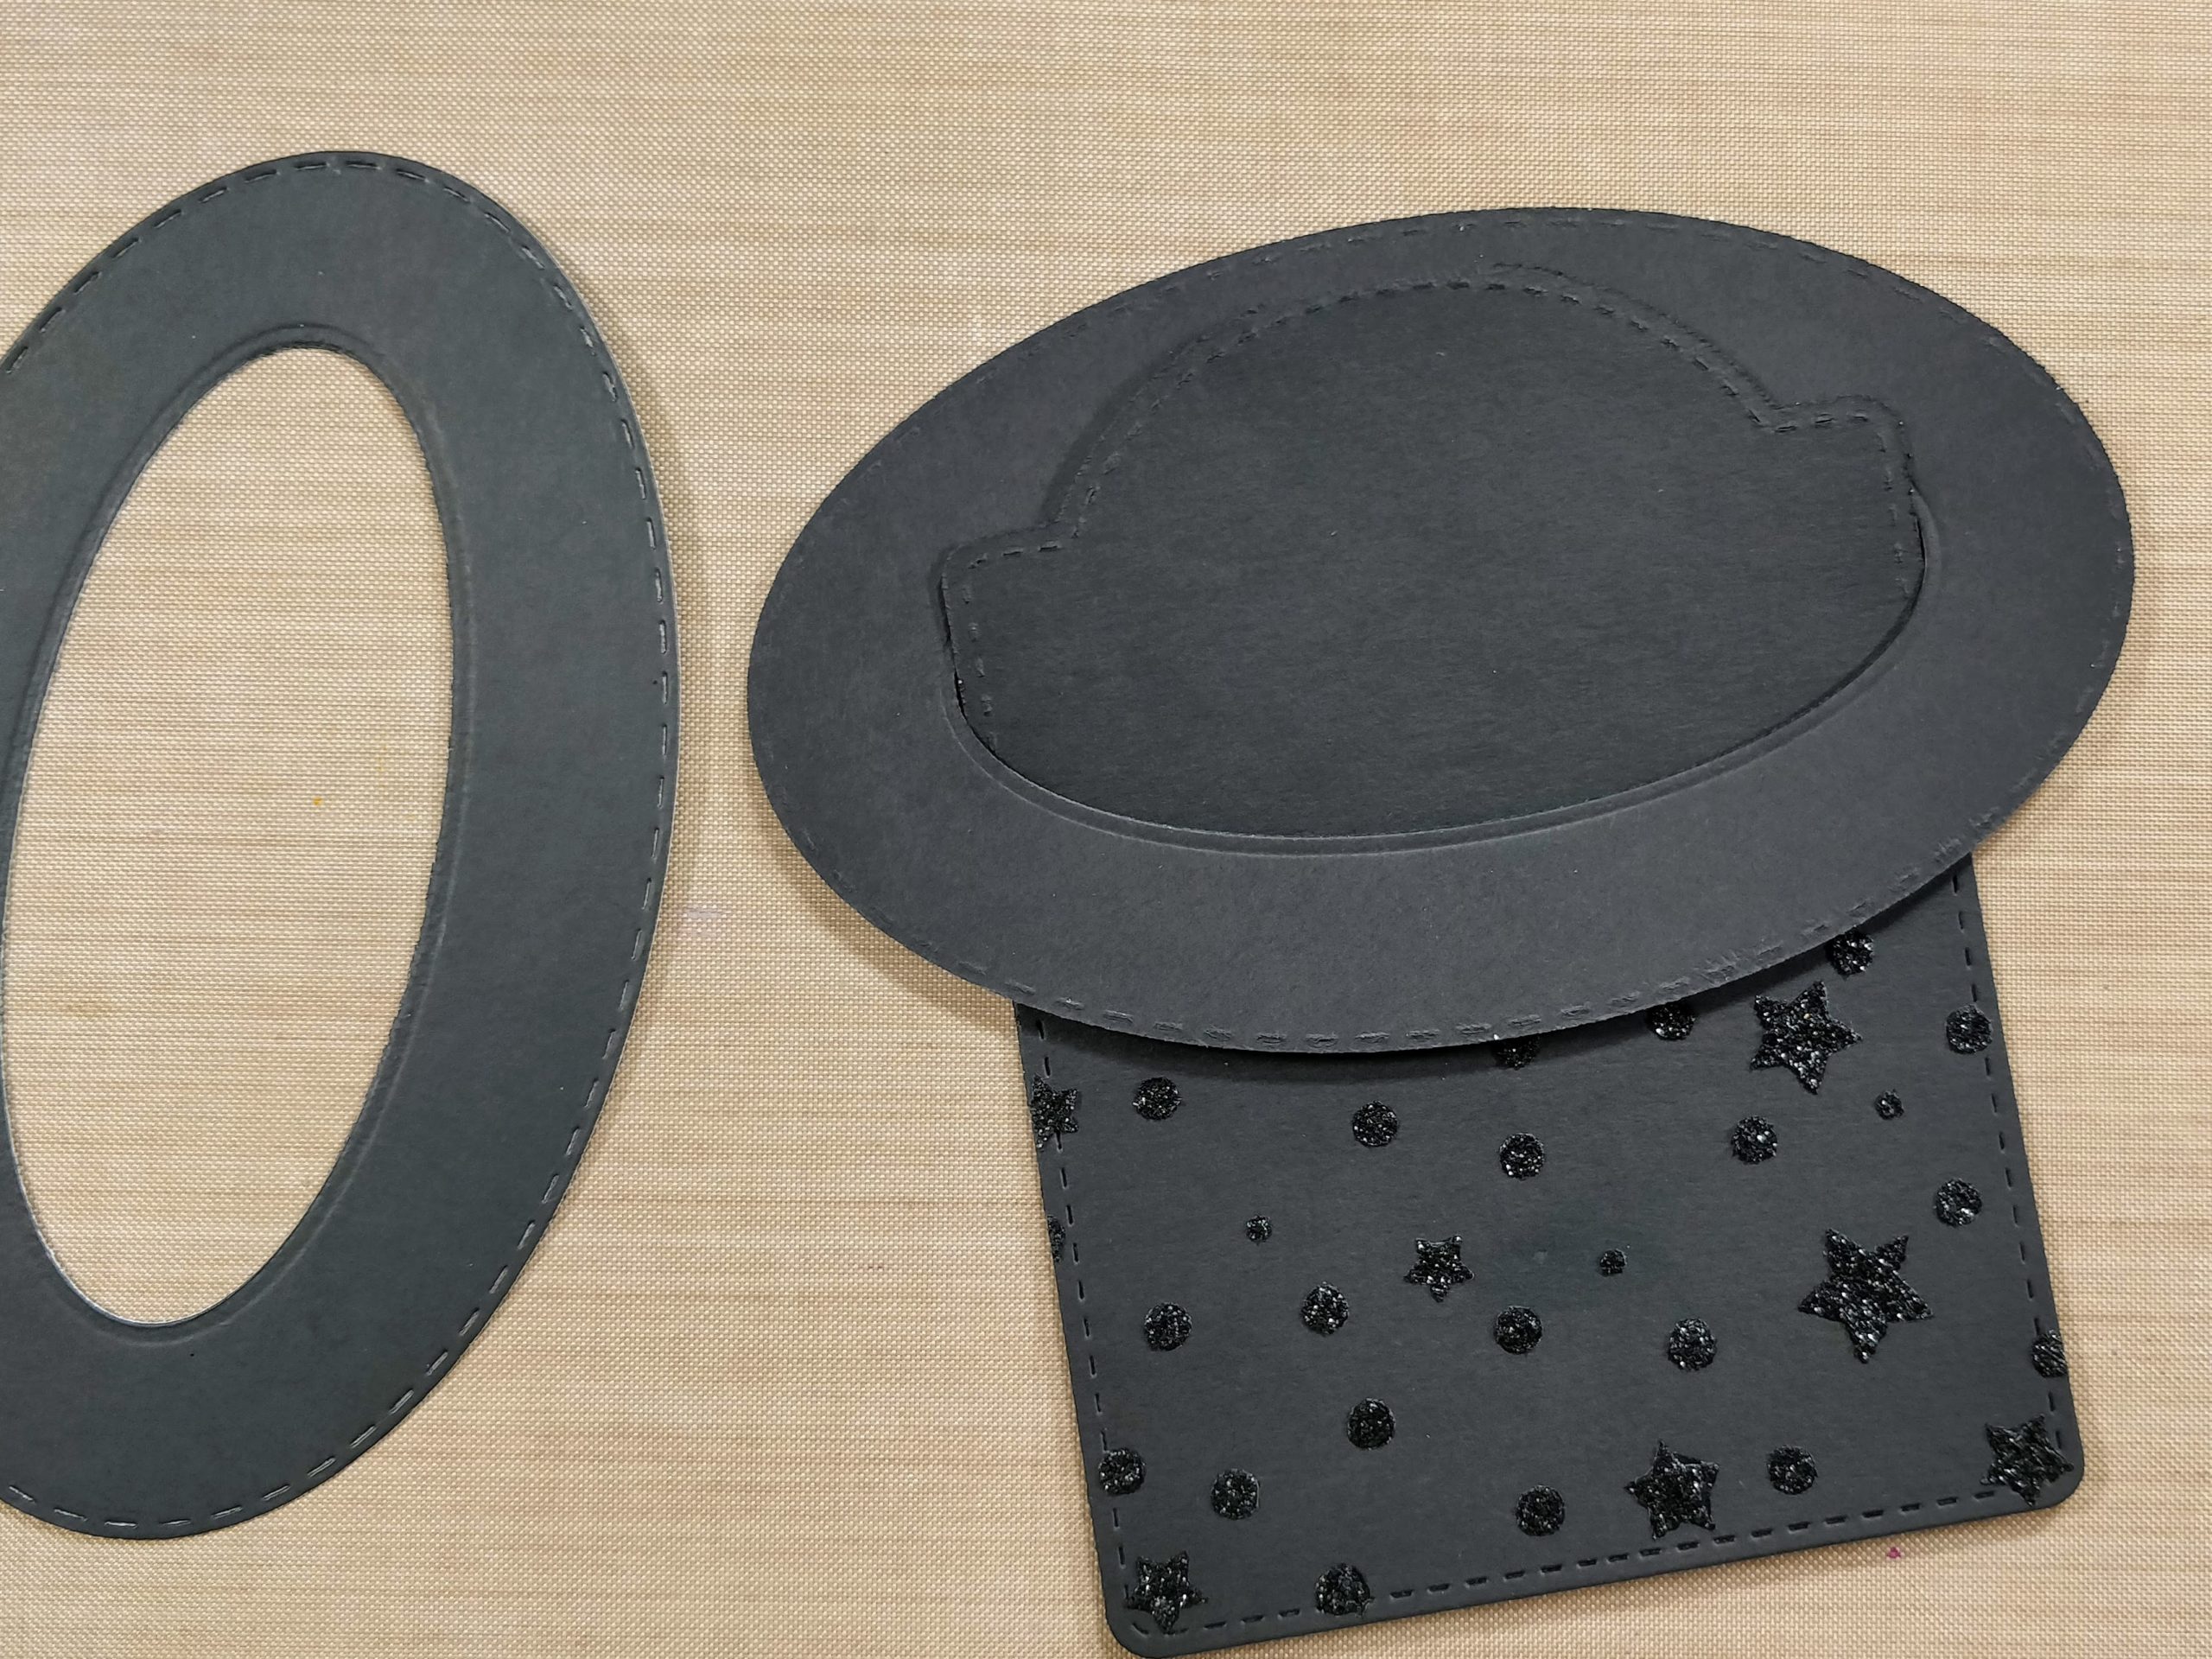
The top hat might look a little complicated, but it was actually pretty easy to make, and I've got step-by-step pictures to help guide you through. Basically, I cut a pair of oval donuts, and a pair of tags (slightly larger than the tag I used for the bunnies). Some black Glitter Glitz Gel stenciled on the tags give the top hat some pizzazz and lend to the magical feeling I was trying to create.

Rabbit Out of a Hat Pocket Card Rabbit Out of a Hat Pocket Card

The tags I used for the hat are the same width as the inner oval, so they slip right inside.* I trimmed the front tag down with the inner oval die so when I glued outer the edges together, they created a library pocket.

Rabbit Out of a Hat Pocket Card

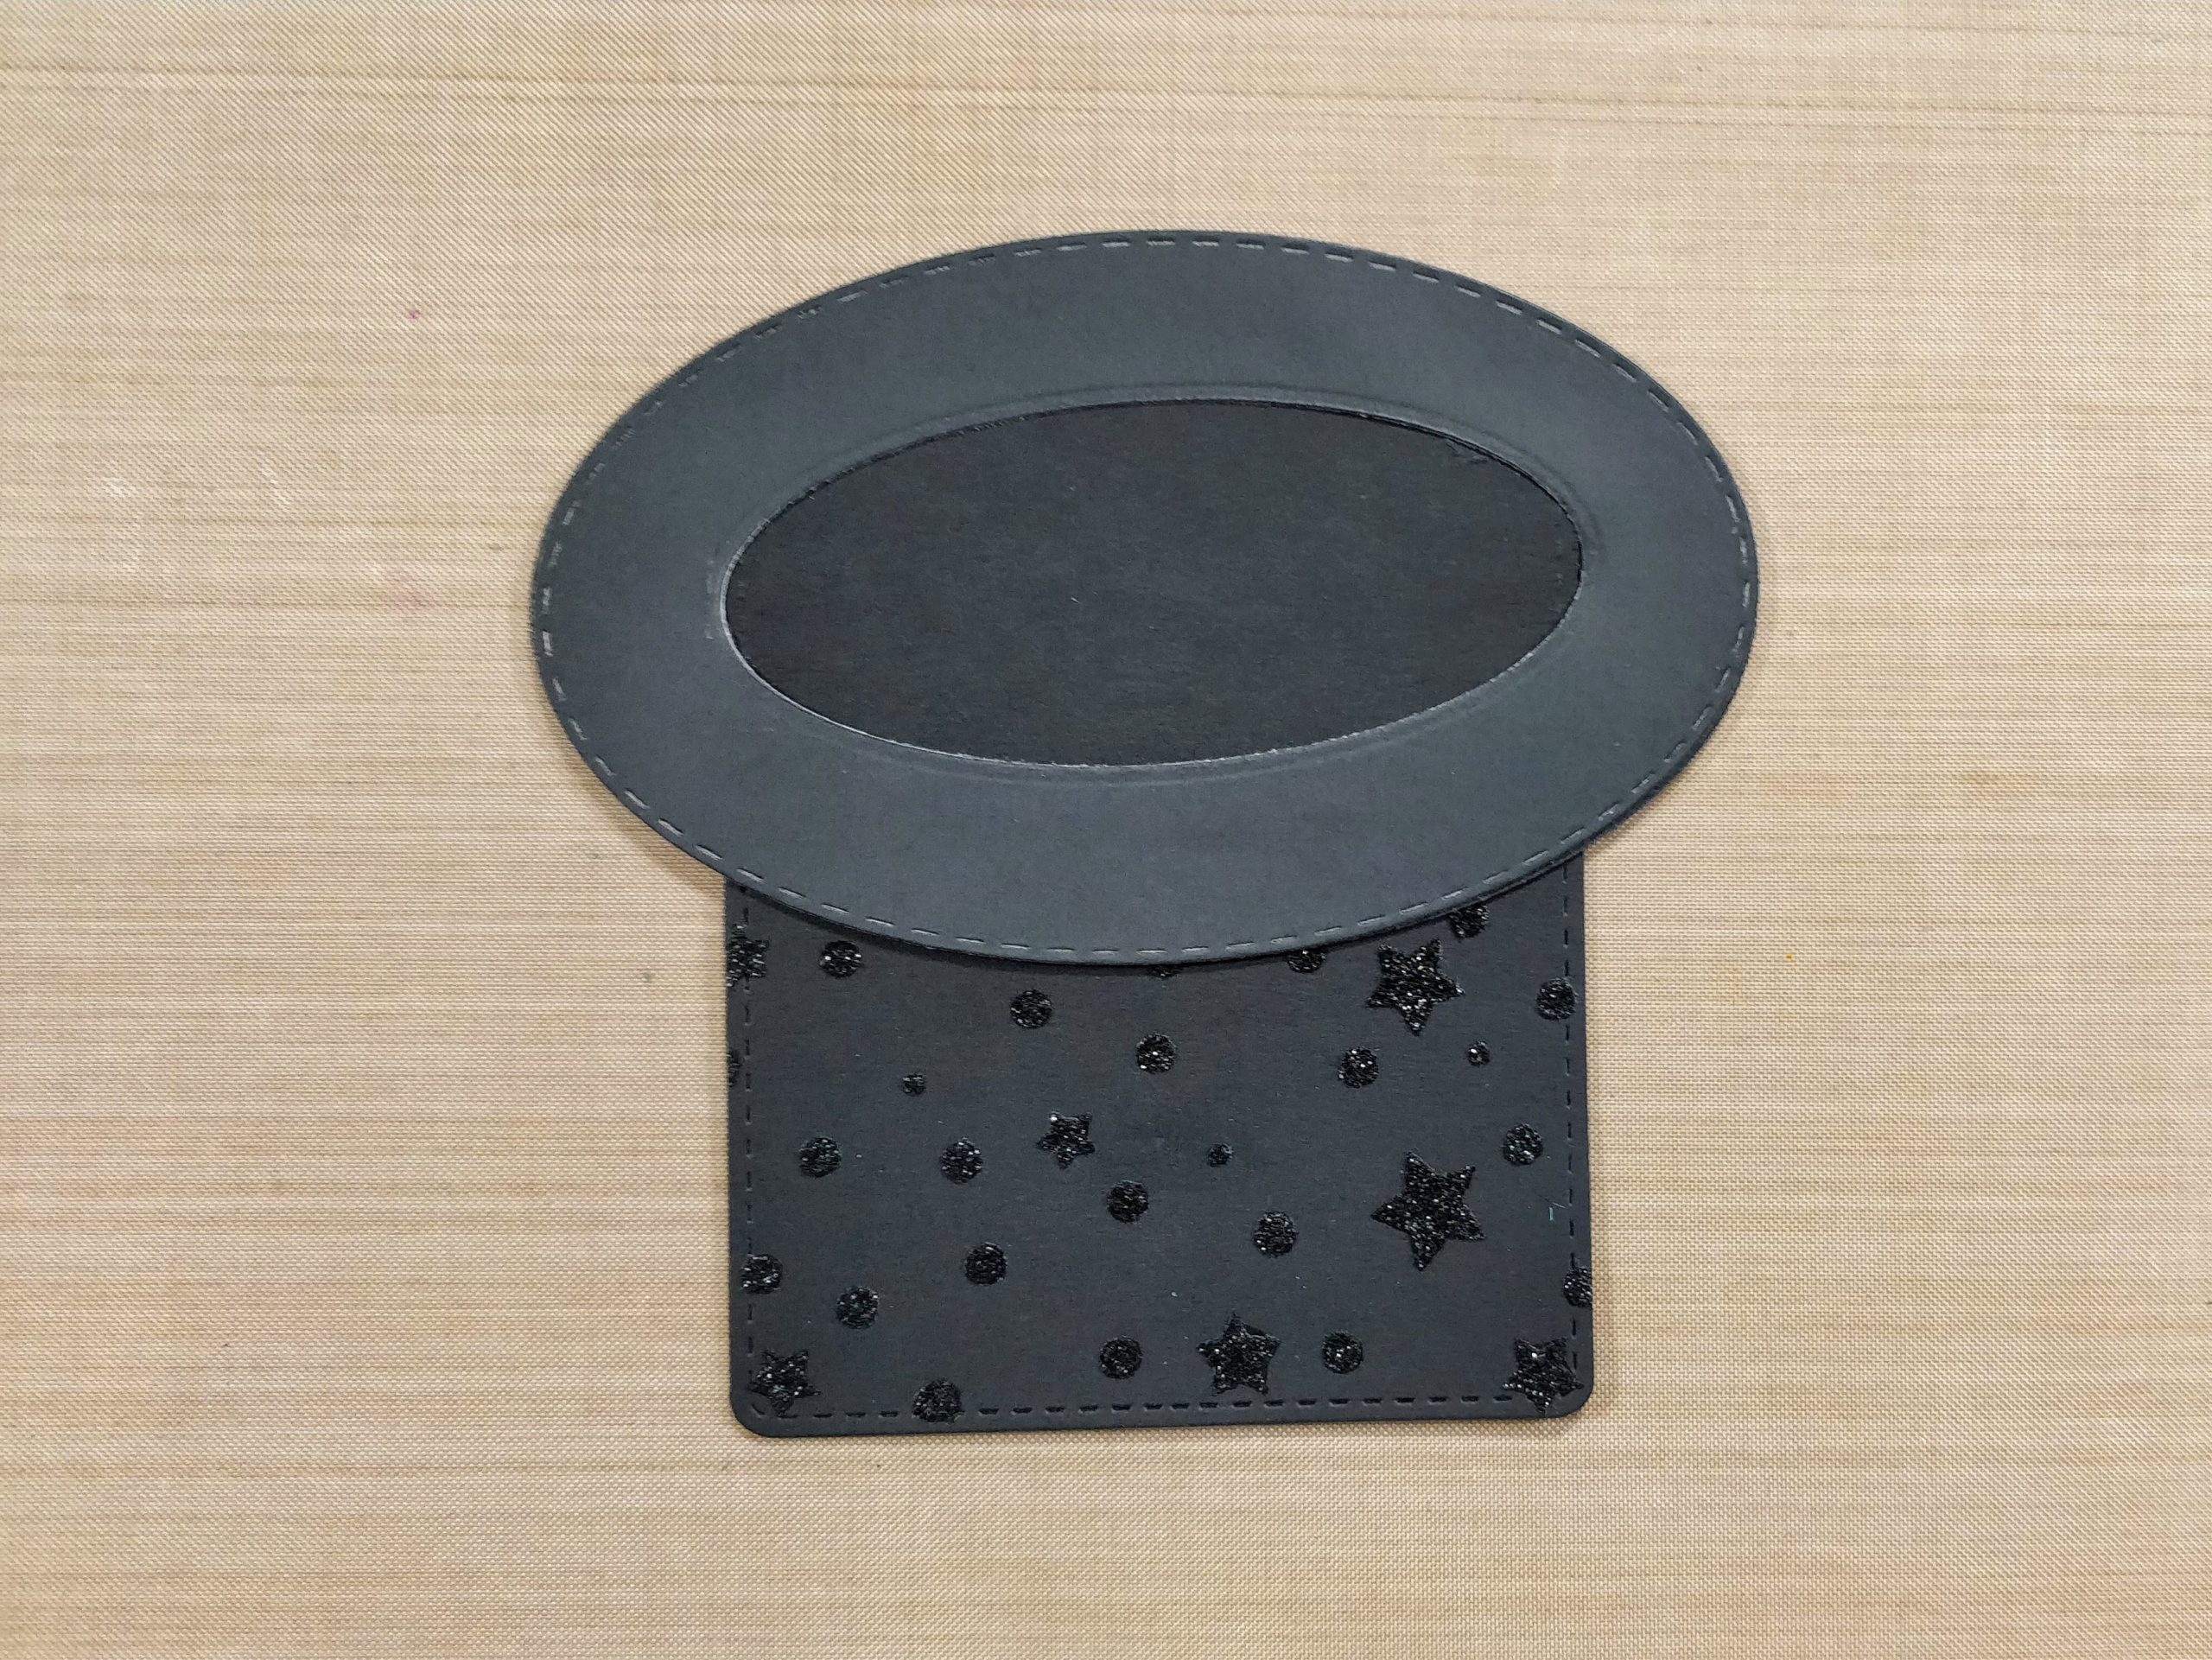
Next, I slipped the pocket in through the center of the first oval and lined it up with the pocket opening. I glued it in place. (It's going to look weird and you're going to wonder if you're doing it right. Don't worry, if it looks like the picture below, it's right.) Now to fix the weird lines at the top, I glued the second oval on top of the first oval. (It doesn't slide around anything, just gets glued right on top.) This hides the top edge of the back of the pocket and makes it look like a hat brim. Test to make sure no glue has seeped out and sealed your pocket shut.

Rabbit Out of a Hat Pocket Card Rabbit Out of a Hat Pocket Card

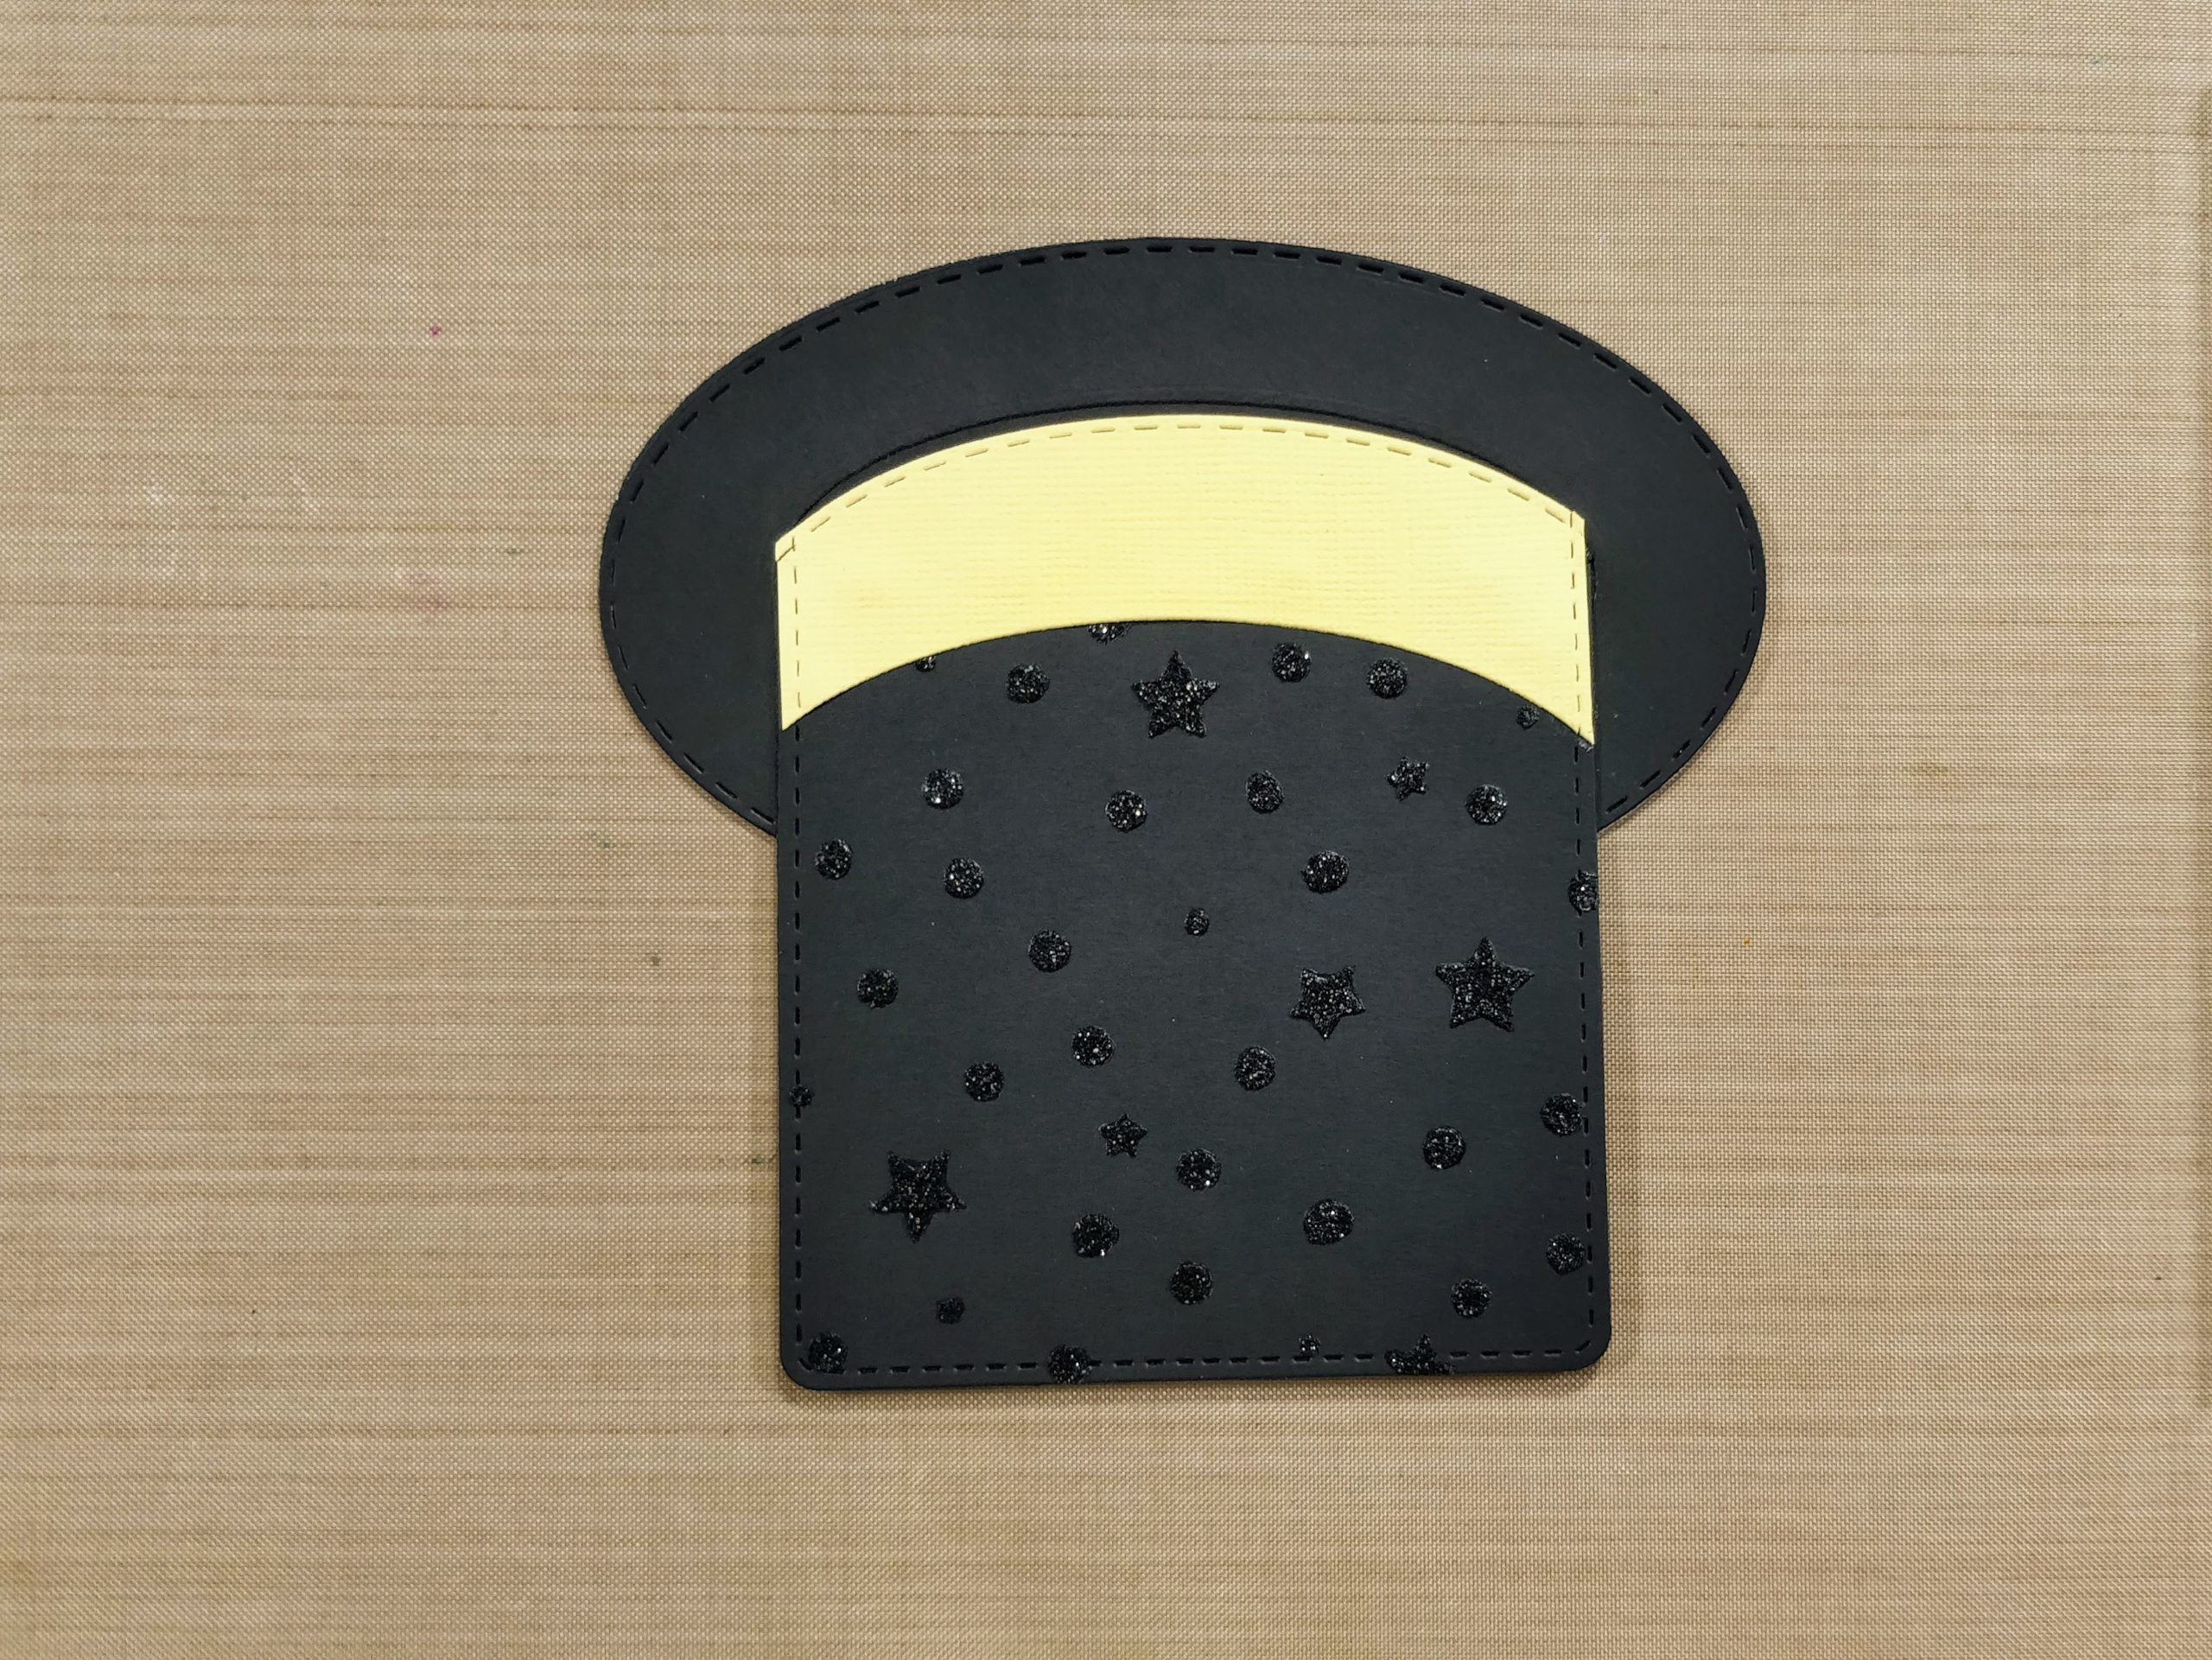
Every dapper top hat has trim, and I decided to add a yellow band to the back of mine. (From the front side's perspective, you wouldn't be able to see the band, so I only added it to the back.) I used the same larger tag and smaller oval dies to cut it out, then I glued it to the hat.

Rabbit Out of a Hat Pocket Card Rabbit Out of a Hat Pocket Card

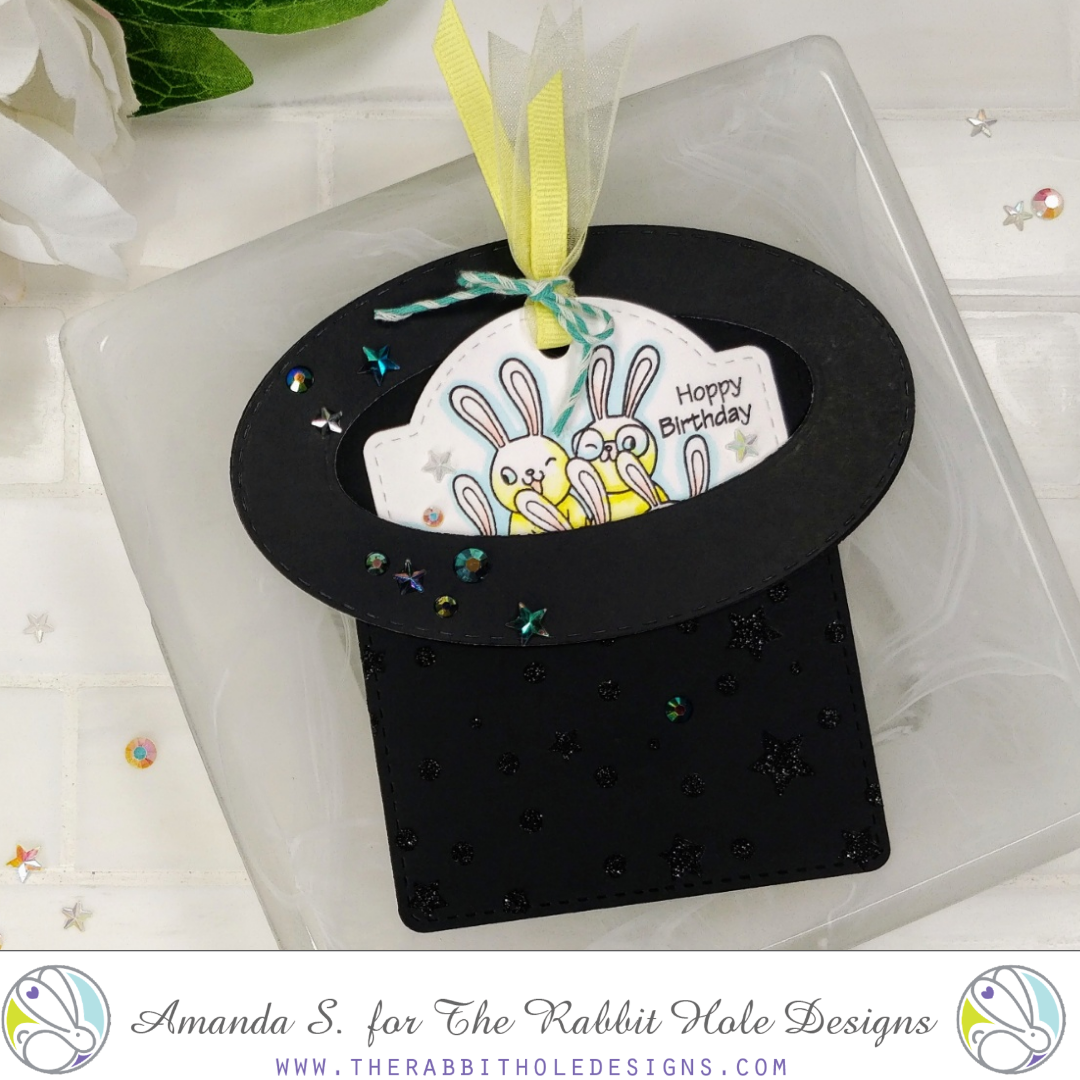
To finish the card, I punched a hole in my bunny tag, tied on some ribbon and twine, then added some flat-backed stars and gems to both the tag and hat. I love it! It's all ready for a very magical birthday...my Grandpa's 90th! (I'll let you know what he thinks of it ☺️)

Rabbit Out of a Hat Pocket Card Rabbit Out of a Hat Pocket Card Rabbit Out of a Hat Pocket Card Rabbit Out of a Hat Pocket Card

Thanks for stopping by today! You can find the sister article to this on my blog, along with links to the specific products I used. Hop on over for more inspiration. If you'd like to see another card I made using this stamp, check this out. I'll be back soon with another fun card.

*If you don't have tag or rounded rectangle dies that are wide enough to fit the exact opening of your inner oval, just cut the right size panels with your paper trimmer and use a corner rounder at the bottom. If your die is too wide, you can cut the panels out, then slide your die over and trim the panels down with it in a second pass through your machine (like I did to shorten the bunny tag).


For more inspiration, updates, and news make sure to check out these places


Beautiful Disaster

I am very excited to share this new card here today.
My card features "Beautiful Disaster" which is from the recent release.

I started by inking the "Circles and Stars" stencil with purple ink.
Then, I used Glitz Gel over the top for sparkle. 

While that dried, I stamped, colored and cut out the beautiful image.   
I just love her. 


Thanks for hopping by today!
-Kelly 


For more inspiration, updates, and news make sure to check out these places