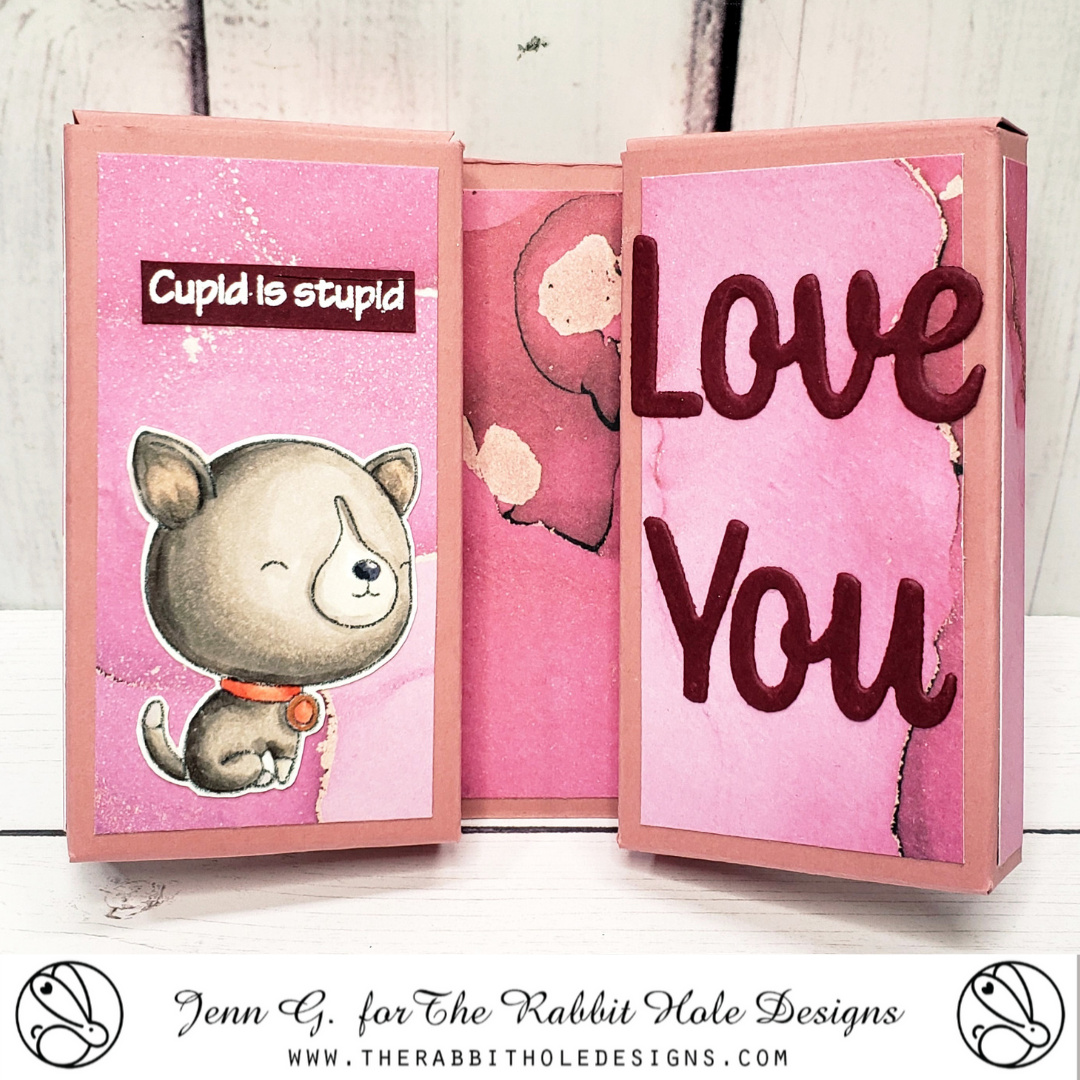
Hello crafty friends! Jenn here with a fun and sassy Galentine's Day Box Card. I designed and created this book fold box card and have provided the details below. Each side holds 3 smarties candy rolls. I share the dimensions, score lines, and details below.
The sweet pup is from The Rabbit Hole Designs' Year 5 Birthday stamp set. I paired with two sentiments from the Sassy Anti Valentine stamp set and die cuts Love and You Scripty Word with Shadow Layer die sets.
The Rabbit Hole Designs Supplies
Let's get started on the box card
I am using white cardstock to show the details, but I use a pink cardstock to create the actual box. It is cut from a piece of sturdy cardstock to measure 11" long x 4 3/4" wide.
I scored the short side all the way down the length of the panel at 1/4", 3/4", 4" and 4 1/2"
Turn the cardstock to the long side and score down the width at 1/2", 1", 2 3/4", 3 1/4", 5", 6 1/8", 7 7/8", 8 3/8", 10 1/8" and 10 5/8"
A - The scored piece of 11" x 4 3/4" cardstock will look like this.
B & C - We are creating two boxes, one on each side, so you need to leave (on the 11" length of the cardstock) two box lids (both on top and bottom) and four side flaps on each side as well. I shaded the areas of the box that need to be removed and cut them out (see photos above). Once the panel is trimmed fold the box and flaps on the score lines.
D & E - To create the box panels inserts, cut a long strip of printed cardstock 3" wide and 10" long. Cut the following pieces from the strip.
- Two 1"x 3" panels
- Four 3/8" x 3" panels
- Four 1 1/2" x 3" panels
Lay the panel inserts out on the box. Do NOT add glue yet. Be sure to leave each far side flap empty as these will be glued to create each box.
Note the placement of the two magnets. They are located on the third panel from each box edge with the magnets in the middle closest to the middle of the box pattern.
F & G - Add a strong piece of double-sided tape 1/2" in from the edge of the third panel and adhere the mini magnet. Repeat this step on the opposite sides third panel. Use Bearly Arts Craft Glue to glue down the panel insert on this side of the box. The 1" x 3 " panel inserts are for the middle of the box card and one is for the reverse side.
H & I - Fold one side of the box in on itself and glue the side tab to the inside is the box as show (I).
J - Repeat these steps with the opposite side of the box card.
K & L - Fold each box lid and box bottom to close the box. You will have two box side that fold in like a book and are secured with the craft magnets. Now you can add the card details.
I stamped out two dog images from the Year 5 Birthday stamp set. One is created using mirror stamping technique on a blank red rubber stamp and restamped on coloring cardstock. Both images are colored with OLO markers creating a brown dog and a gray dog. I used the Cottontail Embossing Powder Tool to treat red cardstock before stamping the Happy Galentine's Day and Cupid is Stupid sentiments with VersaMark Watermark ink and heat set them with white embossing powder. I cut them into strips. I glued one dog and Happy Galentine's Day to the outside of the closed box card.
I added the second dog and Cupid Is Stupid sentiment on the left inside panel of the box card. I die cut the words Love and You and glued them to the inside right card panel. You can fill each box side with Smartie Candy Rolls, money, or any thing that will fit in a box opening measuring 1 5/8" x 31/8" x 3/8".
Thank you, I appreciate you taking time from your day to stop by and check out this Galentine's Day Candy Box Card. I hope you are inspired to create something lovely today!
Be Creative ~ Stay Inspired
Jenn Gross
Follow me, Journey Coach Jenn, on
Instagram - https://www.instagram.com/journeycoachjenn/
YouTube - http://www.youtube.com/c/JourneyCoachJenn
Blog - http://www.journeycoachjenn.com/
For more inspiration, updates, and news make sure to check out these places
The Rabbit Hole Designs Instagram
The Rabbit Hole Designs Facebook Page


This is so fabulous!! Thanks for sharing the tutorial.
ReplyDelete