Pages

Showing posts with label Amanda Stencil. Show all posts

Cute Knotty Card


Hi friends! It's Lauren here today sharing this cute and knotty card featuring the adorable Tailette image from the new Glamping with Tailette stamp set illustrated by Agota Pop. 

I used the versatile Amanda stencil to create a leafy frame for her.
You can watch me create my card in this short video on my YT channel.


I hope I've inspired you to create a cute glamping card with this fun new set. I've linked products I used, below. Thanks for visiting!

Disclosure:

I use affiliate links when I can. This does not add any extra cost to you, but I do receive a small commission which helps keep me creating.
Thank you for visiting!

*You can use code Lauren10 at checkout to save on your purchase. *

Glamping With Tailette Stamp Set, The Rabbit Hole Designs: https://shrsl.com/4ka9l

Amanda Stencil, The Rabbit Hole Designs: https://shrsl.com/2xmzi

Cottontail Blending Brush: https://shrsl.com/3htkd

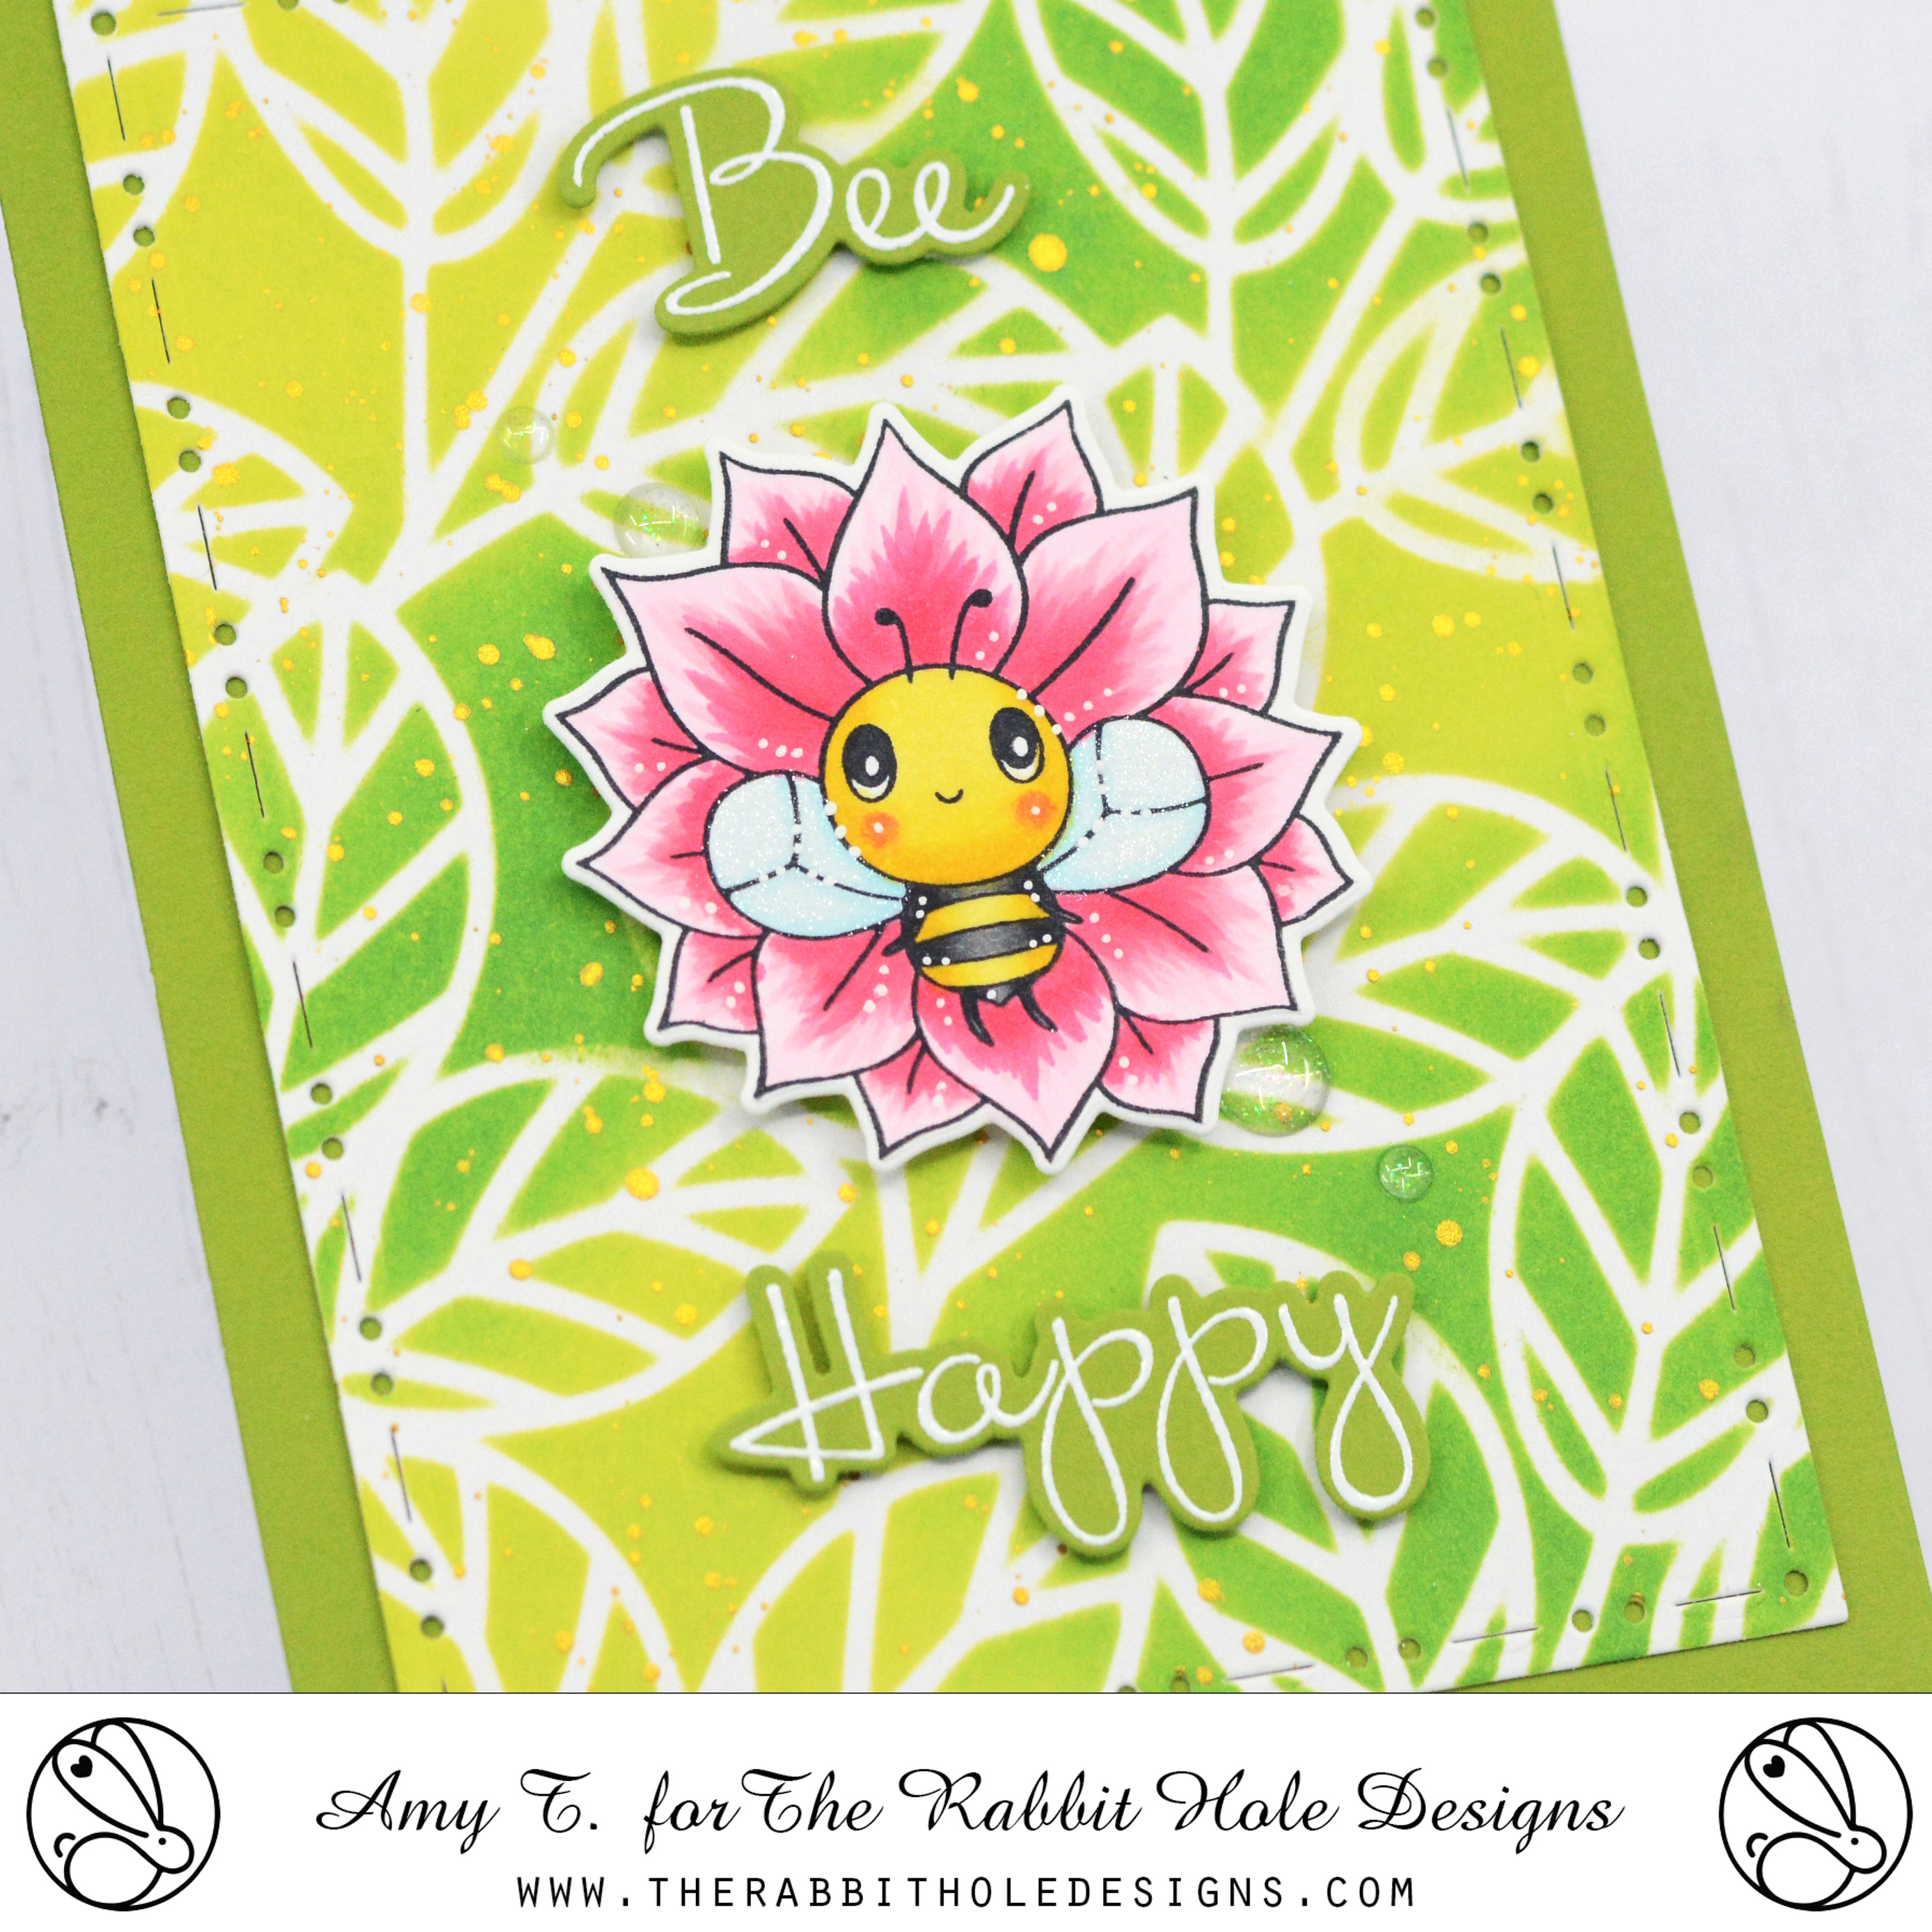
Bee Happy

  Hi everybody!  Amy here with you today sharing a card I created featuring the adorable Sunny Days and Rainbows Stamp Set illustrated by Agota Pop!

Sunny Days and Rainbows Stamp and Die Set illustrated by Agota Pop, Peaceful Bee Stamp and Die Set, Amanda Stencil, You've Been Framed Layering Dies by The Rabbit Hole Designs #therabbitholedesignsllc #therabbitholedesigns #trhd

I started this card by die cutting a piece of smooth white cardstock with the second largest die from the You've Been Framed - Layering Dies.  I then used the Amanda Stencil with Distress Oxide Inks Twisted Citron and Mowed Lawn to create a gorgeous leafy background!  I splattered the background with gold watercolor paint and set it aside to dry.

I stamped out this super cute image of the bee resting on a flower from the Sunny Days and Rainbows Stamp Set, colored it with copic markers, and cut it out using the coordinating die set 

Sunny Days and Rainbows Stamp and Die Set illustrated by Agota Pop, Peaceful Bee Stamp and Die Set, Amanda Stencil, You've Been Framed Layering Dies by The Rabbit Hole Designs #therabbitholedesignsllc #therabbitholedesigns #trhd

Next, I stamped the sentiment, which is from the Peaceful Bee Stamp Set, onto green cardstock and white heat embossed.  I cut the sentiment out using the coordinating die set.

I assembled my card using green cardstock for the base.  I used foam tape to pop up the image and sentiment for some dimension!

Sunny Days and Rainbows Stamp and Die Set illustrated by Agota Pop, Peaceful Bee Stamp and Die Set, Amanda Stencil, You've Been Framed Layering Dies by The Rabbit Hole Designs #therabbitholedesignsllc #therabbitholedesigns #trhd

For finishing touches on this card I added white gel pen accents, glitter, and a few Clear Sparkle Enamel Dots!  Thank you and I hope you enjoyed my card today!

For more inspiration, updates, and news make sure to check out these places:

You're Roar-some!

 Hi everyone!  Amy here with you today and I am excited to share this card I created using the gorgeous No Lion 4x4 Stamp Set illustrated by Tatsiana Zayats.

No Lion Stamp Set illustrated by Tatsiana Zayats, Amanda Stencil by The Rabbit Hole Designs #therabbitholedesignsllc #therabbitholedesigns #trhd

To start this card I die cut a piece of smooth white cardstock and used the Amanda Stencil with Distress Oxide Inks Twisted Citron and Mowed Lawn.  I then splattered the background with gold watercolor paint and set it aside to dry.

Next, I stamped this beautiful image from the No Lion 4x4 Stamp Set, colored it with copic markers, and fussy cut it out.

No Lion Stamp Set illustrated by Tatsiana Zayats, Amanda Stencil by The Rabbit Hole Designs #therabbitholedesignsllc #therabbitholedesigns #trhd

I die cut a green sentiment banner, prepped it with the Cottontail Embossing Powder Tool, stamped the sentiment from the No Lion 4x4 Stamp Set in black pigment ink, and clear heat embossed.  

I assembled my card using green cardstock for the base. I then popped up the image with foam tape on a vellum oval so it would stand out a little more.  I adhered the sentiment banner with foam tape for some dimension as well!

No Lion Stamp Set illustrated by Tatsiana Zayats, Amanda Stencil by The Rabbit Hole Designs #therabbitholedesignsllc #therabbitholedesigns #trhd

For finishing touches on this card I added accents with a white gel pen and a few sparkling sequins.  Thank you and I hope you enjoyed my card today!

Looking Back on a Favorite - Snail Mail


Hi everyone. Lauren here. This month we are taking a look back at some of our personal favorite cards we have created this past year. This cute card featuring the Snail Mail Flower stamp set is one of my favorites because it was the first actual card that I made using a gel press. I was so tickled by how this turned out!

I started out with an A2 (5.5x4.25) sized white cardstock panel and a small round Gel Press plate. Hold on...don't let the gel plate scare you! They are so fun AND easy to use!!


Onto the gel press, I smooshed Kitsch Flamingo, Cracked Pistachio and Peacock Feathers Distress Oxide ink. I used a small brayer to gently and lightly smooth any sharp lines in the ink.


Then, I laid the new Amanda, leaf stencil on top of the ink and carefully pressed it down with my fingers making sure that the stencil was making contact with the whole gel press. I lifted off the stencil and laid my white cardstock panel over top of the inked gel press. I rubbed back of the paper to make sure the paper was in full contact. Then I slowly lifted the panel off.


I let the ink on the panel dry then stamped the snail using Versamark Onyx Black ink. I also stamped the small "Hi" sentiment from the Miss you Space set because I think that's what the little snail is thinking!


To finish my card, I trimmed the panel using a wonky stitched rectangle die from my stash. Then, I backed it with a pink A2 cardstock panel and adhered it to a top folding card base!


I hope you like my sweet snail mail card and that it inspires you to give this technique a try!

Thanks for visiting!