Pages

Showing posts with label Anniversary Card. Show all posts

Easy Happy Anniversary Card

 Hello and welcome back to the blog; it's Rick and I am back to share another one of my favorite cards with you from this year.  Today I am sharing one of my favorite stamp sets from the Rabbit Hole Designs illustrated by Kelly Taylor.  If you don't know I am a big fan of her work.  My card today is an anniversary card that I created using her first stamp set; Lovely Lilies.  It was a must have for me as I am sure most of you feel the same way.  

Lovely Lilies Anniversary Card by Rick Adkins


For my card I actually die cut glitter cardstock using the Falling Leaves Dies and pressed them into the background cardstock using my die cutting machine.  I then stamped and colored the liles and cut them out with the coordinating Lovely Lilies Dies before attaching the bouquet to the card base.  I then simply added the Happy Scripty Word Die and a sentiment from the Happy Scripty Stamp Set to finish off the card.


Lovely Lilies Anniversary Card by Rick Adkins

Thanks for dropping by today I hope that you have a wonderful day!  

Stay Crafty 

Rick 

Fall Color Palette Tips for Lovely Lilies

Hello and welcome back to The Rabbit Hole Designs Blog.  It's Rick here with you again today for another fun card making adventure.  Today I am sharing not one but two cards with you today using the Lovely Lilies Stamp Set and the Lovely Lilies Dies.   This fabulous stamp set was designed by Kelly Taylor or Kelly Taylor Cards.  The Reason I am sharing two cards with you today is because I wanted to take a minute and talk to you about the importance of color; and how color can change the mood or feel of a card design.  


Lovely Lilies Fall Themed Cards by Rick Adkins

Choosing the right colors for your card design is like picking the perfect paint for a masterpiece. The colors you select have the power to convey emotions, set the mood, and leave a lasting impression on the recipient.

Gathering Inspiration:

To start your color journey, gather some inspiration. The Fall season is a goldmine for colors. The changing leaves, the warm and cozy ambiance – it's a perfect place to start. Take a walk outside and soak in the rich, earthy hues of the season. Collect fallen leaves, and you might just find your perfect color palette.

Lovely Lilies Fall Y'all Card by Rick Adkins


Speaking of inspiration, I once found a beautiful acorn in my backyard that had this incredible blend of deep browns, warm oranges, and a hint of soft lavender. It was my aha moment for a Fall-themed card. Sometimes, inspiration strikes when you least expect it.

Selecting Colors for Your Lovely Lilies Card:

Now, let's get down to the nitty-gritty of selecting colors for your Lovely Lilies card. Start by taking a good look at the stamp set. The Lovely Lilies set has such intricate details, and I love how it perfectly captures the beauty of Fall flowers. Consider the elements you want to highlight in your design, and that should guide your color choices.

For me, this set screams Fall with its graceful lilies. I tend to lean towards rich, warm tones like deep oranges, golden yellows, and soft reds for this type of stamp. But you can also balance those warm hues with some cool shades to create contrast and make the design pop.

Lovely Lilies Fall Anniversary Card by Rick Adkins


Color Combinations for Fall-themed Cards:

When it comes to Fall, there are a few classic color palettes that never fail to impress. Think about pairing warm browns with deep greens or soft purples with burnt oranges. It's like a warm, cozy sweater for your card. But don't be afraid to mix it up and add unexpected colors like teal or mauve – that's where the magic happens.

Tips for Experimentation:

Once you've got a few color ideas in mind, start experimenting. Create some color swatches and test out different combinations on scrap paper. Seeing the colors side by side can help you make the final decision. And, trust me, it's so satisfying when you find that perfect match!

I also love using color inspiration boards and tools. Pinterest is a treasure trove of color palettes, and it's a fantastic resource for exploring different combinations. You might stumble upon a palette you've never thought of before.

Examples of Fall-themed Lovely Lilies Cards:

To get your creative juices flowing, I've prepared some Lovely Lilies card designs with various color palettes. You'll see how each combination conveys a different mood and feel. So, take a look, and I hope it inspires you to embark on your own color adventure.

Lovely Lilies Fall Themed Cards By Rick Adkins


I hope this post has shown you that choosing the right color palette is a fun and essential part of card making. Whether you're making cards to brighten someone's day or as a creative outlet for yourself, picking the perfect colors can truly elevate your designs.

Remember, it's all about experimentation and finding what resonates with you. And don't forget to share your creations on social media and tag The Rabbit Hole Designs to spread the card-making love.

Thanks for dropping by today I hope you have a wonderful day and that you found this post helpful. You can find all the supplies that I used on today's cards on my blog post by clicking here!

You can find me on the following Social Media Channels with more crafty inspiration: 
I hope that you have a crafty day.  For more inspiration, updates, and news make sure to check out these places.  

Have a crafty day!
Rick 

Happy Anniversary- with Katie

Hi there, Katie here today.  I have a simple but sweet anniversary card to share with you today. 


I may give this to my hubby for our anniversary in a few months.  I hope he likes it. 

Here is how I made it:
  • I stamped the the main image from Love is More on a slightly opaque vellum using archival ink.  
  • I used zigs and a spectrum aqua for the background. 
  • Used a circle die to cut it out. 
  • I stamped the background stamps onto the white.  
  • Lastly, I adhered the circle over the top. 

Pretty easy and I like the pop of color and the watercolor look of the the cream crisp white. 


I hope you enjoyed this post and thank you for visiting today.  If you would like see a full list of supplies please visit my blog

For more inspiration, updates, and news make sure to check out these places

Personalized Anniversary Card


Hello, everyone! It's Lynnea Hollendonner and I used the Happily Ever After stamp set to create an anniversary card for someone very special to me - my husband!! I wanted to make him a simple card that would remind him of our own wedding. Our wedding colors were sunflower yellow and chocolate chip brown, so I played off of that to create an anniversary card for him.


How - To

  • Start by blending a portion of a piece of white cardstock with yellow inks from dark on the left to light on the right. 
  • Stamp and white heat emboss hearts from the Happily Ever After stamp set over the yellow ink and color with plain water for a subtle bleaching effect. 
  • Cut a diagonal strip out of the center of a second piece of white cardstock and mount on top of the ink blended panel with fun foam. 
  • Stamp sentiment from the Happily Ever After stamp set


Products Used


For more inspiration, updates, and news make sure to check out these places


What's great about this card is that you can customize the colors to fit anyone's tastes! And it doesn't have to be just for weddings or anniversaries! You can definitely give this to a friend as well! Thanks for joining me! See you soon! 

Anniversary Card


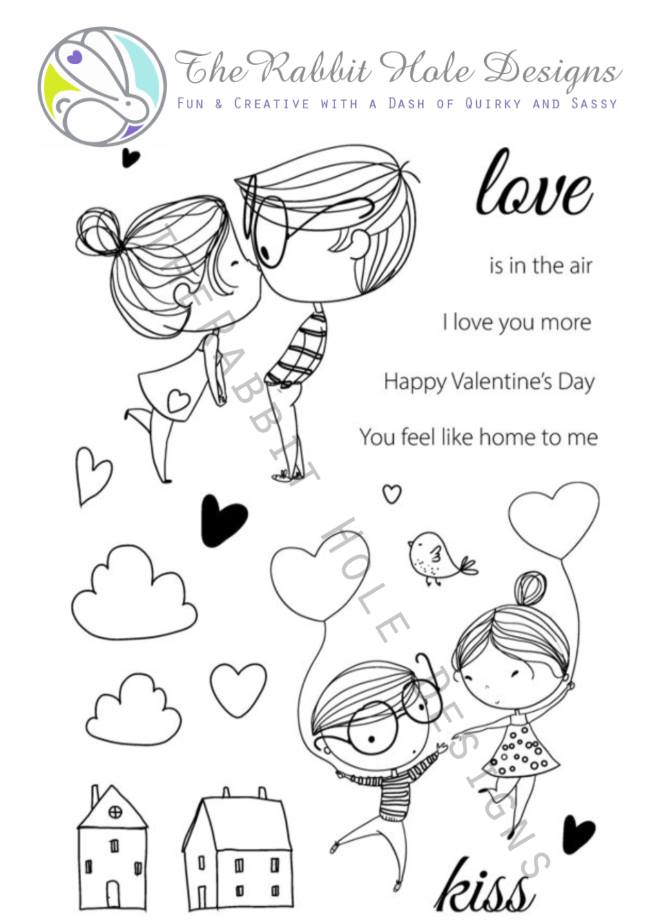
MaryAnn, from PaperDreamz here to share a really easy to make card with you that features the images from the
The Rabbit Hole Designs set Love You More


Card Recipe
  • Create a stamped with versamark watermark ink and clear powder heat embossed background on Neenah Classic Crest White 80lb cardstock using the smaller elements from the stamp set "Don't forget to use your anti-static powder on the panel before stamping" 
  • Grab your favorite blending tools and some inks and set about blending them on the panel any way you wish.  Honestly there is no wrong way here, just go with it!
  • I then stamped the couple with a Copic friendly ink and die cut the panel on a slant.  I found it really easy to do with rectangle dies so I could have a nice finished edge. 
  • I am no pro at Copic coloring of people so I quickly grabbed some markers and gave the stamped image a quick pass with some color. 
  • I stamped the sentiments on the left over piece of cardstock at the bottom of the now diecut couples panel lined it up and gave a quick stamp and I was happy.  Now to assembly.
  • To adhere the ink blended panel to the 110lb card base I used Tombow Multi glue in the green bottle. For the couple panel I added 3D mounting foam to the back of the panel and attached to the top left edge flush top and left of the ink blended panel. I repeated the mounting foam with the sentiment strip but left a bit of space between so you can see some of the background peeking thru. To finish off this card some pink confetti sequins and a couple of clear heart shaped drops that I used some red glitter glue to adhere to the front, give the card a nice pop of sparkle and shine.

For more inspiration, updates, and news make sure to check out these places.

That is all for me today.  I hope I have inspired you to maybe give this technique a go and create some fast and easy cards.
If you are looking for further details about my project including links to instruction and products not listed please feel free to drop on by my blog
PaperDreamz
Thank you for falling down The Rabbit Hole for a few minutes!
MaryAnn