Pages

A Halloween Switch A Roo!

Hi Crafty Friends! 
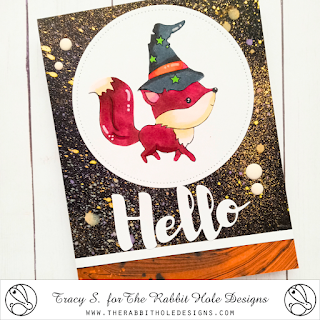
Did you know you can manipulate stamps to completely change the image?  This cute fox by TRHD is part of the Fall Foxes stamp set and I took the witches hat from Meowgical to turn him into a Halloween friend.  By doing so you can open up so many more options and create unique images only created by you.  I encourage you to try this with all your stamps and dies.  I bet you'd be surprised, when you see what you discover.


Thanks for stopping by today!
 I challenge you to recreate this. Make sure to tag me @craftwithme101 and The Rabbit Hole Designs on Instagram if you do. 

For more inspiration, updates, and news make sure to check out these awesome places! 


Angle Layer Card with Coloring

 Hi Friends,

Today I am sharing another elegant Christmas card with the Poinsettia & Pinecones stamp set designed by Kelly Taylor for The Rabbit Hole Designs.

I created some angle layer cards on my YouTube channel a while back and decided to recreate the idea for today's card. I stamped and colored the poinsettia with copic markers.


Hope you enjoy today's card and come visit me on my blog and YouTube channel.

Soft Hugs

 Hello! Erin here sharing a card I made with the Soft Hugs stamp set from The Rabbit Hole Designs.  I really like this set because it is so unique.  And the sentiment "Sending Soft Hugs" is perfect for encouragement, thinking of you, sympathy and other occasions. 

I colored the cotton image with soft pink and dark gray colored pencils. For the background, I used the Falling Leaves stencil and blended a few different pink inks onto pink card stock. I used dark gray for the card base and behind the image. 

Another good thing about this stamp set is that it isn't seasonal.  This same card could just as easily be made in fall colors, Christmas colors, or really any color combination that you can think of! 

For more inspiration, updates, and news make sure to check out these places:

Shimmery Christmas Poinsettias


 Hello! It's Lauren here today sharing this super shimmery Christmas card using the Poinsettia and Pinecones stamp set illustrated by Kelly Taylor. 

I stamped the single poinsettia image 3 times and 5 leaf images onto watercolor paper. I colored them using my watercolor pencils. When the images were dry, I went over each petal and leaf with a light layer of gorgeous, shimmery, Iuile Watercolors. I fussy cut them out once they were completely dry. 


While my poinsettias and leaves were drying, I created a silvery, watercolor background on watercolor paper. I brushed water onto my paper where I wanted the watercolor to be, then I started adding the silver color (Prism) and allowed it to flow ad spread out on the wet area of the paper. Once I was happy with the amount of color coverage, I set it aside to dry.


Then I splattered the panel with the same Prism ink and let it dry. I also painted around the edges of a white top folding A2 sized card base. 


I then created my sentiment by stamping the words Merry Christmas in black ink onto watercolor paper that I had already colored with the Prism watercolor. I then die cut my words out using the Poinsettia coordinating die set.


 Once all my card elements were dry, I adhered them onto my water-colored panel. Then I adhered that onto my card base.


Christmas is the best time of year for all kinds of shimmer and shine and this card is overflowing with it! Below are links to products I used to create my card. Thanks so much for visiting! 

Poinsettia & Pinecones Stamp Set: Poinsettia & Pinecones 6x8 – The Rabbit Hole Designs


Poinsettia & Pinecones Die Set: Poinsettia & Pinecones Dies – The Rabbit Hole Designs


You can follow me at these places:

Fall Color Palette Tips for Lovely Lilies

Hello and welcome back to The Rabbit Hole Designs Blog.  It's Rick here with you again today for another fun card making adventure.  Today I am sharing not one but two cards with you today using the Lovely Lilies Stamp Set and the Lovely Lilies Dies.   This fabulous stamp set was designed by Kelly Taylor or Kelly Taylor Cards.  The Reason I am sharing two cards with you today is because I wanted to take a minute and talk to you about the importance of color; and how color can change the mood or feel of a card design.  


Lovely Lilies Fall Themed Cards by Rick Adkins

Choosing the right colors for your card design is like picking the perfect paint for a masterpiece. The colors you select have the power to convey emotions, set the mood, and leave a lasting impression on the recipient.

Gathering Inspiration:

To start your color journey, gather some inspiration. The Fall season is a goldmine for colors. The changing leaves, the warm and cozy ambiance – it's a perfect place to start. Take a walk outside and soak in the rich, earthy hues of the season. Collect fallen leaves, and you might just find your perfect color palette.

Lovely Lilies Fall Y'all Card by Rick Adkins


Speaking of inspiration, I once found a beautiful acorn in my backyard that had this incredible blend of deep browns, warm oranges, and a hint of soft lavender. It was my aha moment for a Fall-themed card. Sometimes, inspiration strikes when you least expect it.

Selecting Colors for Your Lovely Lilies Card:

Now, let's get down to the nitty-gritty of selecting colors for your Lovely Lilies card. Start by taking a good look at the stamp set. The Lovely Lilies set has such intricate details, and I love how it perfectly captures the beauty of Fall flowers. Consider the elements you want to highlight in your design, and that should guide your color choices.

For me, this set screams Fall with its graceful lilies. I tend to lean towards rich, warm tones like deep oranges, golden yellows, and soft reds for this type of stamp. But you can also balance those warm hues with some cool shades to create contrast and make the design pop.

Lovely Lilies Fall Anniversary Card by Rick Adkins


Color Combinations for Fall-themed Cards:

When it comes to Fall, there are a few classic color palettes that never fail to impress. Think about pairing warm browns with deep greens or soft purples with burnt oranges. It's like a warm, cozy sweater for your card. But don't be afraid to mix it up and add unexpected colors like teal or mauve – that's where the magic happens.

Tips for Experimentation:

Once you've got a few color ideas in mind, start experimenting. Create some color swatches and test out different combinations on scrap paper. Seeing the colors side by side can help you make the final decision. And, trust me, it's so satisfying when you find that perfect match!

I also love using color inspiration boards and tools. Pinterest is a treasure trove of color palettes, and it's a fantastic resource for exploring different combinations. You might stumble upon a palette you've never thought of before.

Examples of Fall-themed Lovely Lilies Cards:

To get your creative juices flowing, I've prepared some Lovely Lilies card designs with various color palettes. You'll see how each combination conveys a different mood and feel. So, take a look, and I hope it inspires you to embark on your own color adventure.

Lovely Lilies Fall Themed Cards By Rick Adkins


I hope this post has shown you that choosing the right color palette is a fun and essential part of card making. Whether you're making cards to brighten someone's day or as a creative outlet for yourself, picking the perfect colors can truly elevate your designs.

Remember, it's all about experimentation and finding what resonates with you. And don't forget to share your creations on social media and tag The Rabbit Hole Designs to spread the card-making love.

Thanks for dropping by today I hope you have a wonderful day and that you found this post helpful. You can find all the supplies that I used on today's cards on my blog post by clicking here!

You can find me on the following Social Media Channels with more crafty inspiration: 
I hope that you have a crafty day.  For more inspiration, updates, and news make sure to check out these places.  

Have a crafty day!
Rick 

Merry & Bright

 Hi everybody!  Amy here with you today sharing this card I created using the beautiful Merry & Bright Stamp Set illustrated by Tatsiana Zayats.

Merry & Bright Stamp Set illustrated by Tatsiana Zayats, You've Been Framed - Layering Dies by The Rabbit Hole Designs #therabbitholedesignsllc #therabbitholedesigns #trhd

I started this card by die cutting a piece of white cardstock with the largest die in the You've Been Framed - Layering Dies.

I then stamped this absolutely gorgeous image from the Merry & Bright Stamp Set directly onto the cardstock, and colored it with copic markers.

Merry & Bright Stamp Set illustrated by Tatsiana Zayats, You've Been Framed - Layering Dies by The Rabbit Hole Designs #therabbitholedesignsllc #therabbitholedesigns #trhd

Next, I stamped the sentiment directly onto the cardstock as well, with black pigment ink, and clear heat embossed for some shine!

I assembled my card using red glitter cardstock for the base!

Merry & Bright Stamp Set illustrated by Tatsiana Zayats, You've Been Framed - Layering Dies by The Rabbit Hole Designs #therabbitholedesignsllc #therabbitholedesigns #trhd

For finishing touches on this card I added accents with a white gel pen, and red glitter to the berries!  Thank you and I hope you enjoyed my card today!

For more inspiration, updates, and news make sure to check out these places:

Crisp Autumn Air

 Hello!  Erin here sharing a card I made using the Fall Foxes stamp set from The Rabbit Hole Designs. I'm still enjoying fall but the leaves are starting to come down rapidly and I know that winter will be hitting where I live before I'm ready for it!  


I started working on this card by choosing the fox wearing a scarf image from the stamp set and colored it with pencils.  I cut it out using the coordinating die set.

For the background, I stamped the Falling Leaves stamp set in green.  I cut a circle so the green card base would show through the but I thought it still needed a little framing.  So I cut a smaller circle in some darker green card stock and used it as a frame or border around the circle.  I decided to use the same dark green to heat emboss the sentiment.  I accidentally grabbed clear embossing powder instead of white the first time I stamped and embossed the sentiment.  I actually liked how it looked so I am going to keep it but I still wanted to use white for this card.  Now I have an extra embossed sentiment to keep with this stamp set for future cards. And of course I used my Cottontail Embossing Powder tool! It works so well to leave the paper static free and helps me get a nice, crisp embossed image.
After I remade the sentiment with white embossing powder, I trimmed it down using my paper trimmer.  At that point, everything was ready to assemble.  For a little dimension, I used foam tape to attach the fox and the sentiment strip.


Lastly, I added my personalized stamp and added stamped some leaves from the stamp set onto an envelope.  I don't always make coordinating envelopes but sometimes they are fun to have. 


For more inspiration, updates, and news make sure to check out these places:

A Very Merry Retro Christmas Card


Hello my crafty friends and welcome to today's blog.  I created a retro Christmas card using The Rabbit Hole Designs Poinsettia & Pinecone stamps (a Kelly Taylor Cards illustration) along with the coordinating dies.
After coloring the images with OLO Markers, I die cut them with their coordinating die.  I cut apart the pine sprig to create two sprigs. Each sprig is gently shaped to bring in some depth to the the pinecones and needles.  I added splashes of white gold watercolor to create a falling snow effect on the Poinsettia flower and pine sprigs.
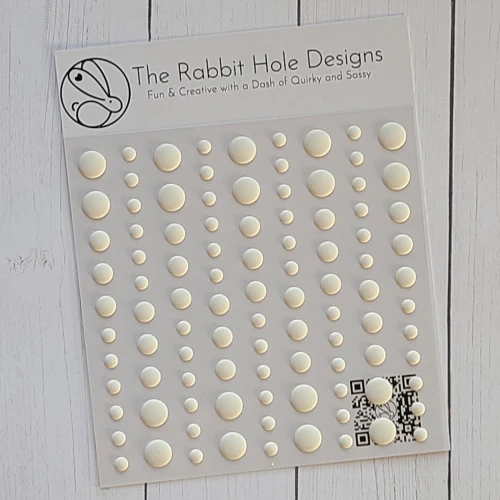
I used a pale pink ink to stamp the solo Poinsettia flower in a random pattern to  4" x 5 1/4" white card front.  I checked the placement of the sprigs and flower on the top right of the card front to see where to stamp the sentiment to the panel.  Once the sentiment is stamped, I attached the poinsettia and sprigs to the card front with glue and foam tape.  I finished the card by mounting it to a sage green A2 card base.  I colored the Matte White Enamel Dots with the white gold paint and lt them dry before adding them to the lower left corner of the card front.

Thank you for taking the time to stop by today's blog.  I hope you enjoyed this tutorial and are inspired to create something lovely today.

Be Creative ~ Stay Inspired

Jenn Gross


Follow me, Journey Coach Jenn, on 

Instagram - https://www.instagram.com/journeycoachjenn/

YouTube - http://www.youtube.com/c/JourneyCoachJenn

Blog - http://www.journeycoachjenn.com/


For more inspiration, updates, and news make sure to check out these places


The Rabbit Hole Designs

The Rabbit Hole Designs Instagram

The Rabbit Hole Designs Facebook Page
The Rabbit Hole Designs Pinterest

The Rabbit Hole Designs YouTube