Pages

Showing posts with label Ribbon Star Stencil. Show all posts

Let it Snow!


Hello everyone! It's Lauren on the blog today with a different way to use the Candy Twist Die. I happened upon this design by accident while I was die cutting a bunch of candy twists for a different card. I was putting them in a pile and I noticed as a few of them overlapped that it resembled a snowflake. Aha! A new card idea was in the works!

I started out by ink blending distress oxide inks onto an white 4.25x5.5" panel. I used mermaid lagoon blueprint sketch and chipped sapphire. I then lightly spritzed it with water and set it aside to dry and set. 

Next, I die cut 3 candy twists and also some other snowflakes from dies I dad in my stash. I glued the centers of the twists on top of each other, rotating them each layer so that the outside candies are side by side. 


When the ink blended was fully dry, I placed the Ribbon Star stencil over top and smooshed white ink through the stencil. I carefully removed the stencil and added some bright white dots all over using a white gel pen. Then I adhered the panel to an A2 sized card base.

I die cut a stitched banner out of white cardstock and stamped the "let it snow" sentiment that I had in my stash in mermaid lagoon distress oxide ink.

The last step was to glue all my snowflakes and the sentiment onto the card front. 

I hope you enjoy this different way to use the candy twist die and try experimenting with it yourself! You never know what you will come up with. Thanks for visiting! Lauren

Candy Twist Die


Ribbon Star Stencil


For more inspiration, updates, and news make sure to check out these fantastic places! 


grab coffee. go VOTE.


Hello my crafty friends and welcome to The Rabbit Hole Designs blog.  Are you ready to rock the Vote this fall?  I was inspired by the fun star studded shorts the Caffeinated Rhino is sporting.  I am using the Ribbon Star stencil and the Marquee Word Stamp set. 

I started with a piece of 4" x 5 1/4" blue printed cardstock.  I used the Ribbon Star stencil and clear embossing ink to stencil the left side of the printed cardstock. I embossed it with white embossing powder and heat set it.  I repeated this technique on the right side of the printed cardstock and embossed it with blue embossing powder and heat set it.  I colored the Rhino and his bird with alcohol markers.  Using a set of click able letters, I created the sentiment  "grab coffee" and "go" on to strips of white cardstock.  Using the Marquee Words I stamped out and created the word "VOTE".  I used the "W" masking off one side to create the letter "V".  I fussy cut each of the letters out and glued them to the strip to read "go VOTE"


so...  Remember to grab your coffee and go vote!


Here are The Rabbit Hole Design products used in this card:

Caffeinated Rhino 3"x4" stamps set

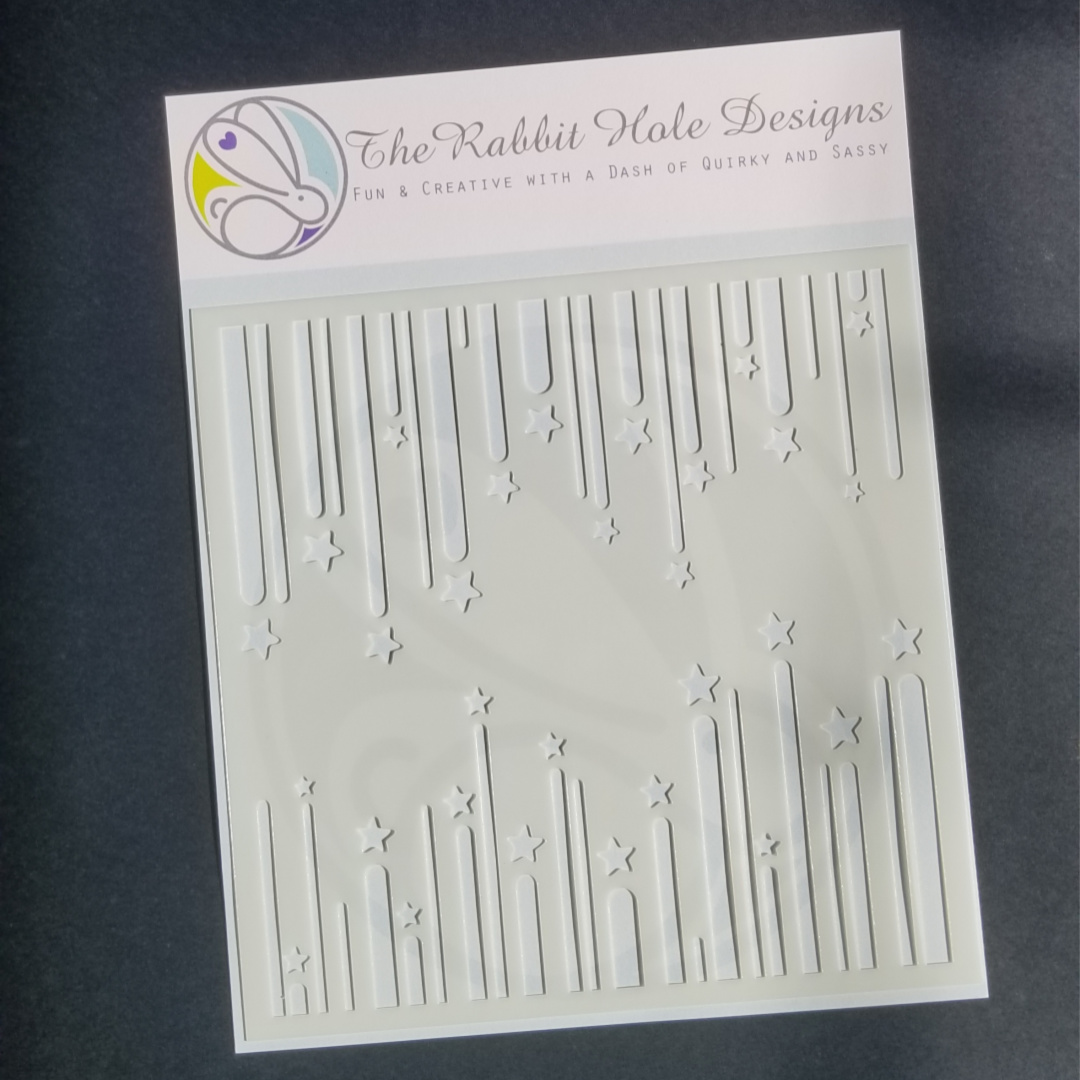
Ribbon Star 6"x6" stencil

Marquee Words 5" x 6.5" stamp set


I hope you enjoyed "grab coffee, go VOTE". card featuring the Caffeinated Rhino stamps set and the Star Ribbon  stencil and Marquee Words stamp set.  Please let me know if you have questions.


Be Creative ~ Stay Inspired

Jenn Gross


Follow me, Journey Coach Jenn, on 

Instagram - https://www.instagram.com/journeycoachjenn/

YouTube - http://www.youtube.com/c/JourneyCoachJenn

Blog - http://www.journeycoachjenn.com/


For more inspiration, updates, and news make sure to check out these places


The Rabbit Hole Designs

The Rabbit Hole Designs Instagram

The Rabbit Hole Designs Facebook Page

The Rabbit Hole Designs Pinterest

The Rabbit Hole Designs YouTube


Stencil Shift for Quick Cards


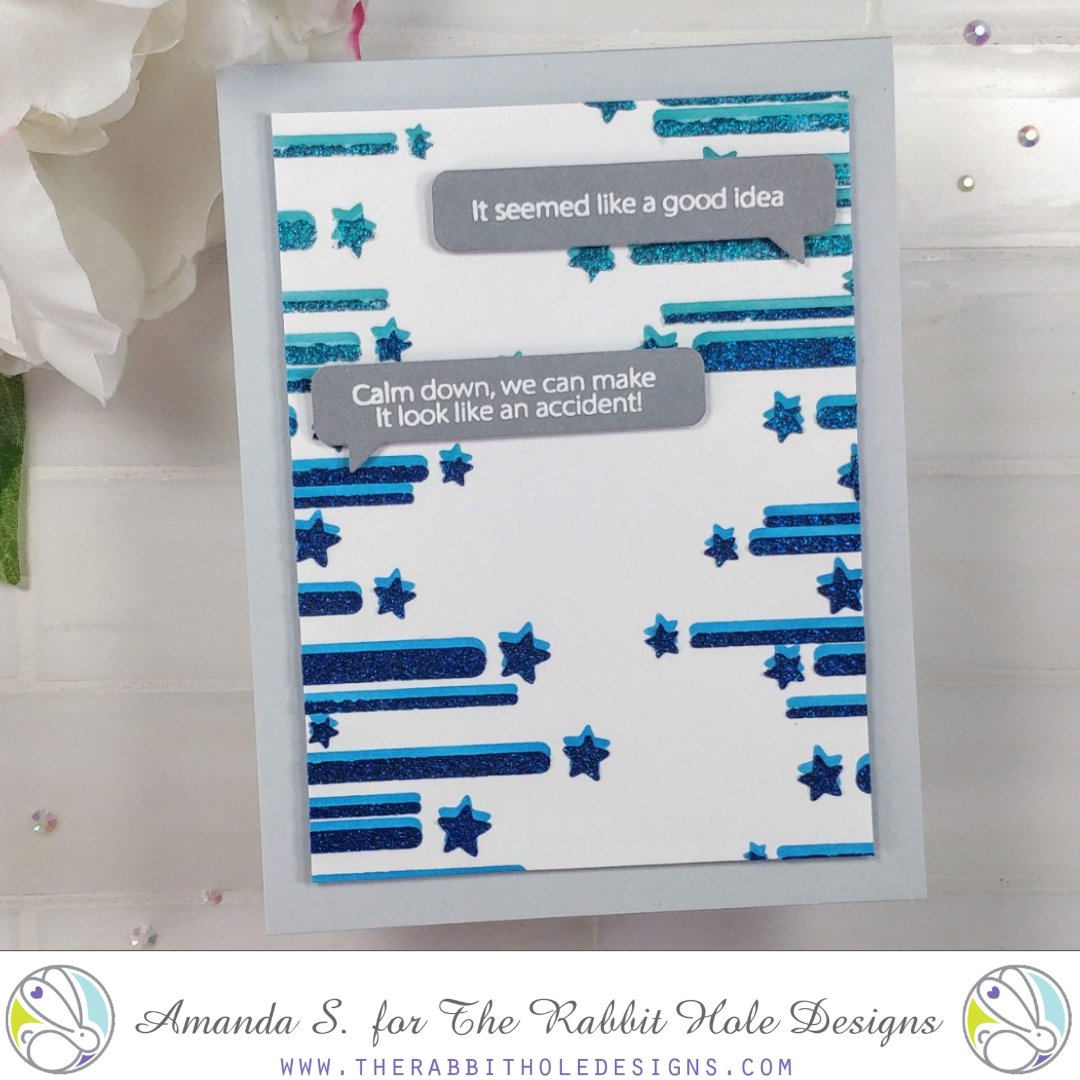
Hey crafty friend, it's Amanda from Pear Blossom Press again, and I've got a fun stencil shift technique to share today. I learned this from my friend Lynnea; she always has the best ideas! And the coolest part, is that it's quick and easy. 

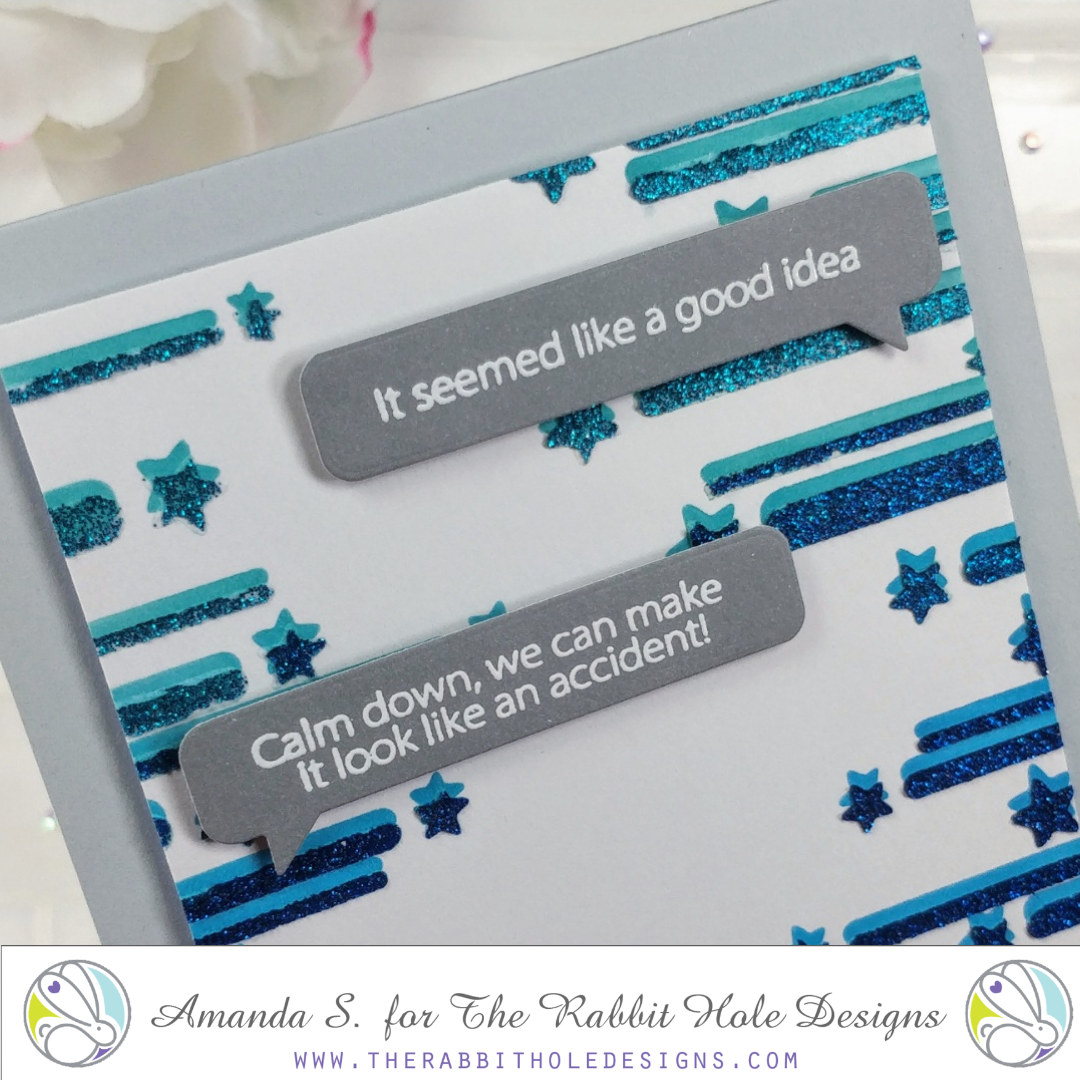
For this technique, pick your favorite stencil and blend ink through it. I used the Ribbon Star stencil, but anything with bold stripes will work really well for this. Next, shift your stencil over slightly and apply glitter gel or metallic paste through the stencil. That's it! Your ink blended layer creates a drop shadow effect for the gel. 

You can clean your stencil while your panel dries, then turn it into a card. For this one, I embossed a pair of Sassy Sentiments and cut them out with speech bubble dies. Then I popped them up onto my trimmed panel, and popped that up onto a card base. Easy peasy, lemon squeezy. 


Thanks for stopping by today. I hope you'll give this technique a try and let me know what you think. Tag me if you do; I'd love to see! If you'd like to see another fun project featuring the Ribbon Star stencil, check this out. You can find the sister article to this on my blog. Head on over for more inspiration. I'll be back soon with another fun card to share. 

For more information, news and updates check out these links:

Never Underestimate the Power of Love

Hello! Alison here with a new card featuring the Ribbon Star stencil from The Rabbit Hole Design's June release.

I really wanted to create a Pride card using this fun stencil, so I painted my background using several Dylusions sprays, allowing the colors to blend together. Then, I applied copper stencil paste on to the dry panel with the Ribbon Star stencil attached.

After I let the paste dry, I stamped my sentiment in black, which is from the Old School Tattoo- Affirmation stamp set. It's one of my favorite stamp sets from The Rabbit Hole Designs.
I created a black card base, but I thought it needed some shine, so I painted on some gold watercolor to frame my rainbow panel.
This card is actually very quick to create....you just have to wait for everything to dry. I really love how the stenciled image stands out against the vibrant background. It would be fun to try this with other color combos too, but I really wanted something for Pride for this card.

The products I used from The Rabbit Hole Designs today are:


You can get more information on my card by visiting my blog HERE. I'd also love it if you followed my social media accounts:


Thanks so much for stopping by. Have an inspiring day!
-Alison

For more information, news and updates check out these links:

Tons of room in my heart for you!


Hi Everyone! Amy here and I’m excited to share with you a card that I made using the Space - Infinity and Beyond stamp set from the June 2020 Release! 


On this card I used the new set called Space - Infinity and Beyond. I ink blended a galaxy background and then stamped an image from the set with clear embossing ink. I heat embossed the image with white embossing powder to have a nice contrast against the dark galaxy background. I used a heart shaped die to cut it out and popped it up on a background where I used the new ribbon star stencil. I felt like the sentiment from the set was a perfect complement to the scene. And don't forget, with any order you will receive one of these adorable TRHD pins for free while supplies last!


You can find these items and much more here


Thanks for checking out my project and have a great day!
Amy


For more inspiration, updates, and news make sure to check out these places.


Happy Birthday!


Hey yall!  Happy Tuesday!  Tangii here with another creation from the June release! I hope you are having a great week and doing something happy!  One of my teamies here shared a card that inspired me for this one.  I used the Ribbon Stars Stencil to make some birthday candles!

I used some scrap paper to make the teal "iced cake" piece. Then I drew a line just below the arch of it, this gave me an idea of where to place my candles.  Next I just masked off a couple the "ribbons" and then using blender brushes and ink I started coloring in my candles.  For the tips of the candles I used some embossing ink and Gold embossing powder... it kind of looks like candle flames.

Finally I added a sentiment from the Sassy Birthday 2 set at the top and added a twine bow!

All of the items I linked in my post are available at The Rabbit Hole Designs.

You can also read about this card on my blog, here with links to the products I used, etc.  Thanks for popping by, come back again soon!

Happy Birthday!

Hi everyone! I am so happy to be on the Blog today.  I have a card to share with you using the Ribbon Star stencil from the Newest Release from The Rabbit Hole Designs.


So I made this fun bright card using the Ribbon Star stencil and my Distress Oxide inks in rainbow colors and blender brushes.  I used Sweet Sentiment cardstock and after I was done blending I used some gold glacier paste to spread over some of my ink. I did let it dry for a little bit and then I heat dried it with my heat gun.


I used the Scripty Happy Birthday Stamp set and heat embossed it in a light gold embossing powder across my panel.  I cut down my panel a little bit to allow some gold glitter paper to peek through.  I then added some gold star confetti.  My panel was then added to a A2 top folding card base.


Here is the inside of my card, I had a strip leftover from my panel so I glued it on my rectangle cardstock for the inside to match. I then stamped and heat embossed the rest of the sentiment from the Scripty Happy Birthday stamp set.  I hope you like my card today, thank you for stopping by!

Here are the Products I used:


For more inspiration, updates, and news make sure to check out these awesome places! 


Thank you so much for stopping by today!


Caffeine MEOW! I'm Seeing Stars!


Hello my crafty friends and welcome to the The Rabbit Hole Design Blog today!   This is Jenn Gross and  I am sharing this colorful card  "Caffeine MEOW! I am Seeing Stars!"  It features the Ribbon Star Stencil and the Caffeinated Cat stamp set.  We best hurry up and get this cool cat his morning cuppa Joe!


I absolutely love how Ribbon Star stencil turned out!  I sent the stencil on top of a 4 1/4 by 5 1/2 piece of white cardstock. I used Karin Brushmarkers to create this look. I colored some of the ink from the Brushmarkers onto a sheet of acetate. Using the watercolor brush, I kept it in a little bit of water and picked up some of the Brushmarkers color off of the acetate. Using a loose daubing motion with a brush I added spots of color to the stencil openings. I use the colors of a rainbow, starting with reds and ending with purples, daubing Watercolor pigment and overlapping other colors. When I left it up the stencil, you could see a loose image of the ribbons and stars. 


I colored the caffeinated cat to look like a Siamese cat. We had Siamese cats as I was growing up the two were called Puss and Boots.  I used Karin Brushmarkers to color they cannot and give him his furry look. I love dotting around the eyes with 2 to 3 colors to give his eyes a bit of depth. He wants his Coffee right MEOW!

Here are The Rabbit Hole Design products used in this card:


I hope you enjoyed this fun whimsical card and it sparks a bit of inspirations. Thank you so much for stopping by the blog!  Please feel free to leave me a comment. I love hearing from you, It's very inspiring to me. Happy crafting! 

Be Creative ~ Stay Inspired
Jenn Gross

Follow me (@journeycoachjenn) on 


For more inspiration, updates, and news make sure to check out these places


Man in the Moon

 Hello there! Happy Monday!!! How's it going by you?
Michelle here, sharing my man in the moon card (hehehe).
I used the stamp set, Space- Infinity & Beyond and Ribbon Star Stencil...makes a 
perfect combo!!!! 
I inked up the background using tumbled glass and chipped sapphire distress
oxide inks. Than I embossed the stencil with metallic silver sparkle embossing powder.
I colored my astronaut with the no-line coloring technique.
I stamped him with antique linen ink and used Copic Markers to color.
For the moon: C00, C1, C2, C3, C5, C7, C9
For the astronaut: C00, C1, N2, C5, C7, B34, B37, B39, R29, R89
For a finishing touch I scattered a few Starletz gems.


Ribbon Star 6x6 Stencil


Space - Infinity & Beyond  4x6

Thanks for stopping by for a peek!!!
Hope you have a great week!!!

Michelle

Thanks for joining us today on the blog!
Come back for more inspiration using The Rabbit Hole Design products. 

For more information, news and updates check out these links:

Holographic Ribbon Star Stencil

Hello! Alison here! Today I have a card that features the new Ribbon Star Stencil. I am so in love with it! I knew immediately that I need to experiment with different foils, and today's card features a holographic one.

I applied a stencil medium that works with foils to a panel of black cardstock. After it dried, I foiled it in my laminator.
I love the sentiments and the cow from the new Infinity & Beyond stamp set, so I heat embossed them with silver. Take a look at those beautiful flashes of color on the foil!
I mounted my panel on to a black card base, and added a piece of metallic washi tape to the right side.
This card is pretty clean and simple, but I think that the holographic foil speaks volumes. I really love this new stencil and I look forward to experimenting with it using other techniques. If you'd like more information, please head over to my blog HERE. Thanks so much for stopping by. Have an inspiring day!
Products used:


For more inspiration, updates, and news make sure to check out these awesome places! 

June Release Inspiration Hop ~ Day 2


Hello and welcome to Day 2 of the Inspiration Hop. We are so excited for you to join us as we present to you our June release. Our fabulous Design Team will be sharing their projects over the next couple of days, so be sure to visit their blogs and leave them some crafty love.


 The 2 new stamps sets and 2 new stencil are all available to purchase right now in the shop.


The two new stencils that are being highlighted today are

Aim For The Stars Stencil

Ribbon Star Stencil
Make sure you come back tomorrow for Day 3 of our Inspiration Hop.


___________________


**Giveaway**


To celebrate the June release, The Rabbit Hole Designs is giving away two gift certificates; one to a lucky Instagram Follower and one to a lucky Fan Page follower.  Winner will be chosen at random from the comments left on the INSTAGRAM post, and tagging friends, and also from commenting on the Fan Page post.  So make sure to head on over to INSTAGRAM and look for the giveaway post @therabbitholedesignsllc and look for the post at The Rabbit Hole Designs Fan Page by 11:59 p.m. PST 05-28-2020.  Winner will be announced on The Rabbit Hole Designs blog 05-29-2020.

This is the graphic you are looking for on our IG and FB


___________________


For more inspiration, updates, and news make sure to check out these awesome places! 


Thank you so much for stopping by today!