Pages

Showing posts with label Valentine's Day. Show all posts


Hello. It's Lauren here today with a cute and cheery card using the new Love Puffin stamp set. 


I had tons of fun coloring up this puffin image and creating a fun layered background for it. 

More details and pictures can be found on my blog: 

https://laurenzrdh.wixsite.com/queenlorecreations/post/puffin-love

Thanks for visiting!

Here are the links to the products I used for this card: 

Love Puffin Stamp Set: Love Puffin 4x6 – The Rabbit Hole Designs 


Love Puffin Die Set: Love Puffin Dies – The Rabbit Hole Designs


Amanda Stencil: Amanda - 6x6 Stencil – The Rabbit Hole Designs


Thanks again for visiting. You can follow me here:


You Feel Like Home To Me Card

Hey Rabbit Hole Crafters! Justin here, and I'm here with a fun traditional Valentine's Day project!

This card uses solely the Love You More set, but only uses the, what I call, scene building images!

I was looking at this card and knew that it was the set I wanted to use to create a Valentine's Day project, but didn't know which images I wanted to use. This set comes with 2 really cute pairings of a boy and girl couple, but what really inspired me was the sentiment "You Feel Like Home To Me". Since the set included images of houses, I knew that was the direction I was going to go.

First, I colored up a handful of houses and clouds with Copic Markers, alternating between a few different Red and Pink groupings I had come up with. I then cut all of the images out using my Scan and Cut.

Note: for images that are generally white, I color them up with a super light/diluted color. For these clouds, I took a super light pink marker and just went around one side's edges. You can also blend this out with a colorless marker if you deem fit.

I die cut a "Slightly Smaller Than A2"-sized stitched rectangle on white cardstock and again on black cardstock. I took my black cardstock panel, marked where I wanted my grounding for the house to be, and die cut a stitched curved edge on the panel. Then an A2-sized rectangle on red cardstock.

I took the white panel and ink blended a background. From the bottom up, I used a light pink, bright pink, and then a lighter red to create an ombré Valentine's Day appropriate sky.

I adhered my black stitched grounding section to the bottom of the ink blended panel. I then laid out how I wanted my houses to be layered, having some houses in front of others to create a little bit of depth, and adhered them. I also adhered my clouds, pairing some of them up, and adhered them with foam tape to raise them off the paper a bit.

I cut two very thin strips of black cardstock and heat embossed one sentiment on each, "You Feel Like Home To Me" and "Happy Valentine's Day". I then adhered those, one sentiment a bit removed and on top of the other, with foam tape in the top left section of my card.

I wanted a little bit of detail on the bottom of my card, so I had some red and white twine on my desk. I wrapped the twine along the bottom edge of my card and tied a bow. Fun tip, when using string to create a bow, sometimes it's hard to get a taught string (i.e. sometimes part of the string on the front is droopy). Remember, nobody is going to see the underneath of your panels, so they don't have to look perfect. I sometimes pull the strings from the back so they look taught on the front. I then take a piece of washi tape to the back to hold the string in place! And see, you'd never really know unless I told you!

I took some red and silver sequins that have been included in past The Rabbit Hole Designs orders and adhered them to my card. I finished by mounting my scene panel to my red A2 panel, and then mounting the entire piece to an A2 card base that is folded on the top edge! And that's how I made my Valentine's Day Card

I used the following products to create this project:


For more inspiration with your The Rabbit Hole Designs Creations, be sure to follow along at these other locations:


For more details about products used in this post, you may also follow along at my personal blog, Just a Note by Justin, as well!

No matter how you're celebrating Valentine's Day this year, I hope this card inspires you to go out and create a fun project with one of your favorite Rabbit Hole Designs sets, or even try out a new one!

Thanks for reading, and happy crafting!

Doggone It, Be My Valentine!

Valentine's Day is coming! I'm sharing a card featuring many products from  The Rabbit Hole Designs

I love this card so much and I cannot wait to give it to the Hubs!! 

I stamped the background using the paw print and bone 
from the "Doggone" set with brown ink on kraft paper.
Several paw prints in the set to pick from. 

I used gold glitter glitz gel with the "Candy Twist" stencil. 
Once it dried, I cut it out with a heart die.

Then I stamped, colored and fussy-cut my pups.

I stamped & colored the large open hearts 
from "Love You More" to create balloons.

I stamped the sentiments from "Doggone".

There's glitter pen on the dog's scarf and Nuvo Glaze on the balloons.  


For more inspiration, updates, and news make sure to check out these links.


 Hope you enjoyed my Valentine take using the "Doggone" set!
Thanks for stopping by! 
-Kelly

Love, under the sea

Hello there! Michelle here
With Valentine's Day approaching, love is in the air....and the sea!
I combined a few stamp sets and some masking to create this no line coloring card.
I love this cutie from Mermaid Hair and used her as my focus.
I used the big heart from Sassy Sentiments- Anti Valentine.
After my coloring was complete, I used stars and part of a sentiment from 
Love You More- Christmas Frost. The 'love' sentiment is from Put a Bow on It.


I began with a mask for both the mermaid and heart...
A. Mask the place where you want to stamp your mermaid, than stamp your heart.  
B. Remove the mask and cut along the heart outline on the mermaid body...this is
your second mask.


C. Place the second mask in it's original position and D. Stamp your mermaid.
 Using a Misti makes this a lot easier.


E. Remove the last mask and stamp the heart again. My placement was not
so perfect, but using antique linen distress ink for no line coloring allows
you to color over your mistakes!!
F. Start coloring...and have fun!!!
Here is a list of Copic colors:
fin, bubbles and bikini: BG11, BG13, BG18
body: E000, E00, E11, E93
hair: V000, V01, V12, V17, V17
heart: R24, R27, R29, R39
water: B32, B93, B24, B37
sand: E11, E13, E17
colorless blender for rays.
I stamped the stars with white ink and 'love' with festive berries distress oxide ink.
I added some white accents with a gel pen and shimmer with 
stickles glitter glue.


That's it for today!
Thanks for taking a trip down the rabbit hole!!!

Michelle

For more inspiration, updates, and news make sure to check out these places.


Dance your heart out!

Hey everyone: it's Jammie here with a little inspiration post for you today.

I sat down at my desk to make this card and literally had NO IDEA what I wanted to make... so... I just went for it.  I grabbed the "You make my heart dance" stamp set and stamped it out using Momento Desert sand Ink onto Sweet Sentiment Coloring paper so that I could color in the "no lines" technique.  Then I just stared grabbing markers.

I use Copic markers, and in all honesty, I didn't write down the ones I used because I was literally just coloring for my mental health.  You know how it goes this time of year right?  You just wanna color or make something and not have to think about it.  So, that's exactly what I did!


I had so much fun making this little card.  Well, I suppose it's not little as it is a 5.5" x 5.5" square card, but you get the point. For the background I used the "Diamond Flower" stencil and Distress Oxide Inks.  I also added a ribbon and some Black Nuvo drops to complete the card and add a little dimension.  

I hope this project has inspired you and I hope to see you use this stamp set on your future projects.  Hope you have a wonderful weekend!  Toodles! 

For more inspiration, updates, and news make sure to check out these places

Stepping It Up With Colored Pencils


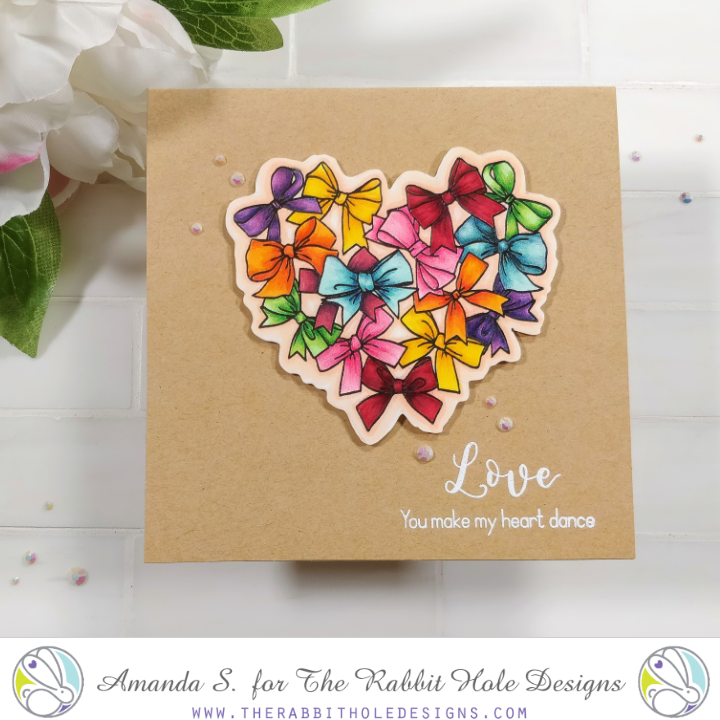
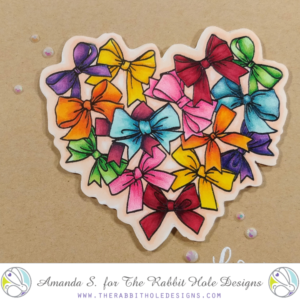
Hey crafty friends, it's Amanda from Pear Blossom Press again. Have you played with the new Put a Bow on It stamp set from The Rabbit Hole Designs yet? It is so pretty and offers a ton of coloring possibilities. After seeing Kathy Racoosin's take on it, I almost didn't want to post my first card with it.

This time around, I had an ace up my sleeve though. I stamped, embossed, and Copic colored my image. I fussy cut it with my ScanNCut and popped it up on a square kraft card base with foam tape (a coordinating die is available). A few scattered gems dressed the card up and it was basically finished. Then, I got on a plane to Florida and took it to Kathy's Coloring Challenge Road Trip class for some advice on how to step it up!

This first picture shows my image before I went to class...


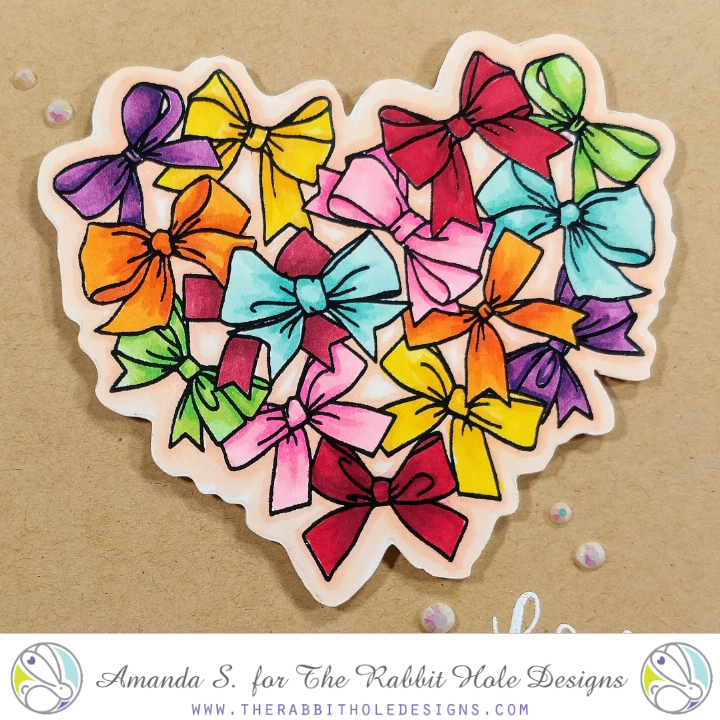
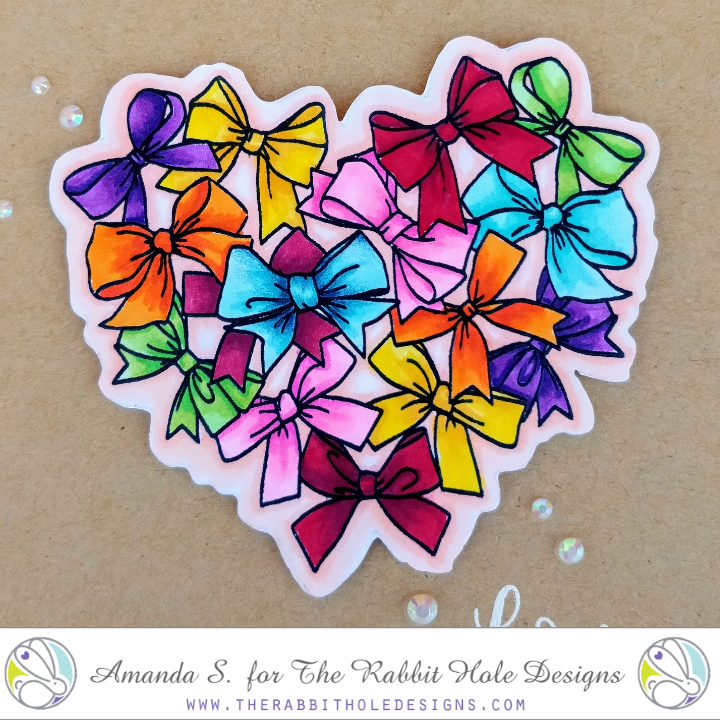
I showed it to Kathy and she used a dark blue colored pencil to deepen the shadows on the blue bow in the center. She used more pressure near the black outlines and then soft squiggles and circles to blend the color out. You can see how much more dimension it has than the others.


Then it was my turn. I got to work on the other bows, adding some shading to the outside edges of the loops, as well as the centers and overlapping areas. I seem to have a heavier hand when it comes to blending so I lost some of the lightest highlight areas, or sweet spots, as Kathy calls them. I will continue to practice, but the additional shading makes a huge difference!


Kathy shares some fantastic tips and techniques in her classes. I took my first one with her in September. I still have lots of practice to do, but the second class was a great refresher and reminded me of tips I forgot about after the first one. Luckily, she will be sharing her coloring classes online soon! Keep an eye out for Kathy's Coloring Challenge Road Trip on Online Card Classes!

Overall, I'm much happier with the updated card. Now I will tell you, she recommends not embossing images because the raised edges keep you from getting your pencil tip all the way to the lines. The more I practiced on this image, the more I understood what she meant. So I'll be forgoing the embossing for a while to compare. Let me know what you think. Can you see the difference between the before and after?


Thanks for stopping by today; I'll be back soon with another fun card. You can find more inspiration and ideas and links to the specific products I used on my blog.

Cupid is Stupid


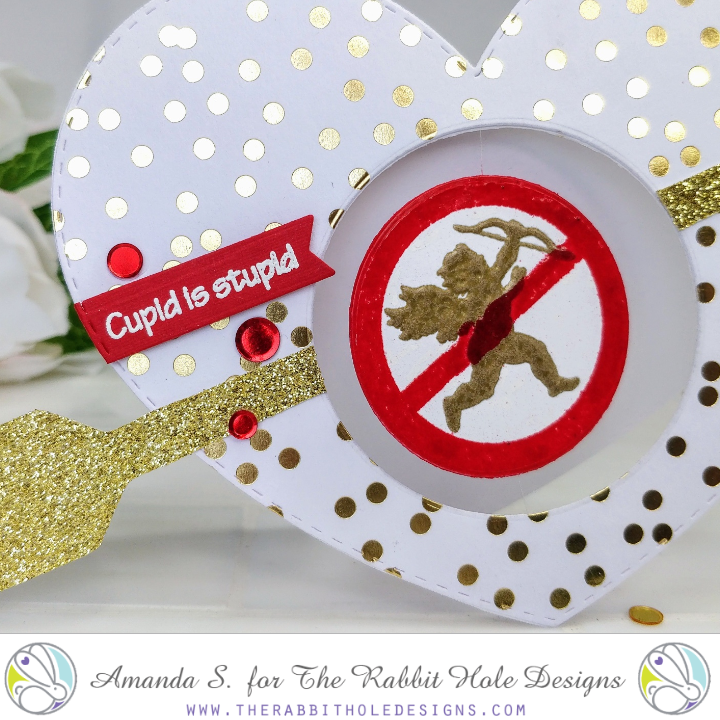
Hello my crafty friend, it's Amanda from Pear Blossom Press again. As we wrap up the Thanksgiving holiday here in the US, I'm busy making valentines. Or in this case, more sassy galentines! This card is easy to recreate and has no coloring at all, so it's also very quick. The spinner element and heart shape, make this card extra fun!


To make this card, I die cut a large heart three times, twice from white cardstock, and once from a gold foiled piece. I scored a line ¾" from the top of one white heart to make the back panel. I die cut a circle from the center of the other two hearts. Using Scor-Tape, I sandwiched in a line of clear thread, before sealing the two hearts together to form the front card panel. Then, I glued the back panel to the front, above the score line. This gave me a heart shaped card with a hole in the front.

I cut an arrow out of gold glitter cardstock using a preset image in my ScanNCut, then cut it in half and glued it to the card front, trimming the edges to mimic the hole in the center. I made sure to position the bottom of the arrow near the bottom of the card, so it would balance when the card is open.


My sentiment and images are all from the new Sassy Sentiments Anti-Valentine set. I stamped and embossed the sentiment with white powder and die cut it with a fishtail banner. I used the large heart die again to cut the left edge of the banner. For the spinner element, I stamped and embossed two cupids with a double layer of gold powder. Then, I lined up the cross out image and embossed it over the top with a double layer of red powder. I used a powder tool in between coats and had to use a Versamarker pen and more red powder to fill in gaps where the second image overlapped the gold powder. I die cut the images with a circle die and glued them together around the thread. A few red sequins finished off the card nicely.

This card is fun to play with when you wind it up and let it go. Plus, the sentiment is hilarious! I keep pulling this stamp set out; I think it's going to get a permanent spot on my desk! If you'd like to see a few more cards using this set, you might like this article. For more inspiration and links to the specific products I used, check out the sister post on my blog today.

Thanks for stopping by; I'll be back soon with another fun card to share!


So-Fishticated Valentines Day card with MaryAnn


Good Morning

Today I am up on the blog and I want to share a fast and easy, easy to make card with you that features the newest images from
The Rabbit Hole Designs set So-Fishticated and Love you More

Card Recipe
  • Stamp fish with Versafine Clair ink in Paradise and Charming Pink, apply clear embossing powder and heat set. 
  • Fussy cut or use a Scan-n-Cut for the fish and use a C5 Copic marker around all the edges to add dimension.  Apply foam tape to back of fish and set aside
  • Versafine Clair in Morning Mist for the LOVE from Love You More with clear embossing powder applied and heat set.
  • Diecut from Neenah Classic Crest 110lb the heart in the center of an A2 sized panel, then I used another die to trim down the panel further.  Apply a piece of acetate to back of diecut panel using strong adhesive.  Add foam to over the acetate leaving plenty of room around the heart and to edges of diecut panel for stability.
  • I used a scrap piece of watercolored paper for the colored layer under the diecut panel and affixed to the center of the card base.  Sprinkle on some sequins in center and spread out just a bit.  Apply foam backed diecut panel and press firmly to attach.
  • Lastly apply the fish to the front of the panel.
  • Neenah Classic Crest Solar white in 110lb(card base), diecut panel, and the fish. 
For more inspiration, updates, and news make sure to check out these places.

That is all for me today.  I hope I have inspired you to maybe give this technique a go and create some fast and easy cards.
~
Thank you for falling down The Rabbit Hole for a few minutes!
MaryAnn
~