Pages

Showing posts with label Tastes Like Honey Stencil. Show all posts

A Happy Hello - The Rabbit Hole Designs Sunny Days and Rainbows stamp set

Hello crafty friends.  I hope you are having a sunny day!  This sweet bee is sliding in on a rainbow to say hello to  to her friend.  I created this un interactive card featuring The Rabbit Hole Designs Sunny Days and Rainbow stamp and coordinating die. This set is illustrated by the talented Agota Pop.   I have paired it with the Taste Like Honey stencil and the Hello Scip[ty word with Shadow Layer die.
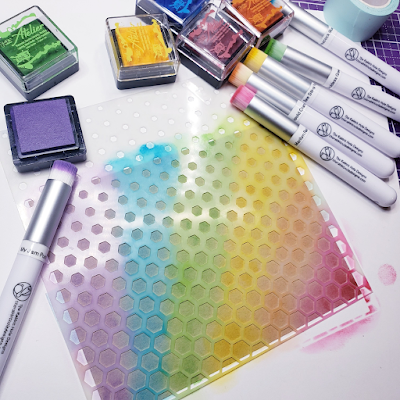
I stenciled the Taste Like Honey stencil in rainbow inks.  I set aside this initial stenciled kraft paper to the side. I will use this background for another project.  Placed the inked stencil, colorside up, on top a piece of 4" x 5 1/4 " white cardstock. I used a baby wipe to clean off the stencil, this will rub the ink off of the stencil and onto the paper through the stencil opening.  The look is a bit subtle, but I think it will be great for this card.
I used three hexagon stacking dies from my stash to die cut shaker window on a piece of 4" x 5 1/4" yellow cardstock.  I attached a piece of acetate to the backside of the hex panel to create the window.

I created the shaker windows by framing the back side of the card front with double-sided adhesive foam tape around the hex window opening.  I added sequin and shaker pieces to the window wells and added the Taste Like Honey stenciled background facing the window to seal in the shakre bits. 

The images are stamped on to Sweet Sentiment Coloring Cardstock and colored with OLO markers and die cut with the coordinating dies.  I die cut the Hello Scripty Word from yellow cardstock and the Hello Shadow Layer from vellum. 
Here is the completed shaker card with all the images and elements added to the card front.  I mounted it to an A2 dark yellow card base.


The Rabbit Hole Designs Products

Thank you, I appreciate you taking time from your day to stop by and check out this fun shaker card featuring The Rabbit Hole Designs new Sunny Days and Ranbows stamp and coordinating dies. I hope you are inspired to create something lovely today! 


Be Creative ~ Stay Inspired

Jenn Gross


Follow me, Journey Coach Jenn, on 

Instagram - https://www.instagram.com/journeycoachjenn/

YouTube - http://www.youtube.com/c/JourneyCoachJenn

Blog - http://www.journeycoachjenn.com/


For more inspiration, updates, and news make sure to check out these places


The Rabbit Hole Designs

The Rabbit Hole Designs Instagram

The Rabbit Hole Designs Facebook Page

The Rabbit Hole Designs Pinterest

The Rabbit Hole Designs YouTube


Mixed Media Buzzed, A Fun Favorite!


Hi again! Lauren here sharing another favorite of this past year. This card is a favorite of mine because it is one of my first mixed media cards. I had been wanting to try mixed media for some time and this year I finally was able to give it a whirl! I am so glad I did because it was so fun creating this card. Here's how I did it!

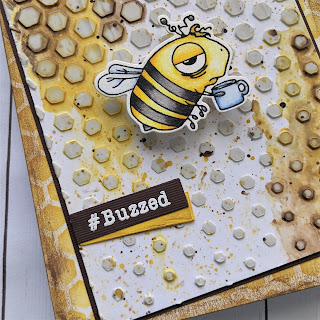
Hi friends! I have been dabbling in mixed media a bit lately and am thoroughly enjoying it. I thought I would make a drippy honey/caffeine inspired card that included this fabulous Caffeinated Bee from The Rabbit Hole Designs.

I started out with a 4.25x5.5" panel which I primed with collage medium then quickly blow dried.

Then I used the Tastes Like Honey stencil, also from The Rabbit Hole Designs. I placed the stencil over my prepared panel and spread a generous amount of modeling paste over the stencil. I set it aside to dry completely (I started in the evening, so mine dried overnight).

Next, I added color to the dry panel using Fossilized Amber and Ground Espresso. I smooshed the ink pads on my glass mat and spritzed with water. I also sprayed my panel with water. Then using a paint brush, applied the color to the top and let the flow by tipping the panel.
When the ink had dried, I rotated the panel and did the same technique to the "bottom" of the panel.


While the panel way drying, I stamped my bee onto white cardstock and colored her using Prisma Color pencils. Then die cut her out.
The colors were:
Bee: Lemon Yellow, Canary Yellow, Spanish Orange, Yellowed Orange, 30%,50%,70%, 90% Warm Greys
Wings: Sky Blue Light, Caribbean Sea
Mug: Sky Blue Light, Caribbean Sea, Light Cerulean Blue

After that, I went back and splattered my panel with Ground Espresso and Fossilized Amber Distress Oxide inks. I set it aside to dry.
Then, I ink blended the Fossilized Amber through the stencil onto a 4.25x5.5" white cardstock panel. Using Gathered Twig Distress Oxide ink on a finger, I rubbed/distressed all around the edges of the panel. Then I adhered it to my top folding card base (same measurements).

Next, I trimmed down my "drippy honey" panel and bordered it with brown cardstock. Then I adhered it to my card base on an angle.
I stamped the sentiment onto brown cardstock using an embossing ink pad and heat embossed in white. I used a sentiment die from my stash to trim it down. I die cut a second sentiment strip of the same size in yellow and distressed it with some Gathered Twig D.O. I adhered those onto the card then added an action wobble to my bee and put her on too!
I hope you enjoy this mixed media card. I had a ton of fun making it and it was much easier than I had thought it was going to be. I hope it inspires you to give it a try as well! Thanks for visiting!

1st Mother's Day - You got this!

Hello my crafty friends and welcome to todays The Rabbit Hole Designs blog. With Mother's Day around the corner, I thought I would create a card to celebrate a mom's first mothers day.  I am using the Tastes Like Honey stencil to create the subtle background.  The decided to color the Caffeinated Bear stamp as a panda bear mom.

The bear is stamped in black ink and colored with Copic markers.  I used  RV10, RV11, and RV13 to color the robe and bunny slippers. I used RV52, RV63 and RV95 to color the robe cuffs and collar.  The Mama bear is colored with the warm grays around the eyes, ears, hands and legs to make the bear look like like a panda.  The eyes are dotted in yellow greens and the coffee mug in blues.  I hand calligraphy the sentiment "Happy 1st Mother's Day"  "You got this!"

Here are The Rabbit HoleDesign products used in this card:

Taste Link Honey 6 x 6 stencil


I hope you enjoyed this 1st Mother's Day card featuring the Taste Like Honey stencil and Caffeinated Bear stamp set.   Please let me know if you have any question.    


Be Creative ~ Stay Inspired

Jenn Gross


Follow me, Journey Coach Jenn, on 

Instagram - https://www.instagram.com/journeycoachjenn/

YouTube - http://www.youtube.com/c/JourneyCoachJenn

Blog - http://www.journeycoachjenn.com/


For more inspiration, updates, and news make sure to check out these places


The Rabbit Hole Designs

The Rabbit Hole Designs Instagram

The Rabbit Hole Designs Facebook Page

The Rabbit Hole Designs Pinterest

The Rabbit Hole Designs YouTube


Just A Note To Cheer You Up!

 Hi everyone! Von Marie here and I am so excited to be on TRHD Blog today. I have a Mini Slimline card and matching envelope to share with you using some of my favorite TRHD products.


On this Mini Slimline Card I used the New Tastes Like Honey Stencil, Come Fly With Me, and Pretty in Peony Stamp Set. I first ink blended white cardstock with Picked Raspberry Distress Oxide ink. I then used the Tastes Like Honey Stencil with a yellow glitter paste and spatula. I then cut it out with a Mini Slimline Die.


I stamped the Peony Flower and greenery with Lawn Fawn Jet Black ink onto Neenah Solar White 80lb cardstock. I colored them in with my Altenew Artist Markers and fussy cut them out. I then stamped and heat embossed the sentiment with Versamark ink and Wow white embossing powder using the Come Fly With Me stamp set onto Black Cardstock 80lb. I used a banner die to cut the sentiment out. I then added my panel onto a Mini Slimline Card base. My peony and sentiment were then added with foam squares. I added sequins and Sparkle and made a mini envelope to match using the same stencil and paste. I hope you have enjoyed my project. Thank you for stopping by!

TRHD Products Used:

Tastes Like Honey Stencil

Come Fly With Me Stamp Set


Pretty In Peony stamp Set


For more inspiration, updates, and news make sure to check out these places:


Thank you for Stopping by and Happy Crafting!

Von Marie


Get Well Wishes & Hugs


Hey yall!  Happy Thursday!!!  Tangii here, hope you all are having a wonderful week!  I used the Starfish in the Sand stamp and did a little "editing" and paired it up with the Tastes Like Honey stencil.  I just love that bunny and he looks so ready to give you a big 'ol squeeze!!


I started off using the Cotton Tail blending brushes and a couple of yellow Oxide inks & stencil for my background.  I also used them on a piece of scrap paper for my "hugs" sentiment.  I stamped the bunny and colored him in yellows.  I used an enamel heart embellie for his necklace. A simple, sweet, bright & cheery get well card. 

Well Latte-da

 Hello friends, Joy here with a mid week caffeinated pick me up!   I don't know about you, but by Wednesday I need an extra shot of caffeine, and as soon as I'm done here I'm heading out to my local coffee shop!  But, I am sure happy to be sharing this buzzy little card with you today! 


I started the project out by blending the Tastes Like Honey stencil onto a vibrant yellow panel with Distress Oxides, Black Soot and Wild Honey with Cotton Tail Blending Brushes.  Once happy with the blend I die cut using a stitched rectangle die from my stash.  My next step was stamping the Caffeinated Bee three times with Memento ink and coloring them with a 3 marker blend of Copics.  I fussy cut the images, but there is a coordinating die available HERE.  I decided to add just a bit more texture to my card by adding a honeycomb die cut to the top of the ink blended panel.  To finish off my card I heat embossed a sentiment from the Blended Sentiments 2 stamp set.  
Okay that wraps things up for me!  

I had so much fun creating this card, and I hope it inspires you to create something special today!  You can follow the link HERE to see the entire line from The Rabbit Hole Designs.  

For more inspiration, news and updates go these places:

Bye for now!!! 


Time to Shake it!

 Hi there! Kimberly here to share with you how I made this card using the Tropical State of Mind stamp set illustrated by Tatsiana for The Rabbit Hole Designs April Release. I am ready to be on the beach looking at her in the grass skirt! 


To start, I colored in my dancing bunny with Copics {listed below} and die cut her using the Tropical State of Mind Dies. Next I blended Kitsch Flamingo distress ink and Twisted Citron Distress ink through the Tastes Like Honey Stencil on white cardstock. I die cut that with an oval die and layered in on an oval piece of pink cardstock. Then I added foam tape and popped it up on another piece of pink cardstock that I die cut using a decorative oval die in my stash.  I added the bunny and a fern leaf that I had in my stash to the oval.  I heat embossed the sentiment on black paper and added it to my oval panel. To make my background, I ink smooshed Kitsch Flamingo Distress ink and Twisted Citron Distress ink on watercolor paper. I dried it with my heat tool and attached it to the card base. I glued the oval panel to the ink smooshed card base. To finish off my card, I added some sequin. to the fern. This is such an adorable set!!

Copics: 
Bunny: E50, E53, R11, RV13 
Skirt: YG21, YG23, YG25
Flower: RV13, RV17
Maraca: Y11, Y13, Y19

Thank you for stopping by!
Kimberly


Honey - You Look Fabulous!


Hello! Lauren here on the blog today with this fun slimline card. My card features the new Tastes Like Honey stencil. This stencil is so awesome because it can be used to create all kinds of different looks for so many occasions. 

To create my card, I blended Gray Flannel ink onto white cardstock using the Tastes Like Honey stencil. The stencil is 6x6 so for it to fit a slimline card, I lines up the stencil and continued blending. I started out dark then lightened up as I continued. I trimmed the paper using a stitched rectangle slimline die from my stash. 

After cleaning the stencil, I repeated the same process onto yellow paper using Wild Honey Distressed Oxide ink and a bit of Fossilized Amber to darken it up a bit. I then die cut 5 stitched hexagons using a set from my stash.

Next, using the Spell It stencil, I blended the Gray Flannel ink to spell "Honey" on white cardstock. I trimmed the paper down and backed it with a matching gray cardstock border.


Then onto gray cardstock, I stamped the you look fabulous sentiment from the Miss You stamp set in Versamark ink. I covered that with white embossing powder and heat set it. After it cooled, I trimmed the sentiment using a rectangle die from my stash.


Having all the elements complete, I started to assemble the card. First I positioned the yellow hexagons onto the gray hexagon stenciled background and adhered them in place. Then trimmed off  any overhanging pieces. I adhered that onto a white 8.5 x 3.5 inch card base and adhered the word honey in the middle and the gray cardstock sentiment underneath.


Thanks so much for visiting. I hope you give this fun stencil a try! 
Lauren 

Products used:


Stenciled Backgrounds with Alcohol Ink


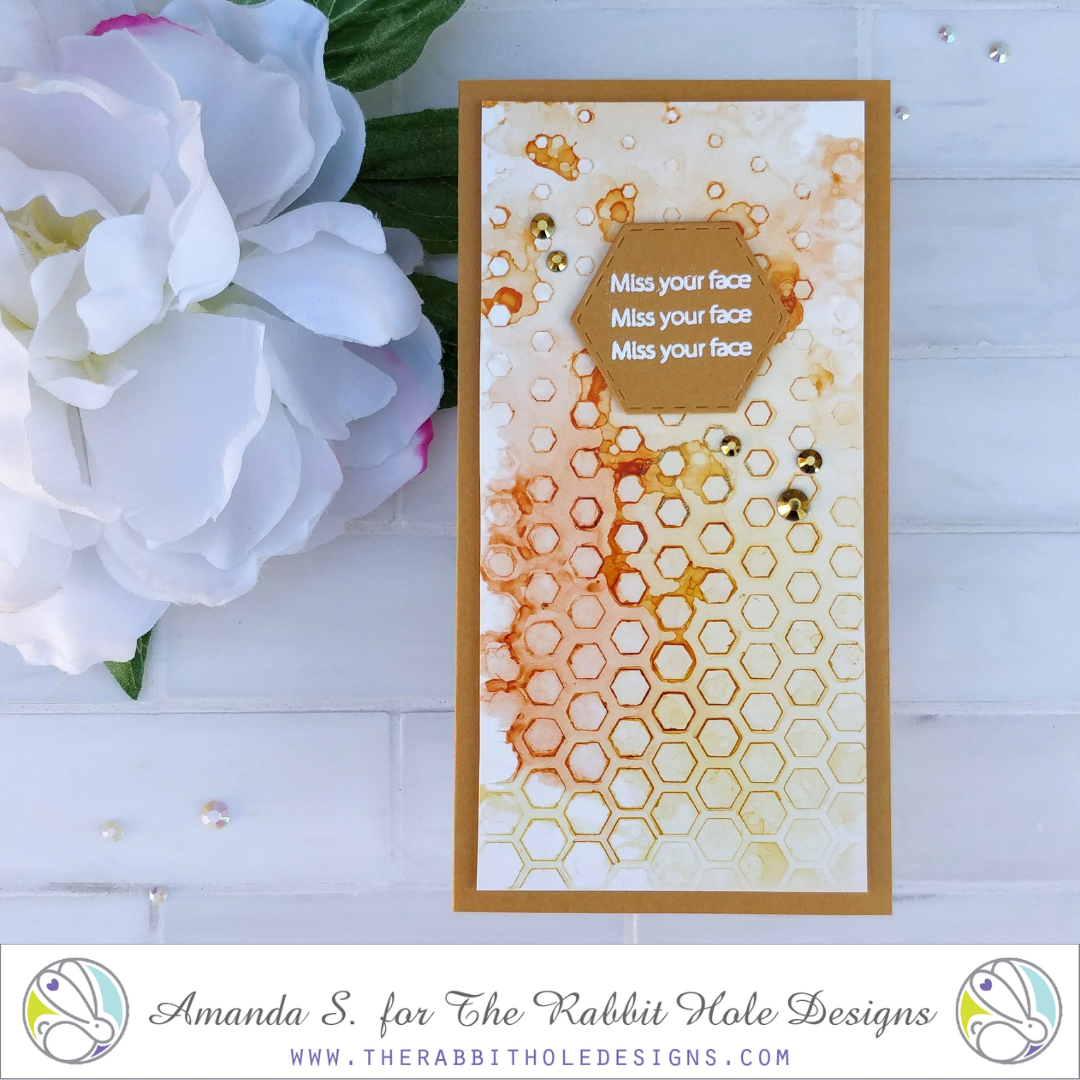
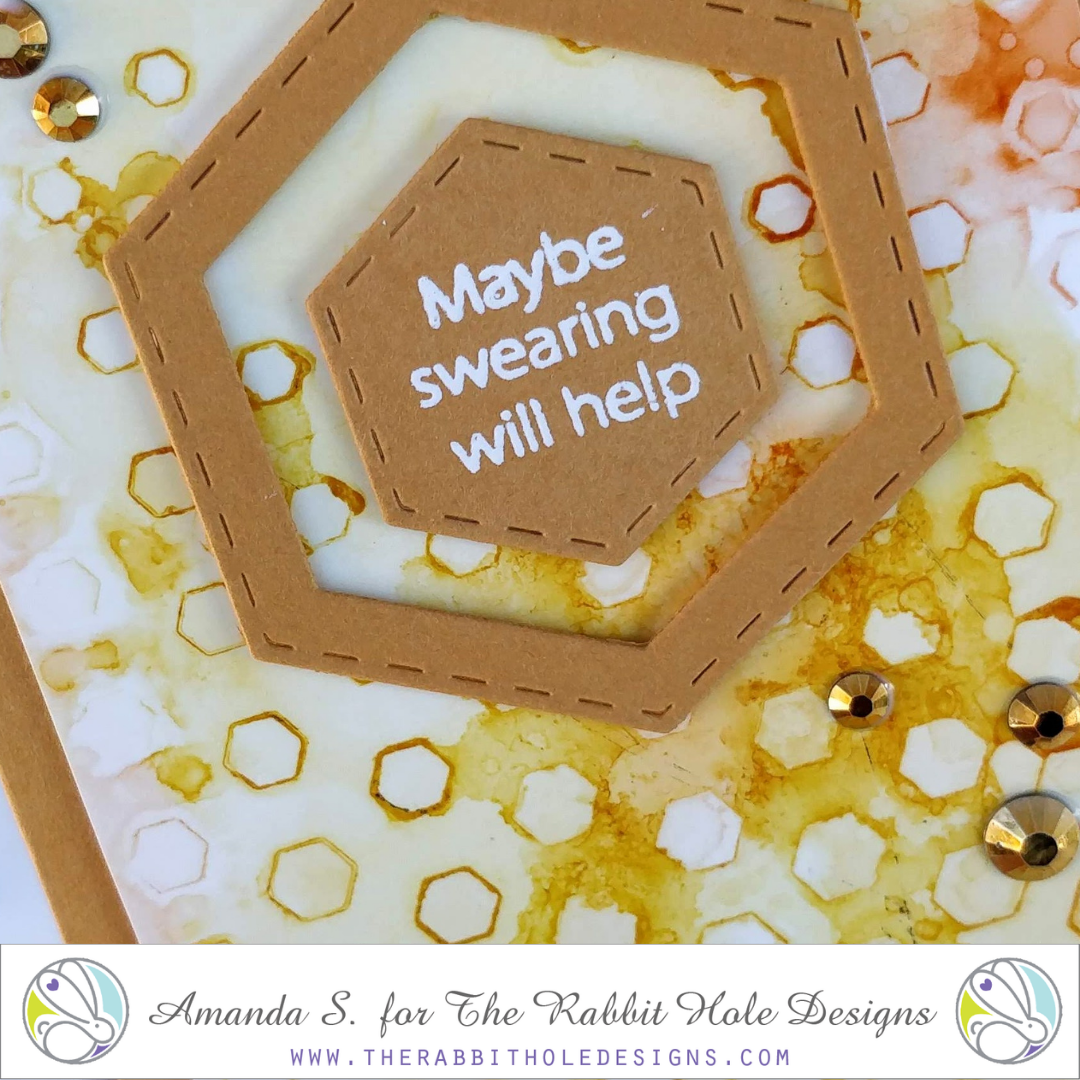
Hello crafty friend, Amanda from Pear Blossom Press here again, and today, I'm sharing a pair of fun mini-slimline cards that feature a cool stencil and alcohol ink technique! 

Head on over to my blog, pearblossompress.com, for instructions on how to combine alcohol inks with the new Tastes Like Honey Stencil for awesome backgrounds! A few Sassy Sentiments pull these cards together. 

Thanks so much for stopping by today! I'd love to know what your favorite way to make backgrounds are. Let me know in the comments below. I'll be back soon with more fun cards to share. Until then, I'll see you on Instagram

For more inspiration, updates, and news from The Rabbit Hole Designs, make sure to check out these places...

April Release Inspiration Hop - Day 3


Hello and welcome to Day 3 of the Inspiration Hop. We are so excited for you to join us as we present to you our April release. Our fabulous Design Team have been sharing their projects over the last couple of days, so be sure to visit their blogs and leave them some crafty love.


 The 5 new stamps sets, 3 dies, and one new stencil are all available to purchase right now in the shop.


The two new stamp sets and one stencil being highlighted today are ...

Starfish in the Sand

Spring Coffee


Thank you for being part of our April Inspiration Hop.


Here is the line up for the hop:


___________________


**Giveaway**


To celebrate the April release, The Rabbit Hole Designs is giving away two savings vouchers; one to a lucky Instagram follower and one to a lucky Fan Page follower.  Winner will be chosen at random from the comments left on the INSTAGRAM post, and tagging friends, and also from commenting on the Fan Page post.  So make sure to head on over to INSTAGRAM and look for the giveaway post @therabbitholedesignsllc and look for the post at The Rabbit Hole Designs Fan Page by 11:59 p.m. PST 04-01-2021. 
Winner will be announced on The Rabbit Hole Designs blog 04-02-2021.

This is the graphic you are looking for on our IG and FB


___________________


For more inspiration, updates, and news make sure to check out these awesome places! 


Thank you so much for stopping by today!