Pages

Showing posts with label Harmony Stamp Set. Show all posts

A Look Beneath the Surface - In-FIN-ity Shaker Card

Hello crafty friends, Jenn here, you can also catch me on social media @journeycoachjenn.  Today I am sharing an A2 infinity shaker card using The Rabbit Hole Designs new Fin-tastic stamp set.  It is paired with the Harmony stamp set and coordinating dies an A2 Shaker Acetate Sheets, and I have a clever way to use the Clear Enamel Dots. 
1 - I colored the koi image from the Harmony stamp set with OLO marker in Violet and die cut it out with the coordinating dies. 

 2 & 3 - I turned the fish over and added about 8 small dots of liquid glue stratigically to the underside of the tail and body of the fish and added the small Clear Enamel Dots over the glue. 

4 - Adding the Clear Enamel Dots will allow the koi fish to swim/slide in the shaker. The card base is a piece of 4 1/8 x 5 3/8"  printed cardstock.   I attached the A2 Shaker Acetate Sheets to the card base leaving the top open to add shaker bits and the fish slider before sealing it closed.
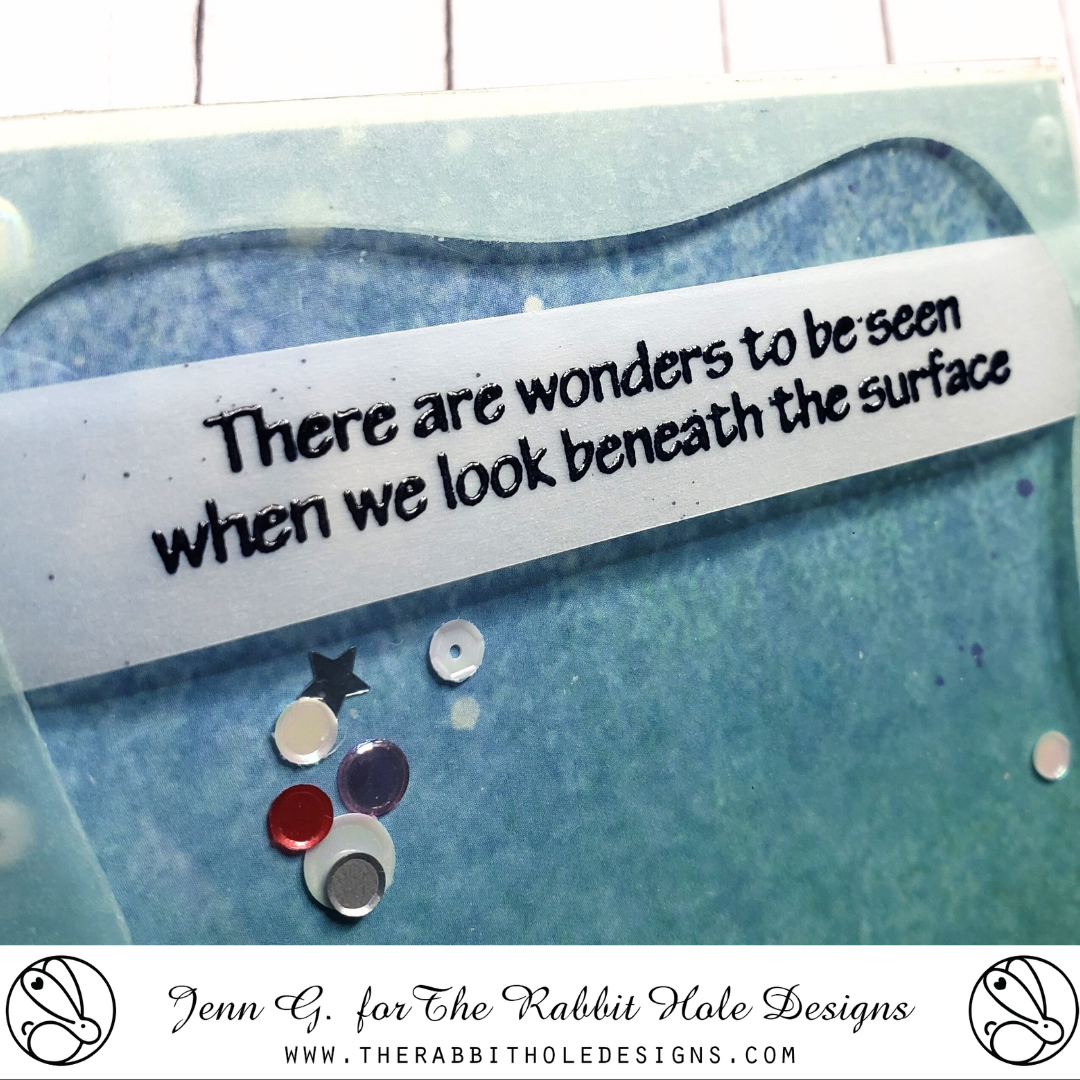
I treated a piece of 5 1/2" x 3/4" Heat resistant vellum with the Cottontail Embossing Powder Tool and stamped the sentiment from the Fin-tastic stamp set ant heat embossed it with black embossing powder.  It is added the sentiment to the card front across the top of the shaker.
The acetate shaker card front is adhered to a white A2 card base. What a fun interactive shaker card with a surprise koi shaker piece.


The Rabbit Hole Design Supplies


Thank you, I appreciate you taking time from your day to stop by and check out today’s The Rabbit Hole Design project.  I hope you are inspired to create something lovely today!


Be Creative ~ Stay Inspired

Jenn Gross


Follow me, Journey Coach Jenn, on 

Instagram - https://www.instagram.com/journeycoachjenn/

YouTube - http://www.youtube.com/c/JourneyCoachJenn

Blog - https://journeycoachjenn.blogspot.com/  


For more inspiration, updates, and news make sure to check out these places


The Rabbit Hole Designs

The Rabbit Hole Designs Instagram

The Rabbit Hole Designs Facebook Page

The Rabbit Hole Designs Pinterest

The Rabbit Hole Designs YouTube


Easy and Beautiful With Sympathy Card: Harmony Stamp Set

Hello and welcome to The Rabbit Hole Designs blog; it's Rick back with you again today.   I am going to share an easy and pretty quick (depending how you want to color) sympathy card using the Harmony Stamp Set and the Splish Splash 6 x 6 Stencil from The Rabbit Hole Designs. Along with a few inks pads, and a few other simple tools, that you may already have on hand.


The first thing that I did for my card was to stamp out the image from the Harmony 4 x 4 Stamp Set, Illustrated exclusively by Tatsiana Zayats for The Rabbit Hole Designs, in an alcohol marker friendly ink on my favorite white cardstock. My go to ink for this is black alcohol marker friendly ink.  I encourage you to use your favorites when you make this card.  Use what you know works for you and your coloring style.  

Once I had the image Harmony Stamp Set stamped out I started the coloring process. I used my favorite alcohol markers for this. But, use what you have in your craft room or craft area.  I knew I wanted to do something with a transition of color from the beautifully drawn flowing tail to the body. So, I went with a few shades of blues that would blend nicely at the end of the tail. And then I used a few purple shades to transition the blue into the reds I used on the body. Between the purple and red areas I just went back and forth with my markers adding layers until I achieved the blend that I was going for with a seamless transition. Sometimes with alcohol markers you have to do this to get the look you want. So, don't be afraid to go over the area you're working on a few times. You may have to give it a few minutes to dry each time between layers and come back. This way you don't over saturate the paper to quickly and get bleed out. 


Once I had all the red colored in on the fish (beta or koi). I colored them as beta fish today. I picked colors that I knew would work well with the other colors I had already colored on the fish from the Harmony Stamp Set. I picked a yellow-green for the leaves and a lighter purple color to color the flowers. I stamped the sentiment in the middle of the two beta fish before moving on. Once the coloring was completed I could cut out the image. I did not used the coordinating Harmony Dies for this, but you could if you wanted to. And just stamp the sentiment after the fact. I just traced around the stamped and colored images with a pencil very lightly and used my paper snips to cut inside the lines leaving a slight boarder.

At this point I started working on my background panel. I used the Splish Splash 6 x 6 Stencil along with three shades of Distress Oxide Inks (listed below in the Materials Used Section) and my CottonTail Blending Brushes to ink blend over the Splish Splash Stencil. I started with the lightest color first and then added the darker two shades to the outside edge of the stencil to create a center vignette on the card and draw your eyes to that area. Next I added a second layer with the Splish Splash Stencil but I turned it 180 degrees and flipped it over to add a second layer the exact same way. But this gave me a second layer of ink blending which allowed the colors in some areas to be darker as you can see in the picture if you look closely.


After my ink blending was completed I cut down my panel to 4" x 5 1/4" and attached it to an A2 size white card base.  I then added the focal panel of the stamped and colored beta fish from the Harmony Stamp Set to the card front with foam adhesive. To finish off the card I added a few white gel pen details to the fish for my highlights and sprinkled around a few of the Clear Sparkle Enamel Dots next to the sentiment.

And there you have it my friends that's how you can create a quick and easy with sympathy card using the Harmony Stamp Set and the Splish Splash Stencil. I hope that you have a wonderful day, and remember do something crafty today! 

Happy Crafting

Rick

The RHD Affiliate Disclaimer:

We want to ensure transparency and honesty in our interactions with you, our valued readers. Please be aware that the links provided on The Rabbit Hole Designs Blog may be affiliate links. This means that if you make a purchase through these links, the project designer may earn a small commission at no extra cost to you. Your support means the world to us!


We kindly request that you accept the tracking cookie for the affiliate websites. Rest assured, this will not expose your computer to viruses or compromise your information. It's a necessary step for the company to attribute the sale to the affiliate, ensuring that creators like our creatives receive their rightful commissions.


Your trust and support empower our creators to continue sharing creativity and inspiration through our blog. Thank you for being an integral part of The Rabbit Hole Designs community!

Harmony: Pond Scene Card

 Hello and welcome to the blog; it's Rick back with you again today to share with you a card I created using the Harmony Stamp Set.  I wanted to create a card that reminded me of a Koi pond, so that's exactly what I did.  You may think that this was really hard to achieve but actually it really wasn't.  

Harmony Scene Card by Rick Adkins

To start off my card I simply had to stamp out the image from the Harmony Stamp Set a few different times in different directions.  I just needed to fill up my A2 card front with this beautiful fish.  Because I knew I was going to be doing some glazing with my alcohol markers to achieve the look of the fish under water.  I stamped them each time in an alcohol marker friendly ink.  Once I had all the fish that I wanted on my card front stamped out I could then start the coloring process.  

When the fish where all colored and the alcohol markers had completely dried, I could start the glazing process.   All glazing means is you take a transparent or semi-transparent media and apply  over your first application of color.  The result is a rich layer of color that can change the tone of value of the color underneath.  Renaissance artist used this technique a lot to mix their paints to get the vivid and sometimes iridescent hues you can see in their paintings.  As you can see with the fish on my card it gives the illusion that they are actually under the water surface.  

Harmony Scene Card by Rick Adkins Flat Lay

Once I had all the coloring complete I prepped the card front with my Cottontail Embossing Powder Tool and stamped the sentiment from the Harmony Stamp Set in an embossing ink.  I then covered the sticky ink with gold embossing powder.  Once completely covered I used my heat tool to heat set the embossing powder.  After the embossing powder had cooled I took my You've Been Framed Dies (I will tell you that this die set is my most used die set in my craft room.)  and cut out the inside panel.  I used the next to largest of the rectangle dies to cut the center out.   I then poked out all the little dots that didn't come out on their own, and then placed a piece of gold foiled cardstock behind this layer to create a mat.  I attached the outside piece from my design onto my card front, this piece fit my A2 size card.  

I then placed the matted card front in the center of my card base using just a little adhesive. If you wanted to pop up this layer with some Scrapbook Adhesive 3D Foam Squares that would give you more dimension on the card and look absolutely fabulous.  To finish off my card I added a few of the Clear Sparkle Enamel Dots (another staple in my craft room) to add a little bling to the card.  There you have it my crafty friends, how I created this gorgeous Harmony Pond Scene Card.  I hope that you have a fabulous and safe weekend.  

Rick