Pages

Showing posts with label Prismacolor. Show all posts

Bunny Flower


Hello! Lauren here today sharing this cute small card featuring the newly released Bunny Bouquet stamp and the Spring Floral #1 paper pack. This is a non traditional card size that measures 4.25x4. I plan on popping it into an Easter basket that I am making up for family friends.

I love the blissful expression on this bunny's face. He is so happy to be immersed in flowers. I thought the adorable face would make a cute center for a flower and I thought of the flowers with faces in Alice in Wonderland. 

To create this card I first stamped the image onto gray cardstock using fade out ink. Then colored it using Prisma color pencils. The colors I used were:
Bunny: 20%, 30%, 50%, 70% Warm Gray white
Cheeks and nose: Blush Pink
Leaves: Spring Green, Apple Green, Kelly Green, Grass Green
Flowers: Cream, Lemon Yellow, Canary Yellow, Spanish Orange

I then worked on the front portion of the card. This floral paper is double sided and I had a hard time deciding which side to use. I picked the purple side for the outside but I didn't want to cover up the green. The cardstock is a good thickness, so I used it as the front of the card cutting off the front of my card base leaving a half inch band to adhere the plaid paper to. 

I then trimmed the colored bunny panel to fit into the inside of the card and adhered it on. 

Next I measured the height of the bunny face from the bottom and then the side so I would be able to line my circle in the right spot on the plaid paper. Then using a small circle die from my stash, I cut the circle in the paper. Then adhered the panel to the half inch white strip on the front of the card.


I then created the flower for the front of the card. I used a stitched scallop circle die and a smaller circle die to cut out a hole in the center.


For the stem, I cut a strip of green cardstock. The leaves I used a die from my stash. I added a stitched hill in a different shade of green cardstock at the bottom. I ink blended Broken China distress oxide ink around the edges of 2 clouds and a die cut hello to add to the front of the card along with a sun. This completes the front scene.


Now this sweet notecard is complete. Thanks for visiting and happy crafting! 
Lauren


The Debonair Cat


This cat never fails to make me smile! I love everything about him from his cute bowler hat down to his adorable teeny paws. He is the most suave cat I know so I was positive he could pull off a pair of red glasses and bow tie and do it with with flair!

To create my charming card, I first stamped the cat image onto white cardstock using fade out ink for no line coloring. I then colored him up using Prismacolor pencils. Colors I used were:
Cat: Warm Gray, 10%, 20%, 30%. 50% for whiskers, nose, mouth and chin
Glasses, bow tie and umbrella: Poppy Red, Crimson Red and Tuscan Red
Hat and vest: Sienna Brown, Chestnut, Dark Brown then Metallic gold for button
Pants: Light Umber, Dark Umber and Chocolate
Book: Cool Gray 50%, 90% and White
Umbrella handle: Dark Umber, Black and White
Coffee cup: Cool Gray 10%, 50% and Seashell Pink


Once I had him all colored and ready to go, I used a scalloped, stitched circle die to cut him out.

Since he is prepared for wet weather, I decided to give him a watery background. I inked Speckled Egg Distress oxide ink through the Splish Splash stencil onto white cardstock. I then trimmed that down using an A2 sized wonky stitched die from my stash and adhered it to a top folding A2 card base.

I then added double sided foam tape to the back of my dapper cat and adhered him to the front of the card.

 I hope this card/cat makes you smile as much as it does me! Thanks for visiting! Lauren

For more inspiration, updates, and news, make sure to check out these places

 Simple Things 3x4 – The Rabbit Hole Designs


Cotton Tail Blending Brushes – The Rabbit Hole Designs


Shabby Chic


I love it when flowers bloom in unexpected places. I created this card with that in mind. I combined the flowers from the Botanical Turtle and the leaves from Pretty in Peony with the Intersection stencil.

I started by creating my background. I wanted an imperfect, kind of shabby look to it. I inked up my stencil with versamark ink, then I placed it on a piece of computer paper and laid my white A2 sized cardstock panel (after using my antistatic tool on it) on top and applied pressure all over the panel. Then I removed the panel and applied black embossing powder over top. I used a paint brush to clean up any areas where I didn't want powder. Then heat set it. You can watch the video below to see my process.


Next I stamped the flower, leaves and turtle onto white cardstock. I colored them using Prismacolor pencils then fussy cut them all out. The colors I used were:
Flowers: Mulberry, Process Red, Pink, White
Leaves: Spring Green, Apple Green, Prussian Green

I arranged the cut outs onto the embossed panel then adhered them down using liquid glue. After they where set, I backed the panel with black cardstock and adhered it to an A2 card base.

Then onto black cardstock, I stamped the sentiment from the Flamingo Botanical set using my versamark ink pad. I sprinkled white embossing powder over it then heat set the powder. After trimming the sentiment, I adhered it to the card front.

I think this is a fun way to get a different look out of the stencil and I love how the card turned out with the flowers added.
Thanks for visiting and I hope you have a wonderful day. Lauren.


Monochromatic Chubby Unicorn


Hiya! It's Lauren on the blog today with this fun monochromatic masculine card using the new Chainmail stencil and Caffeinated Rhino stamp set. This rhino looks exactly like my husband in the morning except my husband has brown eyes!

To create the stenciled chainmail background, I blended Black Soot distressed oxide ink onto a silver shimmer cardstock panel (A2 sized). I trimmed it a bit so it was just under 4.25x5.5, adhered it to a dark grey A2 sized background then mounted that onto an A2 top folding card base.


Then using black ink, I stamped the rhino onto gray cardstock. I colored him using Prismacolor pencils then fussy cut him out ( the coordinating die is now available!).
The colors I used were:
Rhino: French Grey, 10%, 20% and 50%
Boxers: White, and Lemon Yellow
Mug: White
Eye: White, Blue Denim, Cerulean Blue, Indigo blue


After coloring the boxers, I used my Versamark pen to go over each star and covered them with glow-in-the-dark embossing powder. Then I heat set the powder. Then I placed him onto the card using double sided foam tape.


Using black ink, I stamped the sentiment onto the same silver shimmer paper. Then trimmed it using a rectangular die and adhered it onto a dark grey stitched banner I had cut out. I adhered it onto the card above the rhino. To give the card a more polished look, I placed a silver self adhesive "rivet" onto the banner before and after the sentiment.


That completes my card. I hope you enjoy my chubby unicorn. Thanks for visiting!

For more inspiration, updates, and news make sure to check out these fantastic places! 

A Caffeinated Hello!


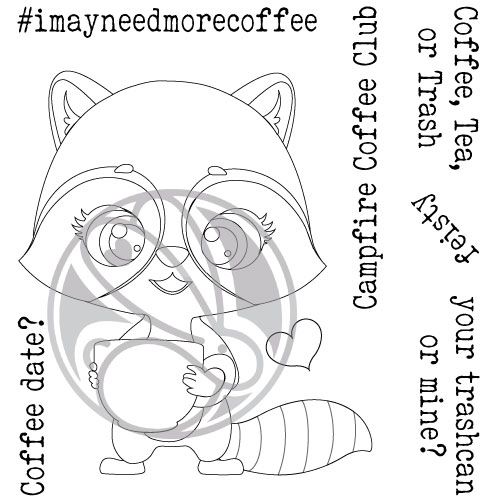
Hello! It's Lauren on the blog today sharing this sweet Caffeinated Raccoon that has a caffeinated hello! Don't you just love that cute face!!! I thought she'd look great on the fun Pinwheel stencil. Both are from this months new release. TRHD is a super sponsor for the Fall/Winter Coffee Lover's Blog Hop Nov. 6-13 over at The Coffee Loving Card Makers, so be sure to head over to check it all out. You'll find the link down below.


I started out by dry embossing a white A2 sized cardstock panel. To do this, I ran them through my die cutting machine using an embossing mat along with the embossing plates. Then, using my Cotton Tail blending brush I lightly blended Picked Raspberry Distress Oxide ink over the panel to make the pinwheel shape stand out. then I trimmed it down slightly and adhered it to a teal cardstock background and then that onto an A2 sized card base.


Next, onto white cardstock, I stamped the word Hello from the Marquee Words stamp set using the picked raspberry ink. I also stamped it onto masking paper and fussy cut the individual letters out.


I then masked the letters and positioned the raccoon over the word so that the word would be under her chin. I stamped her using Black Versafine ink. I took off the masked letters and coloured her using Prismacolor pencils. Then I fussy cut her out. The colours I used were:
Raccoon body: Light Aqua, Aquamarine, Cobalt Turquoise
Eyes and cup: Lilac, Parma Violet, Dioxazine Purple Hue, White
Mouth: Pink


I toped her off with a pink flower and then adhered her to the front of the card using double sided tape.

I hope you are loving the release this month as much as I am. Thanks for stopping by. You can also see this card and my links to other products used on my blog.


As a Super Sponsor of the hop, TRHD is offering a 10% discount on all caffeinated images. Just use the code CAFFEINE.

Here's the link to the Coffee Loving Card Makers Fall/Winter Blog Hop

https://l.facebook.com/l.php?u=http%3A%2F%2Fcoffeelovingcardmakers.com%2F2020%2F11%2F2020-fall-winter-coffee-lovers-blog-hop%2F%3Ffbclid%3DIwAR0nEvz-XQxUwDC6cPpatgbYiU43X8DzdhrheRnHZwsWvwLgm58GfYdMfwA&h=AT3w_CQP9H0dX9cVIVDhUSFTxUriG1mXpq6NWm_kVt9x0jM9ONv8mZR2Xw3x4aqRlZwyf0_U8OI6gRbd6Kml5qcyiUynl3vi5yBeEMxB3nOadTAhSIrjBqeMSIyX6ScQRbAw_A_zMv0o_oaTmUGw&__tn__=-UK-R&c[0]=AT2kf6tKYZVJ1TGa4cSKV5__4EiglTAR0d8Vj21y0-YwD_DUQGjdGRFL-70DDBAXLepq_nU2N8IWLlnFLquqHJzO-K9M_pZPdFrk8TiP6vatgT4Wf4GEikMsHbK29cPGeY9SRF4_gg064vjT8y0NOrkZ-B2MKcni8D_1_Q1hMDBWjBS6BpT3mPuZ7McIoIePwekCqwH_C3GQhFga_Q


Bloom Where You Are Planted


Hello fellow crafty friends! It's Lauren and today I am on the blog sharing this pretty and inspiring card that features the gorgeous Flamingo Botanical stamp set from the newest release.

To create this card, I started out by using my Versamark ink pad to stamp the flamingo and the sentiment onto white cardstock. Then embossed with gold embossing powder.
I coloured the flamingo and flowers using Prismacolor pencils. The colours I used were:
Flowers: Lavender, Parma violet, Dahlia purple and white as a blender.
Leaves: Sap green, Spring green, Grass green
Flamingo: Deco peach, Peach and Black


I used a dotted oval die from my stash to cut out the flamingo. To create the background, I ink blended, using the Cotton Tail blending brushes, Wilted Violet and Mowed Lawn Distress Oxide inks onto Photopaper using the Diamond Flower Stencil. When you use distress oxide inks on photopaper, it creates a dull film over the inked surface. I rubbed that film off with a dry microfiber towel and the surface became nice and glossy.

Using a rectangle dotted die I trimmed the background down to fit my A2 card base. I trimmed the sentiment and backed it with purple cardstock then adhered all the elements of the card onto the base.


I hope you enjoyed todays card! Thanks for stopping by and have a fabulous long weekend! -Lauren

For more wonderful inspiration, info and news, check: