Pages

Showing posts with label Turtle Botanical. Show all posts

Gold Corner Mandala Card and Matching Tag

 Hi everyone! Von Marie here and I have a Card and matching tag to share with you today using the New Corner Mandala Stencil from the latest TRHD Release.


I first started out with a Gold heavyweight piece of cardstock. I placed the Corner Mandala Stencil down on my cardstock and then used some gold Glacier Paste and a spatula over my stencil and cardstock. When it was dry I cut it out with a decorative torn die. I layered it onto kraft cardstock and glued it onto a sparkly A2 gold card base. I then stamped and heat embossed my sentiment from the Turtle Botanical stamp set with Versamark and Ranger Gold embossing powder. I then cut it out with a banner die and glued it onto my card front. I then added gold sequins to decorate my card.


I had leftover cardstock from using the gold paste so I made a matching tag. I cut it out with a pierced tag die and added some cream colored seam binding ribbon with a large flower embellishment. I chose to leave it blank since I wanted to show off the beautiful Corner Mandala Stencil. I hope you like my card and tag set. Thank you for stopping by!

TRHD products used:


Turtle Botanical Stamp Set


For more inspiration, updates, and news make sure to check out these awesome places!

The Rabbit Hole Designs

The Rabbit Hole Designs Instagram

The Rabbit Hole Designs Facebook Page

The Rabbit Hole Designs Pinterest

The Rabbit Hole Designs YouTube

Thank you for stopping by and Happy Crafting!

Von Marie


Shabby Chic


I love it when flowers bloom in unexpected places. I created this card with that in mind. I combined the flowers from the Botanical Turtle and the leaves from Pretty in Peony with the Intersection stencil.

I started by creating my background. I wanted an imperfect, kind of shabby look to it. I inked up my stencil with versamark ink, then I placed it on a piece of computer paper and laid my white A2 sized cardstock panel (after using my antistatic tool on it) on top and applied pressure all over the panel. Then I removed the panel and applied black embossing powder over top. I used a paint brush to clean up any areas where I didn't want powder. Then heat set it. You can watch the video below to see my process.


Next I stamped the flower, leaves and turtle onto white cardstock. I colored them using Prismacolor pencils then fussy cut them all out. The colors I used were:
Flowers: Mulberry, Process Red, Pink, White
Leaves: Spring Green, Apple Green, Prussian Green

I arranged the cut outs onto the embossed panel then adhered them down using liquid glue. After they where set, I backed the panel with black cardstock and adhered it to an A2 card base.

Then onto black cardstock, I stamped the sentiment from the Flamingo Botanical set using my versamark ink pad. I sprinkled white embossing powder over it then heat set the powder. After trimming the sentiment, I adhered it to the card front.

I think this is a fun way to get a different look out of the stencil and I love how the card turned out with the flowers added.
Thanks for visiting and I hope you have a wonderful day. Lauren.


Glitzy Star Power!

Hi TRHD friends! Today is all about stencils! Today's card features the Splish Splash Stencil and the Intersection Stencil


I don't know about you guys and gals, but I really like to stretch my supplies. It's for this reason that I really LOVE stencils. They can be used in so many ways and the price point on them is so reasonable! 

For today's card I wanted to show you two different techniques to use your stencils and really get the most out of them. 


To start I took some heavyweight white card stock and placed the Splish Splash Stencil down on top of it. I used a scraper tool and applied some glitz glitter gel through the stencil to create that awesome design. I then die cut multiple stars from it (once it dried of course).

For the background panel I did a dry embossing technique with the Intersection stencil from the December Mini release. I used my manual platform die cutting machine and a rubber pad and essentially turned the stencil into an embossing folder of sorts. Look at the instructions for your particular embossing machine to see what the best embossing plates "sandwich" would be for your machine. 

I chose a sentiment that I felt fit it really well from the Turtle Botanical stamp set. I stamped it on some card stock and cut it into a sentiment strip. I assembled all the pieces onto an A2 size card base. I used foam tape to pop up the pieces and give it more dimension and interest. That's it guys, easy peasy lemon squeezy! 


I hope that you enjoyed today's card and that you are positively beaming with new ideas on how to use your stencils! Be sure to check out all the  fabulous products that The Rabbit Hole Designs carries. You can follow this link HERE to see their whole product line. 


Thanks for stopping by!
If you want to check out additional information on the products that I used to create this card you can visit my blog at amyswares.com 

-Amy


For more inspiration, updates, and news make sure to check out these places.


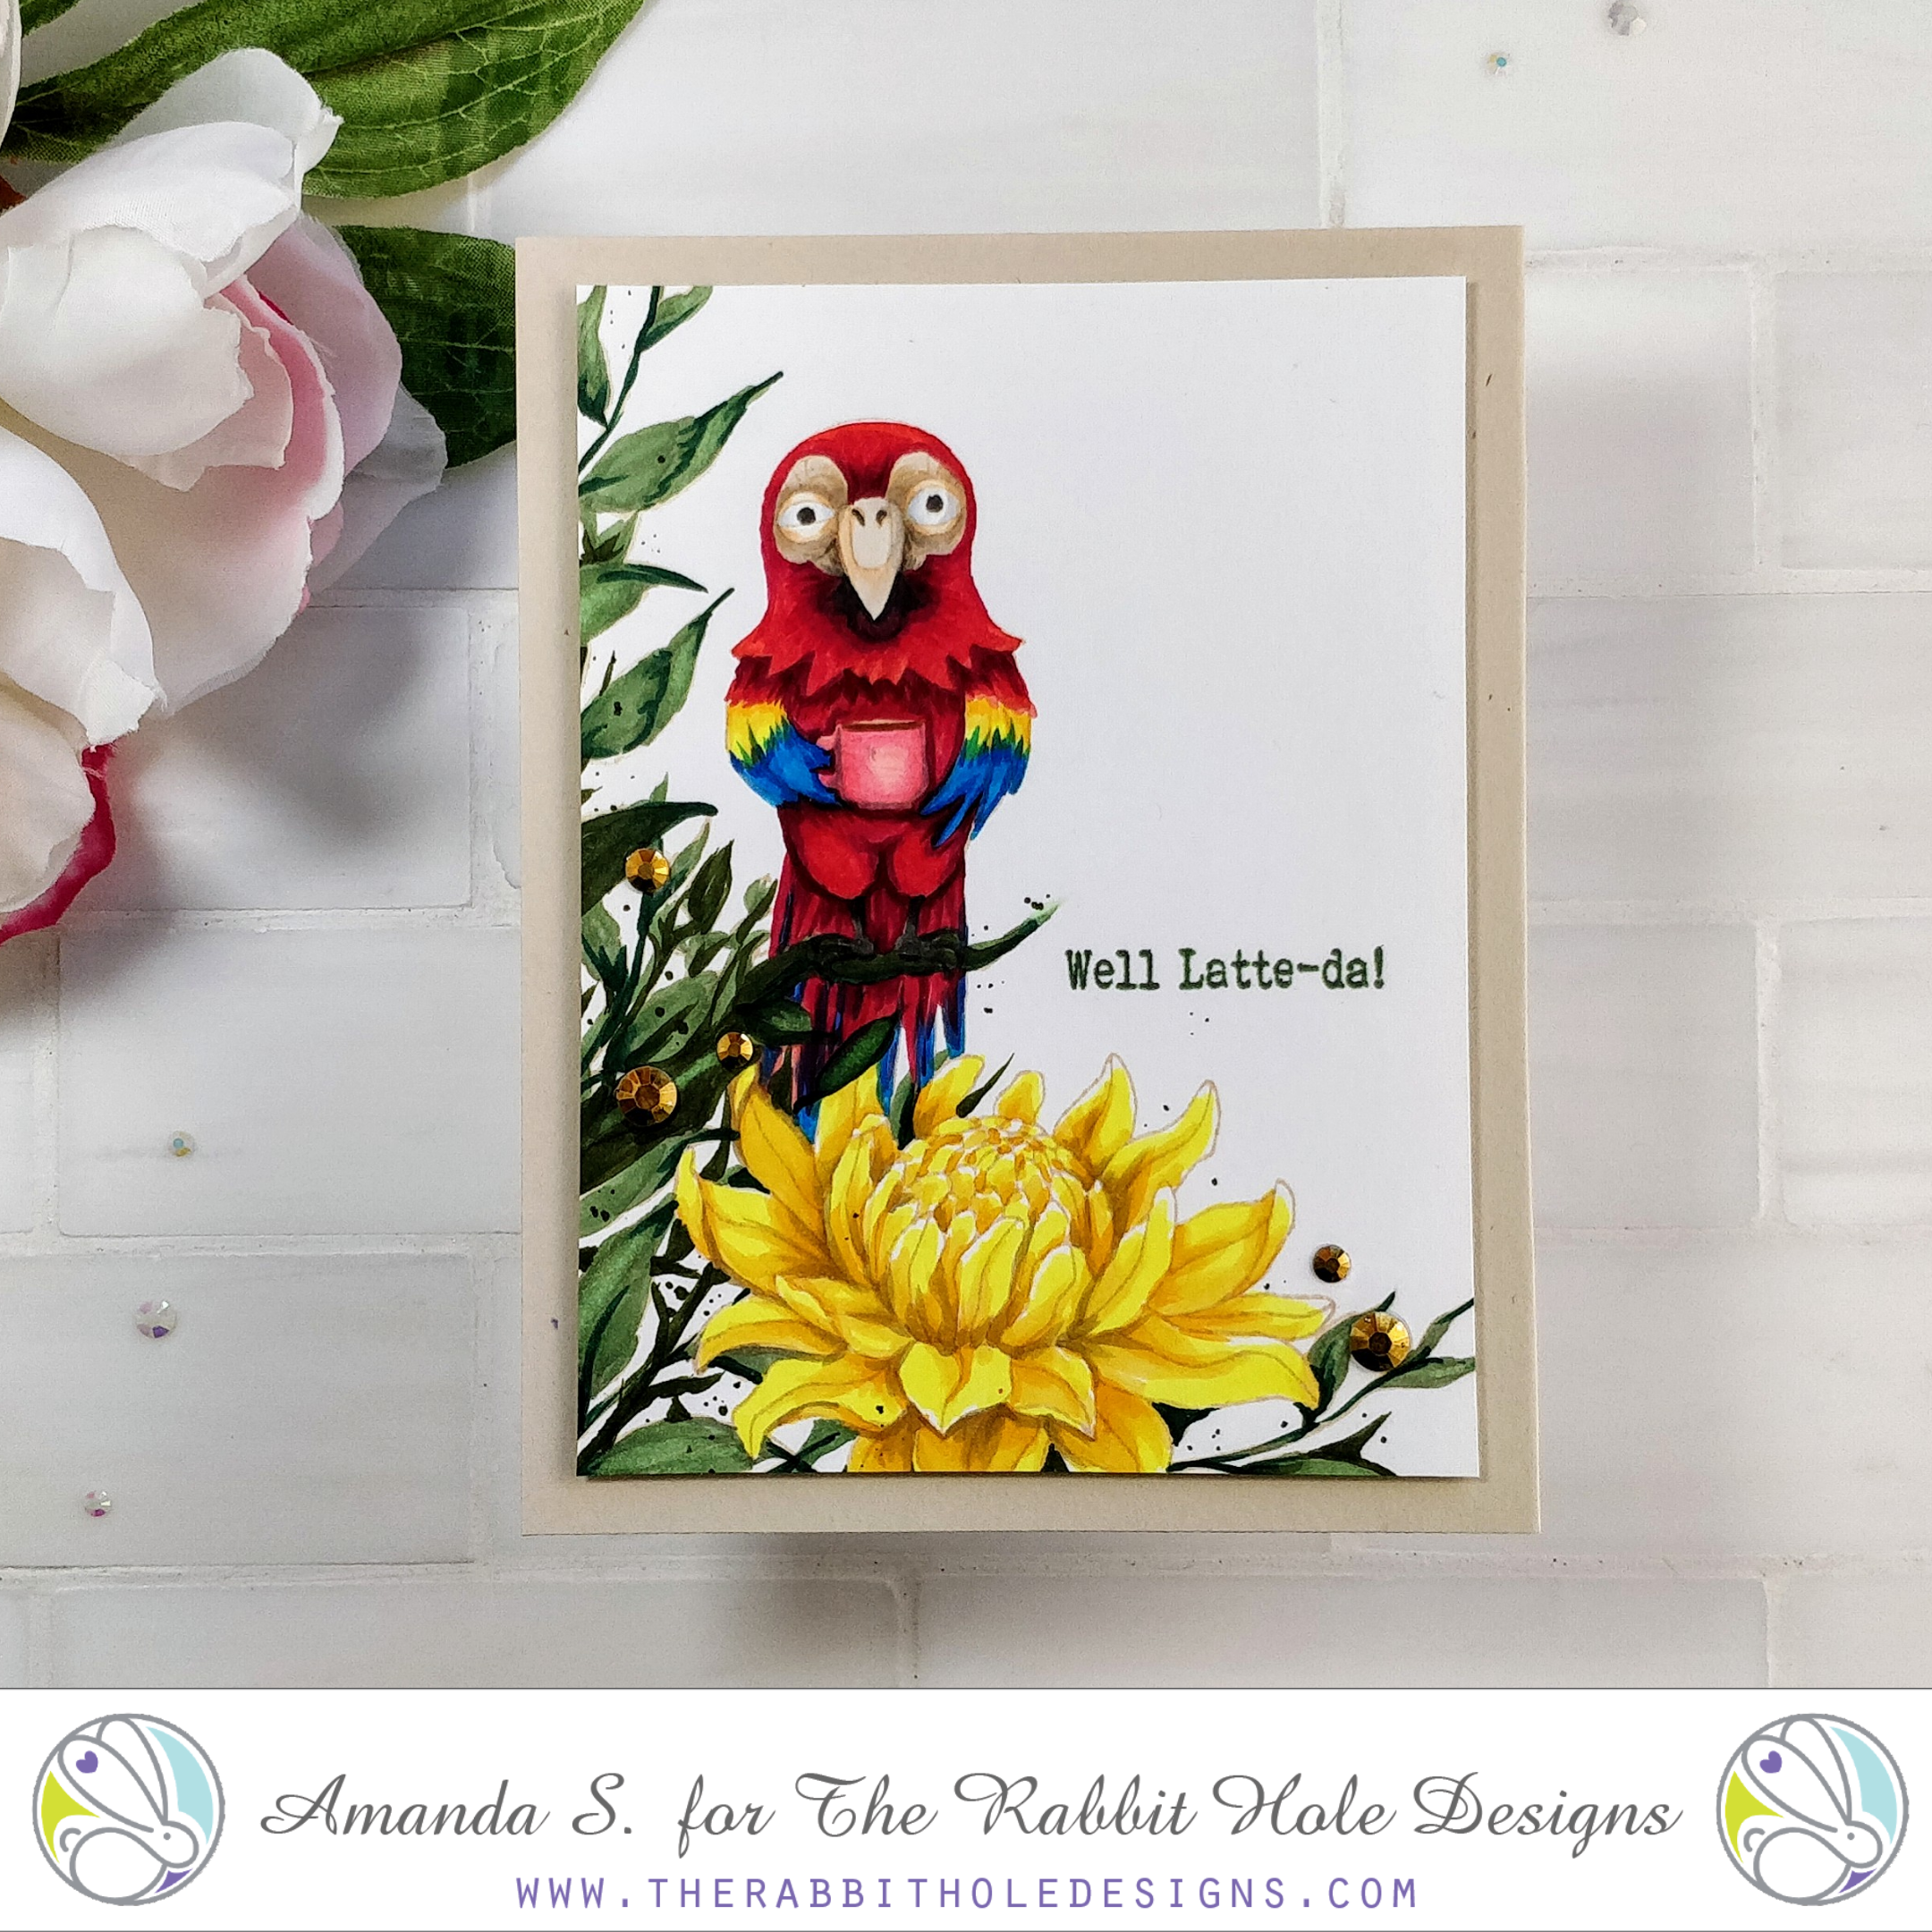
No Line Coloring - Caffeinated Parrot


No line coloring, why is it so hard?! Hi friends, Amanda from Pear Blossom Press here again. If you've never tried no line coloring, the idea is to stamp images in pale ink. Then, as you color the images, the outlines will blend in, and seem to fade away. The problem for me, is that the outlines often end up too pale to see as I'm coloring. Pretty soon, my images look nothing like the original stamps.

I love the look though, so I keep trying. And I'm always searching for tips and techniques to make it easier. One such tip from Kathy Racoosin, is to stamp with a slightly darker ink. She recommends a warm golden brown. Today, I decided to give it a try. And look, it worked! Of course, I still need practice, but that's what today's card was designed to be, practice. 

For this scene, I stamped the flower from Turtle Botanical, masked it off, and stamped leaves from Pretty in Peony all around. I masked off a few leaves where the Caffeinated Parrot would overlap, then I stamped him. I colored everything with Copic markers, and freehand drew in a few extra leaves and stems to fill in the lower left corner. I also added dark green dots around the foliage. 

Once I was happy with the scene, I trimmed the panel down, stamped a green sentiment from Blended Sentiments 2, and foam mounted it to a kraft card base. A few scattered gold gems add sparkle to the scene. Lol, I have to admit, I'm pretty pleased with it. 

Compared to my previous no line coloring projects, this one actually looks like the original stamped images (although, I accidentally edited out the steam that is supposed to be rising from his mug). I think the golden brown ink might just be the ticket! I'd love to know what you think. Any good tips to share for no line coloring? 

Thanks so much for stopping by today. Head on over to my blog for links to the specific products I used. If you'd like to see more inspiration with the new Caffeinated Parrot, check this out! I'll be back soon with another fun project to share. 

For more inspiration, news and updates check out

HELLO

 Hello there and welcome to The Rabbit Hole Designs.

It's Kelly here and I am sharing a card featuring several products from the shop.

This card was so fun to make!

I started with Bristol paper and the new "Splish Splash" stencil.

I used Cotton Tail blending brushes with two shades of green ink for the "splashes" and I used a yellow ink with a dauber on the circle/dot parts. Once it was done, I loved it!  I decided to go big on this one and leave it the full 6x6 stencil size.  Cutting it would have been fine, but it'll be a striking BIG card for someone.  I set that aside and worked on the other elements.

I stamped, copic-colored and fussy cut the botanical from "Turtle Botanical". 

Then I stamped the "Hello" from "Marque Words" with green ink .

I went back to the 6x6 panel, relayered it and carefully added neon yellow glitz gel with a paint brush. 

Once it was all dry, I assembled it using foam to pop the botanical. I finished the flower off with glitter pen. 


 Turtle Botanical:

 
Marquee Words:


 Cotton Tail Blending Brushes:


Botanical Beauty!

 Hello Everyone! Von Marie here and I am so happy to be on the blog today! I made a card using Turtle Botanical from the September Release.


I had fun making this card. It is nice sometimes when you don't have to color. I first grabbed some ink cubes and Cotton Tail Blender Brushes. I used some Neenah Solar white cardstock 80lb. I then used some purple tape to mask over my panel so that I could blend my colors across. When I was done I used the flower image to stamp and heat emboss with Versafine Black ink and Clear embossing powder. I then grabbed a strip of black cardstock to place on my panel. I cut out my panel with a double stitched rectangle die.

I stamped and heat embossed the sentiment again with Versafine black ink and clear embossing powder. I used some gold paint with a paintbrush to flick splatters onto my panel for decoration. I then grabbed some ivory hemp twine and made a bow to place on my panel. I added my panel to a A2 kraft card base and then added some black liquid pearls. I hope you like my card for today. Thank you for stopping by!

TRHD Products Used:

Turtle Botanical


Cotton Tail Blender Brushes


For more inspiration, updates, and news make sure to check out these awesome places! 

 The Rabbit Hole Designs 

The Rabbit Hole Designs Instagram

The Rabbit Hole Designs Facebook Fan Page

The Rabbit Hole Designs Pinterest

The Rabbit Hole Designs YouTube

Thank you for stopping by!

~Von Marie~


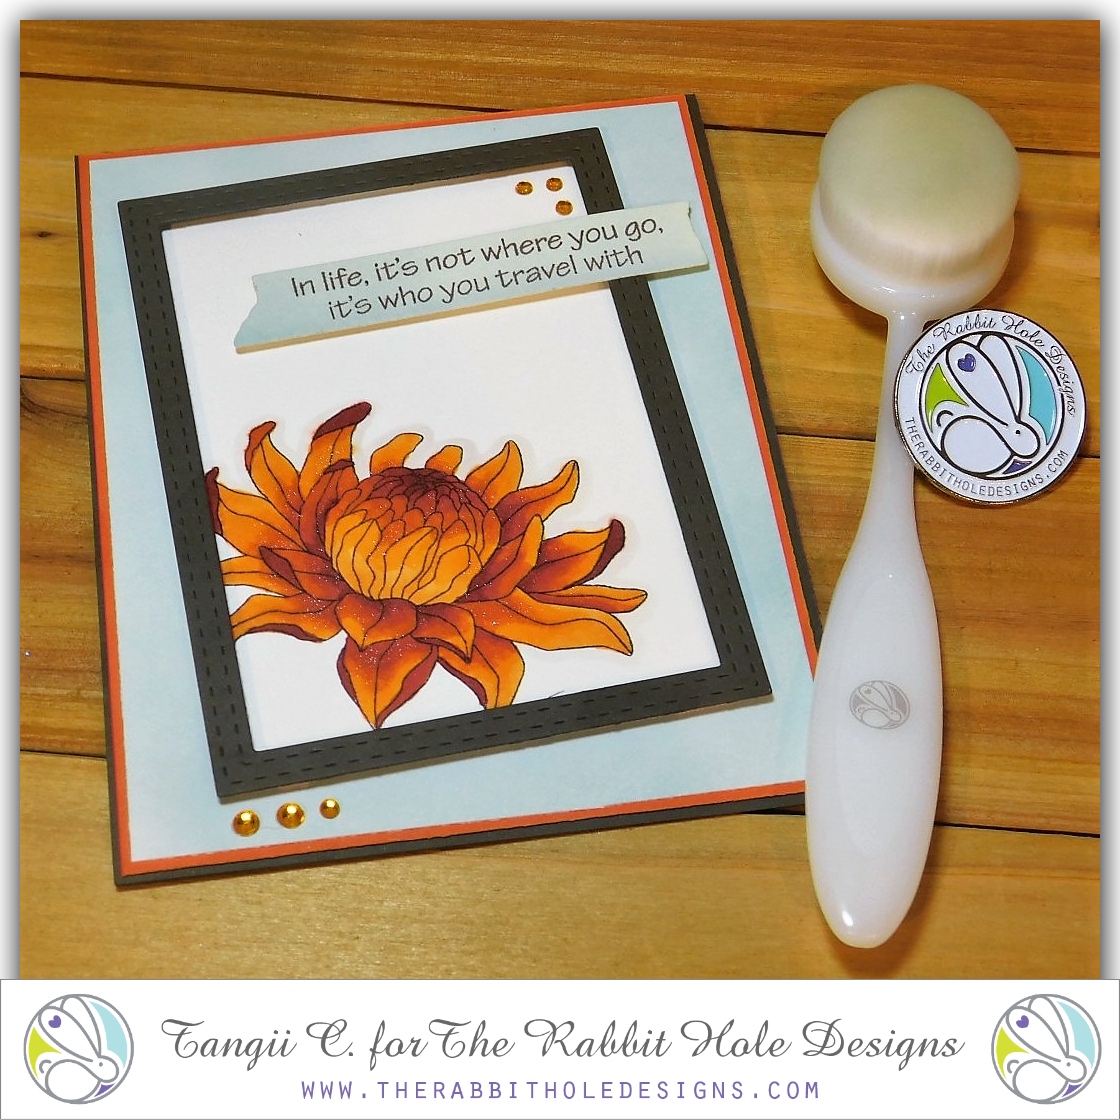
It's Who You Travel With


Hey yall!  Tangii here, Happy Monday!!  Hope you all had a great weekend.  For my card today I'm playing with the Turtle Botanical set.  I started off with a Cotton Tail Blending Brush and some Oxide ink around the outer of my frame.

I placed the brown frame in place, just laying in place (not adhereing), then positioned my image inside the brown frame.  Carefully removing the brown frame, then I stamped the flower.  I used copics to color it, and added some sparkle here and there.  The brown frame is popped up, I like them kind of wonky placed and not so square on.

I blended up a scrap of paper and then die cut it, and stamped my sentiment.  I used a dark brown ink for the sentiment.  Finally I added a few rhinestones here and there.  This flower was so much fun to color!  So many color possibilities, but I love this rust/gold... I just LOVE Fall!!!

All of the items I linked in my post are available at The Rabbit Hole Designs.

You can also read about this card on my blog, here with links to the products I used, etc.  Thanks for popping by, come back again soon!

Botanical Turtle-Be Your Own Kind Of Beautiful


Hello all! It's Lauren and today I am up on the blog sharing my latest card featuring the gorgeous Botanical Turtle from this months release. I think the look of pink and green is so pretty together so I decided it would be perfect for this flower toting turtle!


What I did first was stamp the turtle onto water colour paper with black water colour friendly ink. To colour the image I used water colour pencils that I have had in my stash for years. After I had coloured the turtle I waited for it to completely dry before working on the background.


Once it was dry, I added water to Mermaid Lagoon Distress Oxide ink and with a small paintbrush to create the blue behind the turtle. I had water in mind but it could also be sky.

When the water had dried, I watered down Antique Linen Distress Oxide to paint on the ground/sand. Making sure to have it darker underneath the turtle to create some shadowing. Then left it to dry, then stamped the sentiment in black.

Next, I die cut pink patterned paper with an A2 stitched rectangle die and adhered it to an A2 card base. Then using a smaller curved, stitched rectangle I cut a green rectangle and also the turtle. I adhered them onto the base with the green panel underneath and offset.
For the embellishment, I used fishtail banner dies to create a larger pink one, then smaller green polka dot one. I trimmed them and adhered it to the card.


To add a finishing touch, I placed 3 pink self adhesive dots onto the banner.

Thanks so much for visiting! Hope you have a wonderful day!
-Lauren

YOU...are Beautiful

 Happy Friday!!! Michelle here, sharing a simple card design. Today I am using two of the newest stamp sets from the September Release... Turtle Botanical, and Marquee Words.

I stamped the chrysanthemum bloom and colored with Copic Markers in shades E07, E09, R05, YR04, and YR61.  I fussy cut the flower and set aside. Next, I trimmed a piece of red cardstock and gold glitter paper. I heat embossed the sentiments with gold embossing powder on the red cardstock. I colored in the circles of the word 'YOU' with a white gel pen.

I adhered the red cardstock to the glitter paper than wrapped a piece of bakers twine and tied a bow. I adhered the two panels tot he card base with foam adhesive.  Lastly, I adhered the flower on top of the twine with foam adhesive and scattered some sequins.

Hope you enjoyed this card!
Have a great weekend!!!

Michelle