Pages

Showing posts with label Rainbow Ink Blending. Show all posts

A Rainbow of Gift Packages Wreath Card

Hey there, card makers! I am Rick and I am brand new to the Rabbit Hole Designs Design Team and I get to share a fun card with you today using the Baby's 1st Christmas Stamp Set (designed by Agota Pop exclusively for Rabbit Hole Designs). I'm thrilled to share with a vibrant and unique Rainbow Gift Package Wreath Card using the adorable Baby's 1st Christmas Stamp Set from Rabbit Hole Designs LLC. This fun and colorful design will surely bring a smile to anyone's face during the holiday season. 


You can create this magical design using the oh-so-adorable Baby's 1st Christmas Stamp Set from Rabbit Hole Designs. This stamp set is a true gem - versatile and perfect for adding that extra special touch to your cards.

I started this card design by ink blending the background in rainbow colors. I mean rainbows are great any time of the year right! Next I stamped stamping each set of presents in a wreath formation making sure to mask each one before stamping the next. I then added some additional colors to each with some colored pencils to create a fun colorful card design.


Next I cut out the word happy using the Happy Scripty Word with Shadow Layer Die from some black cardstock and the coordinating shadow die from some white cardstock.  I then masked off the part of the Christmas sentiment that I didn't want to use on this card with some post it notes before stamping it in embossing ink onto some black cardstock and heat embossing it in white.  I used one of the banner dies from the You've Been Framed Layering Dies to cut it out.  To finish off the design I added a few Clear Enamel Dots to add a little extra touch.

Thanks for dropping by today and checking out my card.  I hope you have a wonderful day!  

Rick

For more inspiration, updates, and news make sure to check out these places!


With age comes the cage Rainbow Card


It is June, PRIDE month and I wanted to do a rainbow color combo card for my post at TRHD. This is such a bright look for any card and not hard to achieve at all with a few pointers. First of all, you don't need all the colors of the rainbow in inks to end up with this look. You only need pink (or red), yellow, blue, and purple inks. The colors in between these colors will be created when you blend the colors. It is such a fun look to make when you see your new color blends in between. My favorite on this card is the coral that got created when my pink and yellow blended. I used the new May release stamp set: SxS Life

Profits from every sale of the  SxS Life stamp set will go to fund injured drivers/riders, families of drivers/riders who have lost their lives, and organizations that promote & educate driver and rider safety in the off-road environment. This will be for the lifetime of the stamp set in our shop.

Rainbow of Butterflies


Hello friends, Lauren here today sharing this rainbow of butterflies using the new Butterfly stencil. This small stencil is so versatile! I used it to create a repeating pattern of butterflies flying up my slimline card.

This was quite simple to do. I started with a white slimline sized cardstock panel. I placed the stencil on the bottom and then ink blended Candied Apple and Ripe Persimmon Distressed oxide inks. 


Then, after cleaning my stencil, I positioned it above yet slightly overlapping my previous butterfly. I ink blended Squeezed Lemonade and Mowed Lawn D.O. inks over it making sure not to blend over the orange of my first butterfly.


Again, after cleaning my stencil, I positioned it above and overlapping again my previous butterfly. This time I blended Salty Ocean and Wilted Violet D.O. 


For my sentiments, I grabbed some of my other Rabbit Hole Designs stamp sets and stamped out the words you, are and beautiful onto white cardstock. I trimmed them down, mounted them onto black cardstock and adhered them onto the butterfly panel. 

Next, I trimmed the panel down using a scalloped slimline die from my stash. I added a black slimline cardstock panel to my slimline card base then adhered the rainbow of butterflies panel to the card base.

To finish off the card, I adhered some clear acrylic bubbles from my stash.

I am so happy with how quick and easy this pretty card came together. I hope this inspires you to try this technique out! Thanks for visiting!

For more inspiration, updates, and news make sure to check out these awesome places! 

The Rabbit Hole Designs 

The Rabbit Hole Designs Instagram

The Rabbit Hole Designs Facebook Fan Page

The Rabbit Hole Designs Pinterest

The Rabbit Hole Designs YouTube


Here's the link to the Butterfly stencil: 

Butterfly - 3x4 Stencil – The Rabbit Hole Designs


Anti Valentine's Day Cards


 Good morning crafty card making peeps!
I hope you all enjoyed your Thanksgiving and ate lots of turkey
and spent some quality time with family and friends!
I spent the holiday with family in Georgia and had 
tons of fun shopping and laughing!

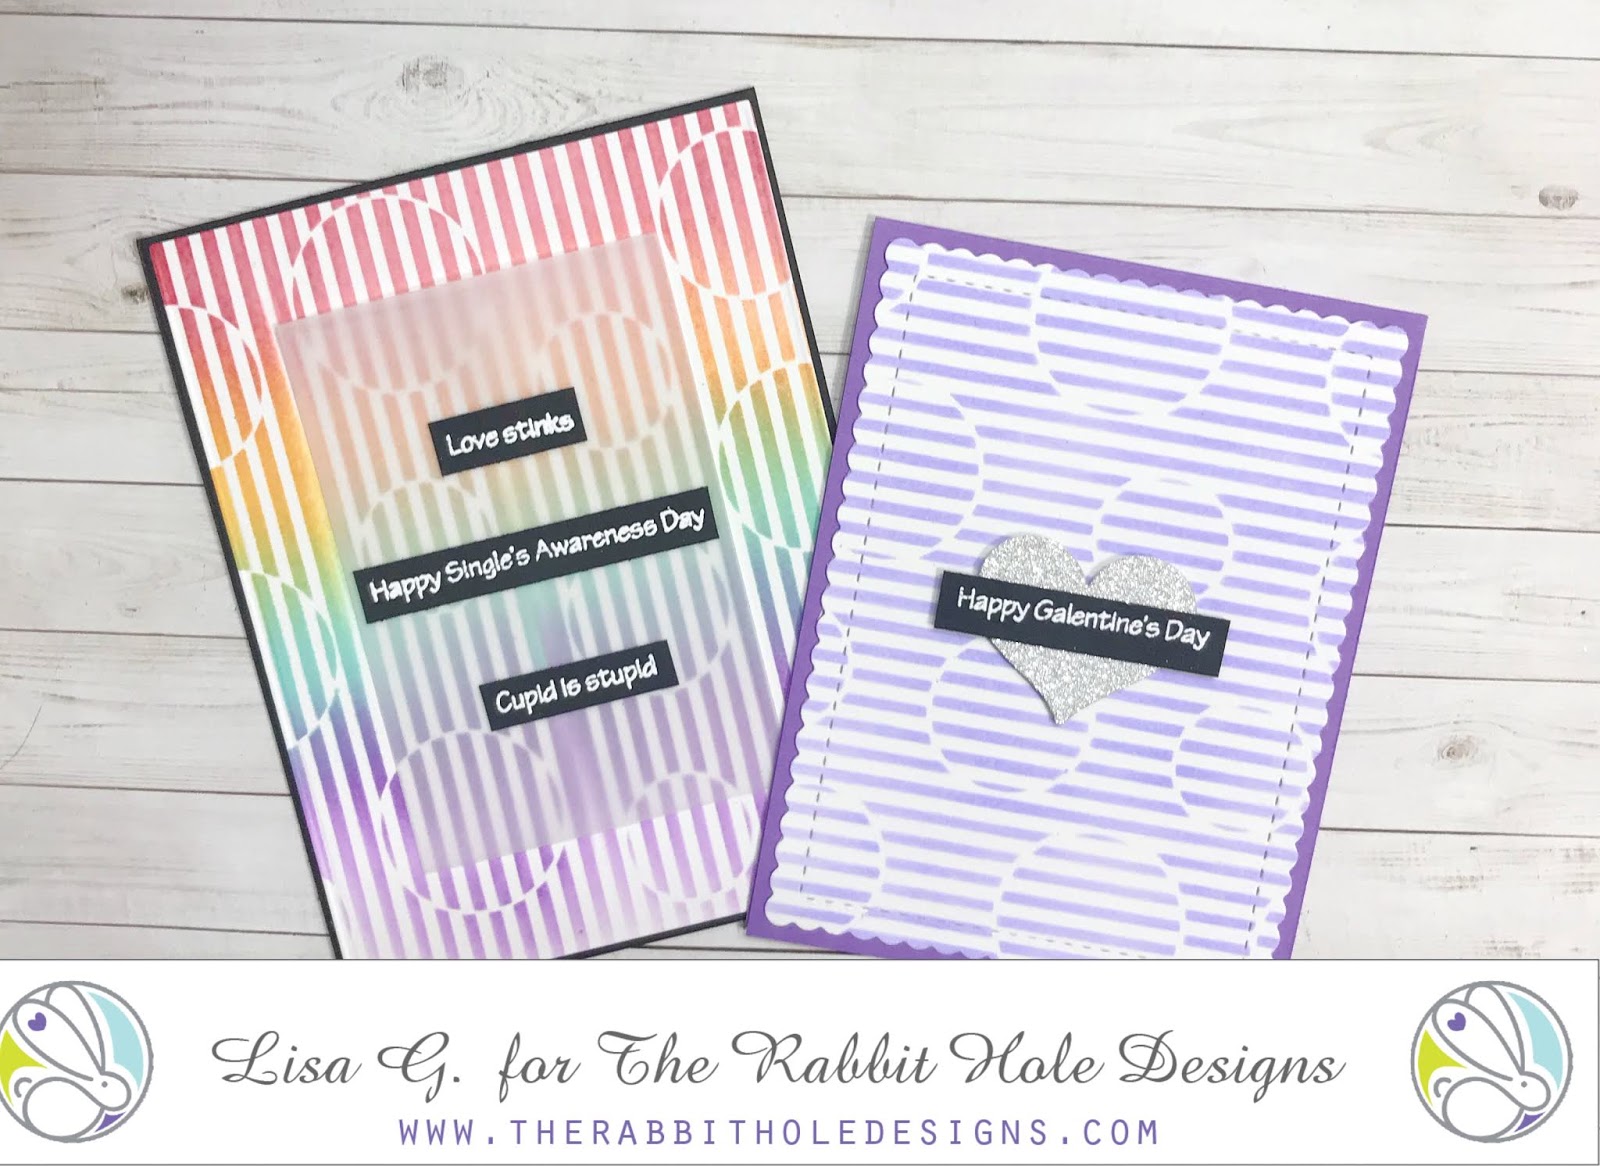
It's Lisa here today on the blog with 2 fun cards
using products from the recent December release!
In the crafty world we are ahead of schedule with the holidays
so we are currently in Valentine's Day mode.
I used the new Anti Valentine Sassy Sentiments combined with the 
Circle Illusion Stencil and came up with 2 fun and easy cards.

For my first card I blended rainbow colors over the Circle Illusion Stencil
for a fun and colorful background. 
I used a smaller rectangle of vellum paper to mute out the center
of the stenciled background and then I added 3 sentiments from
the Anti Valentine Sassy Sentiments. I white heat embossed the sentiments
on to black paper and stacked them on the vellum.
I even decorated the inside of the card with another sentiment
and included the heart image from the same set with the
word "blah" inside of it.


For my second card I used purple ink only over the 
Circle Illusion Stencil for a more monotone look.
I added a heart shape that I cut from silver glitter paper on to the 
center of the stenciled background.

Once again I white heat embossed a sentiment on black paper from the 
and mounted the sentiment it across the silver heart.
Lastly I  decorated the inside of the card similar to the first card.


I love the new stencils, they really make quick work 
of a fun and interesting background with minimal effort.
The Anti Valentine Sassy Sentiments stamp set really 
cracks me up and at the same time can be used for a legit 
Valentine's day card if you use the cupid and heart images 
and any number of other "true love" sentiments.

Thanks so much for stopping by today and don't forget you can 
purchase The Rabbit Hole Designs products at Simon Says Stamp.

For more inspiration, updates, and news make sure to check out these links.


Have a great day, I already am!
💘Lisa 💘