Pages

Happy Easter Friends!


 Today I'm going to show you something extra sweet for your holiday.  I made these goody bags with The Rabbit Hole Designs newest release. 

These are perfect for just about any occasion from birthday parties  to neighborhood welcomes.   

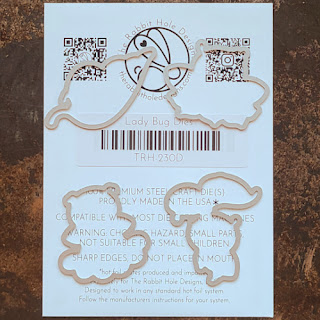
I stamped and colored the images from the stamp sets called "Ladybug" and "Bug You".  I then fussy cut the images out but there are coordinating dies to speed up that process.  After, I pulled out the treat bags I purchased from The Dollar Tree.  12 come in a pack for $1.25.  I used the stencil called Checkered Past to create a basket weave affect.  I used distress ink but any brown pigment ink would work well.  I then glued the images on the prepared baggies and filled with crowd favorites like lotion and gum in one and craft supplies in the other. 

These are so easy to make and take about 10 minutes on each.  They'd be great to mass produce if you needed a lot.  

I challenge you to recreate this. Make sure to tag me @craftwithme101 and The Rabbit Hole Designs on Instagram if you do. 

For more inspiration, updates, and news make sure to check out these awesome places! 

Remember When Yoga Was Called Twister

 Hello and welcome to the blog; It's Rick back with you this week.  I have a super cute cards to share with you today.  This card makes me think about the one time I played twister as a kid and doing yoga as an adult.  And how how needed a nap sometimes afterwards.  


I thought that the little lady bug taking a nap on a leaf (from the Lady Bug Stamp Set) was a fun companion for the sentiment from the Sassy Sentiments 3 Stamp Set.  If you have not seen the Sassy Sentiments 3 Stamp Set yet, you are missing out.  If you want to add a little pizzazz to your cards from a fun stamp set that can be used for all kinds of card designs.  Then the Sassy Sentiments 3 Stamp Set is the one to grab and put into your cart.  


To add a little more pizzazz to my card front I colored the little lady bug in one of my favorite mediums.  And added a little more glamour to the card front by adding hot foil using gold hot foil and the Amanda Hot Foil Plate.  I then added did a little ink blending over the background.  I picked four different shades of a yellow green ink to compliment the yellow greens in the leaf and the violets and red oranges on the lady bug.  I then colored a few of the Clear Sparkle Enamel Dots that I colored with an alcohol marker that matched the yellow green from the background panel.  

Thanks for dropping by today, I hope that you have a fabulous day.  If you want to see all the supplies I used on my card today you can find the full supply list on my blog.  

Simplicity with a bit of humor

Who's ready for a cheeky card today?!

 Who doesn't love a bit of sarcasm with their happy mail?  I know I appreciate a little giggle while receiving it!  This new sentiment set called Sassy Sentiments 3, is the perfect stamp set to get just that.  It is filled with snarky adult humor that, if you know you know.  I paired this set with the checkered past stencil to add some interest and dimension.  For the finishing touch, I placed some of the enamel dots around the sentiment.  Did you know you can color them to match any color theme of your card?  I did so using Ohuhu markers today. 


I challenge you to recreate this. Make sure to tag me @craftwithme101 and The Rabbit Hole Designs on Instagram if you do. 

For more inspiration, updates, and news make sure to check out these awesome places! 


Polka Dots!


Hi! It's Lauren here today to share this cute card featuring one of the adorable ladybug image included in the new Ladybug stamp set illustrated by Agota Pop!

I created a quick video showing how I made it. You can watch it here: 


I've linked The Rabbit Hole Designs products I used, below.

Lady Bug 4x6 – The Rabbit Hole Designs

You've Been Framed - Layering Dies – The Rabbit Hole Designs

You can follow me here:

Hugs Card with the Bug You Stamp Set

Hello crafty friends! Welcome to the blog; it's Rick back with you today.  And I am sharing a super cute little card that I made using the Bug You Stamp Set from The Rabbit Hole Designs. This cute little set was designed by Agota Pop for the Rabbit Hole. 


Bug You Checkered Past Hug Card by Rick Adkins Over Head View

My card today features not only the Bug You Stamp Set from the latest Rabbit Hole Designs release, but also the Checkered Past 6 x 6 Stencil as well. I also used the Mini Hot Foil Plate which is part of the March 2024 Promo for the Rabbit Hole Designs. 


You can get both Mini Hot Foil Die and a randomly selected pack of the Rabbit Hole's fabulous Enamel Dot for free with $25.00 Purchase (before tax & Shipping and after discounts). To get the March Promo you must add March 2024 Promo to your cart. And if cart is eligible the March Promo item will be added. Sweet deal right!


I created the background of my card using some kraft cardstock and the Checkered Past 6 x 6 Stencil. Since I used colored cardstock I went with my distress oxide inks in a monochromatic color pallet to be able to add color through the Checkered Past Stencil. The stencil is designed to be turned two ways, but I actually turned it four times to fill in the cardstock with color. 


Bug You Checkered Past Hug Card by Rick Adkins


While waiting on the ink to dry I went ahead and heated up my hot foil machine.  Because I knew I was going to use the Mini Hot Foil Plate (which is part of the March 2024 Promo) and I was going to use the Hugs Scripty Word Hot Foil Plate for my sentiment.  Once my hot foil machine was nice and ready I could add the Mini Hot Foil Plate to my focal panel and the Hugs sentiment to my card front.  


To finish off the card I colored up my super cute little lady bug from the Bug You Stamp Set with some colored pencils.  I also colored the inside of the hot foiled flowers as well.  And added it to the card front along with my Checkered Past background panel.  I finished off the card by adding a few of the Clear Sparkle Enamel Dots around the hot foiled sentiment.  


Thanks for dropping by today, you can find an entire supply list for everything that I used over on my blog.  I have linked all the supplies from the Rabbit Hole in this post.

Rick

Creating fun cards with no specialty dies!

 Hi friends!

Today I have a super fun card using The Rabbit Hole Designs newest release.  This set is called Ladybug.  I created a fun ladybug background using a circle punch and red and black cardstock.  I also created some stitching using a white and black gel pen.  This step is optional but I think it gives the card some dimension and interest.  As the focal point, I used the sweet little image featuring a ladybug tucked in a group of flowers, stamping the sentiment under it.  


For an extra touch of flair, I added a piece to the back that I call "a wobble".  It gives the image dimension like foam tape but it also creates a wiggle affect when tapped.  I have a reel demonstrating this up on my Instagram.  Make sure to check it out!


 I challenge you to recreate this. Make sure to tag me @craftwithme101 and The Rabbit Hole Designs on Instagram if you do. 

For more inspiration, updates, and news make sure to check out these awesome places! 


Grown Up Goals

Good Morning, MaryAnn here and just stopping by to say this post may not look like Jenn's normal post, this is because she had an unexpected event come up and asked me to fill in and get it posted for her.


 Hello crafty friends, Jenn here sharing  a cute and sassy mini slimline card. It states the very hard truth about adulting. The sentiment is from the Sassy Sentiments 2 stamp set and perfectly fits with the cute little napping ladybug from the New Ladybug stamp and coordinating die sets.
 
The background is stenciled using the New Checkered Past stencil with a light and dark yellow ink.  The squares are just offset enough to create a highlight and shadow.   The napping ladybug is colored with OLO markers and added to a square printed cardstock with a second solid yellow square cardstock.  Both are offset and glued into place mimicking the stenciled background.

Now here's a bit of fun technique to try with The Rabbit Hole Designs' Matte White Enamel Dots. I colored each dot with a red prismacolor pencil and added polkadots with a  black ink pen.  This add a bit of fun to the background while also repeating the ladybug design.

Supplies use:
Ladybug stamp set 
Ladybug coordinating dies
Sassy sentiment 2 stamp set
Checkered Past stencil 
Matte White Enamel Dots 

Thank you for stopping by to check out today's cute and sassy mini slimline card. I hope you are inspired to create something lovely today!


March 2024 Release

Hello and welcome to the Inspiration Hop. We are excited for you to join us as we present to you our March 2024 release. Our Brand Ambassadors will be sharing their projects, so be sure to visit their blogs and leave them some crafty love.

The 3 stamp sets with coordinating dies are all available to purchase right now in the shop.

The products being highlighted today are:

Thank you so much for being here for our inspiration hop.

Here is the lineup for today:

GIVEAWAYS:

To celebrate the March 2024 release, The Rabbit Hole Designs is giving away two savings vouchers; one to a lucky Instagram follower from all comments left on The Rabbit Hole Designs Instagram account release post and one to a commenter on the HOP Blog Posts from all of the Brand Ambassadors Blogs. So make sure to head on over to Instagram to look for the giveaway post. Must comment by 11:59 pm PST 03-07-2024

@therabbitholedesignsllc

Winners will be contacted via DM for the Instagram winner and announced on The Rabbit Hole Designs Blog Day 1 Release post  on 03-08-24

Avra Williams from Lydia's blog was chosen. Please contact us to claim your voucher

info@therabbitholedesigns.com

subject Feb 2024 Blog Hop Winner


This is the graphic you are looking for on our IG and FB fan page

For more inspiration, updates, and news check out these awesome places! 

Thank you so much for stopping by today!

Hello Sunshine!


Hello! Lauren here today to share this fun card I created using one of the images that is included in the new Easter Basket stamp set illustrated by Agota Pop. 

To start, I stamped the flower image around all four sides of my white cardstock panel measuring 4.23 x 5.48. Then colored the flowers using my colored pencils. 


Next, I stamped the word sunshine from the Hello Scripty stamp set onto the card panel.

I then used the Hello Scripty word die to die cut the word out of yellow card stock. I also cut 3 more from black cardstock. I adhered all four words in a single stack with the yellow one on the top. Then adhered it onto the card panel above the "sunshine".


Then I adhered the panel onto a black, A2 sized (4.25 x 5.5") cardstock panel and then onto a white top folding A2 sized card base to complete the card. 

I hope this card has inspired you to use the smaller stamps included in sets as main stamped elements. I've linked the products I used to create this card, below. Thanks for visiting!

https://therabbitholedesigns.com/collections/stamps/products/easter-basket-3x4

Hello - Scripty 3x4 – The Rabbit Hole Designs

Hello - Scripty Word with Shadow Layer Dies – The Rabbit Hole Designs

You can follow me here: