Pages

Showing posts with label Space Infinity & Beyond. Show all posts

You're Outta This World

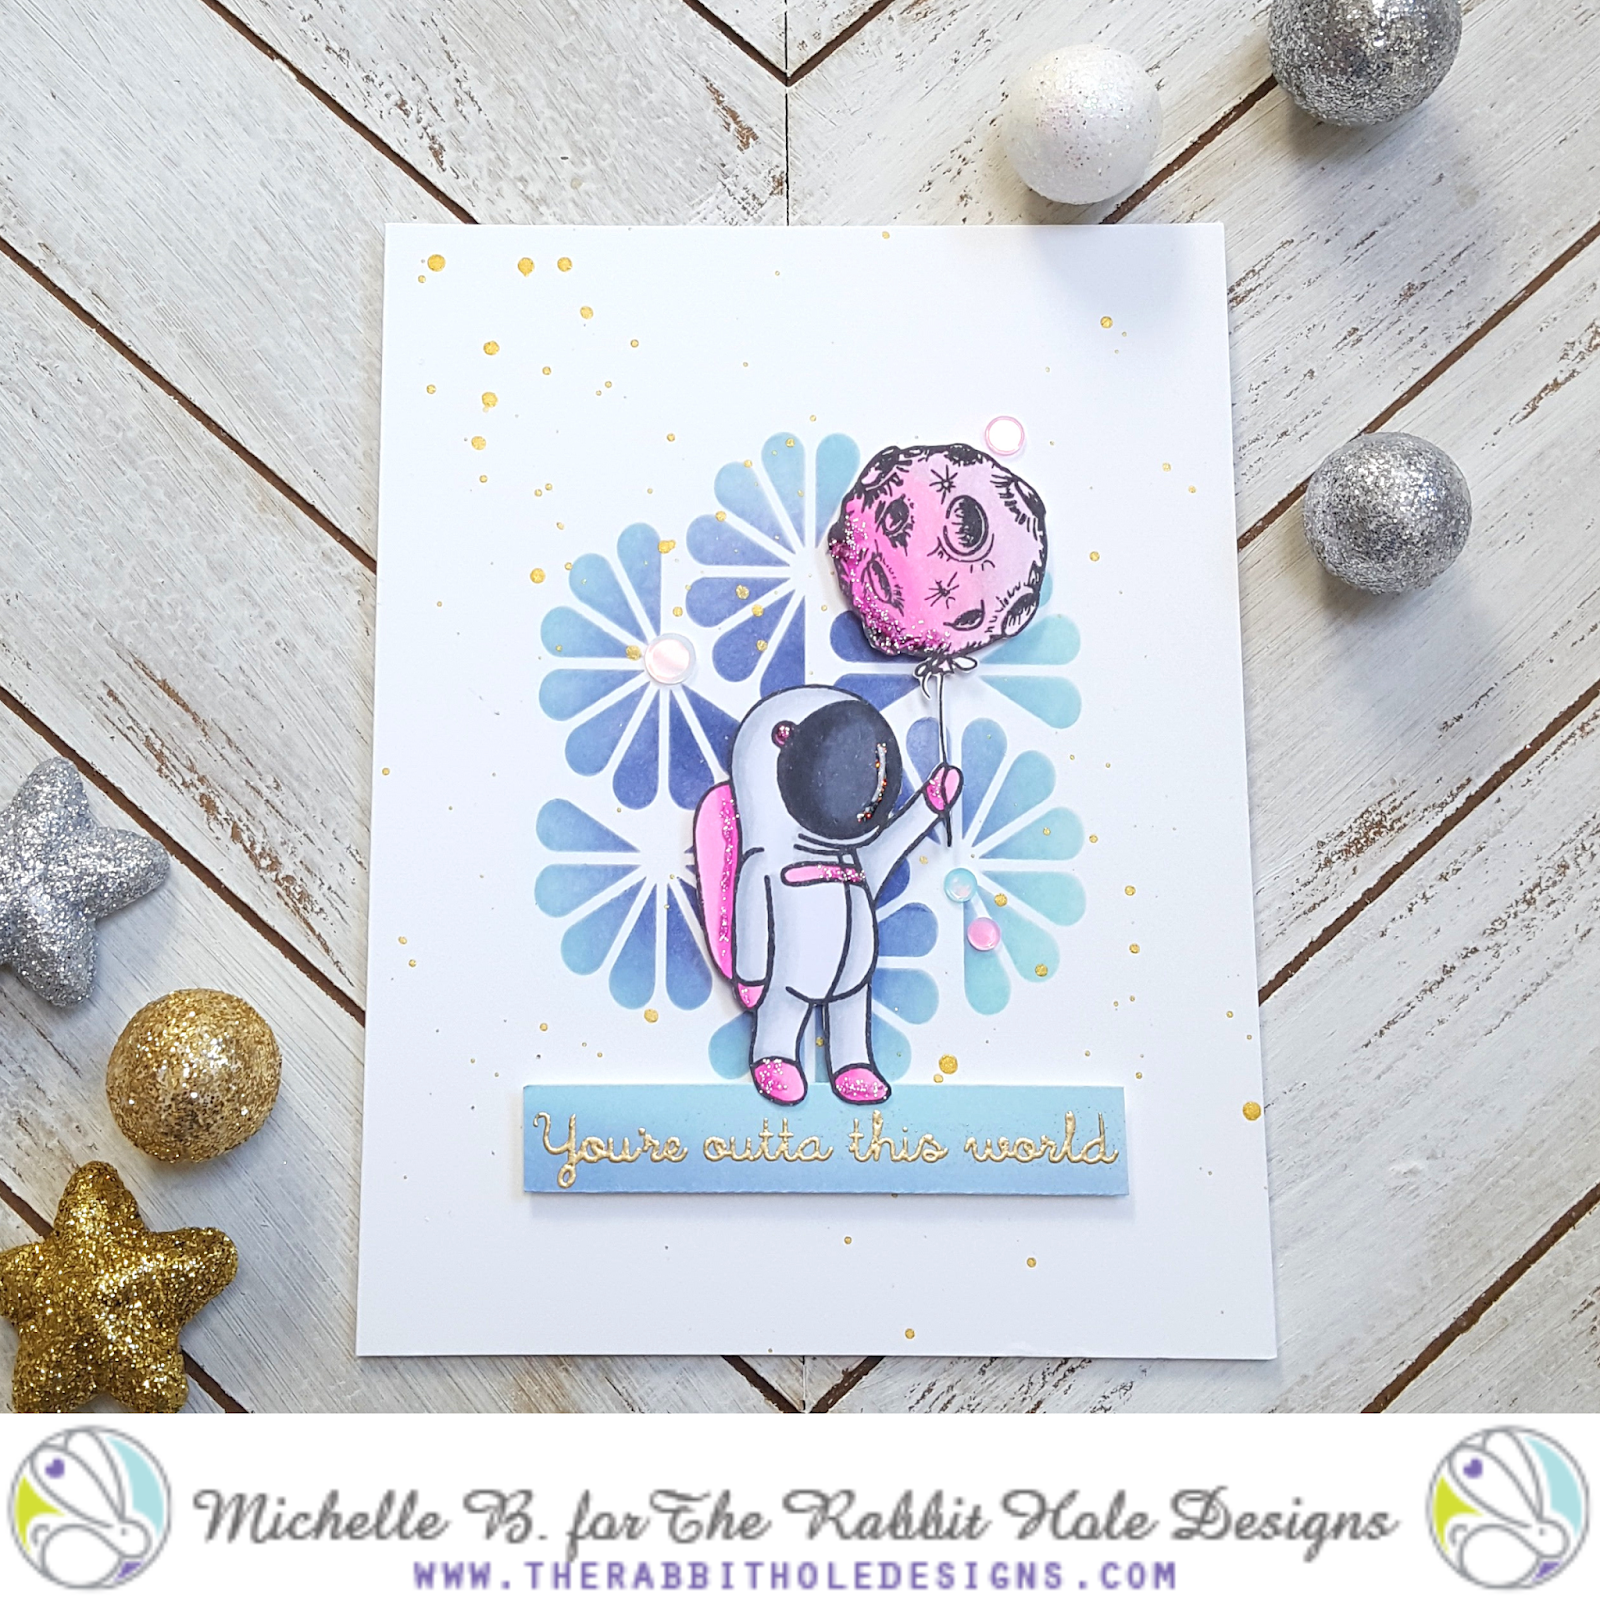
Hello there Rabbit Hole Fans!!! Hope all is well with you. Michelle here, sharing a card 
I created using the stamp set Space- Infinity & Beyond. I love giving these astronauts a female spin...
like the color pink. 

I paired it up with the stencil Twisted Sunshine. I used tumbled glass and chipped sapphire distress
oxide inks than I splattered some white and gold paint. I colored the astronaut with Copic Markers in shades C0, C1, C3, C5, C7, C9, 0, RV000, RV00, RV10, RV02, RV04.

I embossed the sentiment with gold powder over a piece of cardstock I colored
with the same inks.  For a finishing touch I scattered some cupped sequins and added
some shimmer with stickles glitter glue.

Space - Infinity & Beyond  4x6

Twisted Sunshine - 6x6 Stencil
Thanks for stopping by for a peek!
Enjoy your weekend!

Michelle

For more information, news and updates check out these links:


I'd Give You the Moon

Hello! Alison here with a card using a couple of the newest release items from The Rabbit Hole Designs. I really love the June release's theme of outer space, as I have always enjoyed learning about it. So working with these stamps and stencils is a win for me!

I used the Space- Infinity and Beyond stamp set as my jumping off point. I really wanted to do something with just the moon, so I inked only that up (and used some tape to mask off the string) and stamped it repeatedly using Silvery Shimmer Delicata Ink on black cardstock. Also from that stamp set is my sentiment, which I heat embossed with silver powder on purple cardstock.
I really wanted an all-over star pattern in my background so I applied the new Aim for the Stars stencil a couple of times to cover my gray cardstock. I used VersaMark ink and then applied a glittery purple embossing powder to give it some sparkle and shine. I also added some purple ink to my white card base to tie the purples together.
If you would like more information on my card, please visit my personal blog HERE. I hope you can look at your sets a little differently, and see how masking off certain elements can completely change the look of your creations.


Have an inspiring day!
-Alison


Thanks for joining us today on the blog!
Come back for more inspiration using The Rabbit Hole Design products. 

For more information, news and updates check out these links:

Man in the Moon

 Hello there! Happy Monday!!! How's it going by you?
Michelle here, sharing my man in the moon card (hehehe).
I used the stamp set, Space- Infinity & Beyond and Ribbon Star Stencil...makes a 
perfect combo!!!! 
I inked up the background using tumbled glass and chipped sapphire distress
oxide inks. Than I embossed the stencil with metallic silver sparkle embossing powder.
I colored my astronaut with the no-line coloring technique.
I stamped him with antique linen ink and used Copic Markers to color.
For the moon: C00, C1, C2, C3, C5, C7, C9
For the astronaut: C00, C1, N2, C5, C7, B34, B37, B39, R29, R89
For a finishing touch I scattered a few Starletz gems.


Ribbon Star 6x6 Stencil


Space - Infinity & Beyond  4x6

Thanks for stopping by for a peek!!!
Hope you have a great week!!!

Michelle

Thanks for joining us today on the blog!
Come back for more inspiration using The Rabbit Hole Design products. 

For more information, news and updates check out these links:

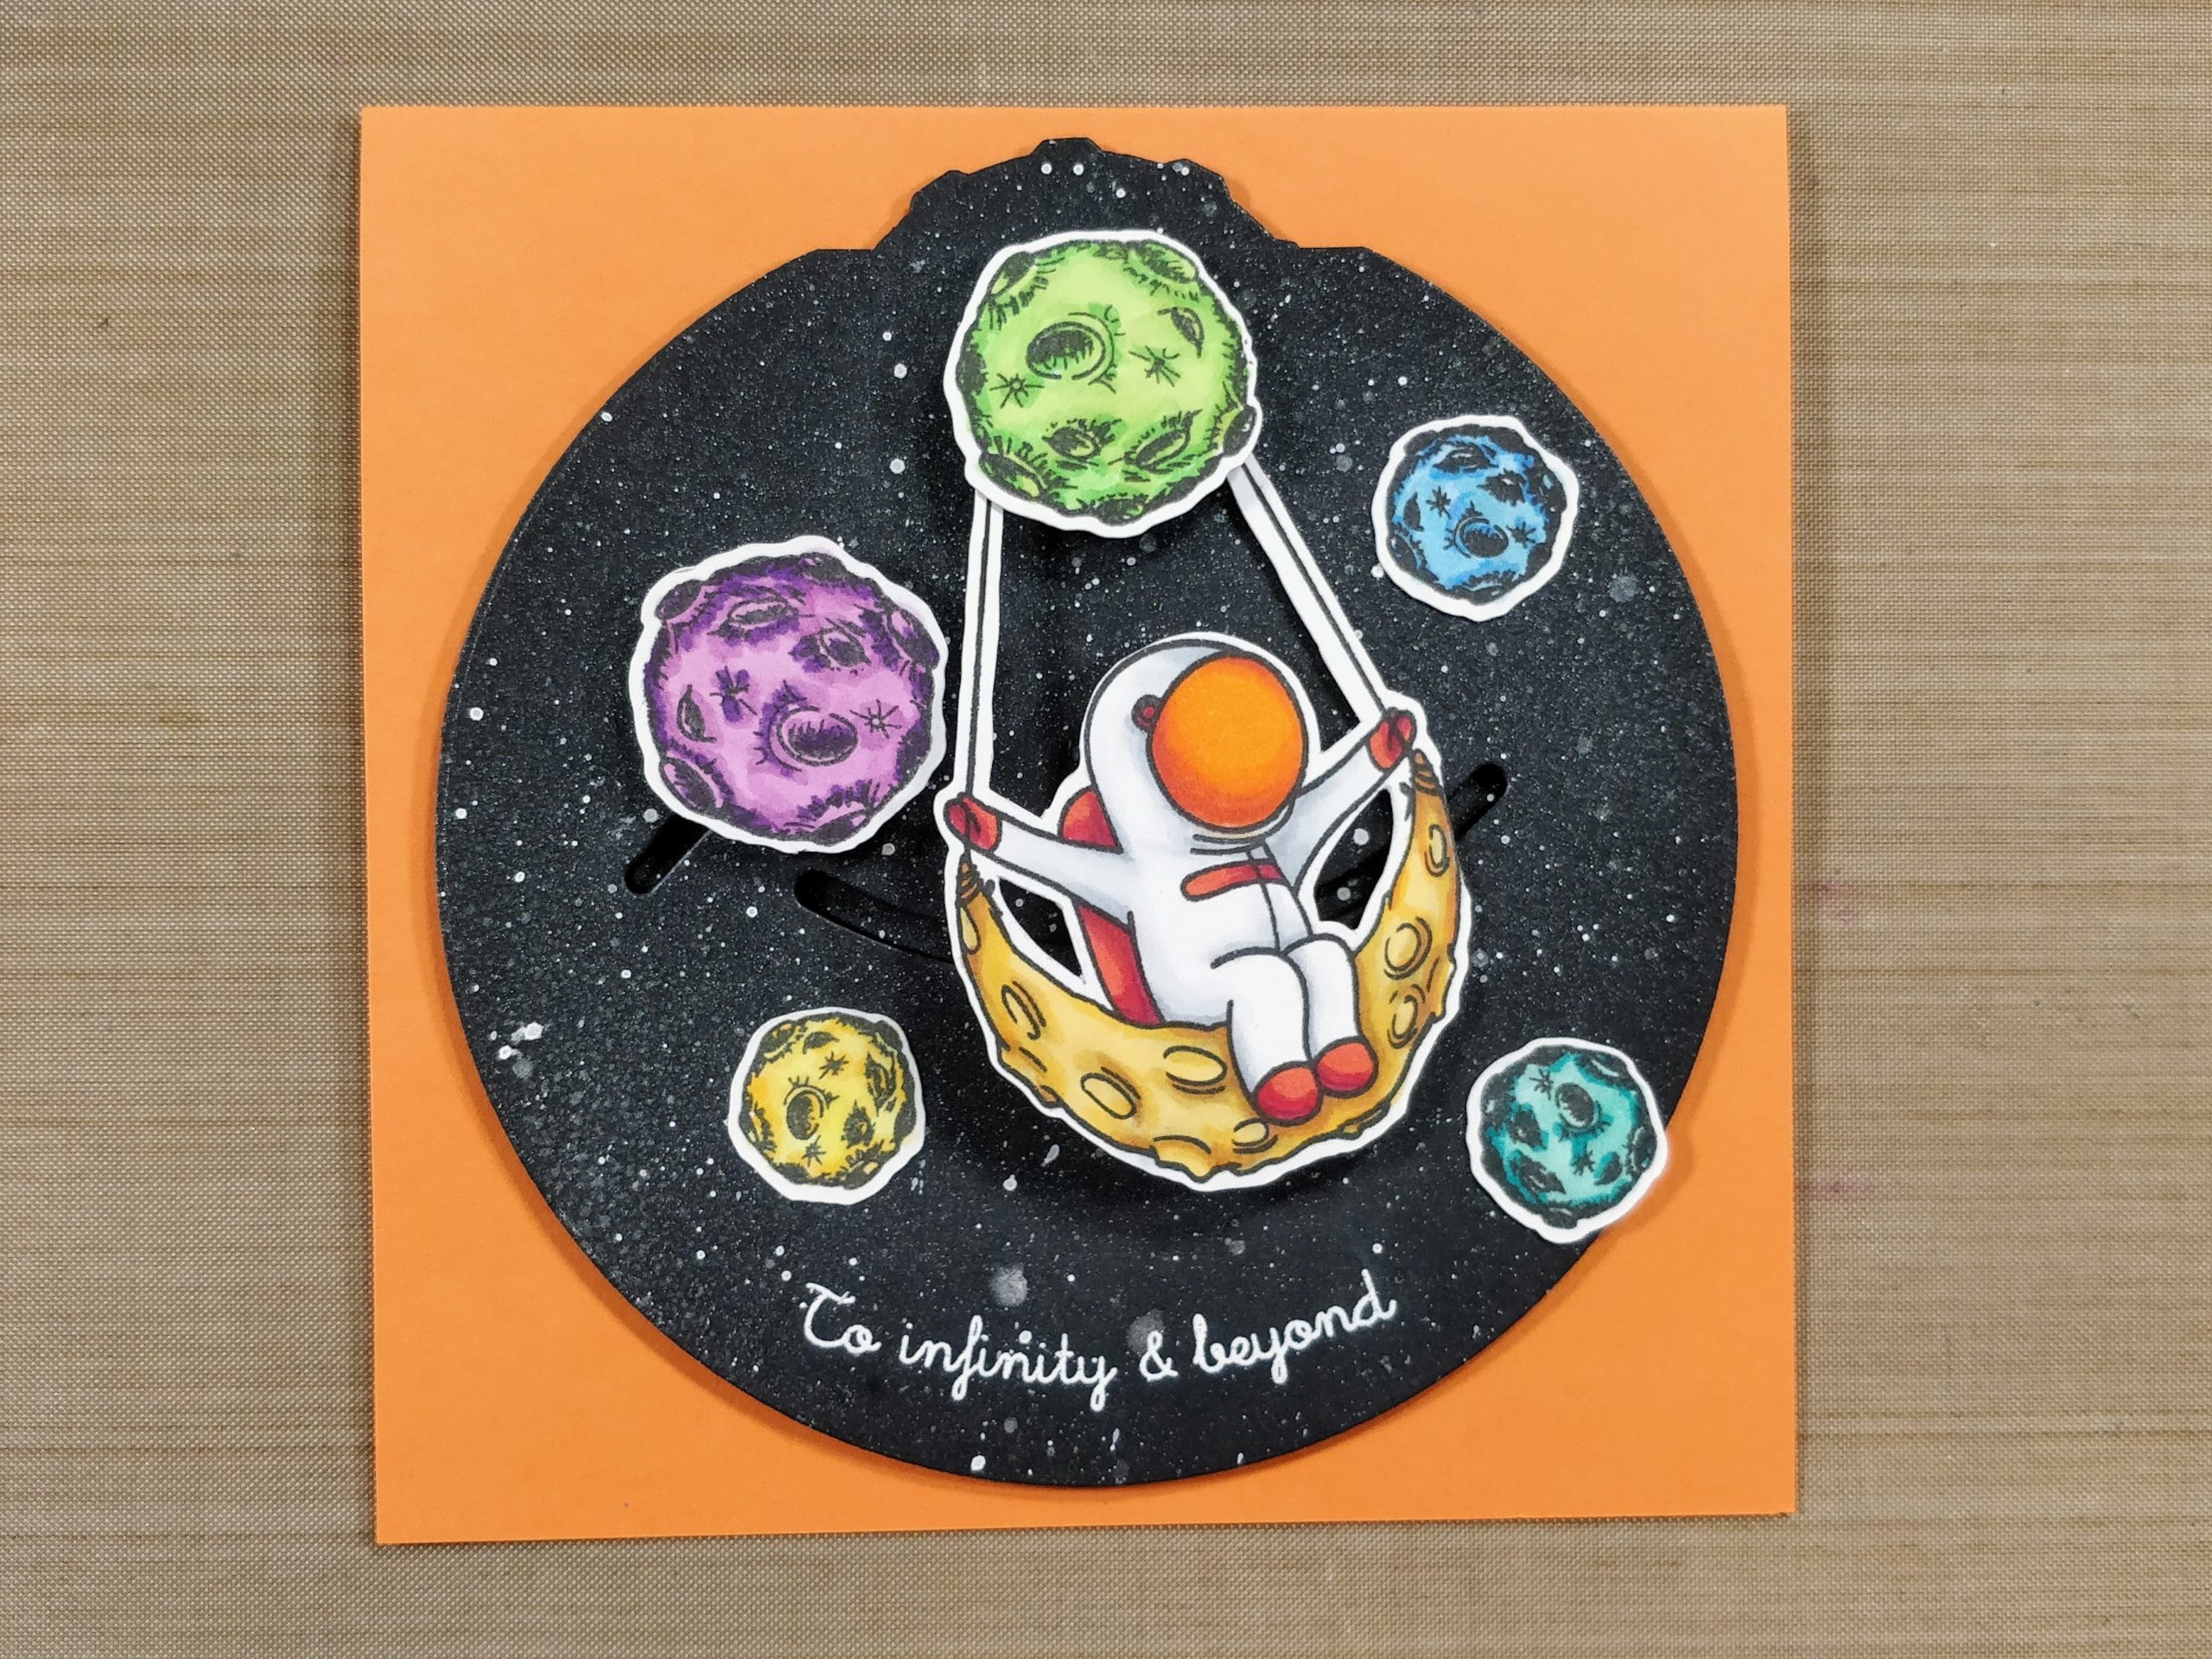
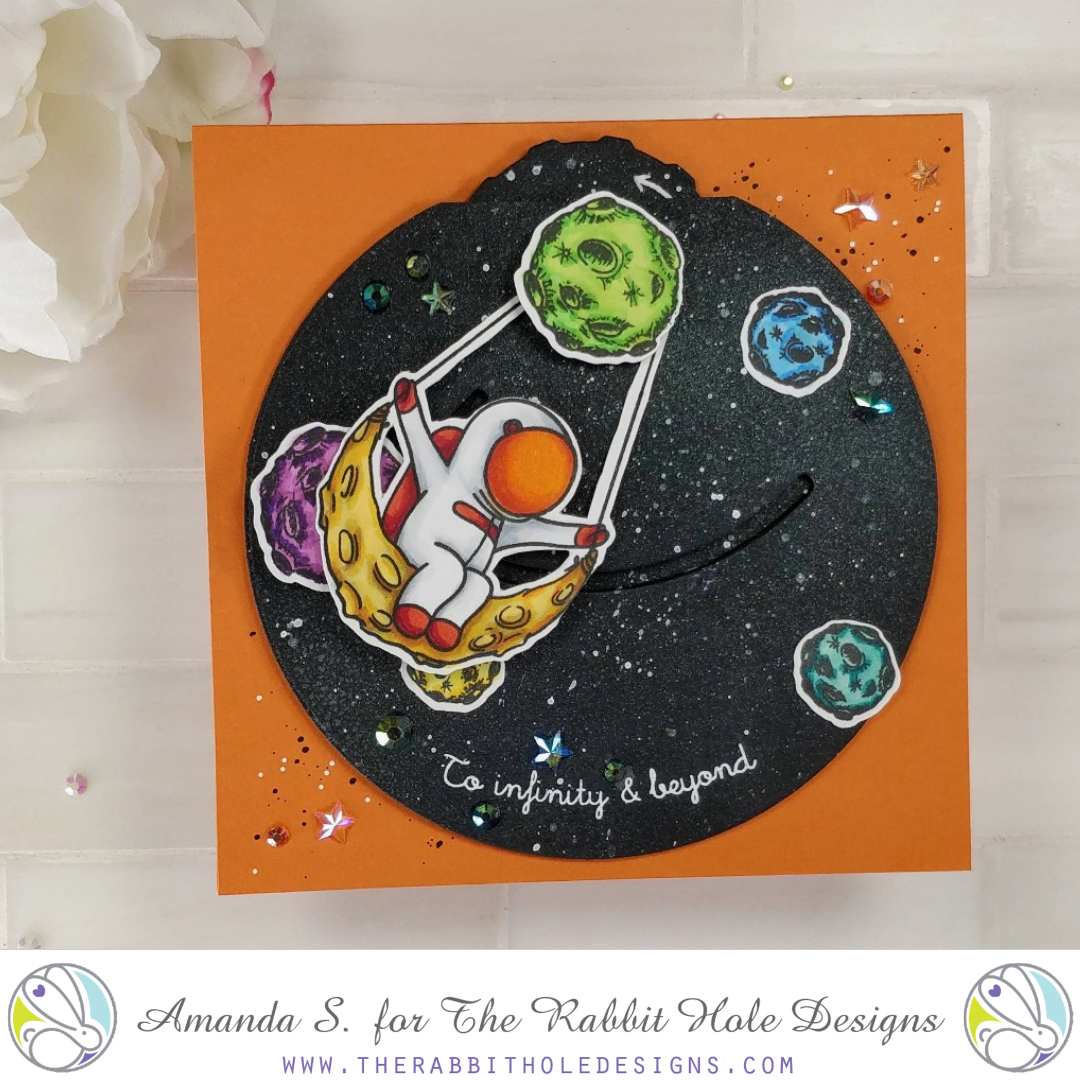
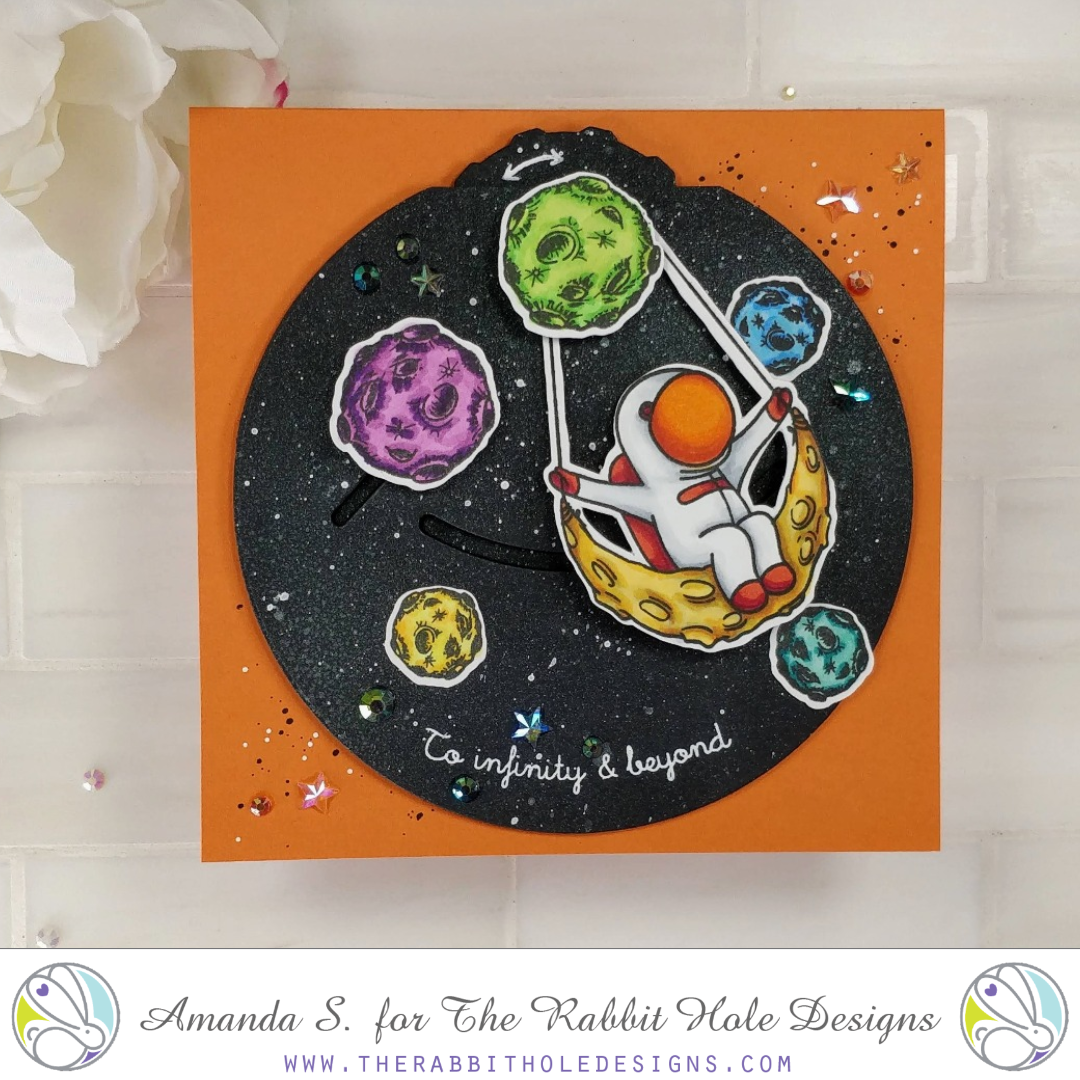
Swinging on the Moon - Double Dial Card

Swinging on the Moon Double Dial Card

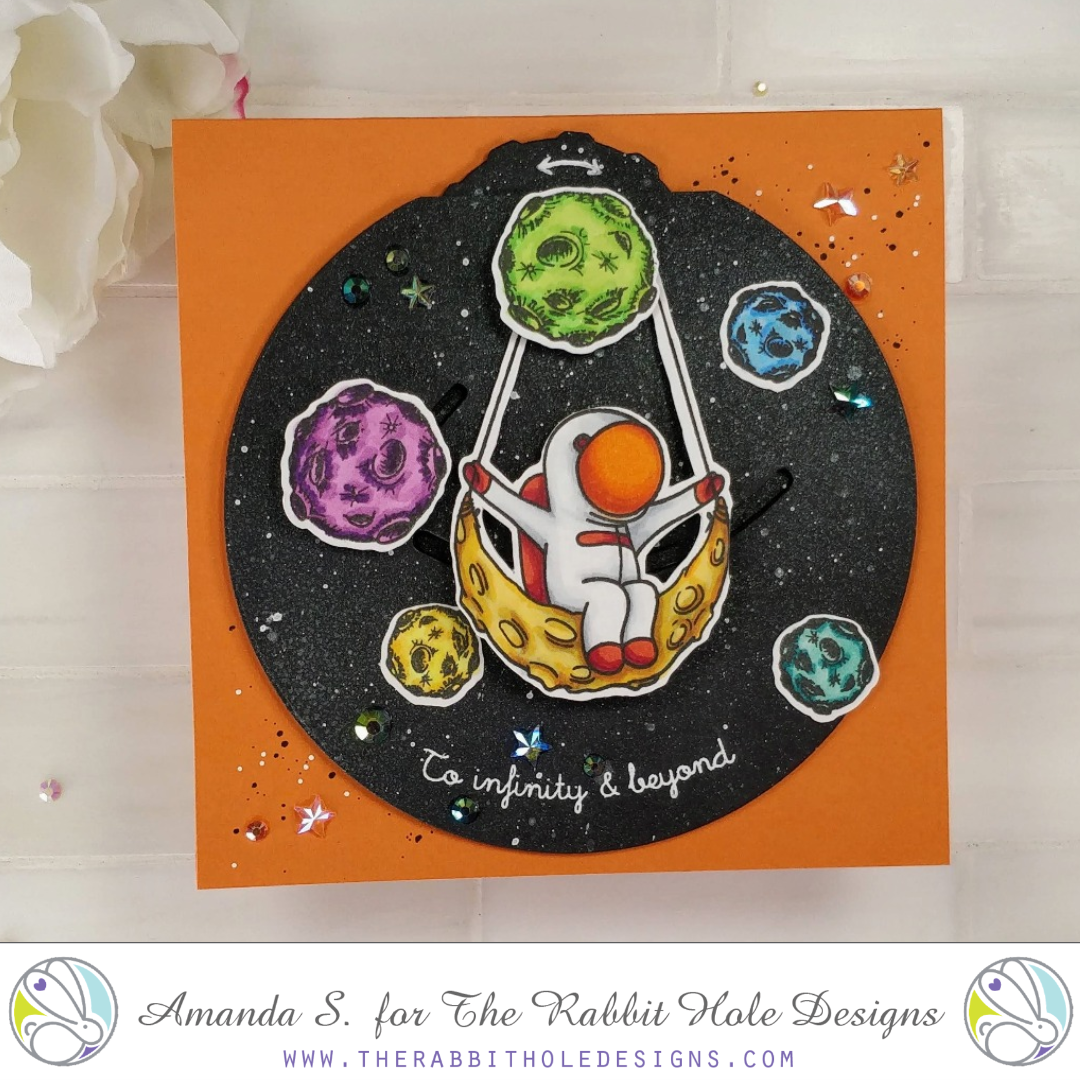
Hey crafty friend, Amanda from Pear Blossom Press here again. I've got an awesome new interactive card for you today! I paired up images from Space - Infinity & Beyond, and Space - Miss You, along with a neat double dial die set, to create a fun swing card. Check it out in action...


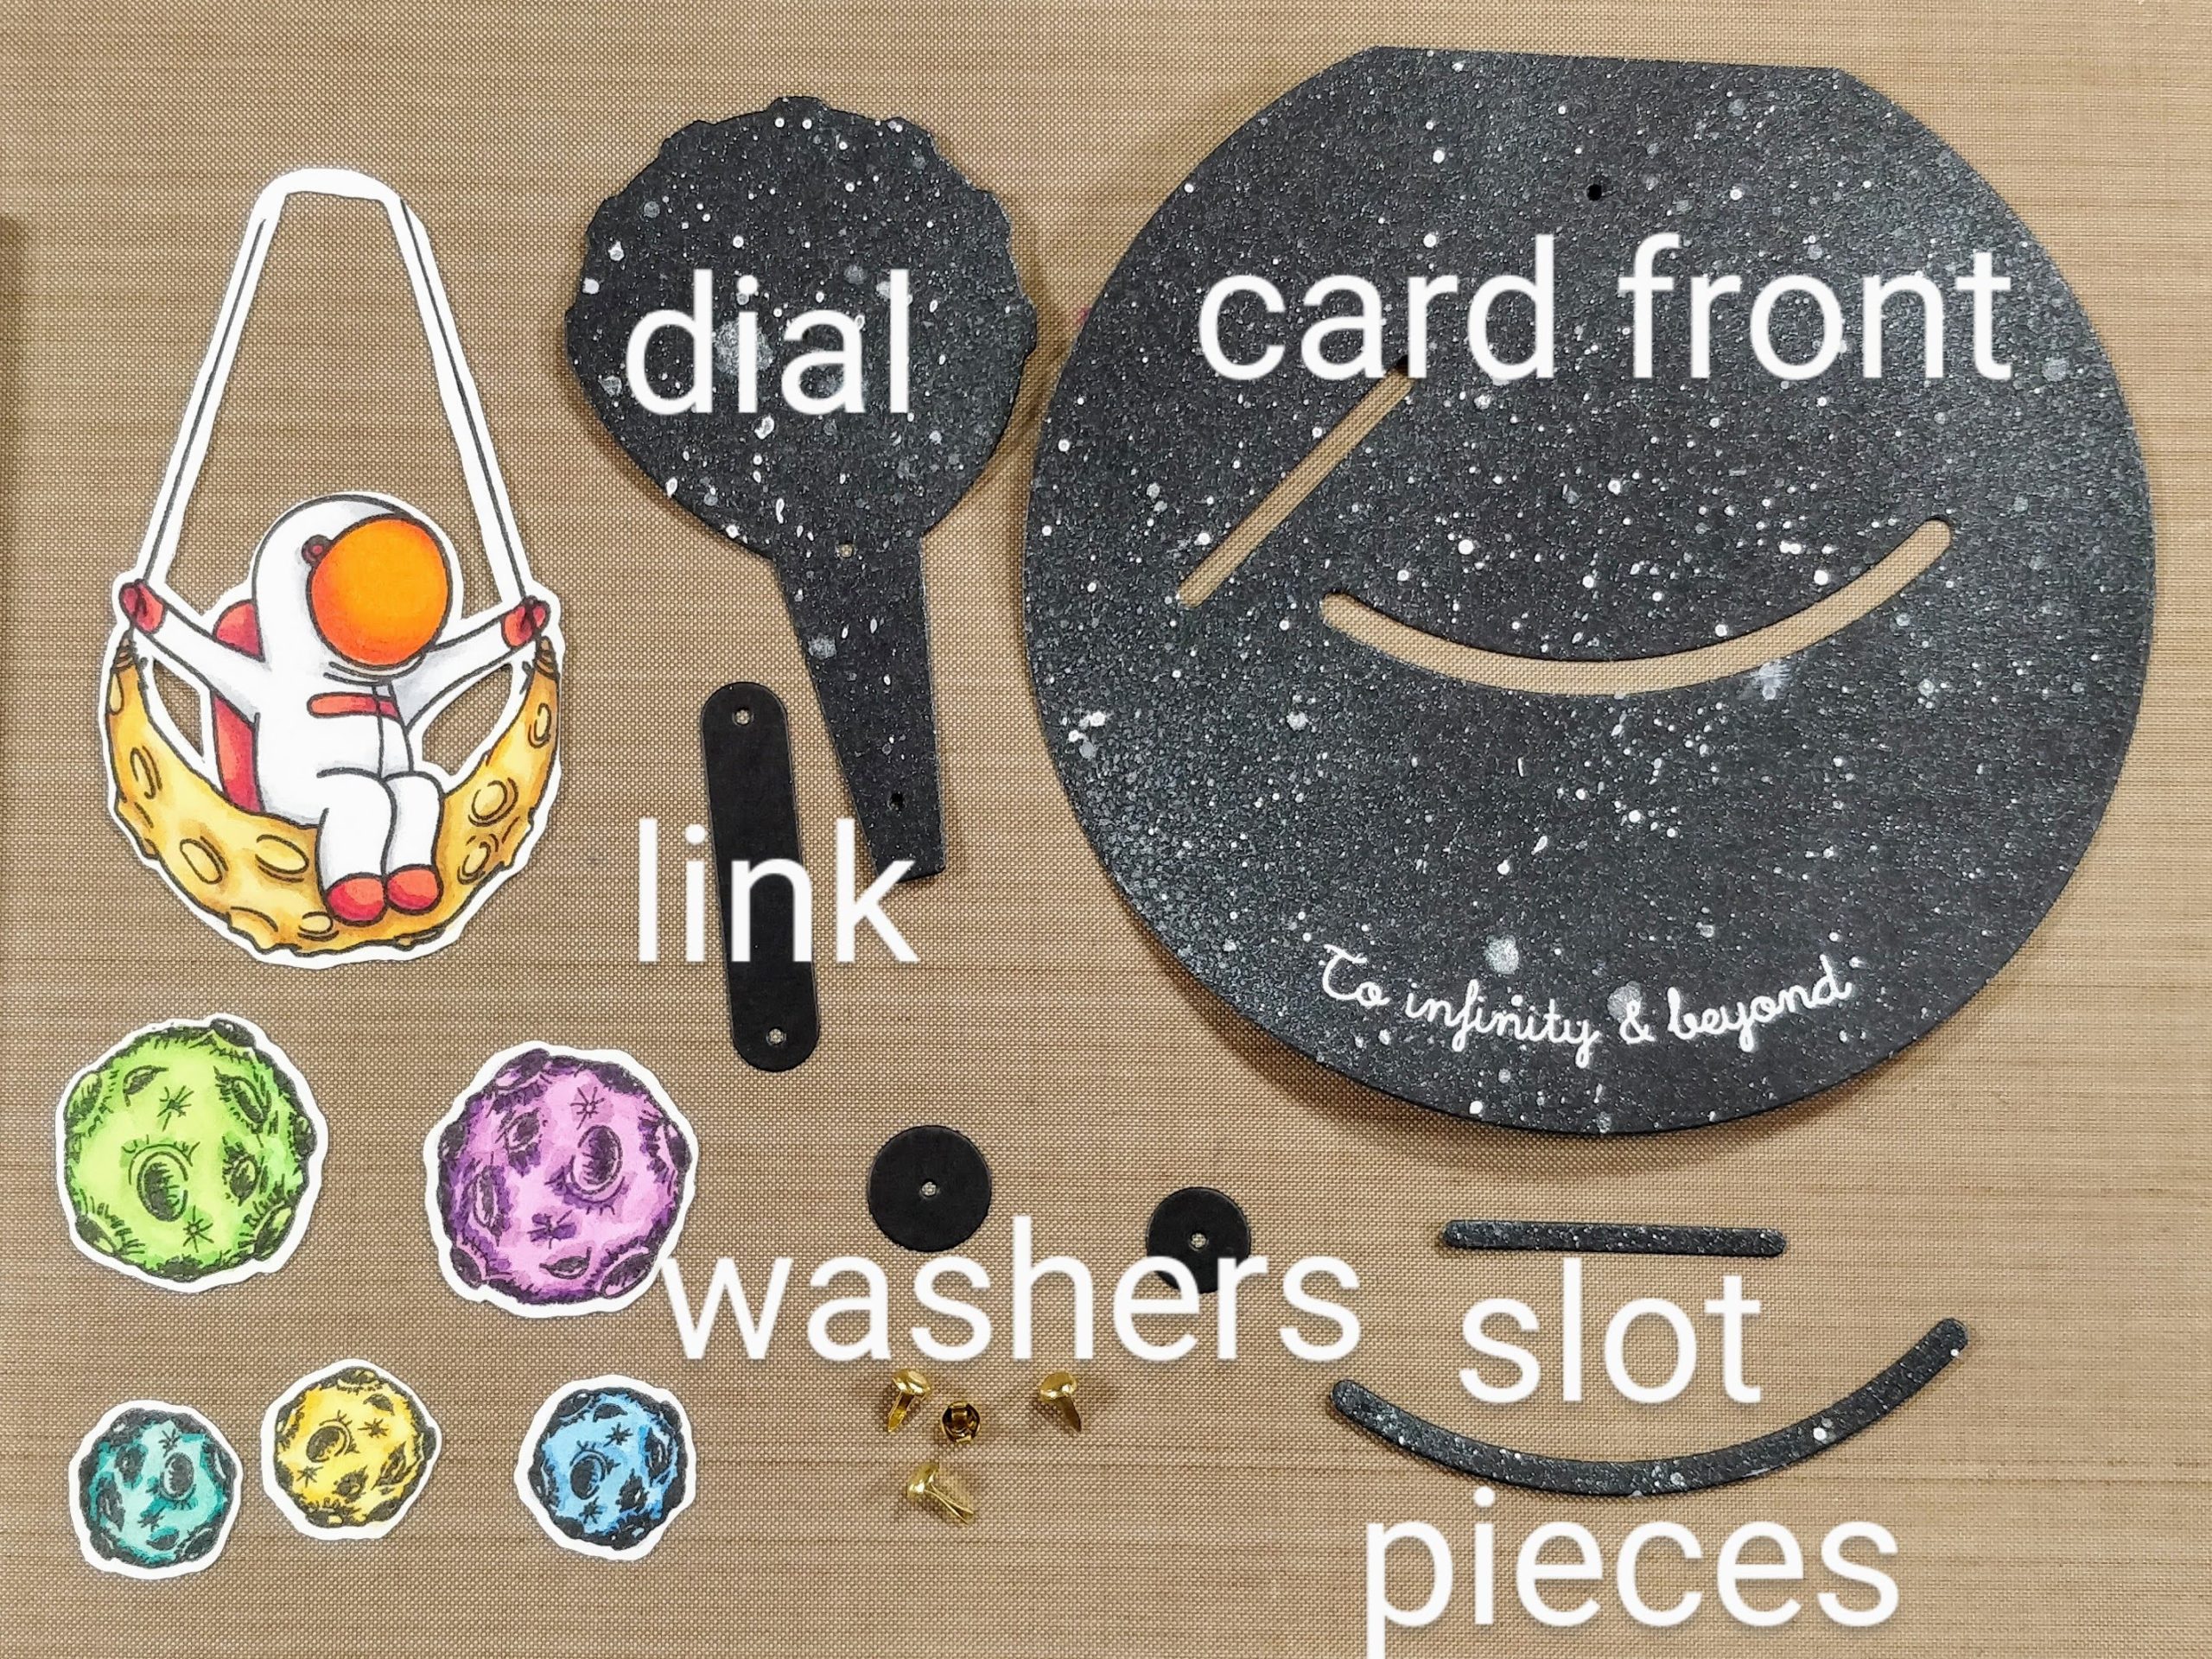
To prep, I stamped my images and Copic colored them. I extended the arms of the astronaut's swing and connected them at the top with a black pen. Then, I cut out all of the images with my ScanNCut. To create the galaxy background, I borrowed a trick from my friend Cassie, and just splattered white paint and shimmer mist onto black cardstock. It's fast and easy. I cut out a 5" circle and trimmed the top off to create the card front. I used the die set to cut the slots from the circle, as well as the dial, link and washers. It may seem complicated, but I promise, this was really easy to put together. Here are step-by-step photo directions to assemble the pieces...

Swinging on the Moon Double Dial Card 
Parts for Swinging on the Moon Double Dial Card.

Swinging on the Moon Double Dial Card 
1. Attach link to dial with brad.

Swinging on the Moon Double Dial Card 
2. Attach dial to card front (narrow tweezers help create extra space when opening brad).

Swinging on the Moon Double Dial Card 
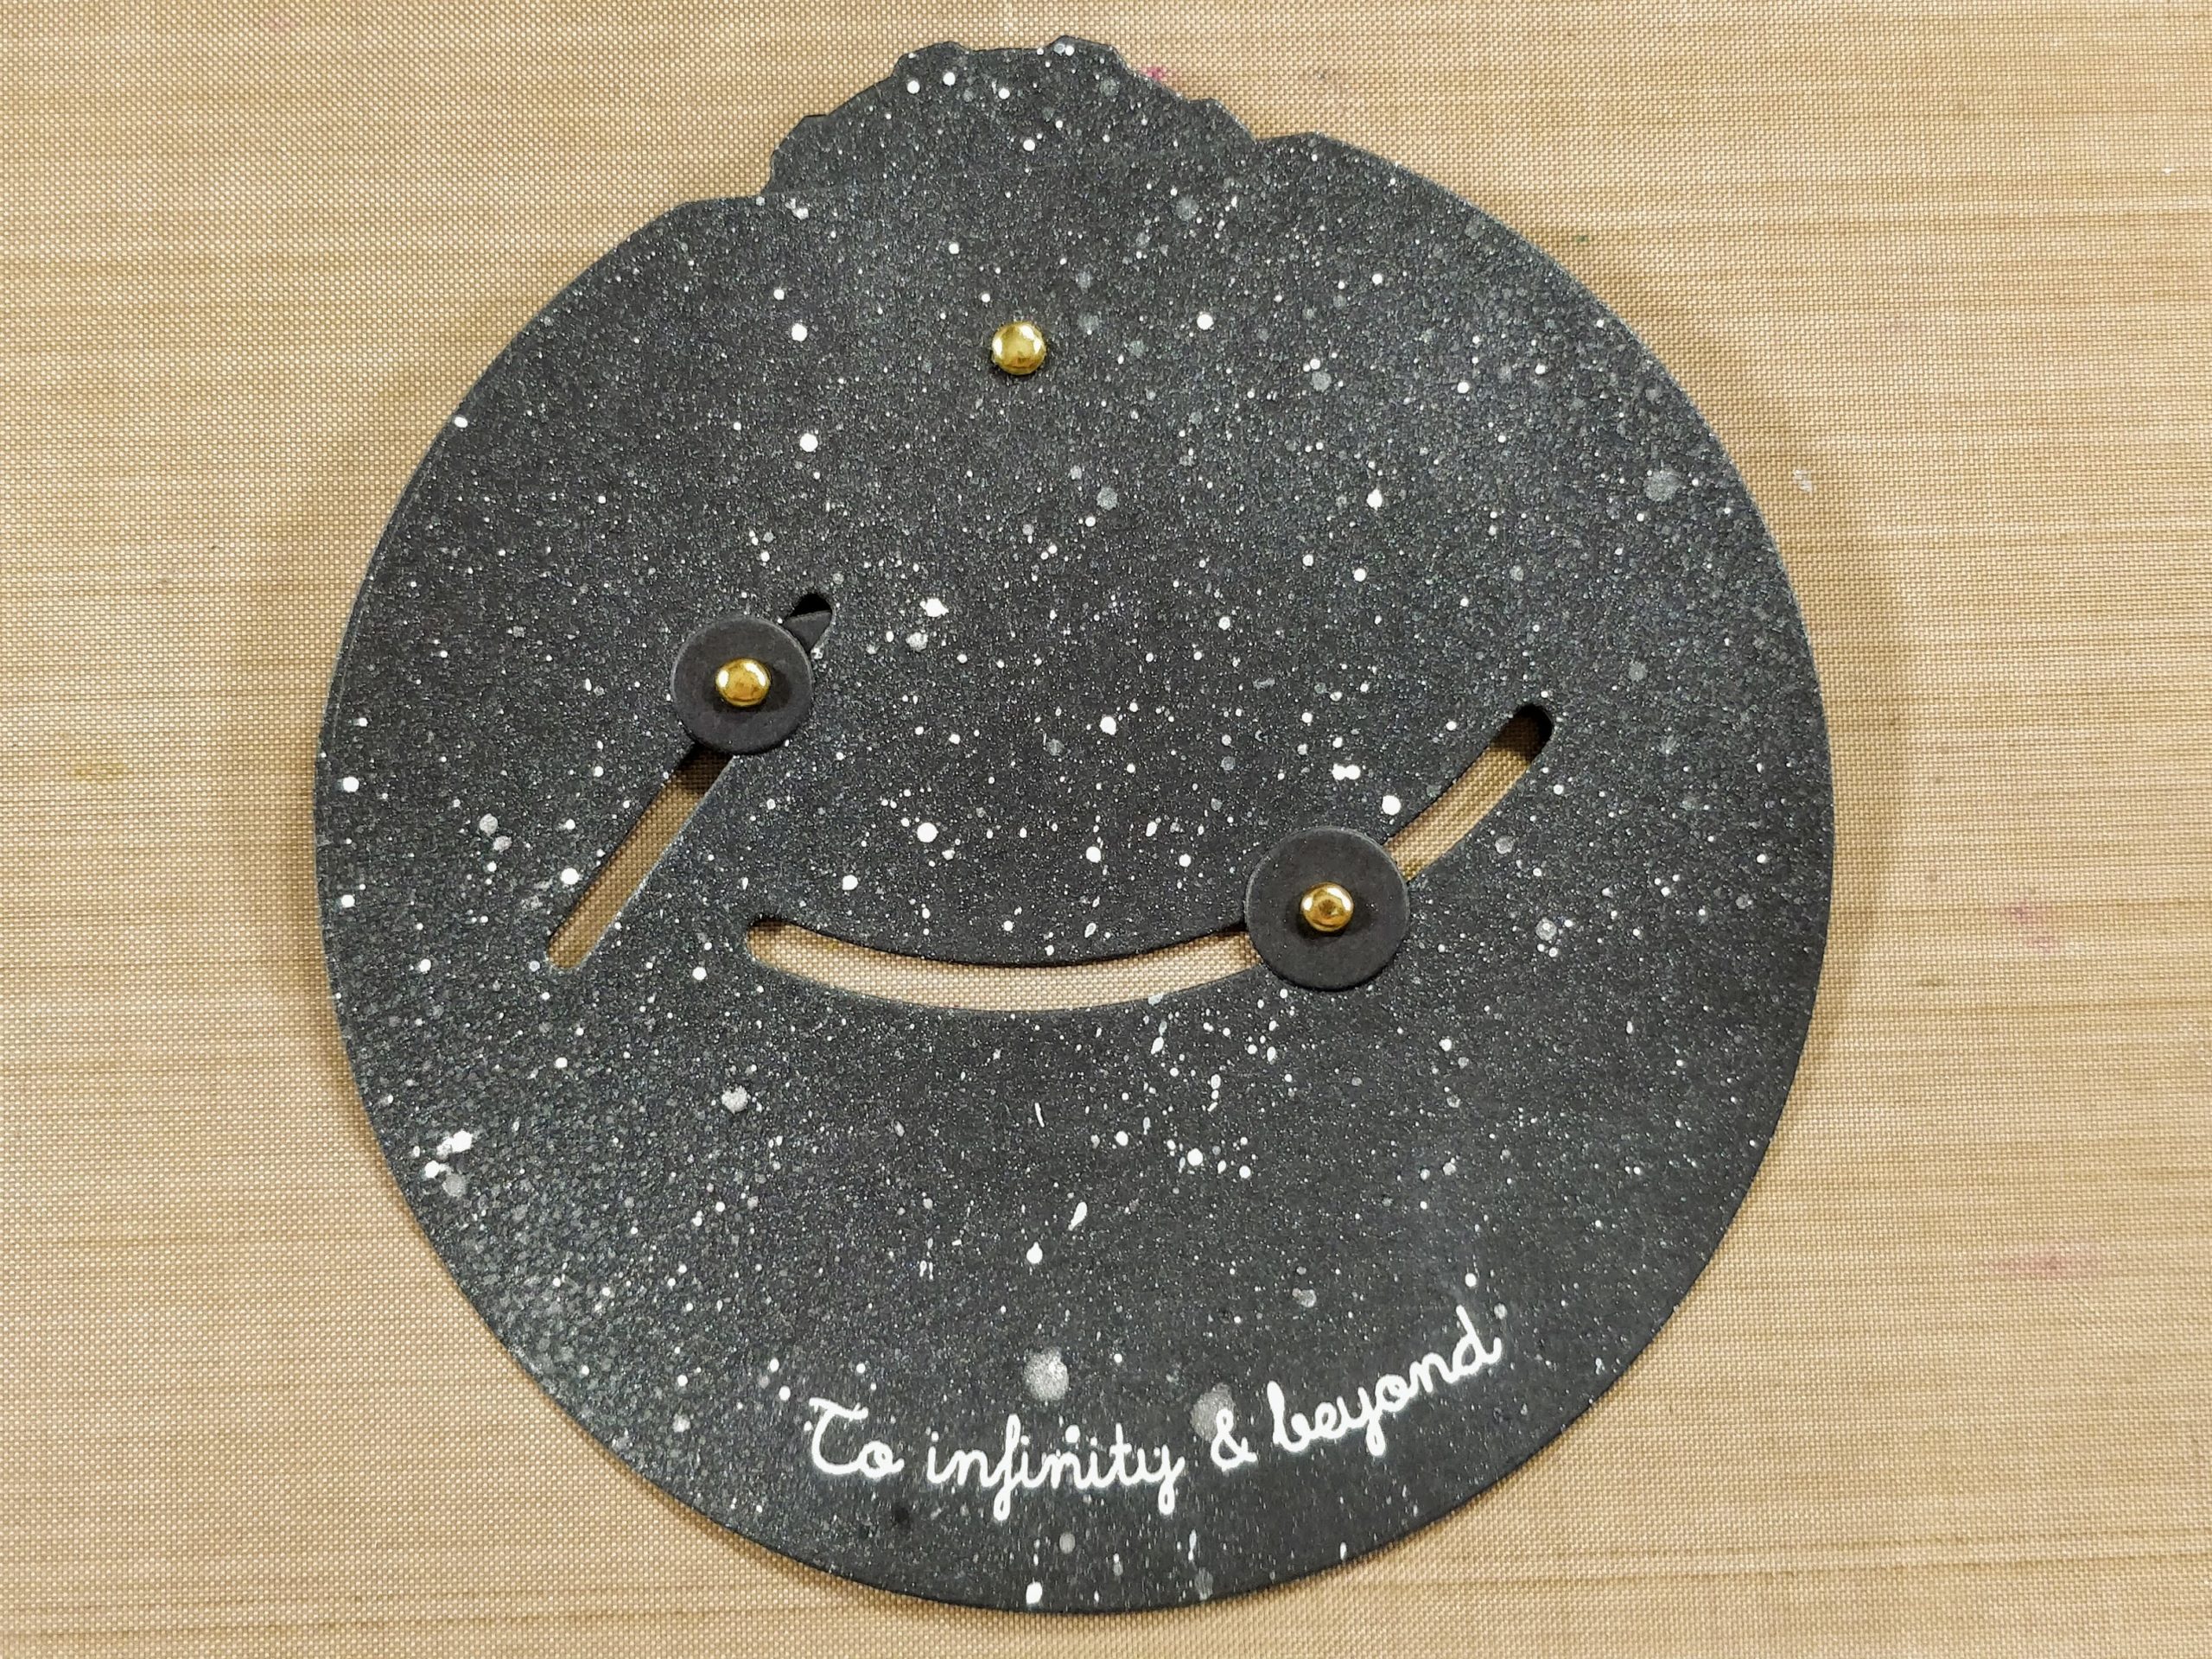
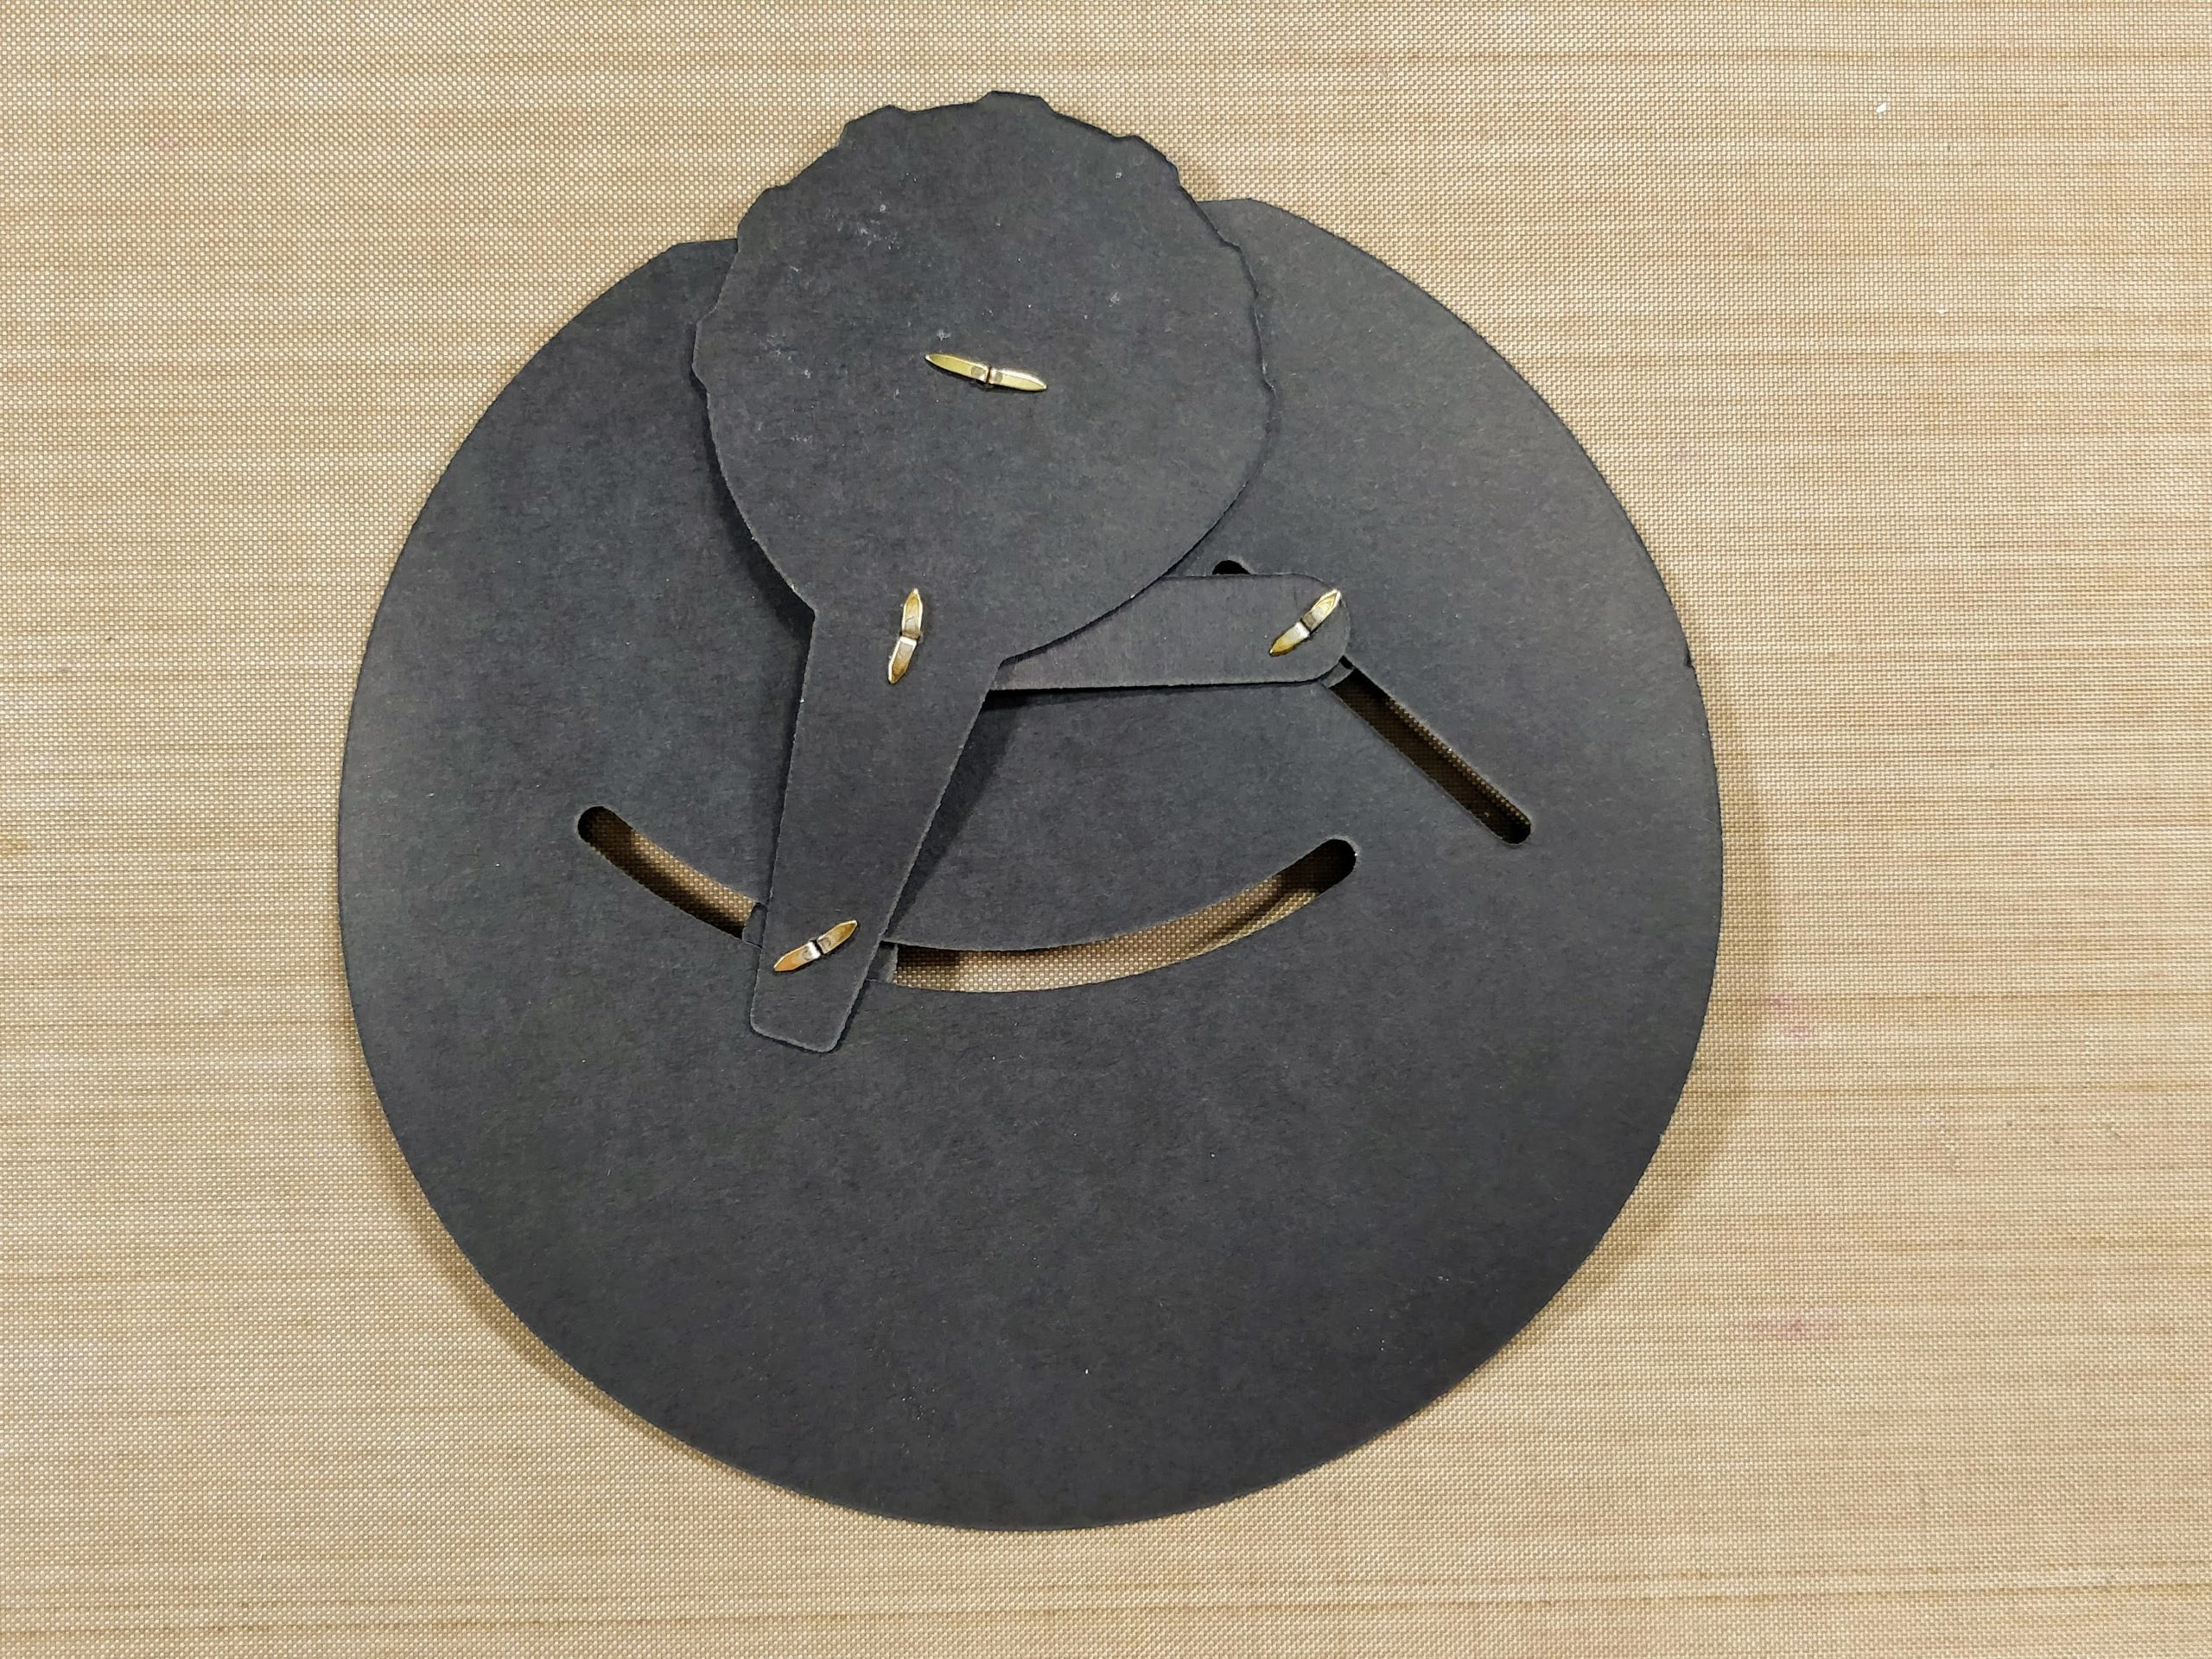
3. Use brads and washers to attach link and dial arm to card front (view from front).

Swinging on the Moon Double Dial Card 
(View from back.)

Swinging on the Moon Double Dial Card 
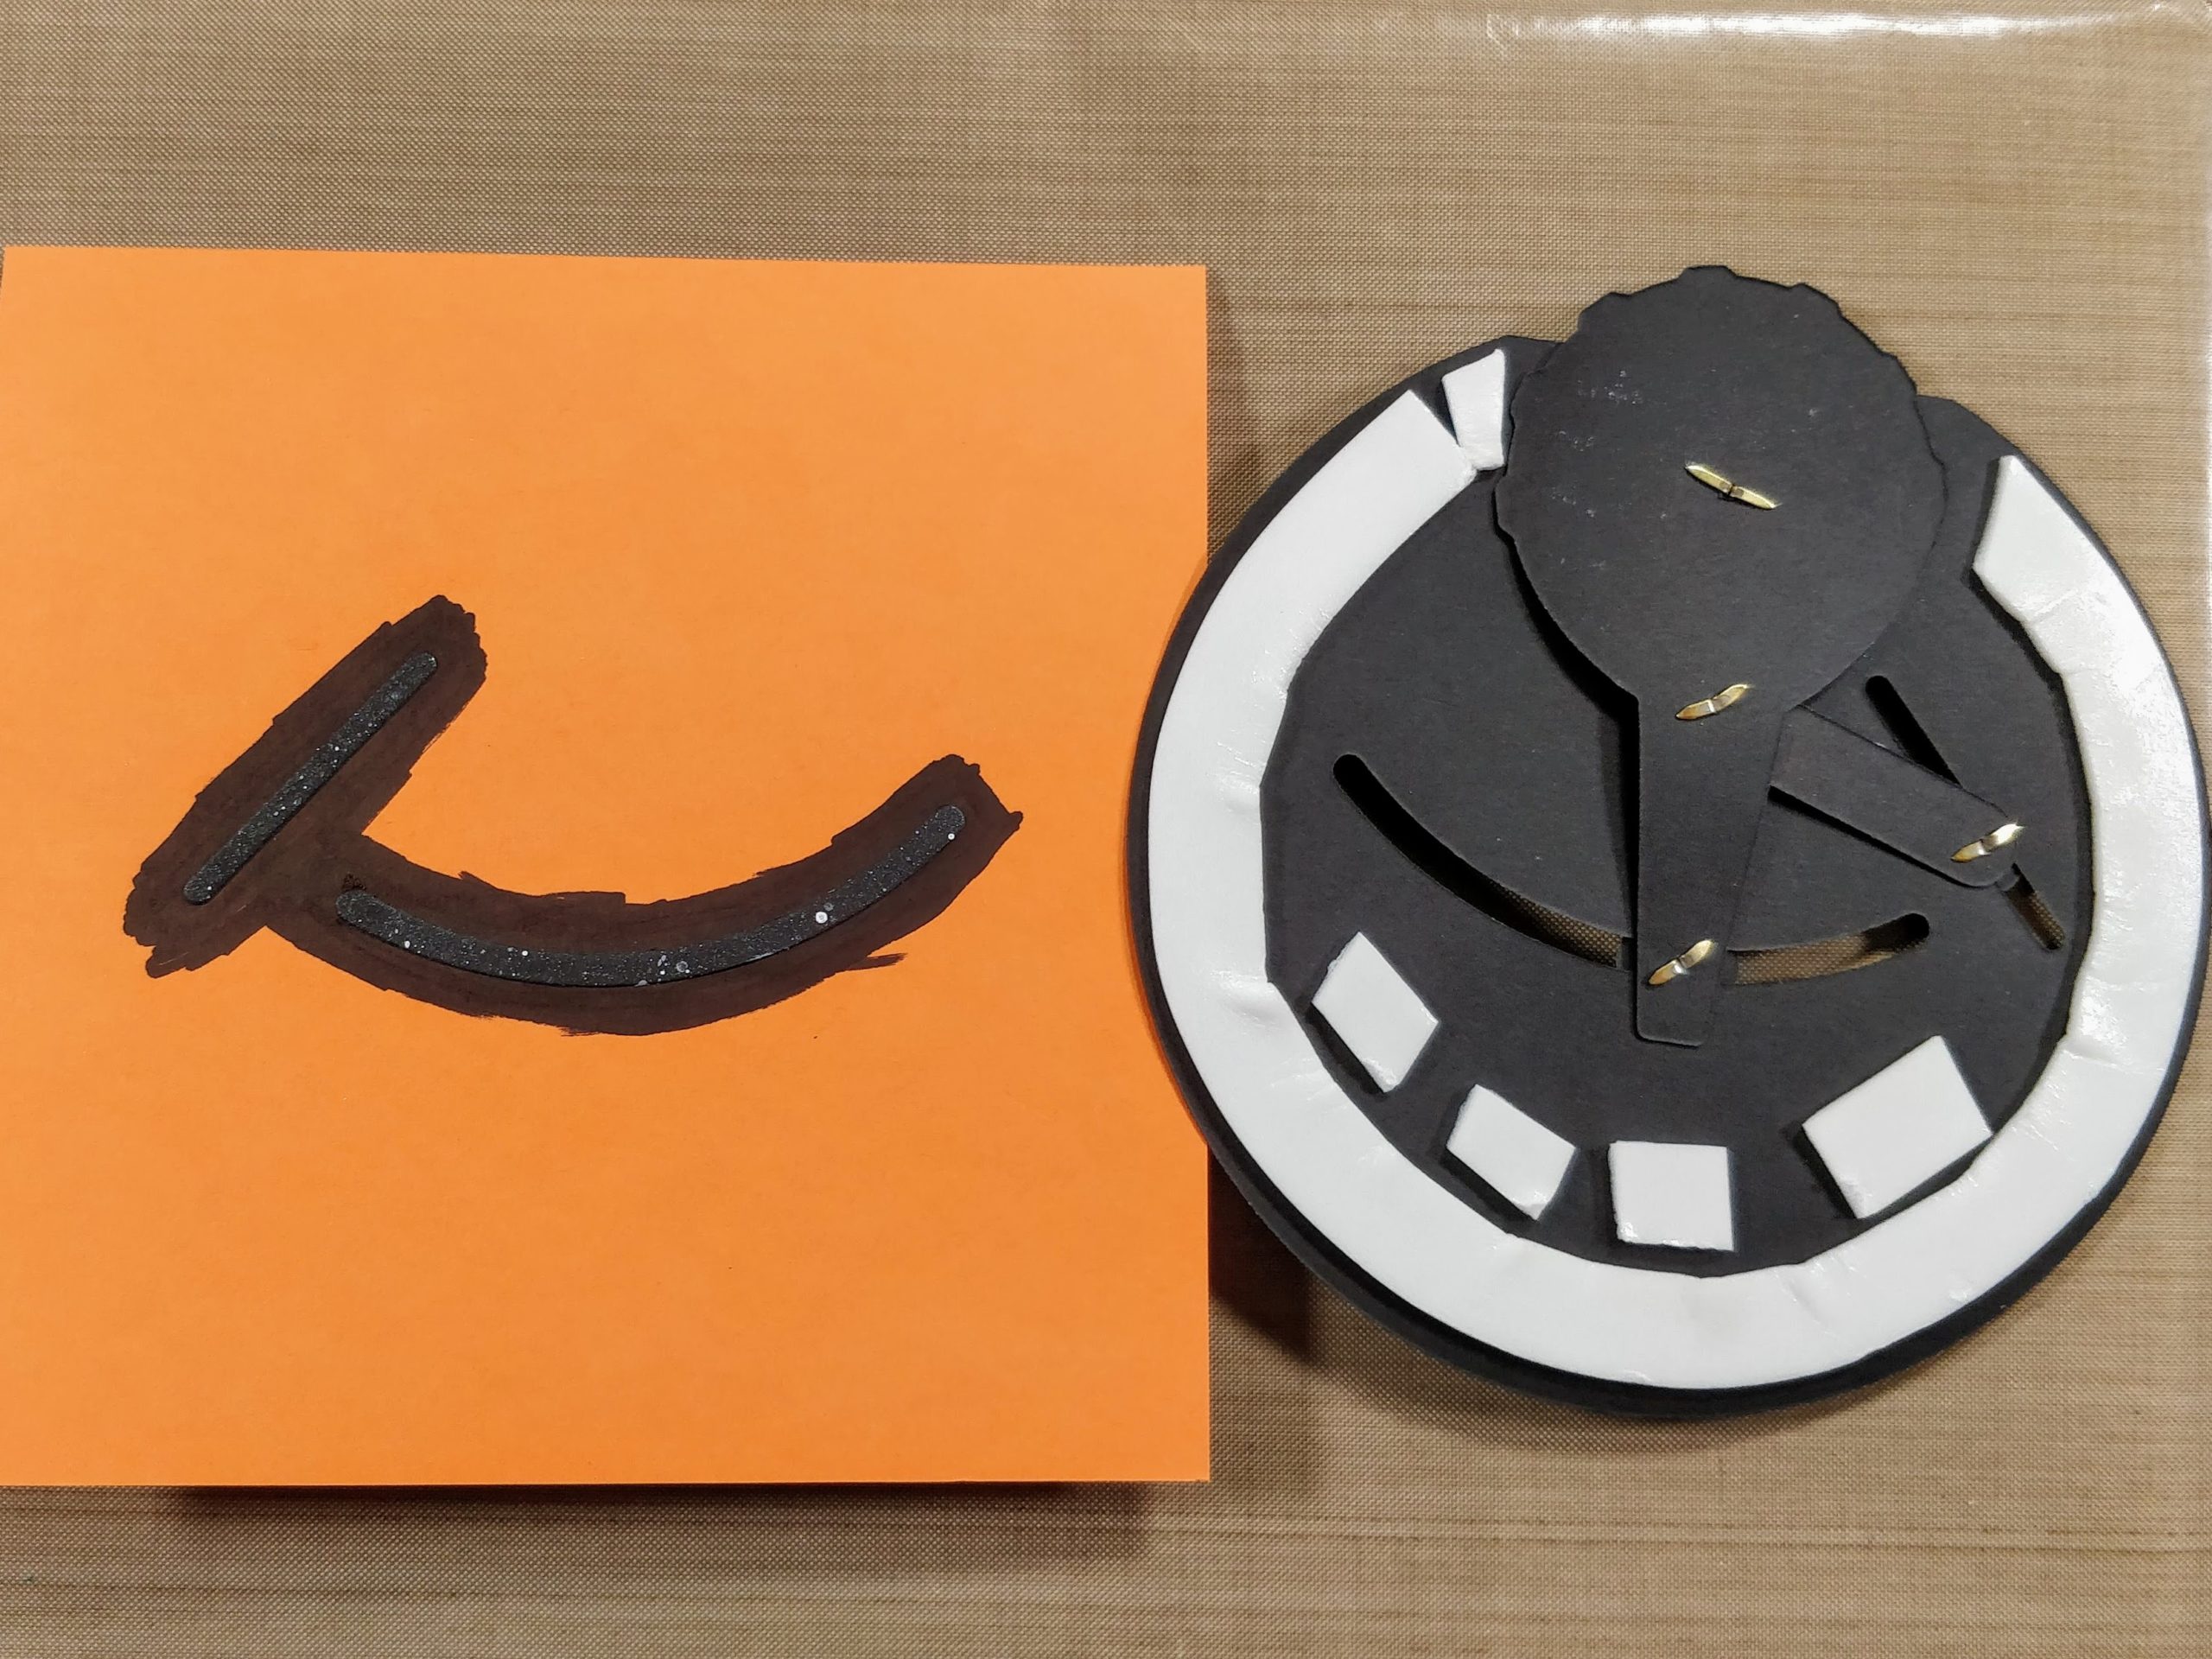
4. Attach black slot pieces to card base and use marker to darken area around them. Apply foam tape to back of card front, away from moving parts.

Swinging on the Moon Double Dial Card 
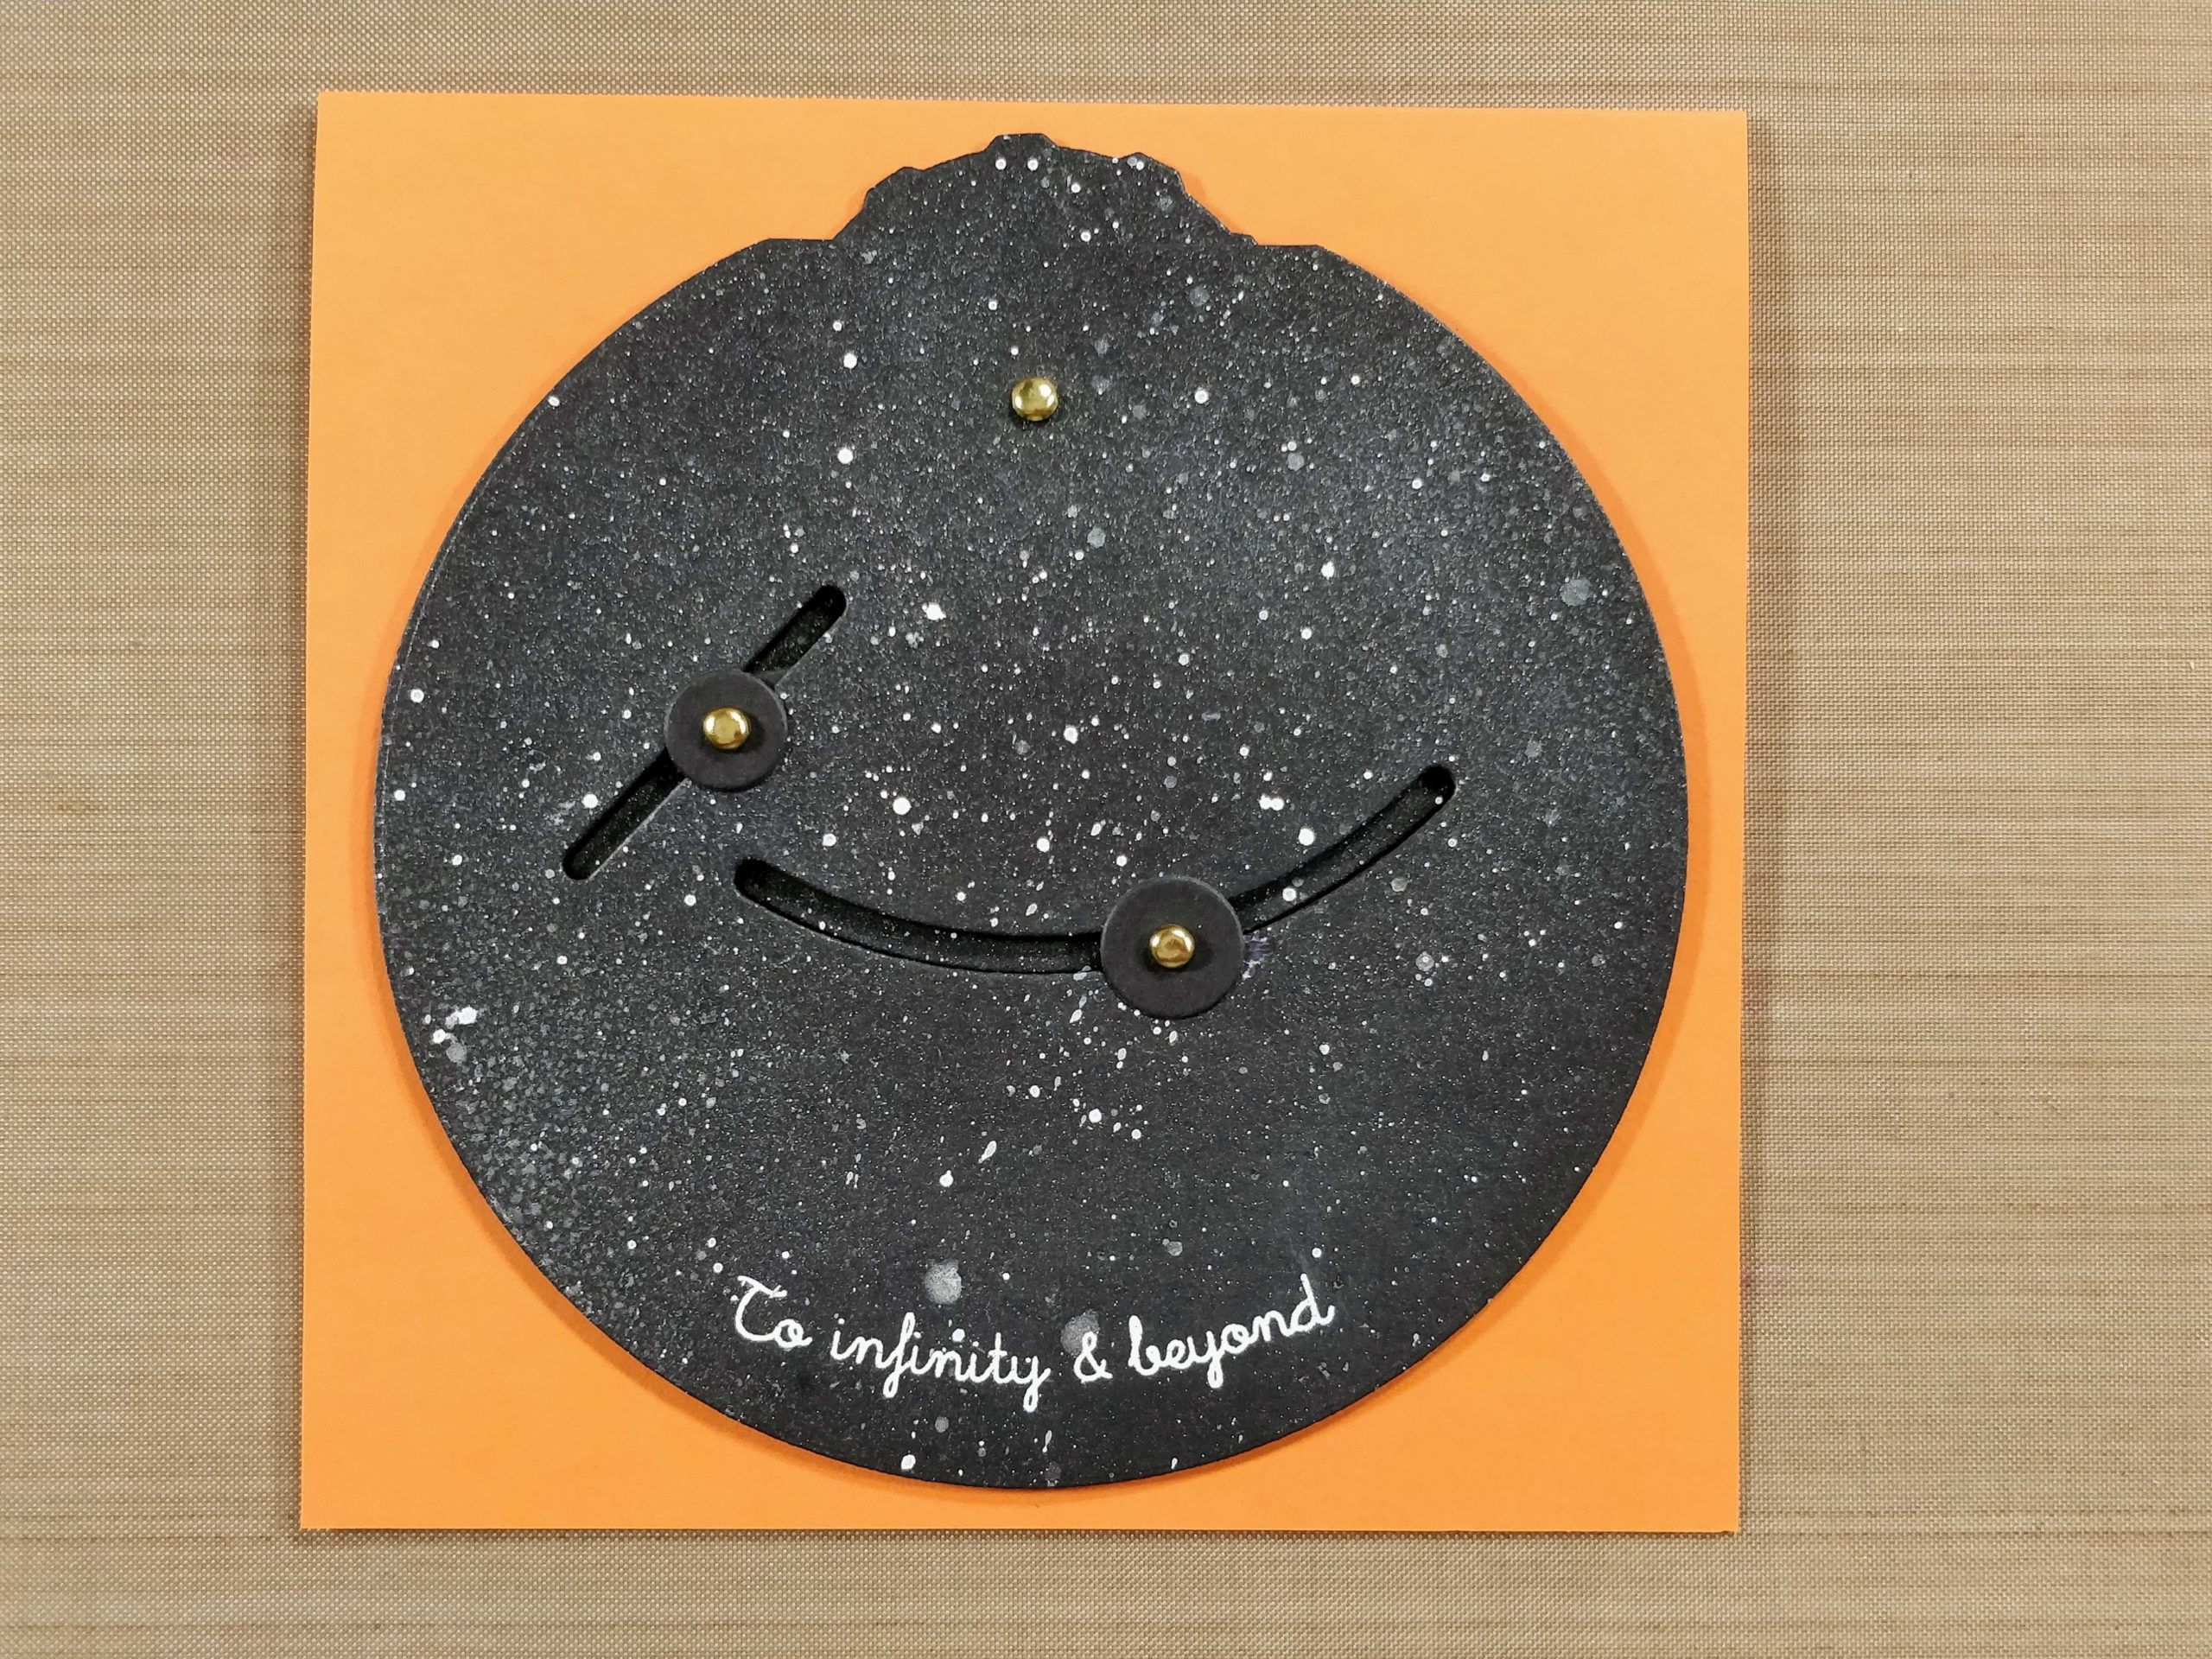
5. Attach card front to card base.

Swinging on the Moon Double Dial Card 
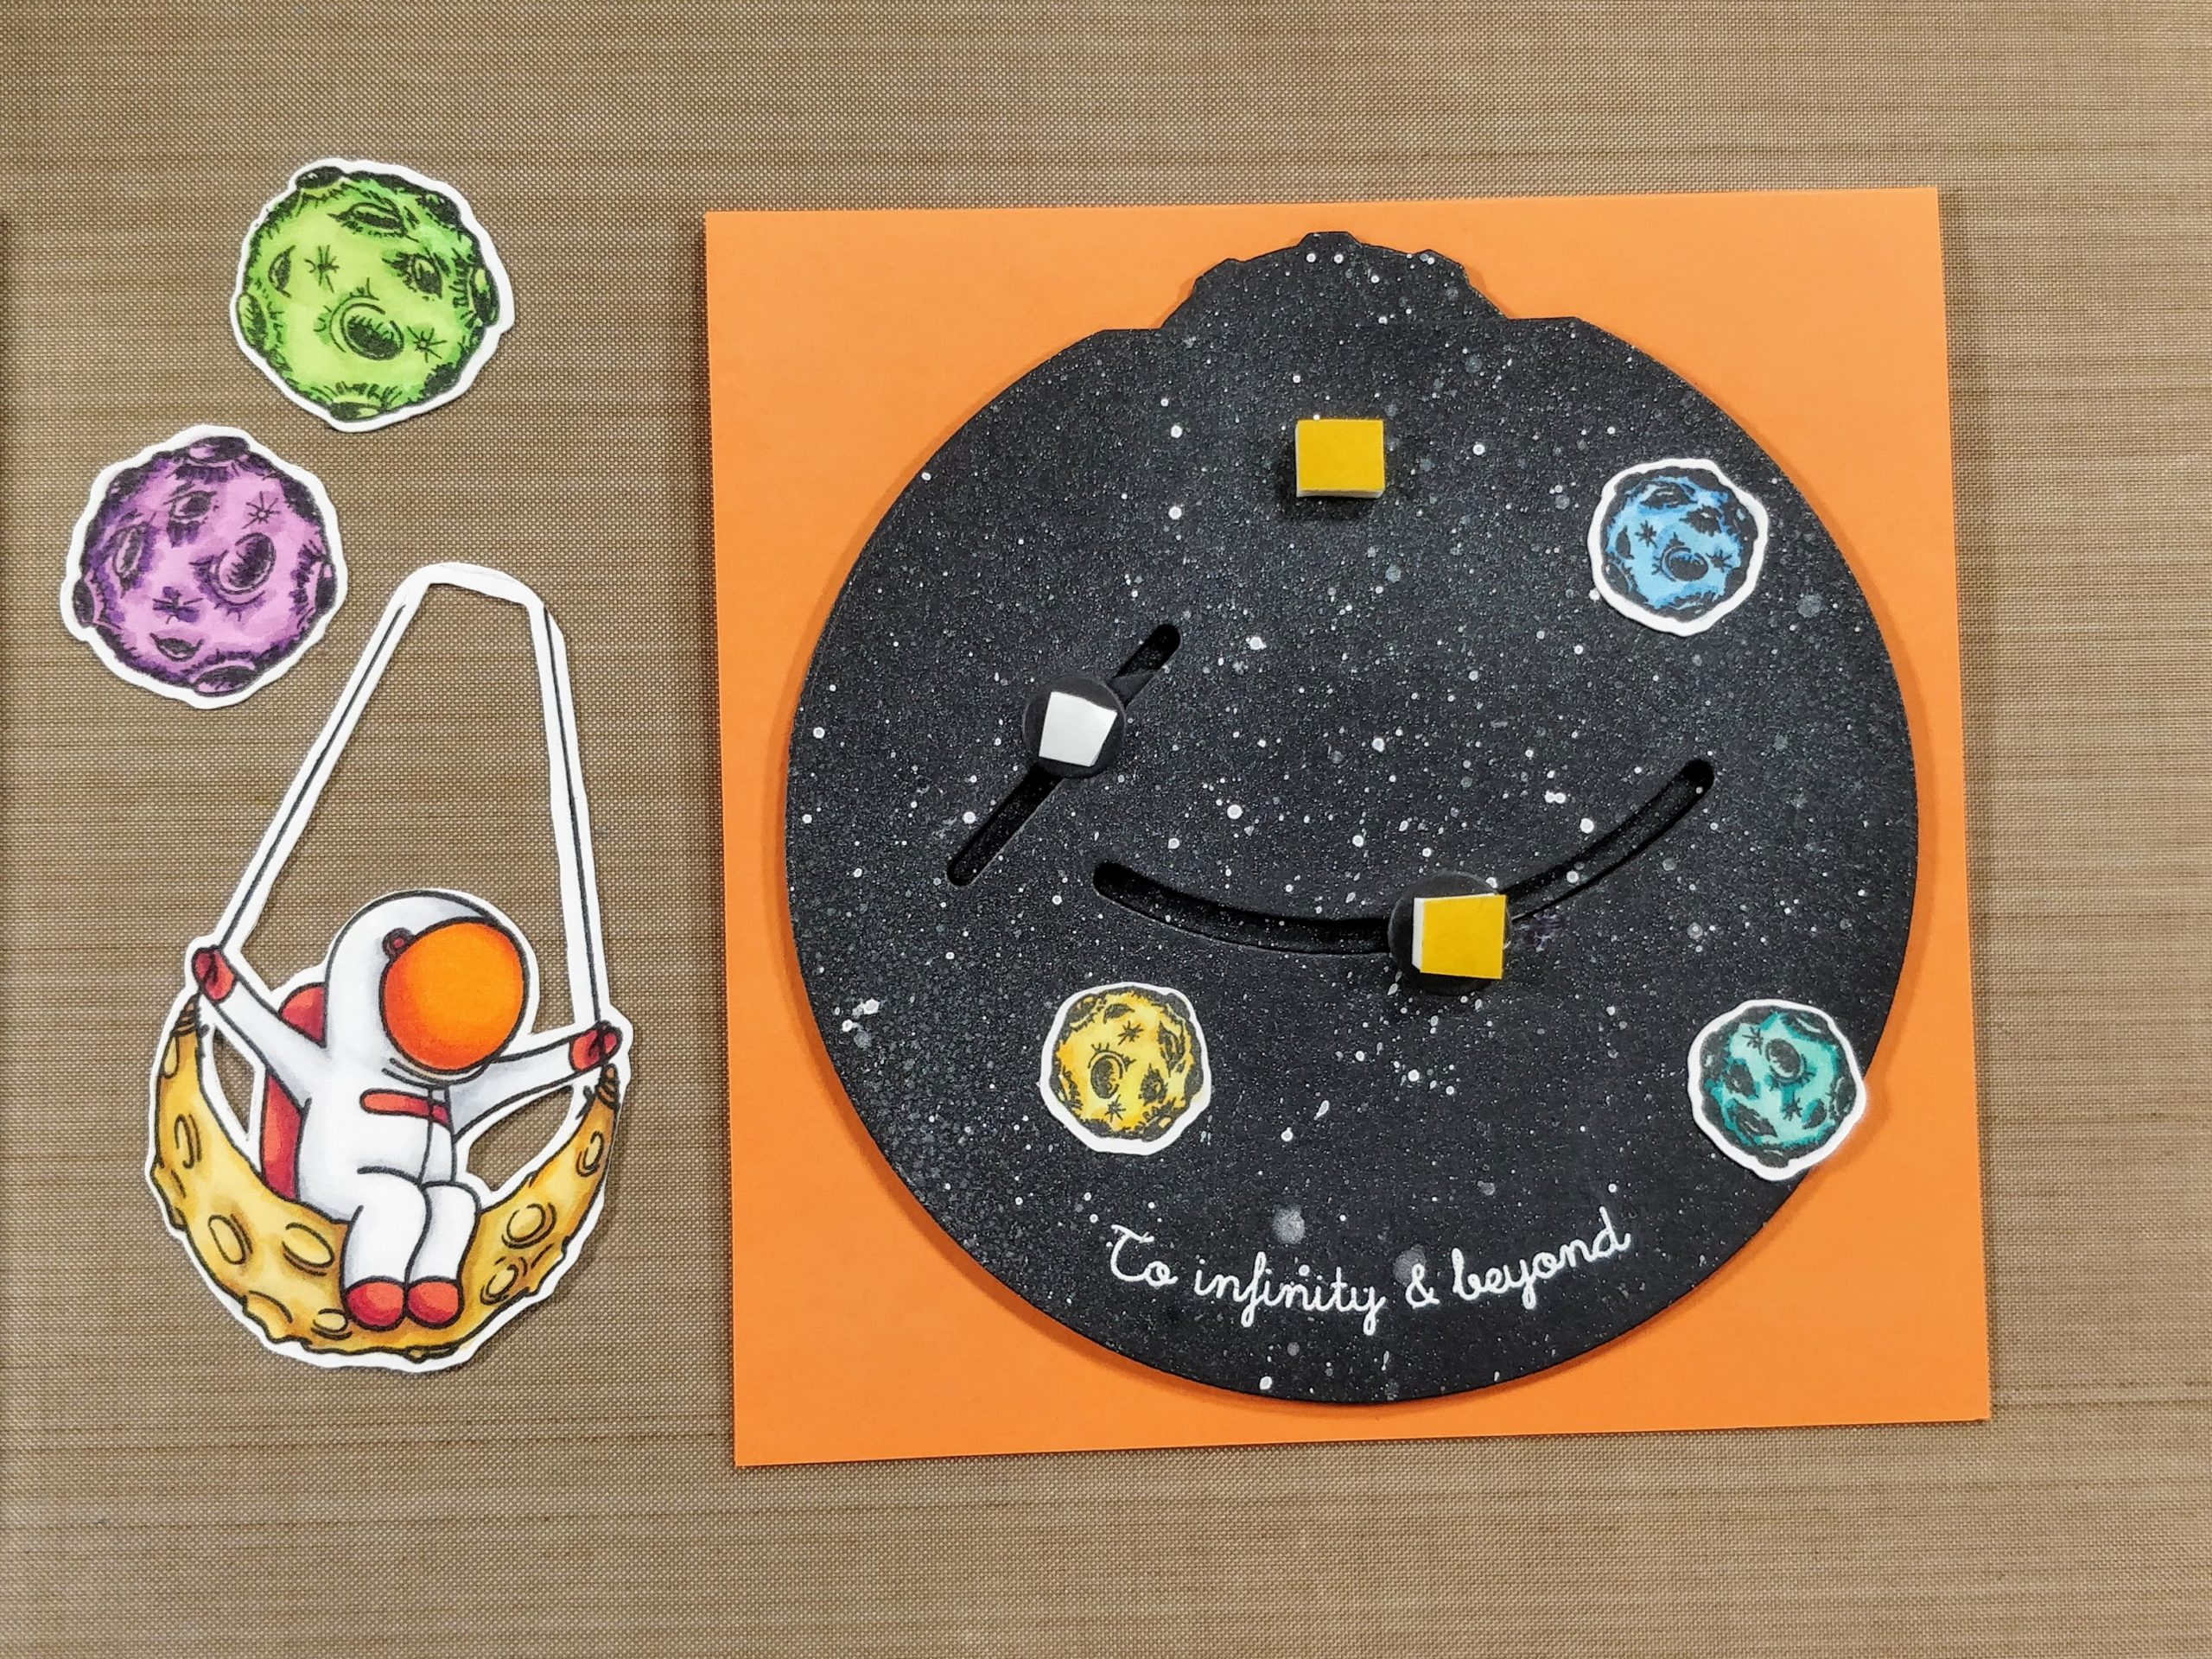
6. Apply double thick foam tape (yellow) on dial brads. Apply regular foam tape (white) on link brad. Glue small moons flat to panel.

Swinging on the Moon Double Dial Card 
7. Attach swing to foam on dial arm. Attach purple moon to foam on link.

Swinging on the Moon Double Dial Card 
8. Attach green moon to top brad.

To finish the card, I added a few dots to the top right, and bottom left corners of the card base with black and white pens. I glued a bunch of round and star shaped gems all over too. And a hand drawn arrow on the dial, lets the recipient know how to operate the mechanism. 

Swinging on the Moon Double Dial Card Swinging on the Moon Double Dial Card Swinging on the Moon Double Dial Card

Thanks for stopping by today. I'd love to know what you think of this one! You can find the sister article to this post on my blog. Head on over for links to the specific products I used. If you'd like to see more cards using these stamp sets, you might like this article, and this one. I'll be back soon with more fun cards to share.

For more inspiration with your The Rabbit Hole Designs Creations, be sure to follow along at these other locations:
The Rabbit Hole Designs BlogThe Rabbit Hole Designs InstagramThe Rabbit Hole Designs Facebook PageThe Rabbit Hole Designs PinterestThe Rabbit Hole Designs YouTube

One Layer Galaxy Card


Hey Everyone! Justin here, and I am so excited to be sharing a project using the new Space- Infinity and Beyond set! This release has a lot of tough competition, but I really think it is my favorite release to-date, and I am so over the moon (see what I did there?) with these new space themed sets and stencils!

For this project, I wanted to make something a little different for me: a one layer card! So I started with an A2-sized piece of white cardstock. I stamped my astronaut with the moon balloon from Space- Infinity & Beyond and colored them in with some Copic Markers. I also wanted to continue the bottom of the stamp, which looked like the ground of the moon. So, I used an alcohol marker safe pen and extended the horizon, while adding in a couple stones. The stones were actually really easy to add in, because if you look at the stamp's styling, the stones shadows are little lines, and were super easy to add in to the rocks I drew. I then colored in the ground of the moon with Copic Markers as well.

Next, I stamped out a mask for my astronaut and the moon on full-adhesive post-its, cut them out and covered them up. I also pieced together some torn up post-it bits to mask off the ground portion as well.

I took my blending brushes and used a red, a peacock blue and yellow ink and applied them in splotches on the white areas of my paper. I then went in with a black ink, and covered up all the splotches. I took those color inks and went back over the black ink to really draw them out of the black so it looked like a multi-color galaxy.

Now, I have 2 rules with making galaxies. The first is to never judge your galaxy until you've finished all your steps, because it really won't look right to you until the very end. And the second is that it's all about the layers and distractions. So now that we've layered up the inks, let's talk distractions (really, they're embellishments that look super pretty).

First, I spritzed my panel with water to help blend the inks together and get some nice distressed water spots. After my panel was dry, I took some sparkle liquid and splattered that onto my card and let it dry. The next thing I did was take some white acrylic paint, slightly water it down, and splatter it onto my sky for some white stars. After the white paint dried, I then took some red metallic water color and splattered that onto the galaxy as well. Once it was dry, I had my galaxy background just the way I wanted it! I know that sounds like a lot of steps, but all of those splatters really help add to the starry galaxy look to the card. And I like to believe that using splatters of different colors and materials adds a nice dimension and detail to your project!

For my sentiment, I felt the "I'd give you the moon" from the Space- Infinity & Beyond set was absolutely the perfect choice for this stamp. I stamped it out and embossed it in white powder.

I removed all of my masking and there were a couple areas that were slightly exposing the white paper. I went in with my alcohol marker safe black pen and touched them up. I also went over the moon balloon's string with the pen as well to make it pop more.

I added my single layer panel to an A2-sized card base, and I was done!

This project uses the following The Rabbit Hole Designs product:


For more inspiration with your The Rabbit Hole Designs Creations, be sure to follow along at these other locations:


For more details about products used in this post, you may also follow along at my personal blog, Just a Note by Justin, as well!

I cannot wait to see what you craft up using these amazing new June release projects! Be sure to share them in The Rabbit Hole Designs Fan Page (and don't forget about the Anything Goes Challenge Album as well!

Happy Crafting!