Pages

Showing posts with label Slimline Card. Show all posts

Above & Below Water Slimline Scene Card

Hello and welcome to the Rabbit Hole Designs blog; it's Rick back with you again today and I am sharing a slimline scene card that will take you both above the water surface and below. This was actually very easy to create it was a mater of putting the elements in the right place and changing the tones and values of the ink blending from the sky and underneath the water.

Adventures with Friends


Hi! Lauren Here with another of my favorites from the past year. This one is special to me because I helped bring this stamp set to life. I love these bunnies from Tatsiana Zayats and the adventures they are going on! 

Full card details can be found on my blog: https://laurenzrdh.wixsite.com/queenlorecreations/post/adventures-with-friends

Here are the links to the products I used for this card 


Sail & Soar Coordinating Die Set: Sail & Soar Dies – The Rabbit Hole Designs


Good Friends and Great Adventures!


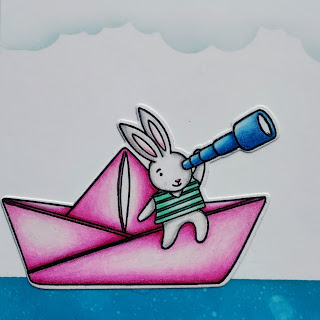
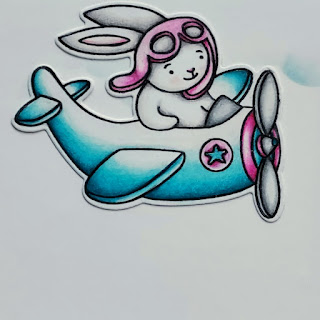
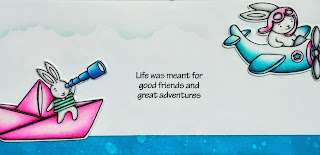
Hello! It's Lauren here on the blog today sharing a fun scene using the adorable new Sail & Soar stamp set illustrated by Tatsiana Zayats. This set is perfect for creating so many adorable and whimsical cards. 

To start my card, I first stamped the cute bunny images onto white cardstock in black ink. Then, I colored them using colored pencils and die cut them using the coordinating dies for the set. 


Once my images were ready, I created the background for them. I used the Clouds in my Coffee Stencil with Tumbled Glass Distress Oxide ink to create soft clouds along the top long edge of an 8.5x3.5" slimline cardstock panel. 


For the water I created a straight line across the bottom of my panel with washi tape, leaving approximately 0.5" below the tape. In that open area at the bottom of the panel, I ink blended Mermaid Lagoon Distress Oxide ink. Then I spritzed it with a little water, and carefully removed the tape. Tip: if the tape is sticking too much, you can warm it up using your embossing heat gun and it will come off the paper more easily. 


Next, I adhered the bunny boat and bunny plane onto the panel. Then, I stamped the sentiment in between the two. 


The last step was to adhere the panel onto a white slimline card base. I love how this sweet scene turned out and I hope it has inspired you to create a cute scene using this new set! Thanks for visiting!

Here are the links for The Rabbit Hole Designs products used for this card:


Sail & Soar Coordinating Die Set: Sail & Soar Dies – The Rabbit Hole Designs


Thanks a Bunch!


Hi! Lauren here to share a fun slimline card using the balloon stamp from the newly released Balloon Party stamp set illustrated by Tatsiana Zayats. This is such a beautiful and fun stamp set to color. I love the balloons included in the set and was inspired to make a whole big bunch of balloons kind of like the bunches that they have at theme parks. 


I started out by using the balloon stamp to create a few masks and to stamp the bottom of a white slimline sized (3.5x8.5) cardstock panel. I made sure to mask off the balloons I had stamped on the panel when I added more next to them. 


When I felt I had stamped enough balloons at the bottom of the panel, I stamped a trio floating above my big bunch. Then I stamped the strings to them.


With the balloons all stamped, I colored them in the colors of the rainbow using my colored pencils. Then I trimmed the panel using a stitched slimline die from my stash. 


I then die cut the word "Thanks" using the Thanks-Scripty Word with Shadow Dies from white cardstock. Then I ink blended a matching orange ink onto the word (you could use a coordinating orange card stock. I didn't have the shade I needed). 


Next, I used the Cottontail embossing powder tool to prepare black cardstock for heat embossing. Then stamped my sentiment onto the prepped cardstock using embossing ink and heat set it white embossing powder on.


 I used a ruler to line up my sentiments so that they would be straight, then I adhered them onto my panel.


The last step was to adhere my panel onto a white slimline card base measuring 3.5"x8.5".

I am really pleased with how fun this card turned out. I love how colorful all the balloons are. I hope this card inspires you to create your own bunch of balloons with this great new set! Thanks for visiting!

For more inspiration, updates, and news make sure to check out these awesome places! 


HB - Maybe Swearing Will Help

Hello my crafty friends!  Are you feeling sassy? I am and I have created this The Rabbit Hole Designs bright birthday slimline to show it. 
    
The Scripty Happy Word with Shadow die and the Scripty Birthday Word with Shadow die sets are used to create the eye-catching sentiment. The background is made from several rainbow colored Candy Twist die cuts and glued into a rainbow pattern. The small sentiment, "Maybe swearing will help", comes from the Sassy Sentiment stamp set.  I choose  to heat embossed it with white embossing powder on black cardstock. 
You can see how easy this card is to assemble this card once all the pieces  are die cut and heat embossed. the card front is layered on a piece of black cardstock and then attached to a white slimline card base.

The Rabbit Hole Design Products 

I hope you enjoyed this Maybe Swearing will help bright and sassy card featuring the products from The Rabbit Hole Designs.  Please feel free to leave me a comment or let me know if you have any questions.


Be Creative ~ Stay Inspired

Jenn Gross


Follow me, Journey Coach Jenn, on 

Instagram - https://www.instagram.com/journeycoachjenn/

YouTube - http://www.youtube.com/c/JourneyCoachJenn

Blog - http://www.journeycoachjenn.com/


For more inspiration, updates, and news make sure to check out these places


The Rabbit Hole Designs

The Rabbit Hole Designs Instagram

The Rabbit Hole Designs Facebook Page

The Rabbit Hole Designs Pinterest

The Rabbit Hole Designs YouTube


Fluttering Butterflies, My Final Favorite from 2021

Happy New Year! Lauren here ending the year with this last favorite of mine from 2021. A beautiful rainbow of butterflies flutter up this slimline card. I hope you like it too! Best wishes for a happy, healthy and crafty 2022!  

Hello friends, Lauren here today sharing this rainbow of butterflies using the new Butterfly stencil. This small stencil is so versatile! I used it to create a repeating pattern of butterflies flying up my slimline card.

This was quite simple to do. I started with a white slimline sized cardstock panel. I placed the stencil on the bottom and then ink blended Candied Apple and Ripe Persimmon Distressed oxide inks. 


Then, after cleaning my stencil, I positioned it above yet slightly overlapping my previous butterfly. I ink blended Squeezed Lemonade and Mowed Lawn D.O. inks over it making sure not to blend over the orange of my first butterfly.


Again, after cleaning my stencil, I positioned it above and overlapping again my previous butterfly. This time I blended Salty Ocean and Wilted Violet D.O. 


For my sentiments, I grabbed some of my other Rabbit Hole Designs stamp sets and stamped out the words you, are and beautiful onto white cardstock. I trimmed them down, mounted them onto black cardstock and adhered them onto the butterfly panel. 

Next, I trimmed the panel down using a scalloped slimline die from my stash. I added a black slimline cardstock panel to my slimline card base then adhered the rainbow of butterflies panel to the card base.

To finish off the card, I adhered some clear acrylic bubbles from my stash.

I am so happy with how quick and easy this pretty card came together. I hope this inspires you to try this technique out! Thanks for visiting!

For more inspiration, updates, and news make sure to check out these awesome places! 

The Rabbit Hole Designs 

The Rabbit Hole Designs Instagram

The Rabbit Hole Designs Facebook Fan Page

The Rabbit Hole Designs Pinterest

The Rabbit Hole Designs YouTube


Here's the link to the Butterfly stencil: 

Butterfly - 3x4 Stencil – The Rabbit Hole Designs


Keep Calm and Carrion - Whimsy Caffeinated Slimline Card

Hello my crafty friends!  You know I love the Rabbit Hole Designs' caffeinated critters and the Caffeinated Vulture does not disapoint.  I gave him an over glazed look, like he is waiting for the caffeine to kick in!

The background is ink blended using Distress Oxide inks; Wilted Violet, Kisch Flamingo and Carved Pumpkin.  The moon was created by masked off an area with piece of masking paper cut into a circle.  The vulture is colored with Copic alcohol markers.
The treeline is created with a stamp set form my stash and black tree ink is blended at the bottom of the slimline.  I gave the background a couple of hours to dry before I used the Cottontail Embossing Powder Tool to treat and prep the bottom of the card.  I stamped the sentiment "keep calm and carrion" with VersaMark Watermark ink and added white heat embossing powder and heat set it.  This backgound layer is attached to a dark purple cardstock layer and then to an Slimline card base measuring 3 1/2" by 8 1/2"  folded.  The Vulture image was adde last using adhesive foam squares.

The Rabbit Hole Designs products used

I hope you enjoyed this whimsy Keep Calm and Carrion slimline card. I think this Vulture is fantastic!  What is your favorite new caffeinated critter?      


Be Creative ~ Stay Inspired

Jenn Gross


Follow me, Journey Coach Jenn, on 

Instagram - https://www.instagram.com/journeycoachjenn/

YouTube - http://www.youtube.com/c/JourneyCoachJenn

Blog - http://www.journeycoachjenn.com/


For more inspiration, updates, and news make sure to check out these places


The Rabbit Hole Designs

The Rabbit Hole Designs Instagram

The Rabbit Hole Designs Facebook Page

The Rabbit Hole Designs Pinterest

The Rabbit Hole Designs YouTube


Trick or Treat Smell my Feet...

Hello crafty friends and welcome to The Rabbit Hole Designs blog.  I created a slimline door card using the The Right Shoes stamp set as door decor.  You may  also notice the panel pattern created in the door.
I stamped the shoe image with Black ink and colored it with Copic alcohol markers.  It is cut it out and set it aside.
The door is created by gluing strips of aqua cardstock on a diagonal pattern onto a 3 1/2" x 8 1/2" white cardstock card front. Trim off the excess slats and cut it into two 8 1/2"x 1 3/4" strips.  A simple turn of one of the strips will create  a chevron pattern when the two sides are plaed next to each other. Adhere these two pieces to a second sheet of 8 1/2" x 3 1/2" white cardstock. Trim them to size creating two door panels.  Frame them with strips the of 1/4" aqua cardstock.  You can see each aqua panel  sits upon a white layer and those two pannels are on top of a full aqua layer for the card front and attached to a Slimline white card base.  A door knob was added using a mat silver rectangle and two different size black gems.  The shoes are added last using adhesive foam squares.

Here are The Rabbit HoleDesigns products used in this card:

The Right Shoe stamp set

I hope you enjoyed learning how ro create a chevron pattern from paper strips used in this slimline door card featuring The Right Shoe stamp set.  Please feel free to leave a comment or ask a question      


Be Creative ~ Stay Inspired

Jenn Gross


Follow me, Journey Coach Jenn, on 

Instagram - https://www.instagram.com/journeycoachjenn/

YouTube - http://www.youtube.com/c/JourneyCoachJenn

Blog - http://www.journeycoachjenn.com/


For more inspiration, updates, and news make sure to check out these places


The Rabbit Hole Designs

The Rabbit Hole Designs Instagram

The Rabbit Hole Designs Facebook Page

The Rabbit Hole Designs Pinterest

The Rabbit Hole Designs YouTube


Color Pop Mini Slimline


Hello my crafty friend! It's Amanda, from Pear Blossom Press again, and today I'm sharing a quick and easy card idea that requires no coloring! The frame around the sentiment, plus a few coordinating gems, add a pop of color that really jumps out at you from the bold, stencilled background. 

This card features the Cat Eye Stencil, and Sassy Sentiments Stamp Set. Head on over to my blog for all of the details, and a few extra tips for this style of card... pearblossompress.com.

Thanks so much for stopping by today. I'll be back soon with more fun cards to share. And don't forget, the new release comes soon. You're not going to want to miss a thing. See you then!

For more inspiration, updates, and news make sure to check out these places.


Clean and Simple Copic Meerkat


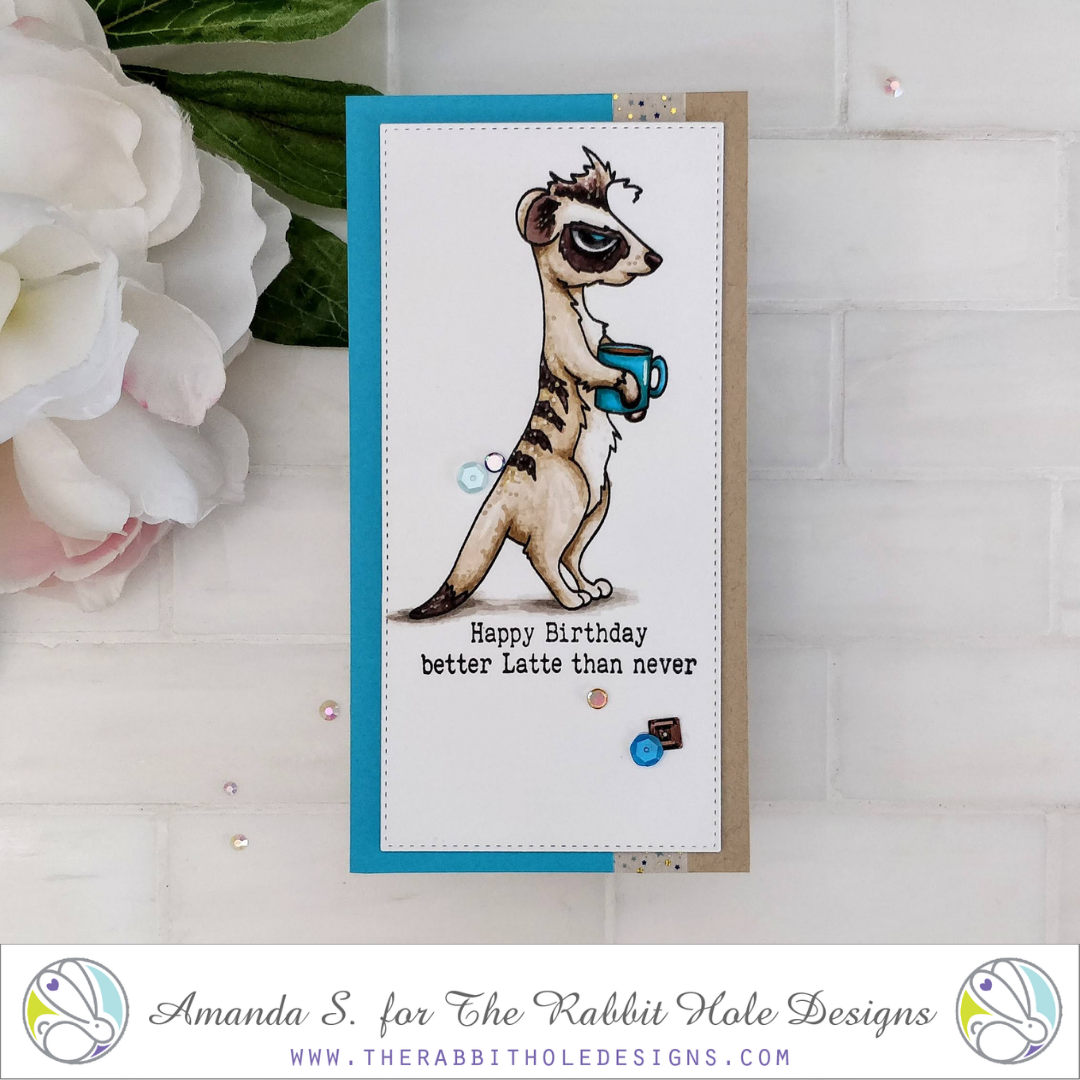
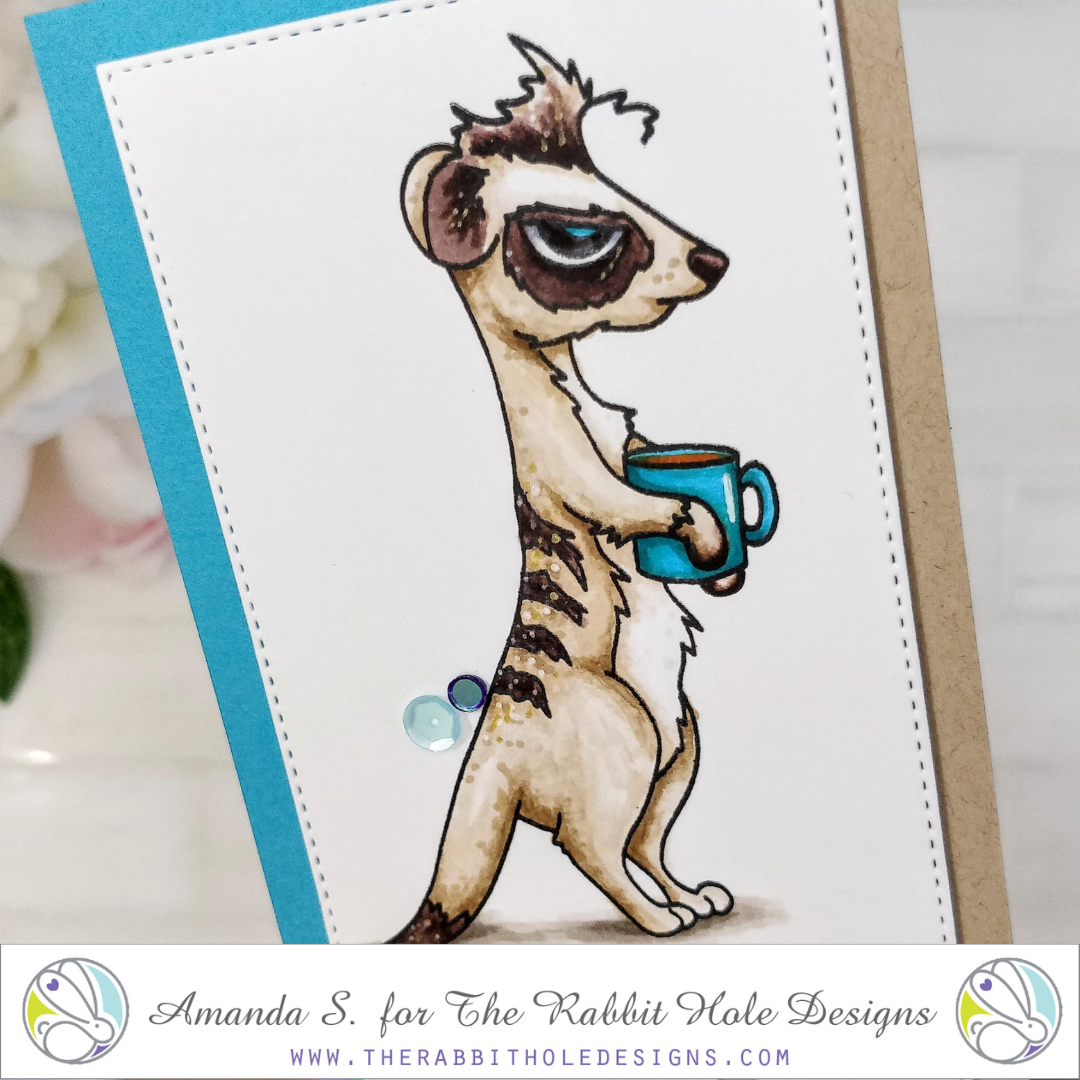
Hello my crafty friend, it's Amanda from Pear Blossom Press, again! Today, I'm sharing a clean and simple card, featuring the new Caffeinated Meerkat. I love this little guy. He's so much fun to color, and he's not too cutsie, so he's perfect for masculine cards too! Especially, when you pair him up with some of the fun sentiments in the Blended Sentiments stamp set

For the Copic chart I used, and coloring tips and tricks, head on over to my blog... pearblossompress.com. I've listed measurements for the card pieces too. 

Thanks so much for stopping by today! I'll be back soon with another fun card to share. Until then, let me know in the comments what your favorite caffeinated critter is. Is there another animal you'd like to see in the series?

For more inspiration, updates, and news, make sure to check out these places...

Butterfly Kiss Mini-slimline

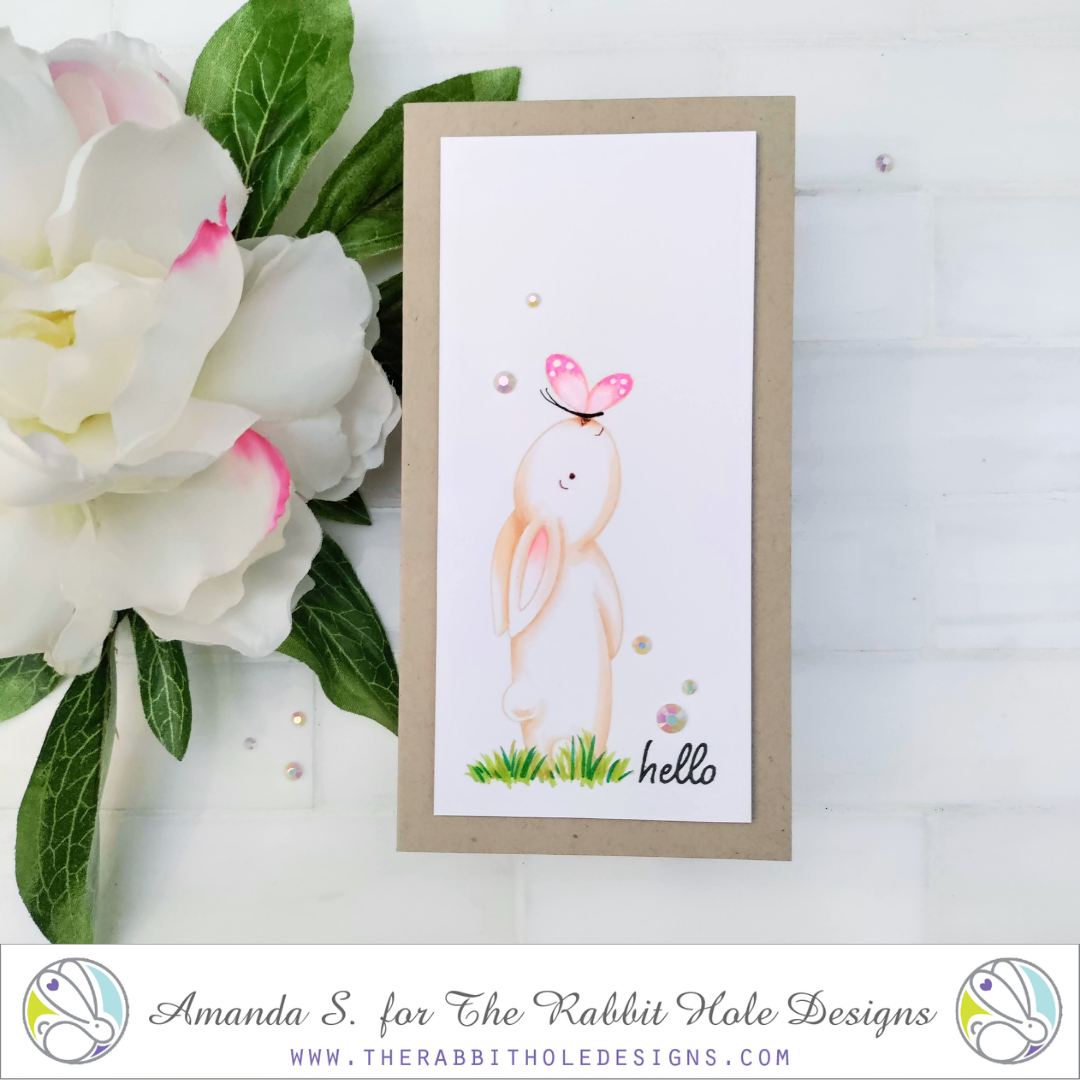
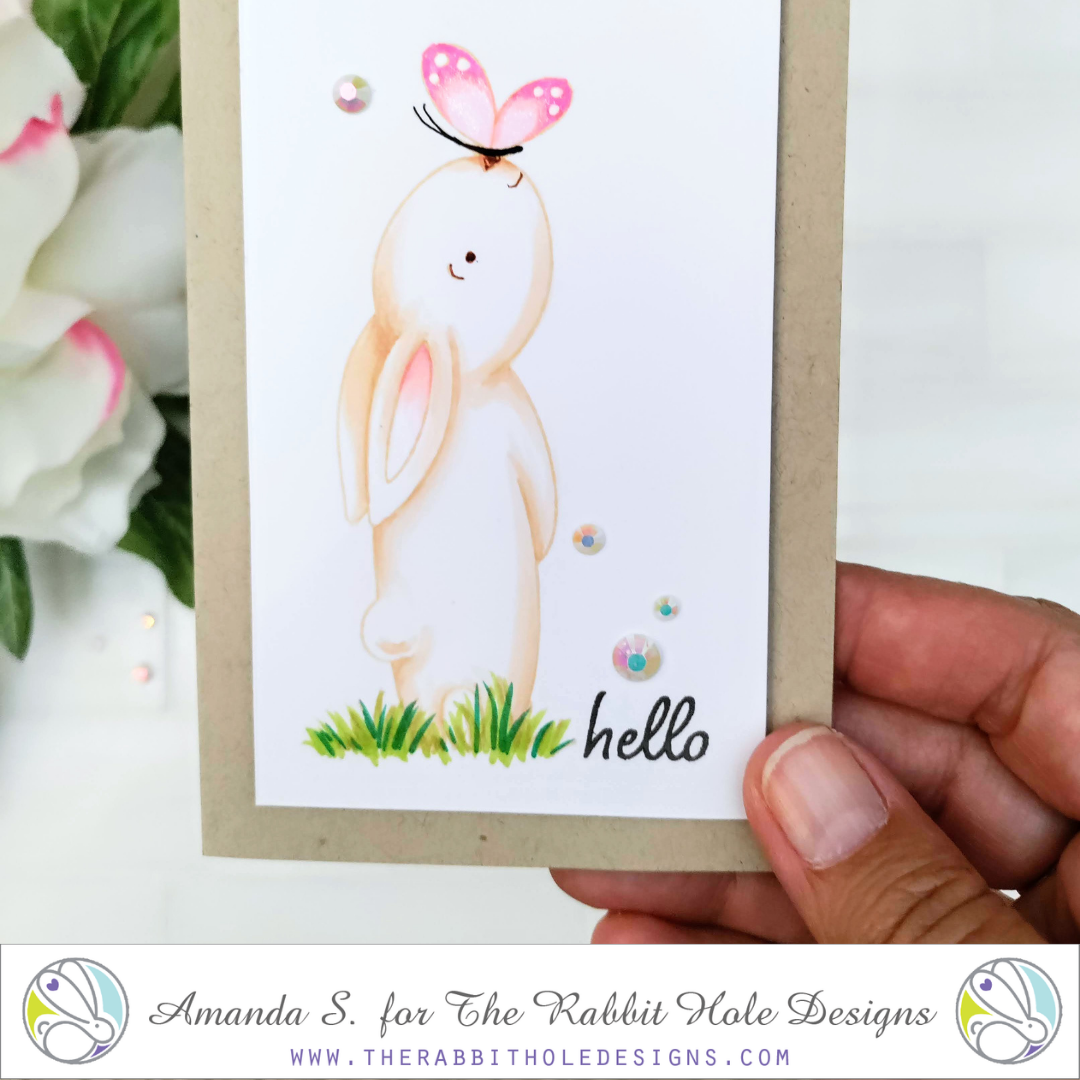
Hello again my crafty friend, it's Amanda from Pear Blossom Press again. Today, I've got a clean and simple mini-slimline card for you, and I think you'll agree, it's very sweet.

Using the new Butterfly Kiss stamp set, and minimal coloring, it came together very quickly too. Head on over to my blog for all of the details, and for a list of the markers I used... pearblossompress.com

Thanks so much for stopping by today. I'll be back again soon with another fun card to share. Until then, I'll see you in the Facebook Fan Page.

For more inspiration, updates, and news make sure to check out these awesome places! 

The Rabbit Hole Designs 

The Rabbit Hole Designs Instagram

The Rabbit Hole Designs Facebook Fan Page

The Rabbit Hole Designs Pinterest

The Rabbit Hole Designs YouTube

Rainbow of Butterflies


Hello friends, Lauren here today sharing this rainbow of butterflies using the new Butterfly stencil. This small stencil is so versatile! I used it to create a repeating pattern of butterflies flying up my slimline card.

This was quite simple to do. I started with a white slimline sized cardstock panel. I placed the stencil on the bottom and then ink blended Candied Apple and Ripe Persimmon Distressed oxide inks. 


Then, after cleaning my stencil, I positioned it above yet slightly overlapping my previous butterfly. I ink blended Squeezed Lemonade and Mowed Lawn D.O. inks over it making sure not to blend over the orange of my first butterfly.


Again, after cleaning my stencil, I positioned it above and overlapping again my previous butterfly. This time I blended Salty Ocean and Wilted Violet D.O. 


For my sentiments, I grabbed some of my other Rabbit Hole Designs stamp sets and stamped out the words you, are and beautiful onto white cardstock. I trimmed them down, mounted them onto black cardstock and adhered them onto the butterfly panel. 

Next, I trimmed the panel down using a scalloped slimline die from my stash. I added a black slimline cardstock panel to my slimline card base then adhered the rainbow of butterflies panel to the card base.

To finish off the card, I adhered some clear acrylic bubbles from my stash.

I am so happy with how quick and easy this pretty card came together. I hope this inspires you to try this technique out! Thanks for visiting!

For more inspiration, updates, and news make sure to check out these awesome places! 

The Rabbit Hole Designs 

The Rabbit Hole Designs Instagram

The Rabbit Hole Designs Facebook Fan Page

The Rabbit Hole Designs Pinterest

The Rabbit Hole Designs YouTube


Here's the link to the Butterfly stencil: 

Butterfly - 3x4 Stencil – The Rabbit Hole Designs