Pages

There's Nobunny Like You


Who doesn't love a little stack of bunnies?!  Hello everyone, it's Cassie back with another card for you today!  For my card I did lots of ink blending.  When I was happy with the blend, I brought in the Candy Twist Stencil, and spritzed some water all over that.  I let it sit for a few seconds, and then dabbed it up.  When I pulled away the stencil, I was left with a subtle textured background that I just love.  

I stamped my bunnies from the new All Ears set, and did just a bit of watercoloring over the top of them.  I stamped and embossing my sentiment and attached that the front.

If you'd like to see exactly how I made this card, you can watch it here or head over to my YouTube Channel.


Here's a closer look at the products I used:


I hope you enjoyed what I made for you today and that you were inspired to go out and get a little crafty.  

For more inspiration, updates, and news make sure to check out these links.

Thank you so much for stopping by!
Cassie

We're Owl Friends Here - Let's Practice Coloring

Owl Right The Rabbit Hole Designs That One Friend

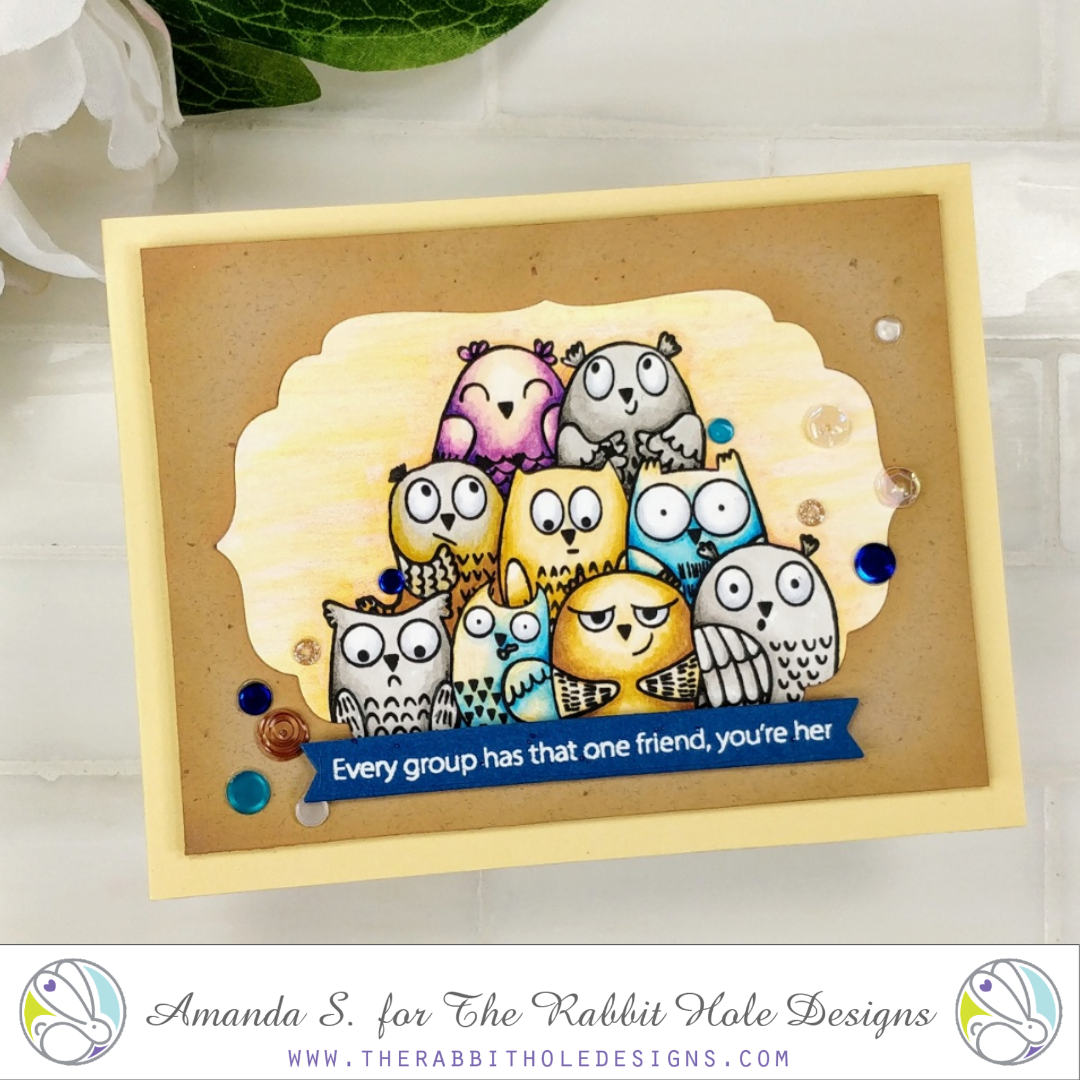
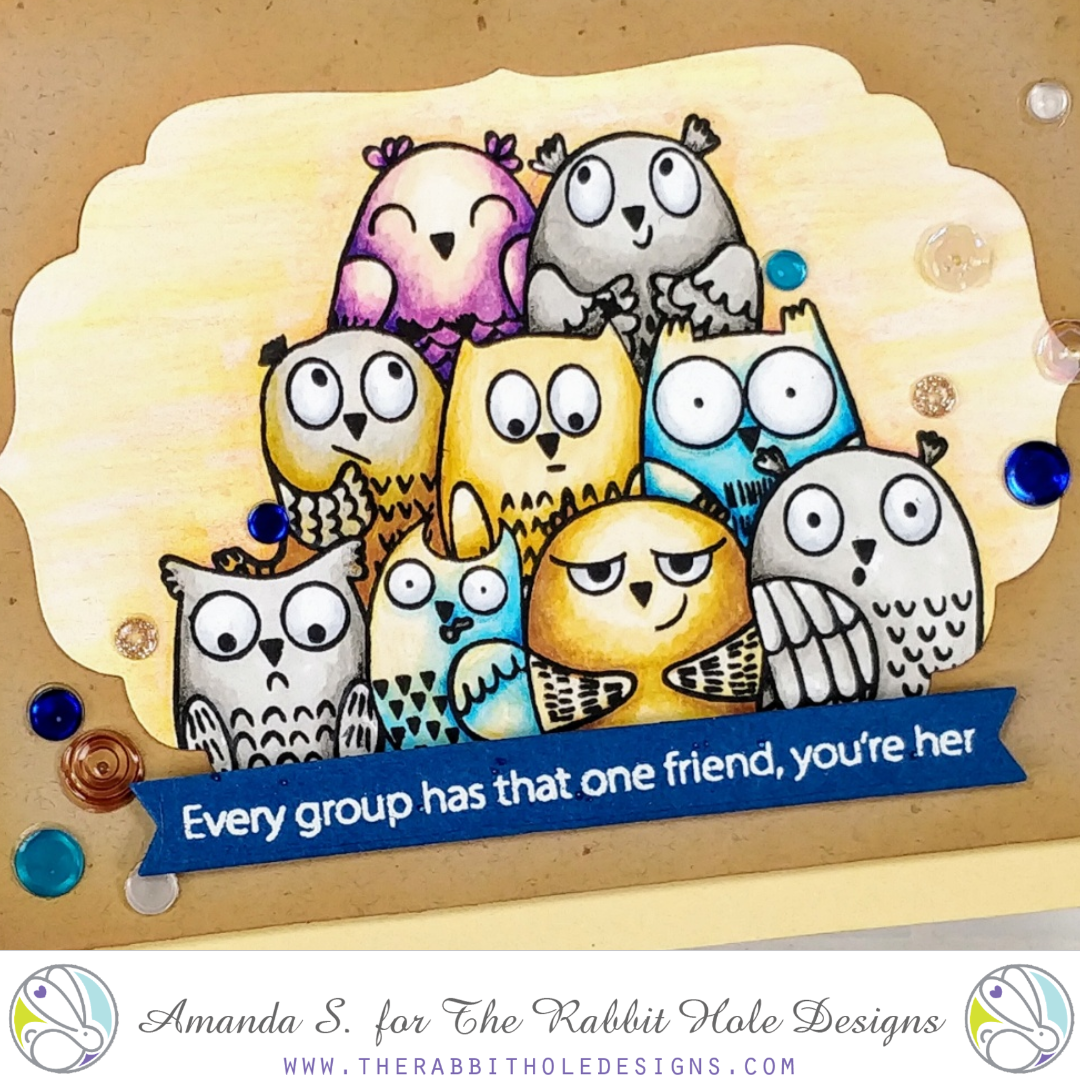
Hey crafty friends, it's Amanda from Pear Blossom Press again. Have you been coloring along for the 30 Day Coloring Challenge this month? I have, and the new Owl Right stamp set has a fun image to color. While I was coloring this one, I wanted to practice adding big, bright highlights. 

I stamped my image and colored it with Copic markers, leaving large areas of white space at the top of each face. The eyes weren't standing out enough, so I chose to color over each owl with a very pale marker. Next, I added a pale cool grey to the bottom half of each eye to add dimension. I added shading by outlining the entire image with a warm marker, then blended it out to a pale yellow. I added extra shading with colored pencils. 

Owl Right The Rabbit Hole Designs That One Friend

To assemble the card, I cut the image out with a label die, then die cut the same label out of a panel of kraft cardstock to inlay the image. I taped the pieces together and then popped the panel up on a cream card base with foam tape. I popped up a fishtail banner, embossed with a Sassy Sentiment, with more foam tape, and added a few sequins. A coat of Diamond Glaze over the sequins adds extra shine. Last time I colored this image, I added Diamond Glaze to all of the eyes as well. Take a look here, and let me know which you like better. Flat or glazed?

Thanks for stopping by today. You can find the sister article to this post on my blog, along with links to the specific products I used. I'll be back with more fun cards to share. In the meantime, hop along with The Rabbit Hole Designs on social media for more inspiration:

Hoppy Easter!

Hey Rabbit Hole fans!  I'm hopping over on the blog today sharing 
an Easter Shaker card I made featuring

I stamped, colored and fussy cut the bunny pile image. 
The shakers were in a Rabbit Hole order.  They are such pretty pastels!

I built the shaker with a frame die cut, acetate and foam tape. 

The sentiment "Happy Easter" is from the set! 
Many versatile sentiments are included.


Bit of Nuvo glaze on the back bunny's glasses and glitter pen on the front bunny's bow. 


For more information, news and updates check out these links:
 
Thanks for hopping over today,
Kelly


Somebunny is Awesome!


Hello my crafty friends and welcome to The Rabbit Hole Designs blog!  Has any-bunny told you, you’re awesome today?  Well I am!    This card features the fun and whimsy 4" x 4" stamp set All Ears! 


I stamped out the bunnies with black ink onto a piece of my favorite coloring cardstock. I colored them with a light grey alcohol marker to add shading and added a pale pink shade to the bunnys' ears and noses. After fussy cutting the group of bunnies out, I glued them to the piece of purple printed paper.


I wanted to frame the bunnies with some love in mind, so I used this fun circle and heart frame die and I die cut it to the upper part of a piece of 4"x 5 1/4" pink cardstock creating the opening for the bunnies to be seen through. I positioned the bunnies on printed paper behind the opening in the pink card front and attach it with foam squares.   I added double side adhesive foam tape to the back of the pink card front and attached it to an A2 white card base.


This sentiment, "Somebunny is"  just happens to be stamped from two different sentiments in the All Ears stamp set.  I masked off the words/letters I did not need and stamped out the sentiment with my stamp positioner onto white cardstock.. Once complete,  I cut out the sentiment. I created a frame layer from the same purple printed paper  I used behind the bunnies. I cut it slighty larger than the sentiment and used it as a layered frame. I glued this sentiment  to the card front above the bunnies as shown.


I love looking through my craft stash to see what I might have available to use with my projects. I found the "awesome" die cut word and knew it would be perfect for this card. I die cut the word from white cardstock and the back accent layer from the purple printed paper. I glued them together and then glued it just below the bunnies on the card front completing the card.


Here are the TRHD products used in this project:

All Ears 4” x 4” stamp set


I hope this fun “Somebunny is Awesome” card inspires you in your creations. Thank you so much for stopping by the blog!

Be Creative ~ Stay Inspired
Jenn Gross
@journeycoachjenn

For more inspiration, updates, and news make sure to check out these places


Diamond Flower Girl Card


Hey Everyone! Justin here, and today I'm featuring an A2-sized card made with the new set Beautiful Disaster, part of the March Release!

What I love about the girl in this set is there are so many variables to color up and entirely change the feel of the image. There are so many skin and hair tones to pick from, and that slouchy sweater can be any color or pattern you want (and could be really fun to pattern paper piece together with the right print)!

For this card, I was inspired by a Pinterest swatch I saw for inks, and decided to use those colors (they're also pretty close to the Rabbit Hole Designs Colors too!).

First, I took a 4.125" x 5.375" panel of white cardstock and stamped my girl in Alcohol Ink Compatible Black Ink in the lower left corner. I colored up my girl with a vibrant purple sweater and some dusty brown hair. I loved how she turned out!

Next, I knew I wanted to use a stencil with this project as well. Instead of fussy cutting out my colored image, I decided I wanted to stencil directly onto that panel. So, I stamped my girl again on a piece of scrap paper for a mask, and left a little bit of blank paper at the bottom of my image for how I was going to adhere it. I fussy cut my mask out and covered my image in a way I hadn't done before. Because my colored image was at the very bottom of the panel, I took a piece of washi tape and stuck it to the back side of the card, so that some of the sticky side was visible on the bottom edge of the panel (maybe about .25" worth of a strip). I took my mask, positioned it, and adhered the bottom portion to my washi tape. I knew I was going to use a light tack spray adhesive for my stencil, which would help keep the mask in place, so long as I didn't move it around too much.

So, following my plan, I applied my Diamond Flower stencil with the light tack adhesive over the masked panel. I then took blending brushes and applied ink in diagonal lines, repeating 3 colors in the same order. Before removing my mask, I flicked some specs of the same ink colors all over my card for a little bit of texture.

I removed my stencil and mask, and was so happy with how my panel turned out!

I mounted my panel to an A2-sized turquoise panel. I then heat embossed my sentiment in white powder on purple patterned paper (if you clock a splotch on the purple paper, it's actually intentionally there by the patterns design and not an accident!), and mounted the sentiment piece on a turquoise frame.

I finished my card by adhering some Rabbit Hole Designs sequins and mounting the card to an A2-sized card base!

Here are the products I used in this card:


For more inspiration with your The Rabbit Hole Designs Creations, be sure to follow along at these other locations:


For more details about products used in this post, you may also follow along at my personal blog, Just a Note by Justin, as well!

There are so many things to love about this new release! I hope this card sparked some ideas and inspiration for your next project!