Pages

Hello Spring - Anemone Card

Hello my crafty friends! I have this beautiful floral card to share with you today!  I am using The Rabbit Hole Design's new Blooming Anemone stamp set with the Optical-Mesh stencil and Hello Scripty Word and Shadow Layer die.  

 I chose a color pallet of purples and greens. The background is a purple cardstock ink blended using Distress Oxide ink using the Optical-Mesh stencil.  I added a bit of clear embossing powder to the stenciled cardstock.  Some of the ink had dried so the embossing powder only stuck to a few areas, but I love the effect.  It adds just a touch of texture.

The sentiment Hello is die cut from a variegated cardstock and also a piece of black cardstock. The variegated Hello is glued on top of the black Hello layered slight off center as a shadow. The Anemone cluster is stamped with black ink and colored with Triblend alcohol markers. It is cut out and attached to the front of the stenciled card front with adhesive foam squares. The finished card front is attached to a white A2 Card base.

The Rabbit Hole Designs Products 

Thank you for stopping by today's blog and checking out this wonderful floral card. I hope you are inspired to create something fun and spend a little time on yourself.

Be Creative ~ Stay Inspired

Jenn Gross


Follow me, Journey Coach Jenn, on 

Instagram - https://www.instagram.com/journeycoachjenn/

YouTube - http://www.youtube.com/c/JourneyCoachJenn

Blog - http://www.journeycoachjenn.com/


For more inspiration, updates, and news make sure to check out these places


The Rabbit Hole Designs

The Rabbit Hole Designs Instagram

The Rabbit Hole Designs Facebook Page

The Rabbit Hole Designs Pinterest

The Rabbit Hole Designs YouTube


Anniversary Pearls

While I do love diamonds, I am always drawn to pearls in jewelry. I love chunky pearls, delicate pearls, necklaces, bracelets, rings.... And I know our Lobsters from the May release love these pearl rings!


I stamped the pearl oyster image from Lobsters for Life three times on white cardstock and colored in with alcohol markers. The sentiment was stamped and wonky cut for a fun look. I added pearls to match for extra bling!

You can find more of my projects on my blog: Joy in a JAR. Thanks for stopping by today!

Versatility on Your Stamps


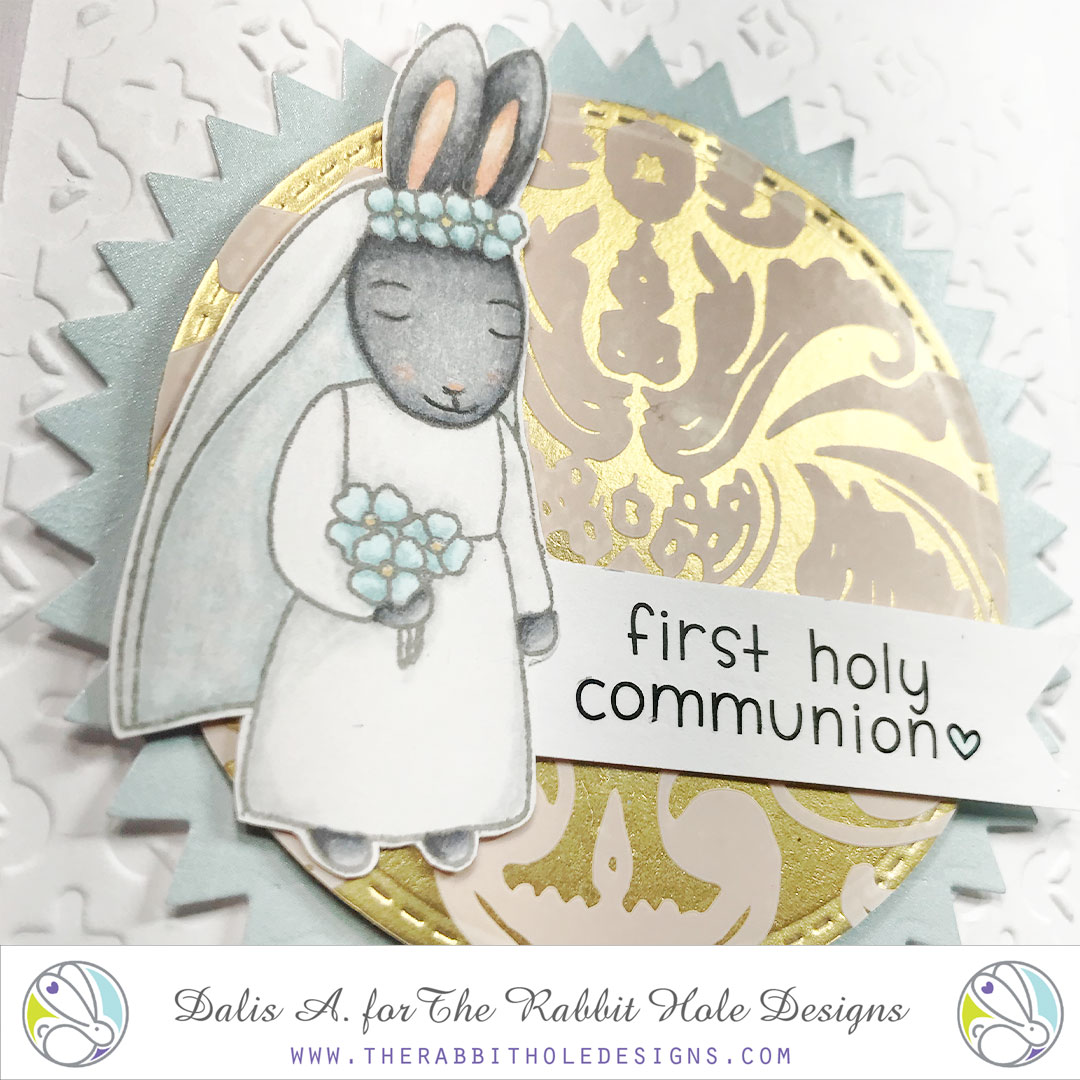
Looking at your stamps in a different way is always the best part of getting a new stamp set. The "Happily Ever After" is a sweet wedding stamp set, but what else can it be? If you mask the groom bunny out of the picture you get this adorable girl bunny that is perfect for a First Holy Communion card. What else do you see when you look at the Happily Ever After couple? Maybe a PROM card, if you mask the veil of the bride? 
After coloring the bunny with alcohol markers, I decided to create the golden backdrop with some stickers to convey the idea of the osties. The embossed folder used even though does not have a cross image, it does bring an idea of a cross, helping bring the theme and the card all together.


For more inspiration, updates, and news make sure to check out these places:

Congratulations!


Happy weekend!!!!  Hope you are having a wonderful Saturday!  Tangii here with another fun card using Congratulations from the May release.  A little embossing here, a little ink blending there and voila!  While this image is fantastic to color, I just can't help but embossing it!  And not just embossing, but embossing in metal (Gold, Silver, etc.)

I also used the Mesh Optical Illusion stencil and some Oxide Ink to add a little something to the upper corner... my card went from "simple" to "woohoo" just by adding that stenciled piece!  I LOVE the final look!

You can also read about this card on my blog, here with links to the products I used, etc.  Thanks for popping by, come back again soon!

Anniversary Wishes

Today's share is made with my husband and me in mind. We will be celebrating our 40th wedding anniversary in July. Our married life has been such a fun adventure, and we have traveled many places together by car. So my inspiration for this card came from our explorations of the country and the world over the last several decades! Wow, that sounds OLD. Anyway -----

I used a hand cut cloud stencil that a stamping friend made for me many years ago to make the subtle sky, and stamped my sentiment (Just Married 4x4) on top. I then masked and stenciled a road-shaped section from the new Fiddlehead Stencil 6x6, and adhered it to the card front. I thought it made a cute "cobblestone" type design for the car. I stamped, clear embossed, and colored the car image (alcohol markers), and then cut it out with the Coordinating Die. It looks like they are ready for another adventure!

You can find more of my projects on my blog: Joy in a JAR. Thanks for stopping by today!