Pages

Showing posts with label Galaxy. Show all posts

Cosmic Cake Slimline


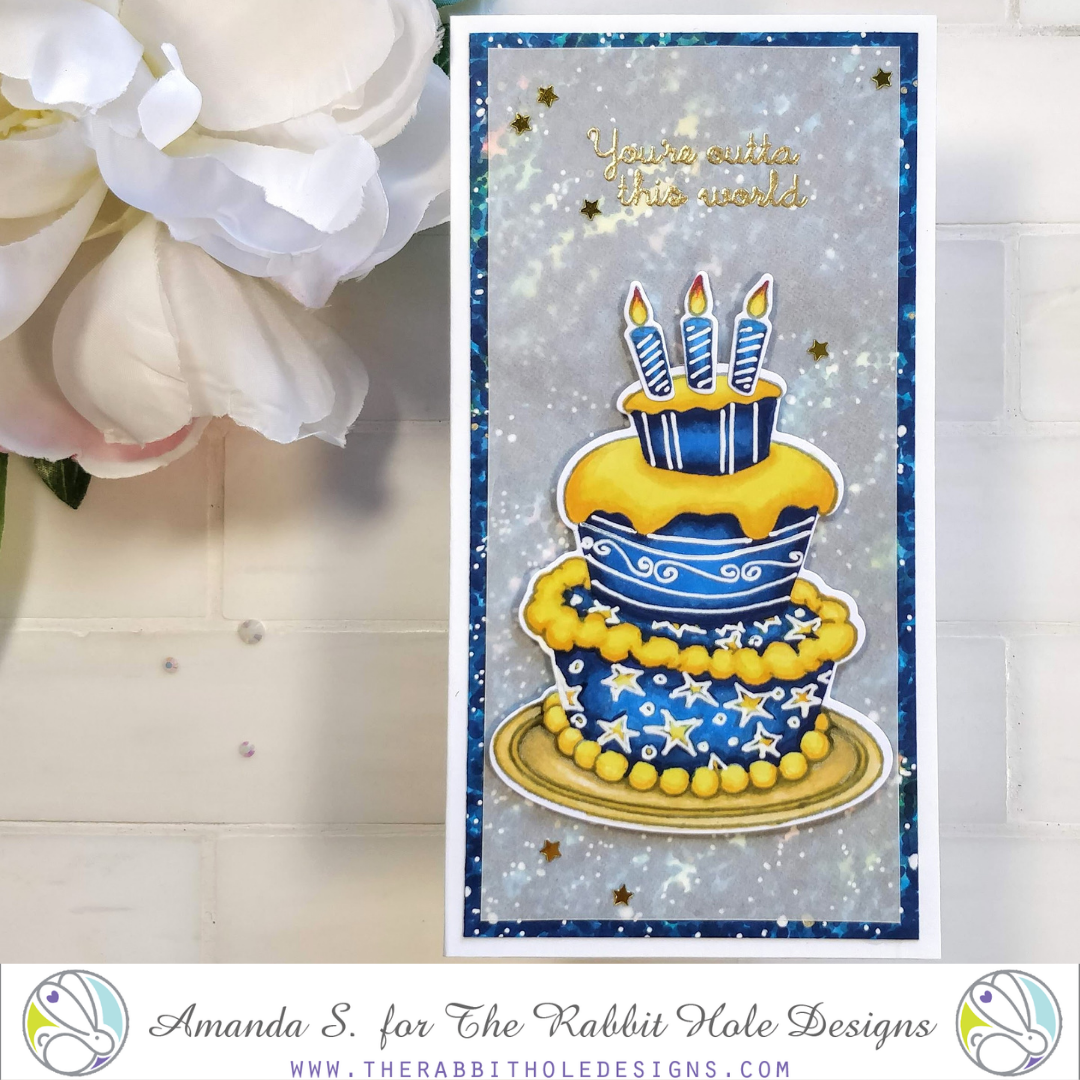
Hey crafty friend, it's Amanda from Pear Blossom Press again. Need an "out of this world" birthday card? I've got you covered! Today's card features a Copic colored galaxy background; the best part - no splatter mess!

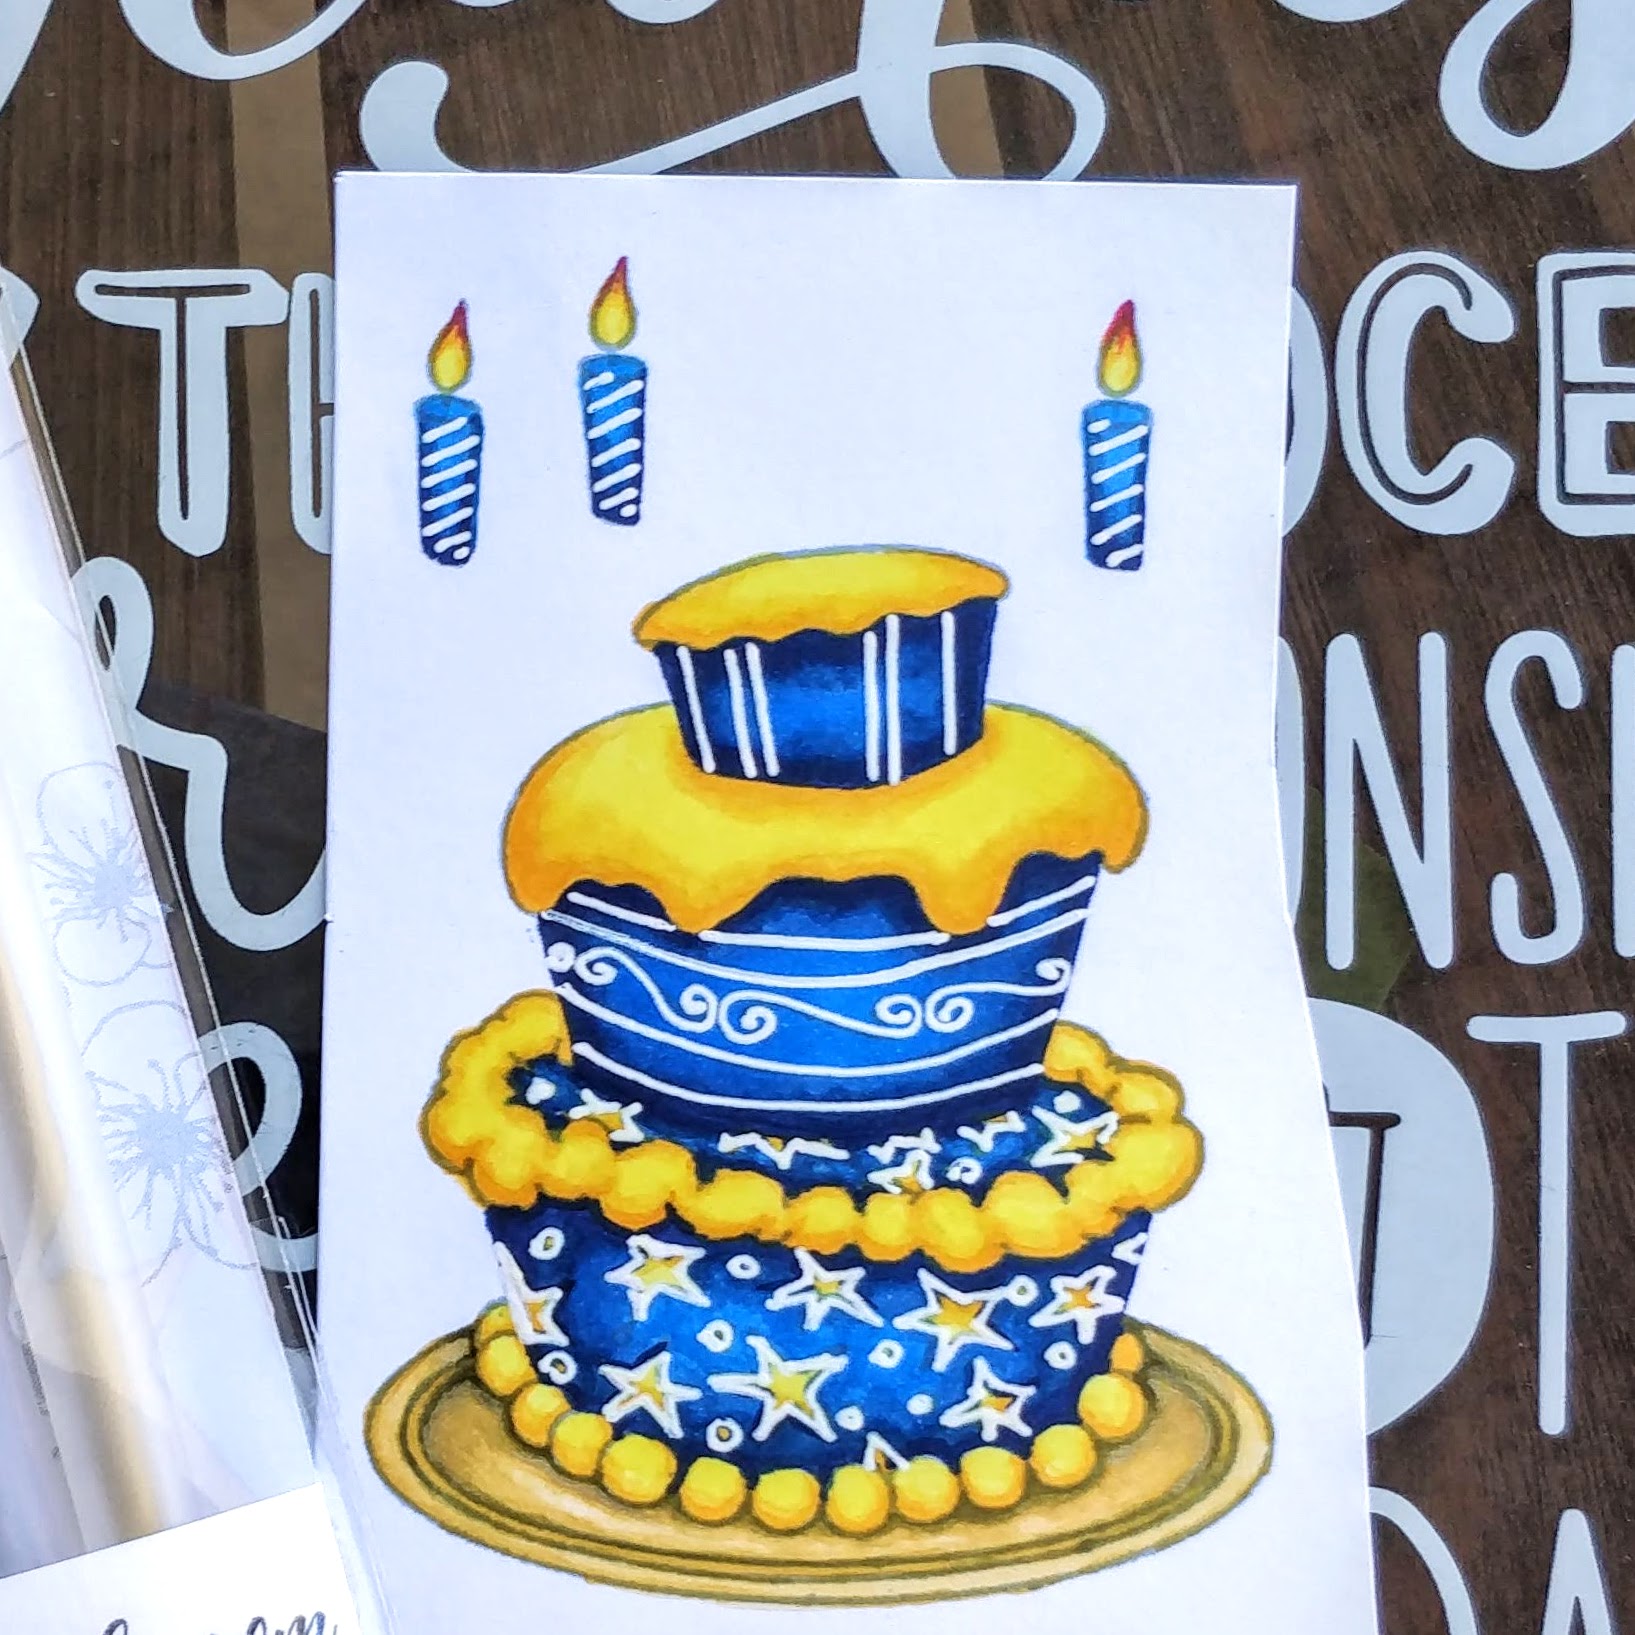
First, let's start with the star of the show, the cake! Have you seen the Just Cake stamp set from The Rabbit Hole Designs yet? It's really cute! (And it has stars all over the bottom layer, so it inspired the galaxy background for the rest of the card.)

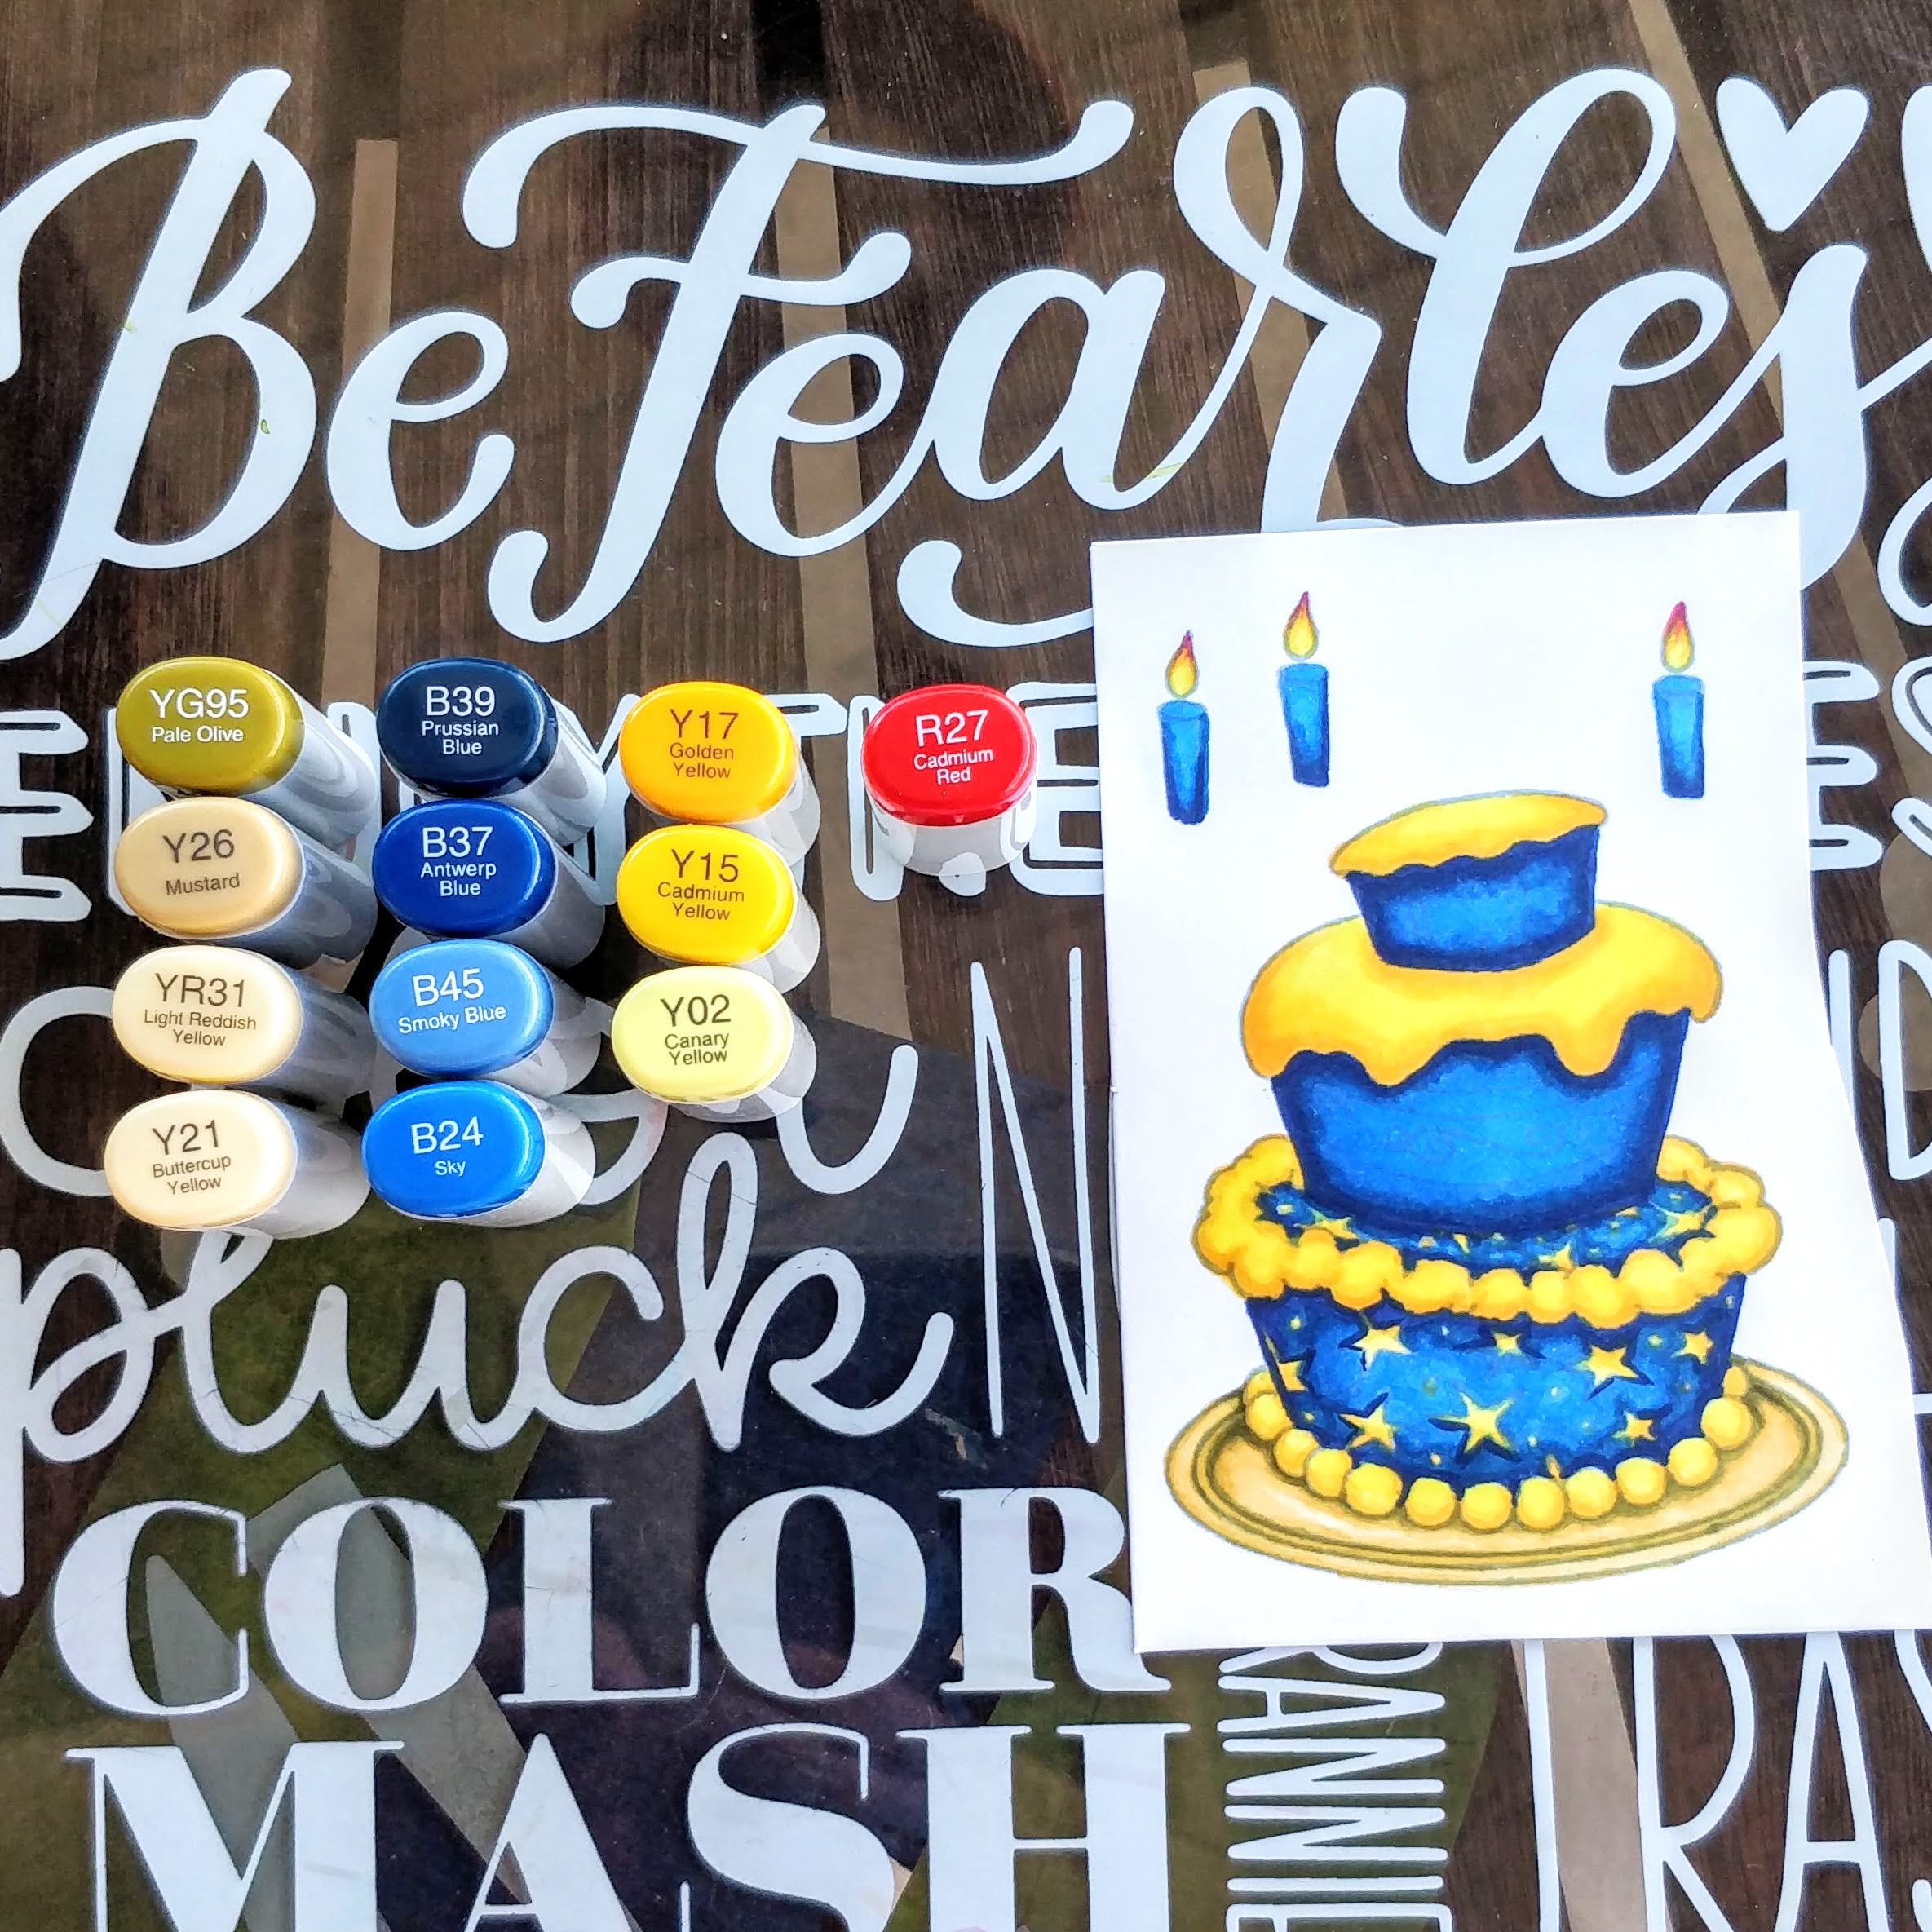
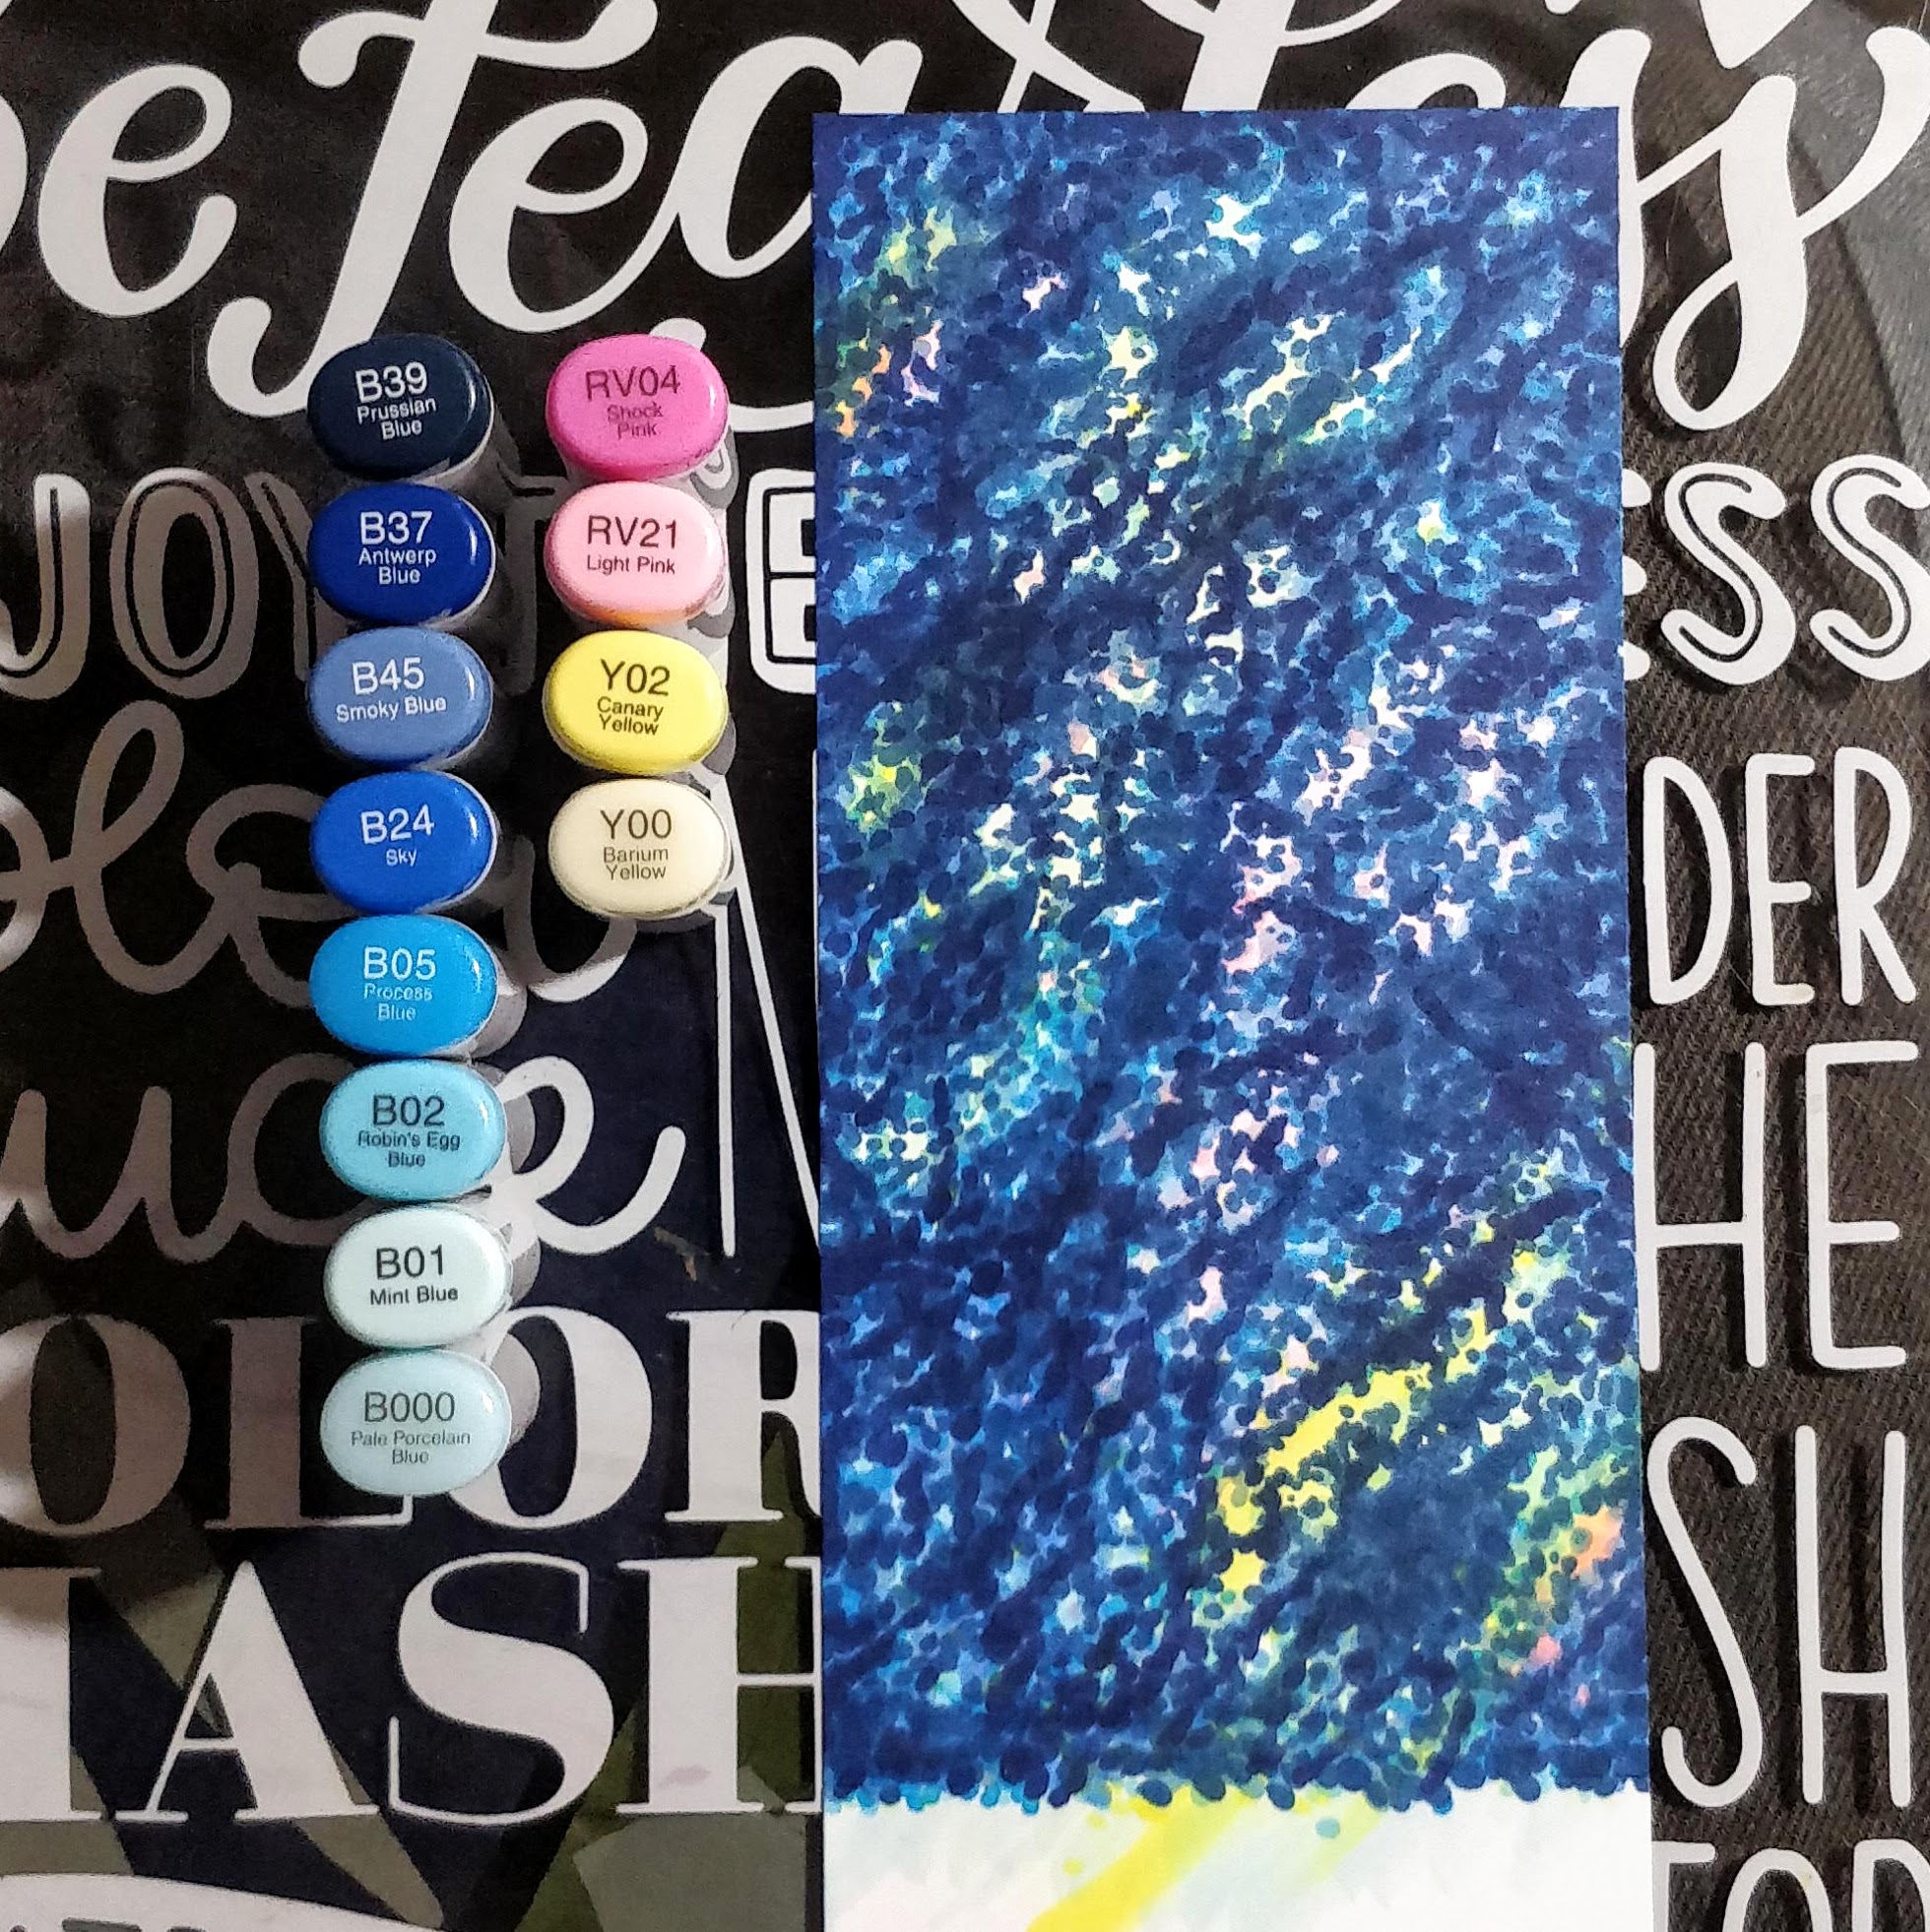
Knowing that I wanted to color it in shades of blue, I stamped the cake with London Fog ink. It's a Copic friendly grey, that works well for no-line coloring. (I prefer to stamp with Warm Glow ink for living things, and warm tones. London Fog is perfect for coloring cool tones and inanimate objects.) You can see the Copic markers I colored the cake with below.

Once I was happy with the colors, I came back and outlined some of the details with a white gel pen. 

Using the coordinating dies, I cut out the cake and candles. I glued the candles on top and set it aside while I worked on the background.

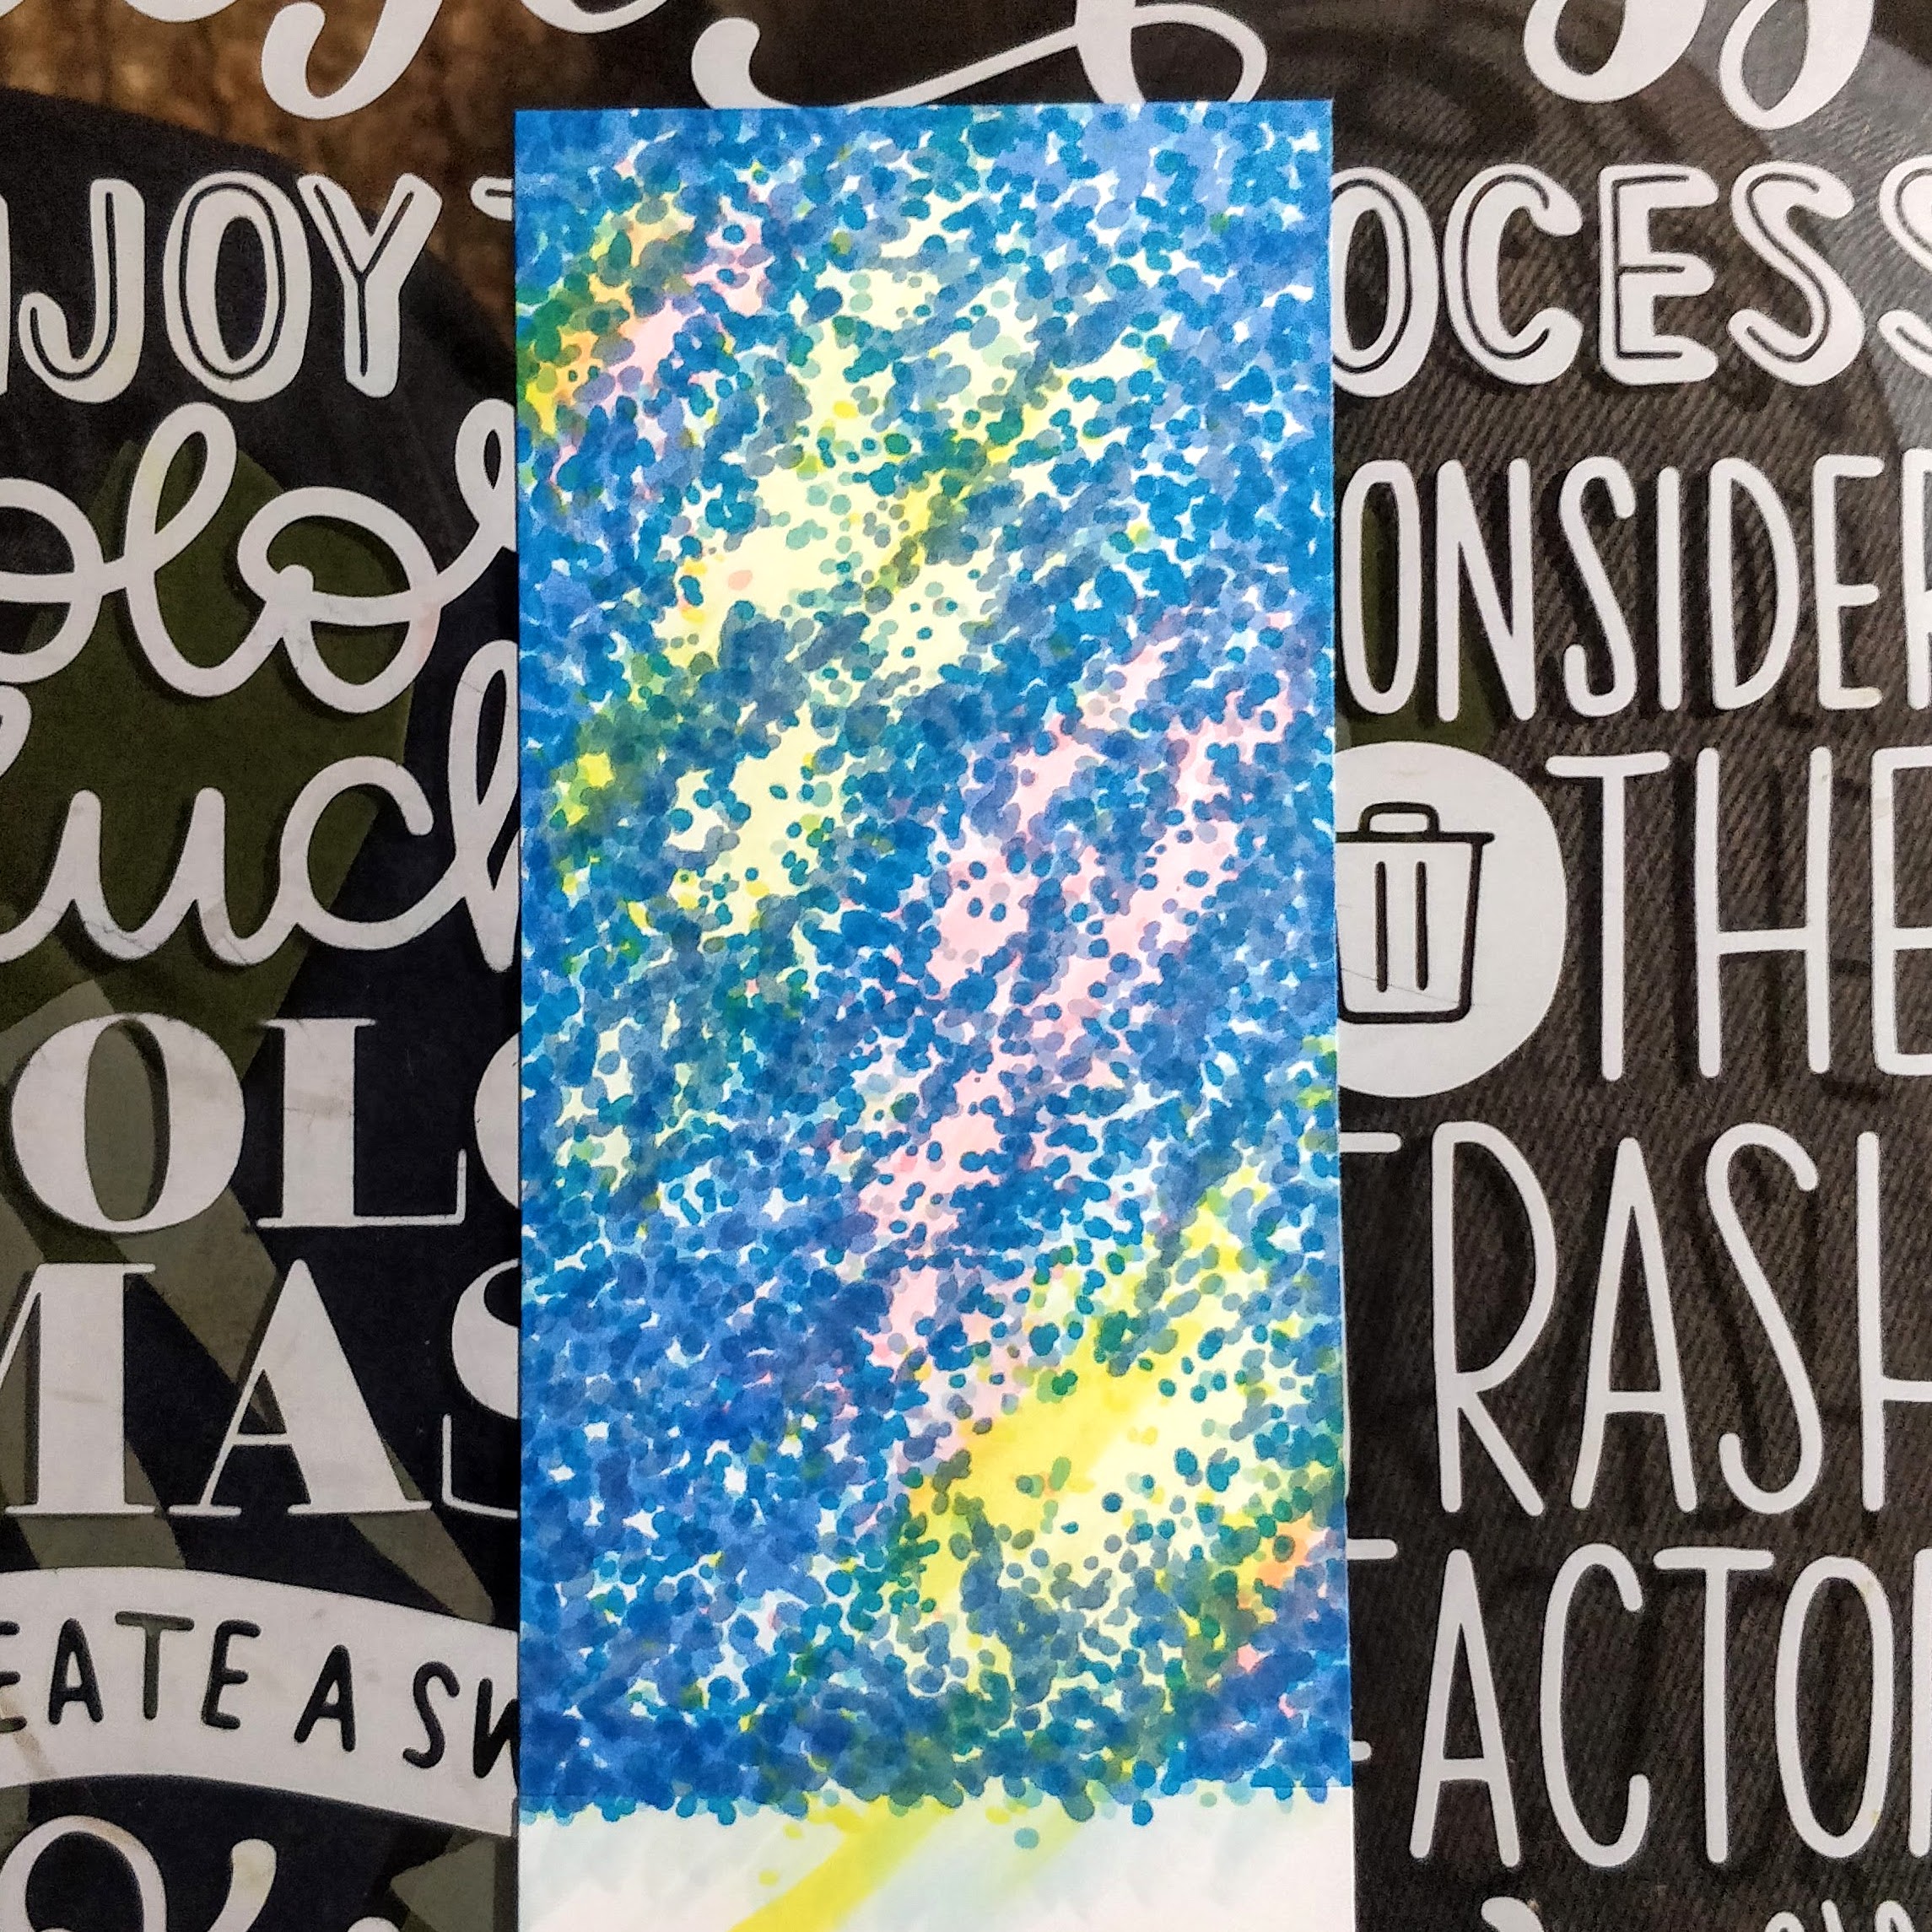
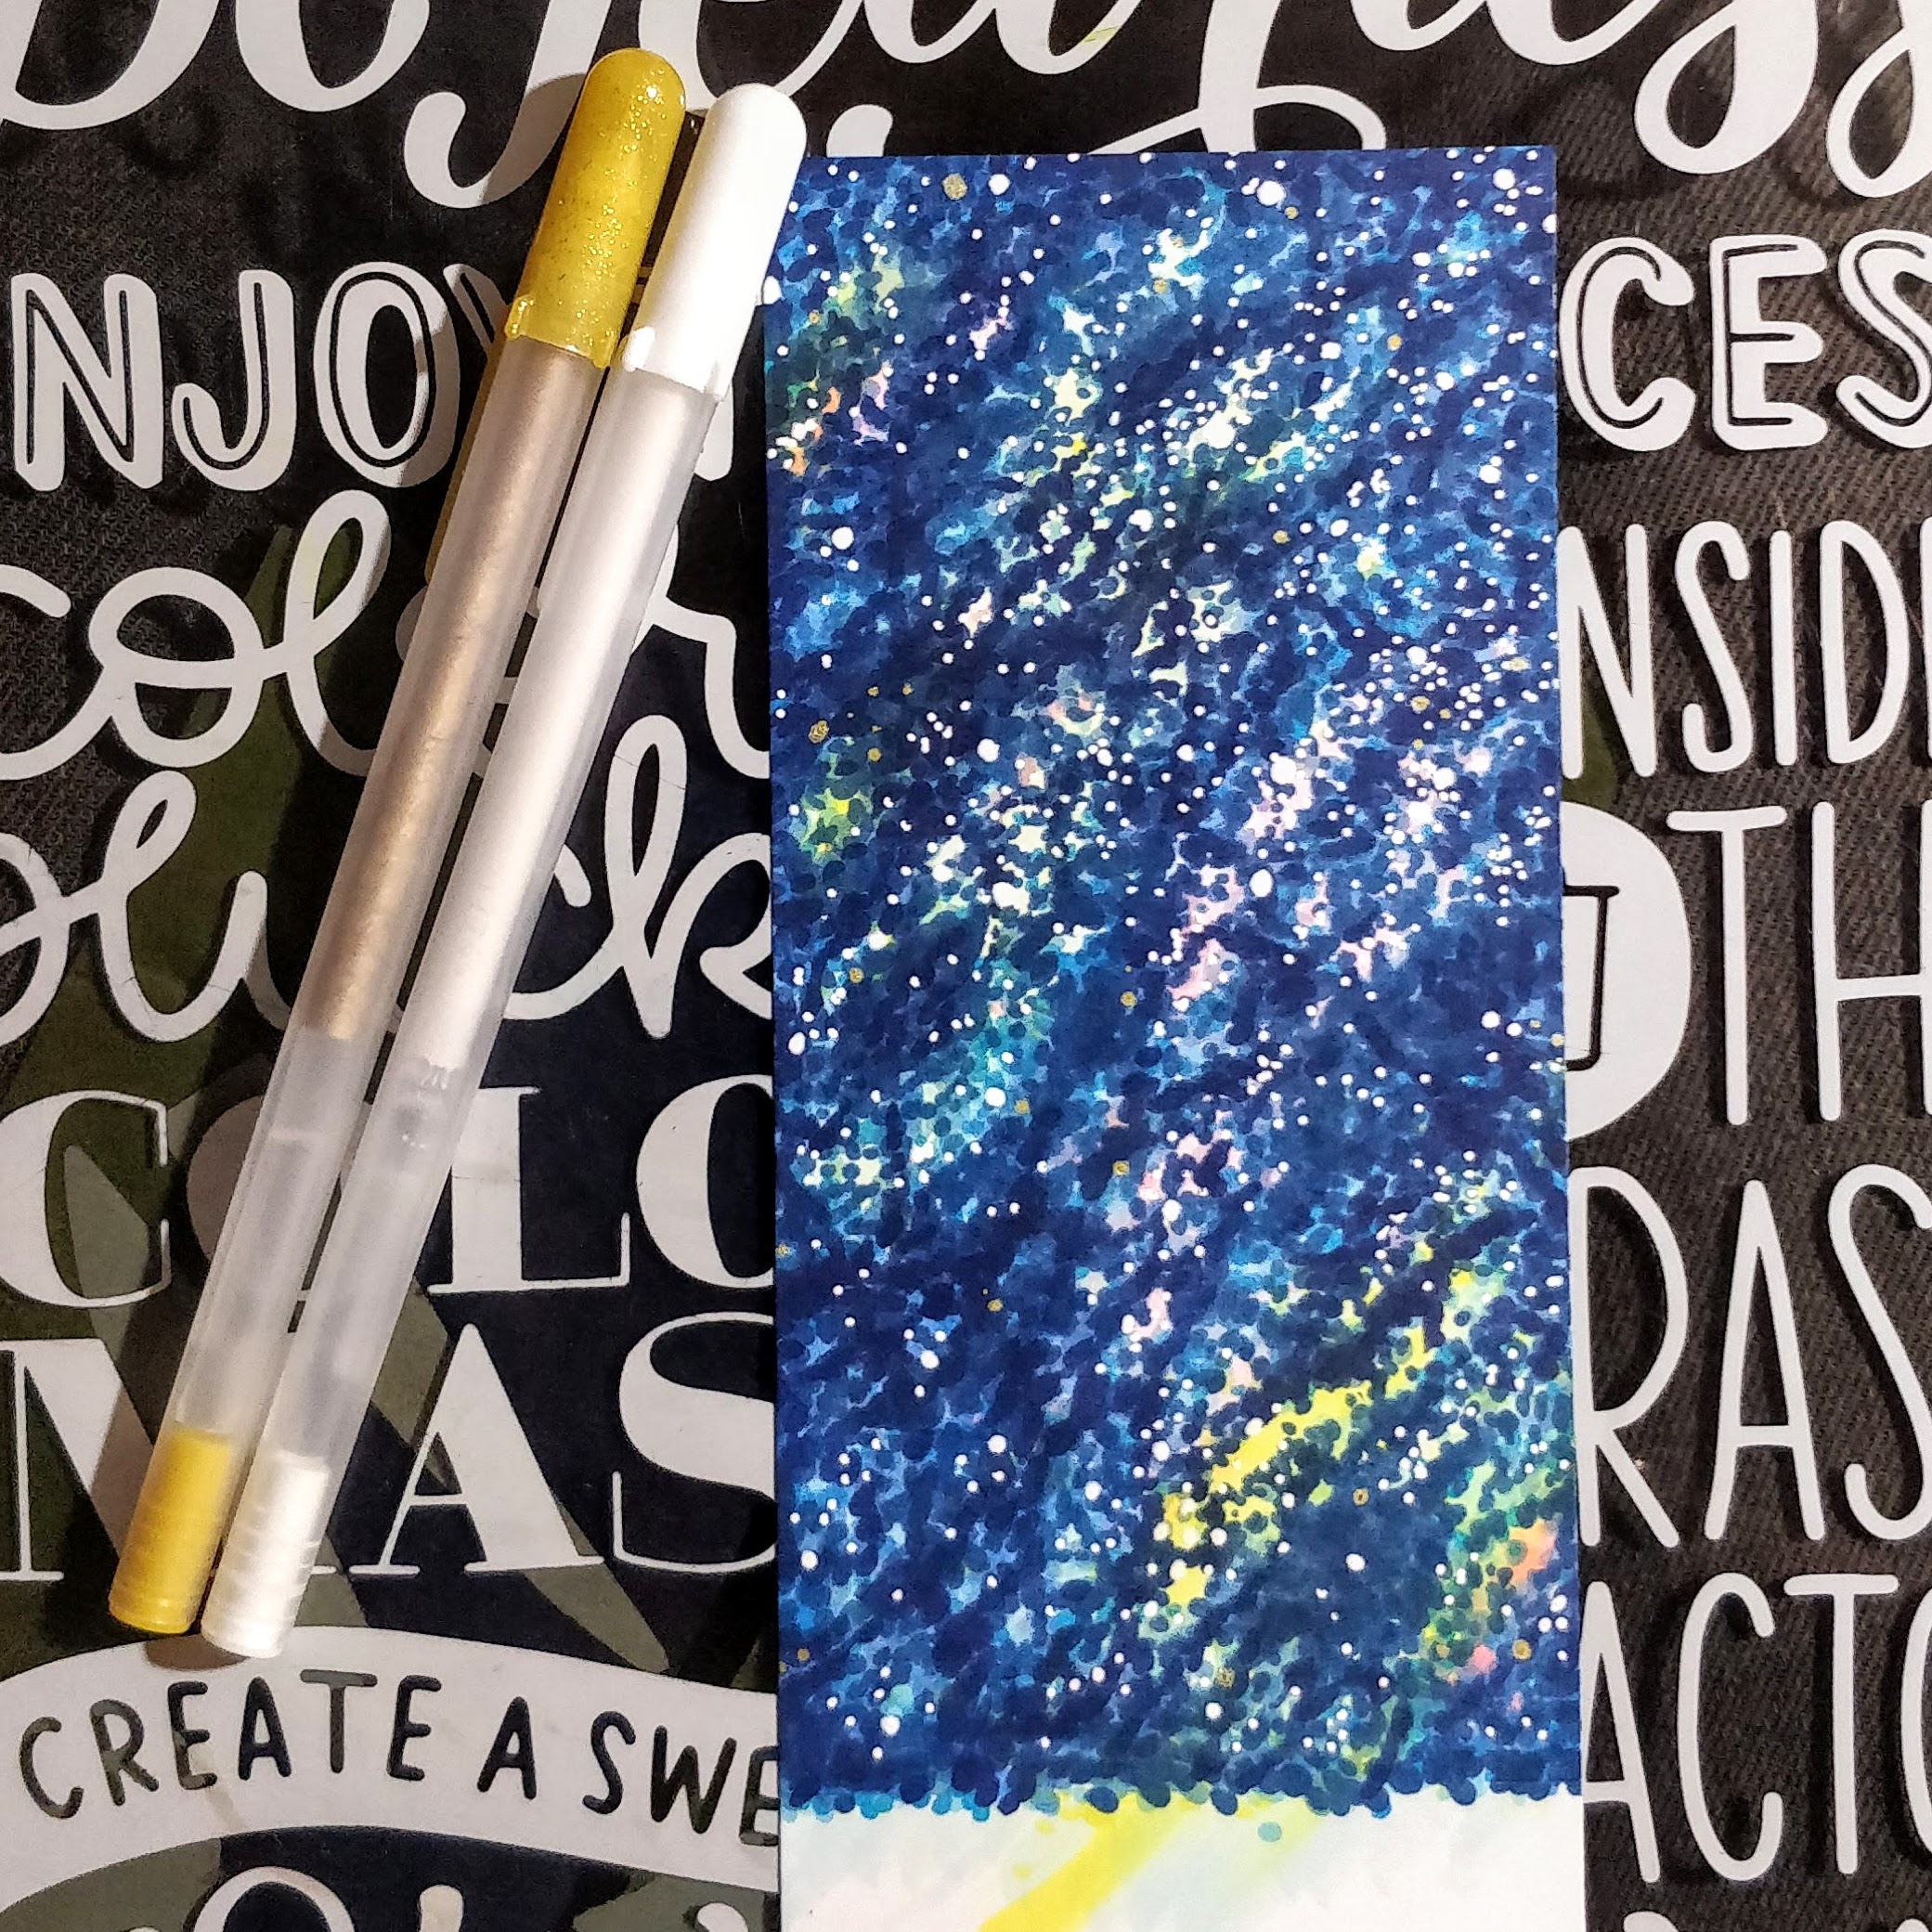
Just like all galaxy backgrounds, this one started out a mess. I scribbled pale shades of pink, yellow, and blue onto a white cardstock panel. Next, I stippled dots of mid-tone colors all over, making sure not to completely cover the pale colors. Then I added more dots with my darkest markers. You can see the progress below. Notice that even after my darkest colors are down, the background still doesn't look like a galaxy. To pull it together, I added lots of dots with a white gel pen, and then a few gold dots for shimmer. Every galaxy needs stars, right?


Originally, I thought I'd pop the cake up right on top of the galaxy, but the background was so busy, the cake was almost lost. No problem, a little vellum fixes everything. I embossed the sentiment in gold powder, then glued the vellum panel to the galaxy, leaving a border visible. To keep the glue from showing through the vellum, I strategically applied it behind the sentiment and where the cake would sit. I also dabbed a small dot of glue at each corner of the galaxy background, and smeared most of it away. The vellum sticks to it and the glue is virtually invisible.

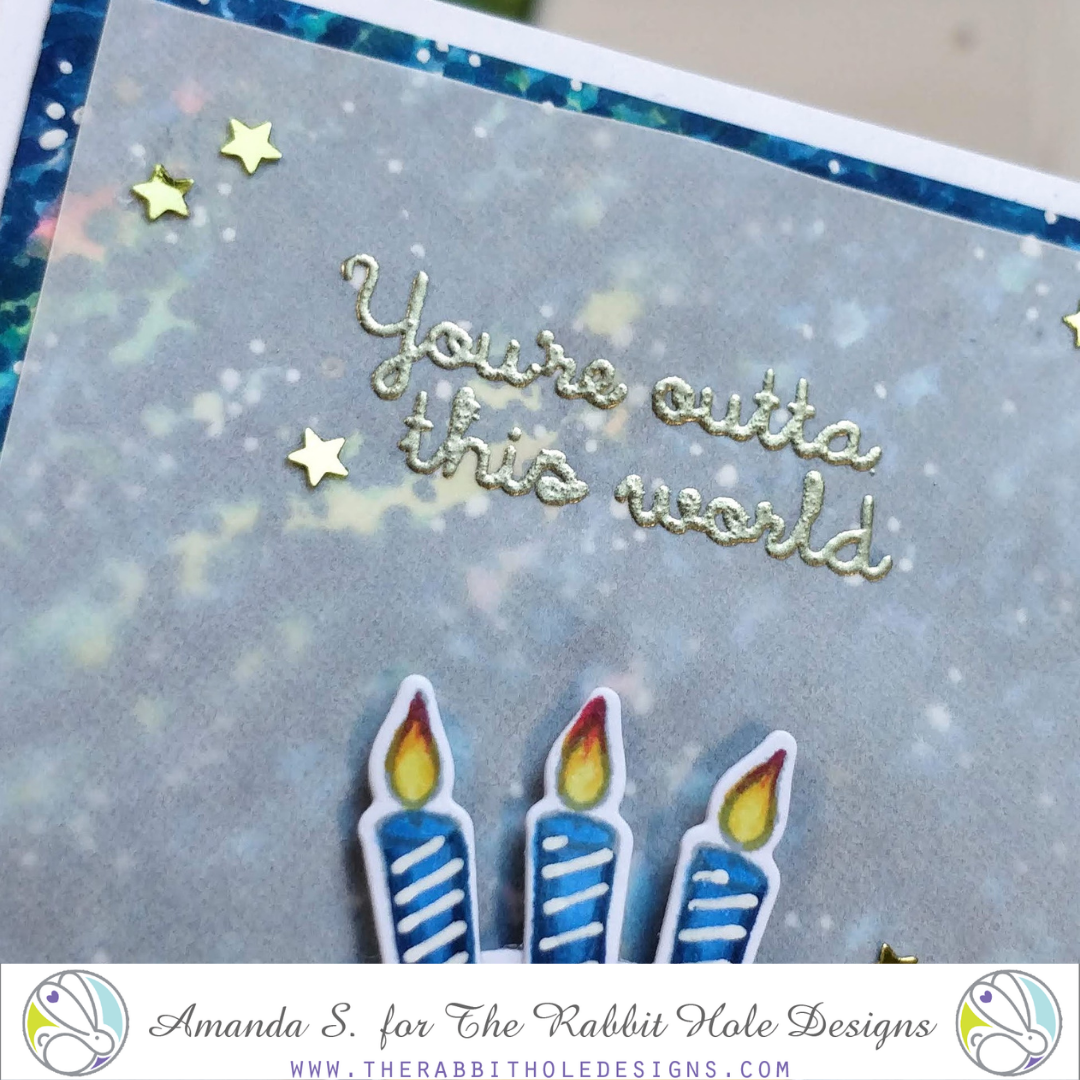
To complete the card, I glued the galaxy to a mini-slimline card base, again leaving a border, and popped the cake up on top with foam tape. A few gold star confetti pieces add extra sparkle. Isn't it fun? This card fits into a #7 coin envelope.

Want to see another card using the Just Cake stamp set? Check out this article! Let me know if you spot the difference in the no-line coloring.

Thanks so much for stopping by today! You can find the sister post to this article on my blog - pearblossompress.com. I hope I've inspired you to give this a try. Tag me on social media if you do. I'd love to cheer you on!

For more inspiration, updates, and news make sure to check out these fantastic places! 

One Layer Galaxy Card


Hey Everyone! Justin here, and I am so excited to be sharing a project using the new Space- Infinity and Beyond set! This release has a lot of tough competition, but I really think it is my favorite release to-date, and I am so over the moon (see what I did there?) with these new space themed sets and stencils!

For this project, I wanted to make something a little different for me: a one layer card! So I started with an A2-sized piece of white cardstock. I stamped my astronaut with the moon balloon from Space- Infinity & Beyond and colored them in with some Copic Markers. I also wanted to continue the bottom of the stamp, which looked like the ground of the moon. So, I used an alcohol marker safe pen and extended the horizon, while adding in a couple stones. The stones were actually really easy to add in, because if you look at the stamp's styling, the stones shadows are little lines, and were super easy to add in to the rocks I drew. I then colored in the ground of the moon with Copic Markers as well.

Next, I stamped out a mask for my astronaut and the moon on full-adhesive post-its, cut them out and covered them up. I also pieced together some torn up post-it bits to mask off the ground portion as well.

I took my blending brushes and used a red, a peacock blue and yellow ink and applied them in splotches on the white areas of my paper. I then went in with a black ink, and covered up all the splotches. I took those color inks and went back over the black ink to really draw them out of the black so it looked like a multi-color galaxy.

Now, I have 2 rules with making galaxies. The first is to never judge your galaxy until you've finished all your steps, because it really won't look right to you until the very end. And the second is that it's all about the layers and distractions. So now that we've layered up the inks, let's talk distractions (really, they're embellishments that look super pretty).

First, I spritzed my panel with water to help blend the inks together and get some nice distressed water spots. After my panel was dry, I took some sparkle liquid and splattered that onto my card and let it dry. The next thing I did was take some white acrylic paint, slightly water it down, and splatter it onto my sky for some white stars. After the white paint dried, I then took some red metallic water color and splattered that onto the galaxy as well. Once it was dry, I had my galaxy background just the way I wanted it! I know that sounds like a lot of steps, but all of those splatters really help add to the starry galaxy look to the card. And I like to believe that using splatters of different colors and materials adds a nice dimension and detail to your project!

For my sentiment, I felt the "I'd give you the moon" from the Space- Infinity & Beyond set was absolutely the perfect choice for this stamp. I stamped it out and embossed it in white powder.

I removed all of my masking and there were a couple areas that were slightly exposing the white paper. I went in with my alcohol marker safe black pen and touched them up. I also went over the moon balloon's string with the pen as well to make it pop more.

I added my single layer panel to an A2-sized card base, and I was done!

This project uses the following The Rabbit Hole Designs product:


For more inspiration with your The Rabbit Hole Designs Creations, be sure to follow along at these other locations:


For more details about products used in this post, you may also follow along at my personal blog, Just a Note by Justin, as well!

I cannot wait to see what you craft up using these amazing new June release projects! Be sure to share them in The Rabbit Hole Designs Fan Page (and don't forget about the Anything Goes Challenge Album as well!

Happy Crafting!