Pages

Showing posts with label Put A Bow On It. Show all posts

Love Forever

Hello there! Michelle here. I love the newest stencil, Broken Glass! It's one of the most versatile 
stencils out there! I paired it up with Old School Tattoo- Anchor and love the way it turned out.


I inked up the stencil with victorian velvet and dried marigold distress oxide inks. I spritzed the stenciled background with water, than splattered some gold and black paint. Allow to dry.
I trimmed the panel to 4 x 5 1/4inches.  Next, I trimmed a piece of vellum to 2 1/4 inches and kept it long enough to fold over the stenciled panel. I embossed the sentiments with black embossing powder. The 'love' sentiment is from the stamp set Put a Bow on It.  
Adhere the vellum strip to the stenciled panel, than adhere to a piece of glitter paper that measures the same as the card base, 4 1/4 x 5 1/2.


I stamped the anchor with black ink than colored up with Copic Markers. I used shades:
W1, W3, W5, W7; RV32, RV34; YR00, YR61, YR02. I fussy cut the anchor. I laid down a piece of gold thread, than adhered the anchor on top. 
For a finishing touch I added some stickles glitter glue and sequins.

Thanks for stopping by for a peek!

Michelle


For more inspiration with your The Rabbit Hole Designs Creations, be sure to follow along at these other locations:


Love, under the sea

Hello there! Michelle here
With Valentine's Day approaching, love is in the air....and the sea!
I combined a few stamp sets and some masking to create this no line coloring card.
I love this cutie from Mermaid Hair and used her as my focus.
I used the big heart from Sassy Sentiments- Anti Valentine.
After my coloring was complete, I used stars and part of a sentiment from 
Love You More- Christmas Frost. The 'love' sentiment is from Put a Bow on It.


I began with a mask for both the mermaid and heart...
A. Mask the place where you want to stamp your mermaid, than stamp your heart.  
B. Remove the mask and cut along the heart outline on the mermaid body...this is
your second mask.


C. Place the second mask in it's original position and D. Stamp your mermaid.
 Using a Misti makes this a lot easier.


E. Remove the last mask and stamp the heart again. My placement was not
so perfect, but using antique linen distress ink for no line coloring allows
you to color over your mistakes!!
F. Start coloring...and have fun!!!
Here is a list of Copic colors:
fin, bubbles and bikini: BG11, BG13, BG18
body: E000, E00, E11, E93
hair: V000, V01, V12, V17, V17
heart: R24, R27, R29, R39
water: B32, B93, B24, B37
sand: E11, E13, E17
colorless blender for rays.
I stamped the stars with white ink and 'love' with festive berries distress oxide ink.
I added some white accents with a gel pen and shimmer with 
stickles glitter glue.


That's it for today!
Thanks for taking a trip down the rabbit hole!!!

Michelle

For more inspiration, updates, and news make sure to check out these places.


With Love

Hello there!
Michelle here!
Hello there TRHD fans!!!
I can't say how much I love the stamp set Put a Bow on It!!!
Any way you design it, it's just fabulous!!!!
Today I embossed it on black cardstock and added color with Polychrome 
Pencils. I first laid down white shading than colored over it with a teal shade.
The color just pops on black cradstock!!! I die cut the stamp with it's coordinating 
die and propped it up with foam adhesive onto kraft cardstock. 
I stamped the sentiment using part of the sentiment stamp from 
Pretty in Peony  I embellished with a few teal sequin.
Lastly, I added some blue stickles glitter glue.

Thanks for taking a peek!

For more inspiration, updates, and news make sure to check out these places


Michelle


Love and Hope

Hello crafty Rabbit Hole fans!
 It's Lisa here with you today on The Rabbit Hole Designs blog and I have 
2 cards for you using the Put a Bow on It stamp set that was recently released.


This stamp set is so elegant and can be used in so many different ways!
For the recent release I colored it up, cut it out and used it as a focal point
on the front of a gate fold card with a shutter mechanism on the inside.
You can see it in action here
⬇︎


On today's cards I decided to stamp directly on to my card and 
heat emboss the images in gold.


For the first card I stamped the bow image and "Love" sentiment multiple times 
randomly all over a white card stock panel cut to 5 1/2" x 4 1/4" with 
embossing ink.  Next I sprinkled gold embossing powder all over
the stamped images and hit them with my heat gun.
I love watching the transformation of gold powder when it melts,
it's truly magical and I never get tired of seeing it.
The next step was to die cut a large scalloped rectangle from gold glitter paper.
I adhered the scalloped rectangle to the embossed panel and since it 
was slightly smaller, it allowed some of the images to peek out around
the edges.  I love that look.


For the second card I repeated the steps of stamping the bow randomly over
the white card stock and heat embossing with gold but this time
I decided to a bit of watercoloring inside of the bows with some pretty pinks. 
Once the bows were colored I stamped the sentiment "Hope" 
from the Put a Bow on It stamp set in pink ink.
I once again used a large scalloped rectangle die but this time from pink glitter paper.
I backed the rectangle with acetate so I could create a shaker card this time.
I included some pink sequins from The Rabbit Hole Designs Fearless Bundle
as well as a mix of other sequins from my stash.

I'm loving how these two cards came out and I love how versatile
the Put a Bow on It stamp set is.


For more inspiration, updates, and news make sure to check out these places


Thanks so much for stopping by today.
Have a great day, I already am!
💘Lisa 💘

Stepping It Up With Colored Pencils


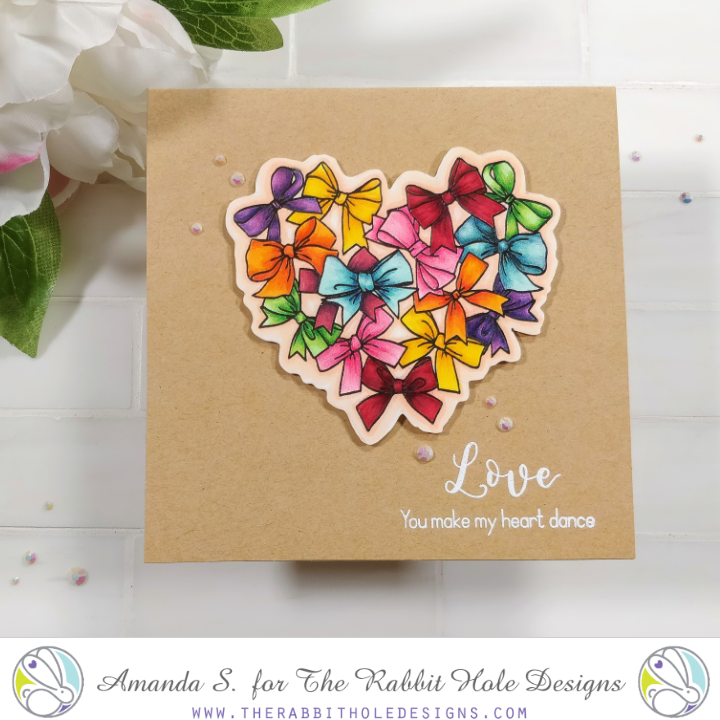
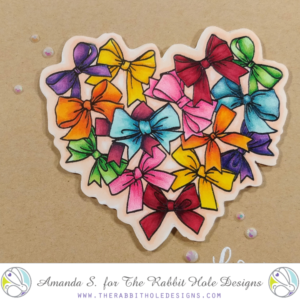
Hey crafty friends, it's Amanda from Pear Blossom Press again. Have you played with the new Put a Bow on It stamp set from The Rabbit Hole Designs yet? It is so pretty and offers a ton of coloring possibilities. After seeing Kathy Racoosin's take on it, I almost didn't want to post my first card with it.

This time around, I had an ace up my sleeve though. I stamped, embossed, and Copic colored my image. I fussy cut it with my ScanNCut and popped it up on a square kraft card base with foam tape (a coordinating die is available). A few scattered gems dressed the card up and it was basically finished. Then, I got on a plane to Florida and took it to Kathy's Coloring Challenge Road Trip class for some advice on how to step it up!

This first picture shows my image before I went to class...


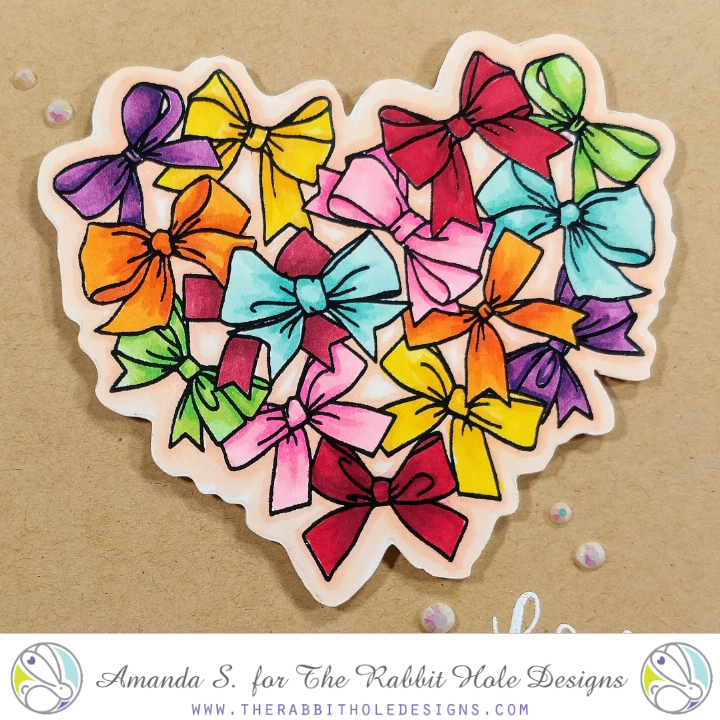
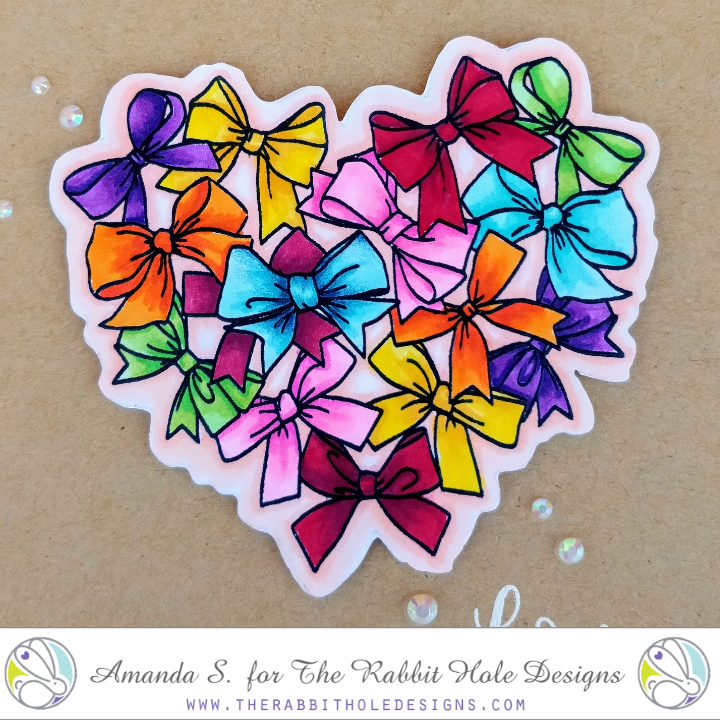
I showed it to Kathy and she used a dark blue colored pencil to deepen the shadows on the blue bow in the center. She used more pressure near the black outlines and then soft squiggles and circles to blend the color out. You can see how much more dimension it has than the others.


Then it was my turn. I got to work on the other bows, adding some shading to the outside edges of the loops, as well as the centers and overlapping areas. I seem to have a heavier hand when it comes to blending so I lost some of the lightest highlight areas, or sweet spots, as Kathy calls them. I will continue to practice, but the additional shading makes a huge difference!


Kathy shares some fantastic tips and techniques in her classes. I took my first one with her in September. I still have lots of practice to do, but the second class was a great refresher and reminded me of tips I forgot about after the first one. Luckily, she will be sharing her coloring classes online soon! Keep an eye out for Kathy's Coloring Challenge Road Trip on Online Card Classes!

Overall, I'm much happier with the updated card. Now I will tell you, she recommends not embossing images because the raised edges keep you from getting your pencil tip all the way to the lines. The more I practiced on this image, the more I understood what she meant. So I'll be forgoing the embossing for a while to compare. Let me know what you think. Can you see the difference between the before and after?


Thanks for stopping by today; I'll be back soon with another fun card. You can find more inspiration and ideas and links to the specific products I used on my blog.

Love by Niccole

Hello everyone!

It's Niccole from Nic & Viv Designs back again to share another card I made using one of The Rabbit Hole Designs new stamp sets. 


For today's card I used the Put A Bow On It stamp set. I love how versatile this stamp set is.

I have a lot of pictures today for you. This way I can show you each card and a close up of the foil on each card.


How to create this card:
  • Square card base that is 4.25"x4.25".
  • Stamp the bows stamp from the Put A Bow On It  stamp set with Versamark Ink on a 3.75"x3.75" square.
  • Add clear embossing powder and heat emboss bow image.
  • Cut a piece of foil to cover embossed image.
  • Run bow image with foil through laminator.
  • Remove foil to reveal foiled image.
  • Frame out square stamped image with coordinating color to frame it.
  • Add image to square card base.
  • Stamp the word LOVE from the Put A Bow On It stamp set in the bottom right corner at an angle coinciding with the heart shape.
  • Add a few black Nuvo Crystal Drops randomly to finish the card.
Here is one more picture of the full cards ...


What do you think of the three foiled Put A Bow On It cards? Which is your favorite I really love how they turned out.

TRHD Products used:

For more inspiration, updates, and news make sure to check out these places

The Rabbit Hole Designs YouTube

I have had so much fun playing with the Put A Bow On It stamp set today.

Thank you so much for stopping by and spending some time with me.

Until next time ... Hugs & inky fingers!   -Nic-


Thinking of You


Hello there!!!
Michelle here, stopping by with a card I created for a friend going 
through a difficult time. She's a 'bow' girl so I know this card will
have her smiling. 

I embossed the stamp, Put a Bow on It, than colored it with a combination of 
Copic Markers and Prismacolor Pencils.  I die cut the bow cluster with the coordinating die.
I inked up the card base with cracked pistachio distress oxide ink. 
I splattered some white paint onto the background and 
bow cluster.  

The sentiment is from the stamp set Pretty in Peony  I also embossed it 
with gold embossing powder. 


I love the way it sparkles!

Here are the supplies I used:

Put a Bow on It 4x4
Put a Bow on it - Die

Pretty in Peony 4x6

Thanks for stopping by!

For more information, news and updates check out these links:


Put a Bow on it...for Christmas!

Hey everyone, DT Jammie here with another awesome way to use the "Put a Bow On It" stamp set.  I love this set because it is super versatile and I can use it for nearly any holiday, and birthdays, and even sympathy.  Today, I've decided to use it for CHRISTMAS!!!!! Yup... check it out:


Pretty sure I used almost every G and YG marker that Copic has to offer, and if they had more, I'd likely have used those too!  But it was so fun to create this gradient of green bows!!! 

This is the stamp set I used named "Put a Bow On It" and here's the link to purchase it from:

For more inspiration, updates, and news make sure to check out these places


I hope this card inspires you and I really hope to see some of your projects using this awesome stamp!  Happy Holidays from my family to yours!
Toodles!!!!
-Jammie 

Bow Love

Hello again! It's Amanda W. taking over the blog today with this fun, clean and simple Valentine card.

I was inspired by another crafter who did two versions of the same card a while ago - one was in full color and the other was simple and just the outline. This is something that I never do and was excited to try.


I heat embossed my bows in black and painted one that stood out to me with gold watercolor. I took the same watercolor and flicked it on a red panel. Then heat embossed love in black on the bottom right corner. I popped the red panel on a black card base and popped the bows up with foam squares.


The shine of the embossing and the shimmer of the metallic watercolor make this clean and simple card just a little bit more. It catches your eye and is just striking. I love this color combo!

The products I used today are:


For more information, news and updates check out these links:

 I appreciate you sharing your time with me. Have a fabulous day!

x

December Release Inspiration Hop ~ Day 3


Hello and welcome to Day 3 of the Inspiration Hop. We are so excited for you to join us as we present to you the final day of our December release.  Our fabulous Design Team has been sharing their projects over the past few days, so be sure to visit their blogs and leave them some crafty love.


 The 4 new stamp sets, 3 dies, & 2 stencils are available to purchase right now in the shop.
~
As a thank you every order placed will be eligible for a 20% discount. Discount Code TRHDTHANKFUL20 This code will only be accepted until 12-01-2019. There are no exclusions on this code it is applicable to your whole order. Not applicable to previous orders. May be used more than once. Does not apply to shipping and tax.
Please see graphic at the bottom of the post.
**Please Note: Free Shipping WILL NOT be available during the time this discount code is in effect. **
~

The stamp set that is being highlighted today is:

Put A Bow On It


but you might also see this stamp set floating around our design team ...


**Giveaway**
To celebrate day 3 of inspiration The Rabbit Hole Designs is giving away the stamp set Put A Bow On It and the stencil Square Illusion to one lucky winner. Winner will be chosen at random from the comments left on participating blogs, so make sure to visit each stop and leave a comment. Leave comments by 11:59 pm PST 11-28-19 on all participating blogs. Winner will be announced on The Rabbit Hole Designs blog 11-29-2019 


Here is the line up for the hop:
Amanda Stevens
Amanda Wilcox
Lisa Golzbein
Cassie Trask

Thank you for joining us the last few days of our Inspiration Hop.


Thank you so much for stopping by today!