Pages

Showing posts with label Mid Century Modern #2 4 Layer Stencil. Show all posts

Warm Wishes

 Hi everyone!  Amy here with you today sharing a card I created using the 1 Line Snowperson Stamp Set and Mid-Century Modern #2 Stencil.

1 Line Snowperson Stamp Set, Mid-Century Modern 2 Stencil, You've Been Framed - Layering Dies, Clear Sparkle Enamel Dots by The Rabbit Hole Designs #therabbitholedesignsllc #therabbitholedesigns #trhd

To start this card I die cut a piece of smooth white cardstock using the second largest die from the You've Been Framed - Layering Dies.  I then stamped the image and sentiment from the 1 Line Snowperson Stamp Set and silver heat embossed.

1 Line Snowperson Stamp Set, Mid-Century Modern 2 Stencil, You've Been Framed - Layering Dies, Clear Sparkle Enamel Dots by The Rabbit Hole Designs #therabbitholedesignsllc #therabbitholedesigns #trhd

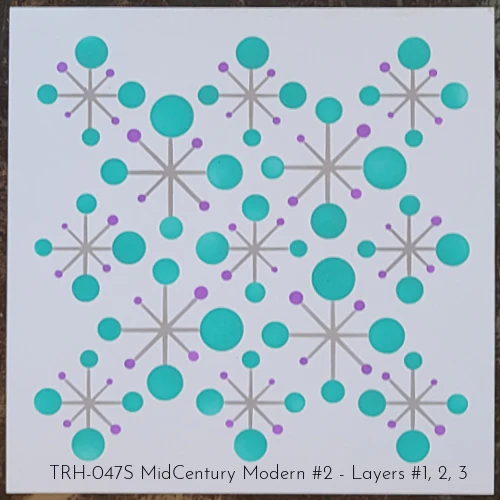
Next, I masked off the snowperson, and used Layer 1 of the Mid-Century Modern #2 Stencil with Weathered Wood Distress Oxide Ink.  I then used Layer 4 of the same stencil with Distress Oxide Inks Salvaged Patina, Kitsch Flamingo, and Shaded Lilac to create a colorful snowy background!

I assembled my card using teal cardstock for the base, and added a few Clear Sparkle Enamel Dots!  

1 Line Snowperson Stamp Set, Mid-Century Modern 2 Stencil, You've Been Framed - Layering Dies, Clear Sparkle Enamel Dots by The Rabbit Hole Designs #therabbitholedesignsllc #therabbitholedesigns #trhd

Thank you and I hope you enjoyed my card today!

For more inspiration, updates, and news make sure to check out these places:

Infinity Shaker- Revisiting a Personal Favorite


Hello. Lauren here. For the month of December, we revisit our personal favorite creations we've made over this past year. One of mine was this sparkly Christmas infinity shaker card using the Mid Century Modern #2, Layered stencil.


Full tutorial can be found on my YouTube Channel: https://youtu.be/jYT-mHklrNo

Thanks for visiting. You can follow me here:

For more inspiration, updates, and news make sure to check out these awesome places! 

Merry Christmas!

  Hi everybody!  Amy here today sharing a card I created using the gorgeous Bunny Christmas Stamp Set illustrated by Tatsiana Zayats, and the Mid-Century Modern #2 Stencil.

Bunny Christmas Stamp and Die Set illustrated by Tatsiana Zayats, Mid-Century Modern #2 Stencil by The Rabbit Hole Designs #therabbitholedesignsllc #therabbitholedesigns #trhd

I started this card by die cutting a piece of smooth white cardstock and blended on Distress Oxide Inks Salvaged Patina, Saltwater Taffy, and Shaded Lilac.  I then splattered on some white paint and set it aside to dry.  After the paint was dry, I used the Mid-Century Modern #2 Stencil to create the large, gorgeous snowflakes in the background.

Next, I stamped this adorable image from the Bunny Christmas Stamp Set, colored it with copic markers, and cut it out using the coordinating die set.

Bunny Christmas Stamp and Die Set illustrated by Tatsiana Zayats, Mid-Century Modern #2 Stencil by The Rabbit Hole Designs #therabbitholedesignsllc #therabbitholedesigns #trhd

I die cut a teal banner for the sentiment, prepped it with the Cottontail Embossing Powder Tool, stamped the sentiment from the Bunny Christmas Stamp Set, and white heat embossed.

I assembled my card using teal cardstock for the base, and popped up the image and sentiment banner with foam tape for some dimension!

Bunny Christmas Stamp and Die Set illustrated by Tatsiana Zayats, Mid-Century Modern #2 Stencil by The Rabbit Hole Designs #therabbitholedesignsllc #therabbitholedesigns #trhd

For finishing touches on this card I added accents with a white gel pen, glitter, and glossy accents to the bunny's nose!  Thank you and I hope you enjoyed my card today!

From Your Flaky Friend


Center stage for this adorable snowman! The line that creates this 1 Line Snowperson can be positioned so it looks like he is on a hill of snow. This little guy was colored with a no-line watercoloring technique. The background was created by blending 2 different Distress Oxide inks and stenciling the Mid-century Modern #2 stencil. Stenciled only 2 of the 4 layers of the stencil set and offset them. 


For more inspiration, updates, and news make sure to check out these places:

"Joy to the Squirrel"


Clarence is back and he is having a blast during our Christmas in July celebration! Of course, Clarence couldn't stop himself from playing with some snow and creating a snow-squirrel!  The Clarence Christmas set TRH-170 is a 4x6 set that includes three adorable and fun images of Clarence and two sentiments. 


Clarence was colored using watercolors. He is such a fun character to color. I added some highlights and lowlights to the tail to make it look furry. I kept the colors to match the retro palette of reds and teals. The background is one of the layers of the Mid-Century Modern #2 Stencil used with TCW's Stencil Butter (Pearl White)


For more inspiration, updates, and news make sure to check out these places:

Joy to the Squirrel


Happy Friday yall!!!!  Tangii here, and I'm playing with some goodies from the July Release.  I inked up one of the images from Clarence Christmas and paired it up with the Mid Century Modern #2 stencil!

First off, I stamped Clarence, colored him with Copics and cut him out by hand.  Once done, I set him aside. Next up, I did some ink blending on my main panel with some red and green Oxide ink, using the Cotton Tail Blending Brushes.!

 I used my heat gun to go over this panel to make sure those Oxides were good and dry then went over it with the Cottontail Embossing Powder Tool so that my embossing powder would only stick where I wanted it! I first used Layer 1 of the Mid Century Modern #2 stencil, I layed it over my panel in a wonky angle (not square) and went over it with an Embossing ink dauber and heat embossed with some clear ep. Then I layed down Layer 3 of the stencil set (the smaller dots) and placed it at a different wonky angle, I wanted these dots in random places and not lined up with the first layer.  I went over this with the Embossing dauber and added some silver ep.  Finally I adhered Clarence and my sentiment
 with foam.

You can also read about this card on my blog, here with links to the products I used, etc.  Thanks for popping by, come back again soon!

Merry Christmas Shaker Card


Hello! It's Lauren here today sharing this full panel shaker card featuring the new Mid Century Modern #2 stencil and the sentiment from the 1 Line Reindeer stamp set. I went with a non-traditional soft color palette that I thought went well with the retro stencil.

I created a video tutorial showing how I created this card. Here's the link to the YouTube video: 

https://youtu.be/jYT-mHklrNo

This was a fun card to create. I hope it inspires you to create your own pretty holiday cards using this fun new release. 

For more inspiration, updates, and news make sure to check out these places
 

Here are the links to the products used for this card:

Mid Century Modern #2, 4 Layers stencil: 


1 Line Reindeer stamp set:


Stenciling in Layers

Hello friends!

Today's share is for those that love stenciling! The newly released Mid Century Modern #2 4 Layer Stencil has infinite possibilities with colors and designs. My quick and easy card today uses three shades of blue Distress Oxide Inks, sparkly embossing glitter, and silver and white sequins -- PLUS a fabulous sentiment (also embossed with sparkly glitter) from Bunny Christmas


You can find all of the products in The Rabbit Hole Designs Shop! Choose some traditional colors, choose icy wintry blues, or go crazy with neons - but it's a ton of fun and very relaxing with this easy-to-line-up set!

See more of my projects on my blog at Joy in a JAR.

July 2022 Release Hop - Day 3


Hello and welcome to the last day of the inspiration hop. We are excited for you to join us as we present to you our July 2022 release. Our Brand Ambassadors have been sharing their projects over past few days, so be sure to visit their blogs and leave them some crafty love.

The 6 new stamps sets, 3 coordinating dies, 1 four layer stencil, and 1 paper pack are all available to purchase right now in the shop.

The products being highlighted today are:


If you missed it go back and check out Day 1 and Day 2 of our inspiration hop.

Here is the line up for today:

__________________
**Giveaway**

To celebrate the July 2022 release, The Rabbit Hole Designs is giving away two savings vouchers; one to a lucky Instagram follower and one to a lucky Fan Page follower.  Winner will be chosen at random from the comments left on the INSTAGRAM post, and tagging friends, and also from commenting on the Fan Page post.  So make sure to head on over to INSTAGRAM and look for the giveaway post
and look for the post at
by 11:59 p.m. PST 06-30-2022 
Winners will be contacted via DM for the IG winner 
and announced in the 
Facebook Fanpage group on 07-01-2022

This is the graphic you are looking for on our IG and FB
___________________
For more inspiration, updates, and news make sure to check out these awesome places! 

Thank you so much for stopping by today!

July 2022 Release Hop - Day 2


Hello and welcome to day 2 of the inspiration hop. We are excited for you to join us as we present to you our July 2022 release. Our Brand Ambassadors will be sharing their projects over the next few days, so be sure to visit their blogs and leave them some crafty love.

The 6 new stamps sets, 3 coordinating dies, 1 four layer stencil, and 1 paper pack are all available to purchase right now in the shop.

The products being highlighted today are:


If you missed yesterday ... Here is Day 1 of the hop. Make sure you stop back tomorrow for Day 3 of our inspiration hop.

Here is the line up for today:

__________________

**Giveaway**

To celebrate the July 2022 release, The Rabbit Hole Designs is giving away two savings vouchers; one to a lucky Instagram follower and one to a lucky Fan Page follower.  Winner will be chosen at random from the comments left on the INSTAGRAM post, and tagging friends, and also from commenting on the Fan Page post.  So make sure to head on over to INSTAGRAM and look for the giveaway post
and look for the post at
by 11:59 p.m. PST 06-30-2022 
Winners will be contacted via DM for the IG winner and announced in the Facebook Fanpage group on
07-01-2022

This is the graphic you are looking for on our IG and FB
___________________
For more inspiration, updates, and news make sure to check out these awesome places! 

Thank you so much for stopping by today!