Pages

Showing posts with label Simon Says Stamp. Show all posts

Sparkling Warm Wishes!

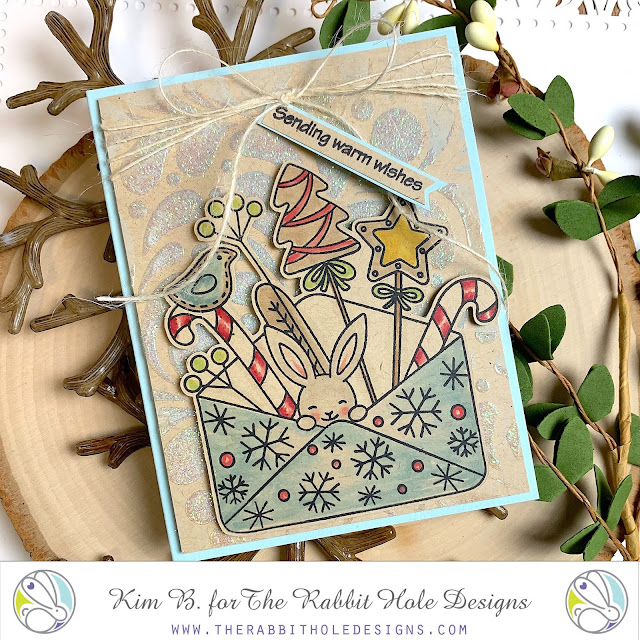
Hello crafty friends! Kimberly here and I am so smitten with the new release "Hoppy Holidays" illustrated by Tatsiana! Isn't this bunny the sweetest?


To make this card, I blended Speckled Egg distress oxide through the Splish Splash stencil on Kraft cardstock. Then, without lifting it, I spread glitter paste through the stencil over the distress ink. Next, I put it to the side to dry. 

While I waited for the glitter paste to dry, I stamped the image from the "Hoppy Holidays" stamp set on Kraft cardstock, colored it in with Copic markers and fussy cut it out. Then, I stamped the sentiment on a strip of Kraft cardstock. I cut a flag in one end and layered it on a piece of blue cardstock. 

Once the glitter paste dried, I wrapped twine around the card and tied a bow. I popped the stenciled background up on foam tape and added it to a blue card base. To finish the card, I popped the image up on foam tape, attached it to the card and tucked the sentiment under the bow.  

Thank you so much for stopping by! Check out more awesome products in The Rabbit Hole Designs shop! I hope I have inspired you to create something today!!

Kimberly
Love, under the sea

Hello there! Michelle here
With Valentine's Day approaching, love is in the air....and the sea!
I combined a few stamp sets and some masking to create this no line coloring card.
I love this cutie from Mermaid Hair and used her as my focus.
I used the big heart from Sassy Sentiments- Anti Valentine.
After my coloring was complete, I used stars and part of a sentiment from 
Love You More- Christmas Frost. The 'love' sentiment is from Put a Bow on It.


I began with a mask for both the mermaid and heart...
A. Mask the place where you want to stamp your mermaid, than stamp your heart.  
B. Remove the mask and cut along the heart outline on the mermaid body...this is
your second mask.


C. Place the second mask in it's original position and D. Stamp your mermaid.
 Using a Misti makes this a lot easier.


E. Remove the last mask and stamp the heart again. My placement was not
so perfect, but using antique linen distress ink for no line coloring allows
you to color over your mistakes!!
F. Start coloring...and have fun!!!
Here is a list of Copic colors:
fin, bubbles and bikini: BG11, BG13, BG18
body: E000, E00, E11, E93
hair: V000, V01, V12, V17, V17
heart: R24, R27, R29, R39
water: B32, B93, B24, B37
sand: E11, E13, E17
colorless blender for rays.
I stamped the stars with white ink and 'love' with festive berries distress oxide ink.
I added some white accents with a gel pen and shimmer with 
stickles glitter glue.


That's it for today!
Thanks for taking a trip down the rabbit hole!!!

Michelle

For more inspiration, updates, and news make sure to check out these places.


Let Them Eat {Birthday} Cake...


Hello there!

 Michelle here! Stopping by to share a birthday card with you using one of my favorite
color combos...aqua, violet and gold!!!
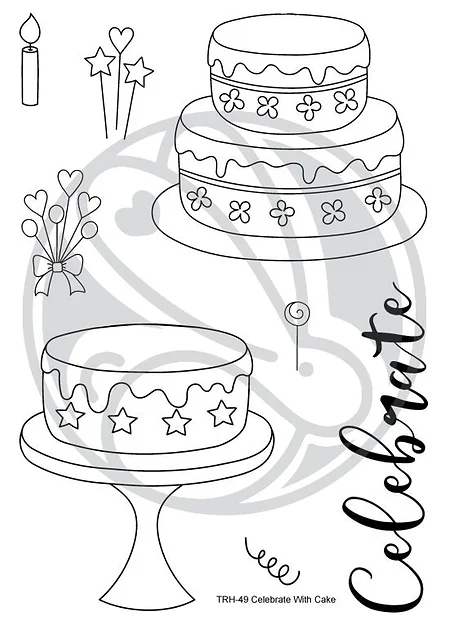
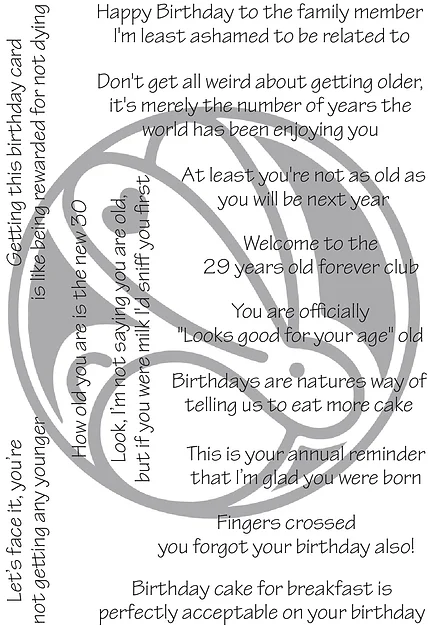
I used the stamp sets Celebrate With Cake, and Sassy Birthday, along with Diamond Flower Stencil.
I inked up the background with this sweet stencil and distress oxide inks in peacock
feathers and tumbled glass. Than I added some gold and black paint splatters and set aside to dry.

I stamped the double layer cake than masked the image and stamped the pedestal 
from the single layer cake. I colored the cake with Copic Markers in shades:
cake plate: BG10, BG11
Cake: E50, E51
Icing and Flowers:  V12, V15, V17
Topper: BG11, BG13, BG18
For the sentiment, I shaded a piece of Copic friendly paper with V12, 15, and 17.
I embossed the sentiment with gold powder.
For a finishing touch I added some clear stickles glitter glue and sequins.

Supplies used:
Celebrate with Cake 4x6

Sassy Birthday 4x6

Diamond Flower - Stencil 6x6

Thanks for taking a peek!!!
Check out all the items in the shop and also at Simon Says Stamp!!!

For more inspiration, updates, and news make sure to check out these places ...

See you soon!!!

Michelle


You Donut Know How Much I Love a Midnight Snack Card


Hey Rabbit Hole Crafters! Justin here and I'm super excited to share with you this fun creation I made using the More Than Donuts set, paired with the Circles and Stars stencil!

I knew I wanted to make something with this adorable, donut-loving squirrel, but wanted to get a little bit of inspiration. While thumbing through my stencils, I came across the Circle and Dots stencil and thought it would be fun to create a night time scene with it, giving a little bit of a backstory that this squirrel must have woken up for a midnight snack, and decided to munch on a purple donut (because I would totally do this too)!

First, I colored my More Than Donuts squirrel up with some warm gray alcohol markers. I used some longer marker brush "flicks" on the tail to make it look bushy, and not flat. I also used a light blue green marker on top of the gray inside the glasses, and then used some clear glossy gel to make the glasses 3D. I also used some violet markers for the frosting, earthy brown colors for the donut itself, and used some purple gems and white gel pen markers to make donut sprinkles.

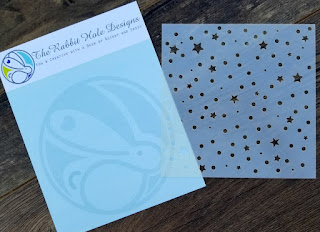
For my background, I ink-blended with brushes a purple night sky, going from a light purple, to mid purple, to dark blue to black. I really love to make non-traditional sky colors, because they're a little more striking than your standard blue sky. I then took my Circles and Stars stencil, adhered it with some light tack spray to my purple night sky panel, and used a champagne colored metallic gel over the top to get some pretty and shiny dots and stars in my night sky! Always remember that when applying a gel to your stencil to A) remove the stencil and set aside your panel to dry in a place it won't be disturbed and B) clean your stencil off immediately with warm water and soap.

I took a piece of brown wood-print paper, cut it down to the same size as my purple night sky panel, and hand cut it into a wonky "L" so it looked like a tree. I then adhered it directly to my purple night sky panel, and adhered my squirrel in it's place. To add some shadow, to make it really look like this squirrel was perked on a branch, I took a warm gray alcohol marker and shaded in any part where my squirrel touched the tree branch. I placed my night sky panel onto a patterned A2-sized piece of paper.

To finish my card out, I stamped my sentiment on to a light purple strip of card stock, mounted it to a darker purple slightly thicker card stock, and made it into a banner. I adhered my banner into it's correct location, and trimmed the edges so it fit onto the card.

I adhered a few purple jewels into the night sky, and that's my card!

Here are the products I used in this card:


For more inspiration with your The Rabbit Hole Designs Creations, be sure to follow along at these other locations:

For more details about products used in this post, you may also follow along at my personal blog, Just a Note by Justin, as well!

I hope this card sparked some fun ideas for your future projects, and maybe an idea for your next late night snack! Thanks for reading, and happy crafting!

Ready to Par-Tea!!!

Hello there!
I hope you are all getting excited for 
The Rabbit Hole Designs' First Birthday Bash!!!

But today we celebrate our very own, Heather Ferguson's birthday!!!
We wish you a very happy birthday, Heather!!!

Michelle here! I started off with my chosen stencil, Twisted Sunshine, and layered
some distress oxide inks beginning with the darkest shade: black soot, 
picked raspberry and worn lipstick. Than I added some splattered white and gold paint.
Set aside to dry.

Next, I stamped and colored this hilarious flamingo!!!
I used Copic Markers in shades RV13, RV14, RV25; R21, R22;  
W3, W5, W6, W7; BG10, BG11, BG15; Y19.
For the sentiments, I used the stamp set Perfectly Blended! This stamp
set is full of fun caffeine puns!!! I embossed the sentiments with
gold embossing powder.

I adhered the flamingo, sentiments and gold thread with some foam tape.
I scattered some sequins and added some clear stickles glitter glue.

I hope you enjoyed this post!!!
Thanks for stopping by!!

For more inspiration, updates, and news make sure to check out these places.The Rabbit Hole DesignsThe Rabbit Hole Designs InstagramThe Rabbit Hole Designs Facebook PageThe Rabbit Hole Designs PinterestThe Rabbit Hole Designs YouTube


A Hoggy Post Holiday Card


Hello everyone and happy day after Christmas!
I have family in Iowa and live in So Cal, so speaking to them on Christmas they were at 58 degrees and beautiful weather with no snow and we were at 54 degrees with rain and wind, so it was a bit backwards for us.  I hope you all had nice weather, good food and took time to be present.  We celebrated with our oldest son, his wife and their one year old (my very active toddler grandson), my dad and my husband's sister.  Our youngest son and his little family were ill and spent the day at home recuperating. But we had a grand visit and some good food and it was a beautiful day! 

I have a fun card to share with you that showcases our Hoggy Holiday's stamp set and our Light Me Up stencil and I used the sentiment "Let it snow" from our Love You More- Christmas Frost stamp set. So let's get started on how this card came to be:


I started with a piece of Simon Says Stamp Card Stock in Schoolhouse Red cut to 4.25" x 5.5"
I then took our Light Me Up stencil and using White Pigment Ink and a blender brush, I stenciled the snowflake all over the card stock.  I then used the brush and blended more white ink all along the edges of the card stock.  I love how it looks like those frosted windows you see around the holidays with the center being the focal point.  I then let the panel dry.  I then used Ink On 3's Liquid Pixie Dust and splattered the background liberally, and oh my how I am in love with this!  I then used some white ink and watered it down and splattered the background with that as well..... and if I wanted to leave it at that I believe that would have carried this card, it was such a great panel.  But, I had this little piggy all colored up and could not wait to use him! I love his scarf and shirt and that hat... he is adorable!!!  So I cut him out, popped him up on fun foam and put him on the bottom left of the card.  Then I stamped the sentiment on black card stock 3 times with clear sticky ink and heat embossed with white, fine detail embossing powder and cut out small banners and popped them onto some foam as well.  After I placed all the elements on the card front and placed my panel onto a white A2 sized card base, I then took some Vicki Boutin Iridescent Texture Glitter Paste and put it on the tops of my sentiment strips and under neath my piggy, and since sparkle and glitter is AWESOME- I then sprinkled some Unicorn Glitter on top while the texture paste was still wet for more fun.


Hopefully you can see some of the chunks and sparkle in the close up pictures.... it is so pretty in real life.  I also put some glitter gloss on the white parts of the piggy's hat and then used a white gel pen and added some lines here and there for some added interest.


If you have any questions for me please feel free to leave me a message, and from my family to yours I hope you all had a wonderful Christmas!  I added links to the sets I used in the body of the post.  You can also get our stamp sets and stencils at Simon Says Stamp or at The Rabbit Hole Designs.


Love by Niccole

Hello everyone!

It's Niccole from Nic & Viv Designs back again to share another card I made using one of The Rabbit Hole Designs new stamp sets. 


For today's card I used the Put A Bow On It stamp set. I love how versatile this stamp set is.

I have a lot of pictures today for you. This way I can show you each card and a close up of the foil on each card.


How to create this card:
  • Square card base that is 4.25"x4.25".
  • Stamp the bows stamp from the Put A Bow On It  stamp set with Versamark Ink on a 3.75"x3.75" square.
  • Add clear embossing powder and heat emboss bow image.
  • Cut a piece of foil to cover embossed image.
  • Run bow image with foil through laminator.
  • Remove foil to reveal foiled image.
  • Frame out square stamped image with coordinating color to frame it.
  • Add image to square card base.
  • Stamp the word LOVE from the Put A Bow On It stamp set in the bottom right corner at an angle coinciding with the heart shape.
  • Add a few black Nuvo Crystal Drops randomly to finish the card.
Here is one more picture of the full cards ...


What do you think of the three foiled Put A Bow On It cards? Which is your favorite I really love how they turned out.

TRHD Products used:

For more inspiration, updates, and news make sure to check out these places

The Rabbit Hole Designs YouTube

I have had so much fun playing with the Put A Bow On It stamp set today.

Thank you so much for stopping by and spending some time with me.

Until next time ... Hugs & inky fingers!   -Nic-


Thinking of You


Hello there!!!
Michelle here, stopping by with a card I created for a friend going 
through a difficult time. She's a 'bow' girl so I know this card will
have her smiling. 

I embossed the stamp, Put a Bow on It, than colored it with a combination of 
Copic Markers and Prismacolor Pencils.  I die cut the bow cluster with the coordinating die.
I inked up the card base with cracked pistachio distress oxide ink. 
I splattered some white paint onto the background and 
bow cluster.  

The sentiment is from the stamp set Pretty in Peony  I also embossed it 
with gold embossing powder. 


I love the way it sparkles!

Here are the supplies I used:

Put a Bow on It 4x4
Put a Bow on it - Die

Pretty in Peony 4x6

Thanks for stopping by!

For more information, news and updates check out these links:


All I Want for Christmas

Hello there!


DTM Michelle here from My Passion for Crafting.  
Today I am sharing a slim line card using the stamp set
This card measures 3 1/2 by 8 1/2. I inked up the card
base with shabby shutter and black soot distress oxide inks.
Than I embossed the background with stars and white embossing powder.
To finish the background I splattered some gold paint. 


I colored the adorable couples with Copic Markers. 
I added some Stickles glitter glue for a hint of shimmer.
All sentiments were embossed with white powder.


Thanks for stopping by today!

Michelle

For more inspiration, updates, and news make sure to check out these places.

All I want for Christmas

Hello everyone! DTM Shanna here today with a card featuring The Rabbit Hole Design‘s new release for November, Hoggy Holidays! I love making non-traditional Christmas cards, and the presents image in this set was just perfect for a rainbow card!!  (any excuse for a rainbow right?!?)


I started by making a watercolored background for my presents by ink smooshing a rainbow of distress inks across a piece of watercolor paper.  I let the dry and then actually stenciled over it with Ranger Transparent Texture paste using the Diamond Flower stencil from TRHD.  The end result was quite pretty, but silly me ended up covering most of the stencil work with the card elements.  So here is a close up I took on my phone of the scrap so you could see how pretty the stencil work turned out.

Next I stamped out a bunch of the presents and colored them with my Zig markers, sticking to the colors of the rainbow. I lined them all up across the watercolored background in rainbow order, adhering with foam tape.


I chose a split card design for this card, die cutting 2 panels to adhere to my card base with foam tape above and below my stamped images.  The accent makes it look like the presents are *floating* in the negative space between the panels.  Kinda fun!!


Here is the full stamp set, isn't it cute??  


That wraps up my post for today, I will be back next week for another trip down The Rabbit Hole!  Until then you can find me over on my blog, Caffeinated Craftiness or over on Instagram
-Shanna


For even more inspiration, updates, and news make sure to check out these links.

Caffeine Saves Lives

Hello again Rabbit Hole fans!
It's Lisa back on the blog with you today and I have a short story to share with you.
I recently acquired the Caffeinated Shark stamp
and die and I'm so glad I did! Did you ever not order a stamp because you thought
you wouldn't use it and then see it used on a card and you're sorry you didn't order it?
Well a good purple haired friend of mine calls it FOMO...….
Now for those of you who don't know what that means (I certainly did not)
It means "fear of missing out".....
Well, I'm not missing out anymore, now little sharky is mine and I'm so glad he is!
I really have to start training myself to look at craft supplies in a different way
and see the potential in them.
Ok enough rambling for now, on to my card!
Card Recipe
1)  I usually start by stamping my image with some Copic friendly ink
and coloring with my Copic markers. I loved coloring sharky with my "W"
markers and giving him some fun spots along the way. I used the matching
die to cut him out after he was colored.
2) I covered my card base with some fun water themed patterned paper as a
background for my card.
3) My bubbly frame die cut was the perfect layer over the patterned paper
for little sharky and his fish friends.
4) I stamped the super funny sentiment from Perfectly Blended and
cut it in half.  I then inked the edges of the 2 sentiment strips in blue
to match the card.
5) I foam mounted the fish, sentiment and shark on the card and I'm
picturing the fish being scared of sharky and that the
caffeine is saving THEIR lives! 🤣🤣🤣

Here are the two Rabbit Hole stamp sets I used for today's card:

CAFFEINATED: Shark Clear Stamp 3x4
Caffeinated Shark
Perfectly Blended Clear Stamp 4x6
Perfectly Blended

Don't forget you can now purchase The Rabbit Hole stamps, dies and stencils
at Simon Says Stamp! Stay tuned to The Rabbit Hole FB Fan Page and Instagram
(see links below)
during the new September release so you don't miss out on some
great deals over at Simon Says Stamp!
Oh and by the way, the new Rabbit Hole release starts on August 26th and
just an FYI, y'all are in for some SCARY fun!


For more inspiration, updates, and news make sure to check out these links.

Have a great day, I already am!
🦈 Lisa ðŸ¦ˆ