EZ Birthday Card
Clean, Simple, Masculine...
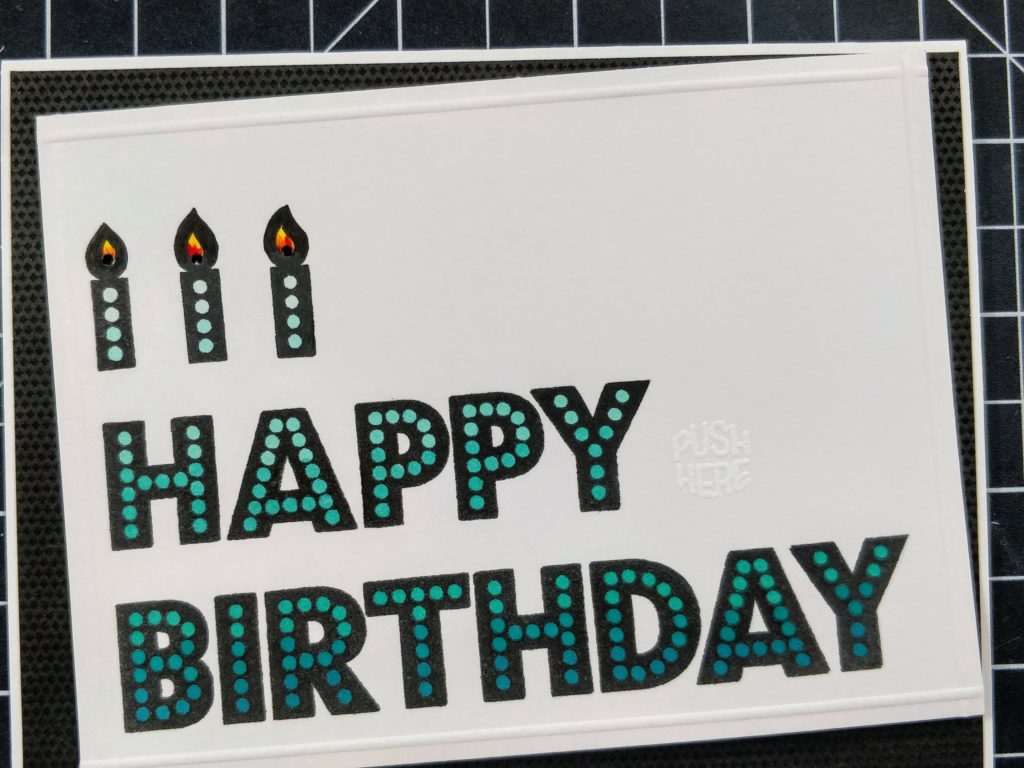
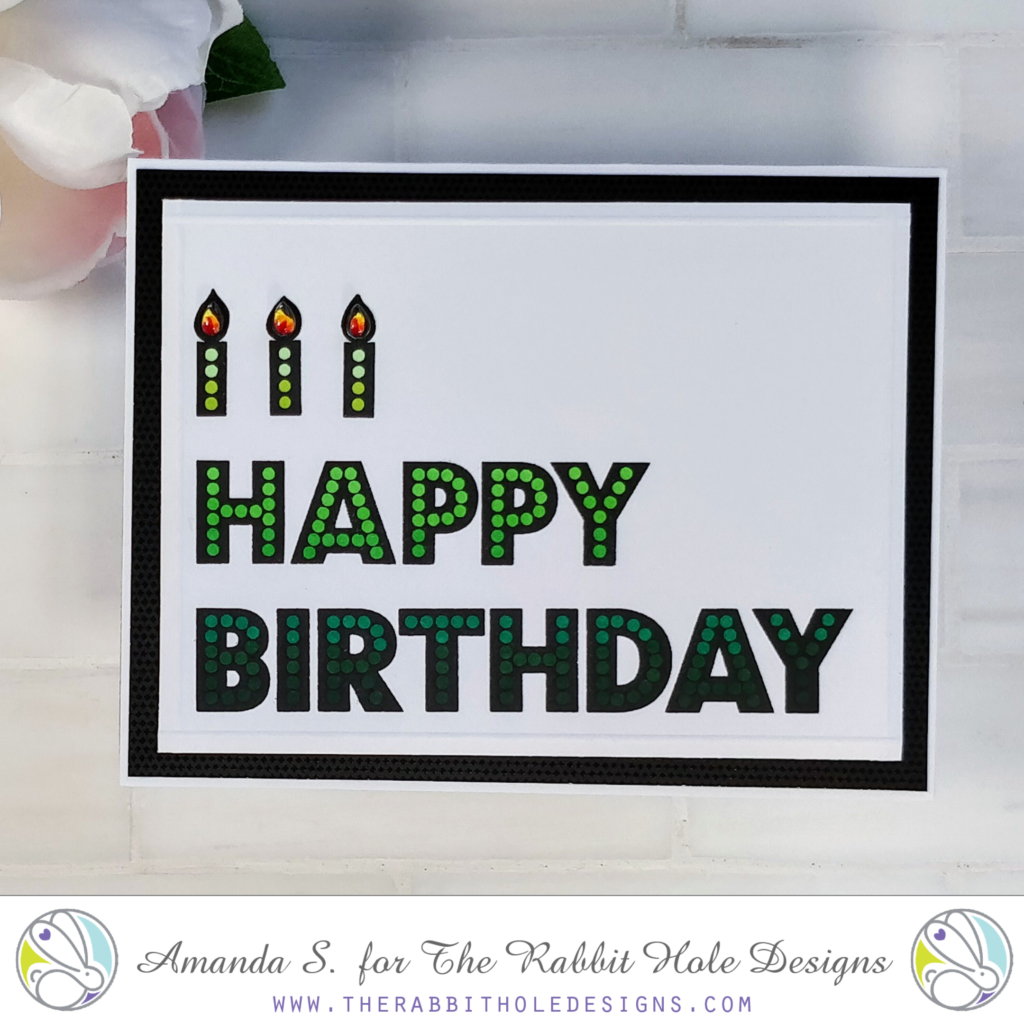
Why are masculine cards so hard? Is it just me, or are clean and simple cards hard too? It's never that they take a lot of work; it's just that the ideas are hard to come up with. And it's hard to know the difference between clean and simple, versus plain and boring, right? Amanda from Pear Blossom Press here again, and today, I'm sharing a two versions of a clean and simple, masculine card. Since I already took care of the hard part (coming up with the idea), you're going to love how fast you can whip up a whole batch of these to have on hand!
STEP ONE:
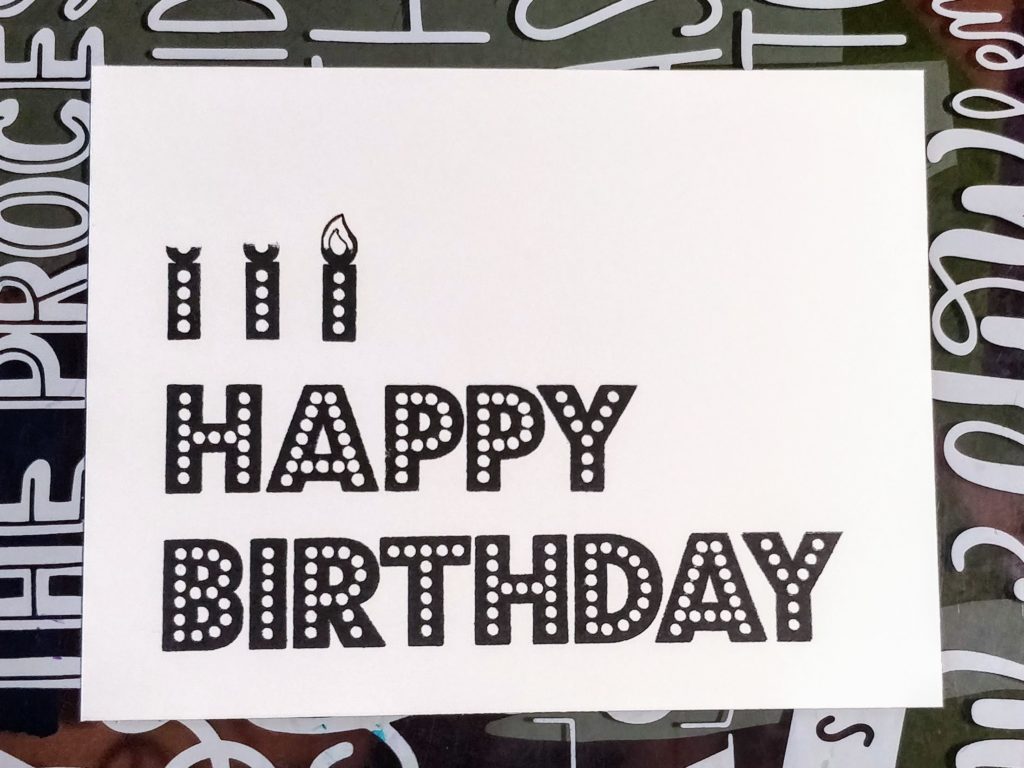
Stamp HAPPY BIRTHDAY from the Marquee Words set onto a white panel. Turn the exclamation point upside down and stamp the bottom portion of it (mask off the top of the dot) above the words. Move it over and stamp it two more times. Next, use a Copic Multiliner and draw the top of the dot to look like a candle flame.
STEP TWO:
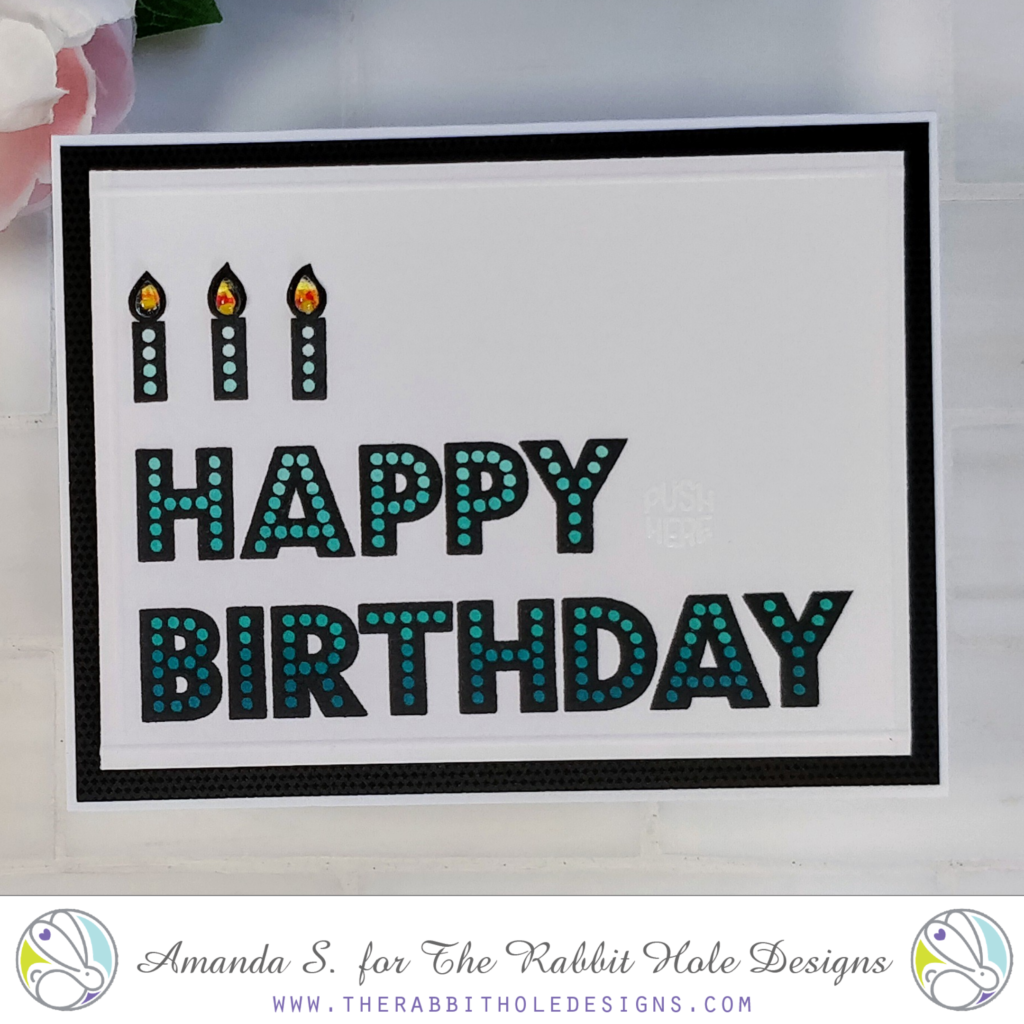
Color the dots and flames with Copic markers. I used shades of green for one card, and blue greens for the second. Next, I trimmed the panels down to 5" x 3¾" and added a raised border, by scoring 1/8" on all four sides of the panels in my Scor-Pal. At this point, you can pop the panels up with fun foam on black mats and white card bases. (That's what I did for the green card.) But if you want to spend a few more minutes on the cards, you can add lights to the flames with EZ-Lights. They'll add a real pop of light! To do that, you'll want to punch a small hole at the base of each candle flame. And if you look closely, you'll see that I embossed PUSH HERE next to the Y in happy. I used white powder to allow it to blend into the background. In person, you can see the raised, shiny text, but it doesn't detract from the clean layout.
STEP THREE:
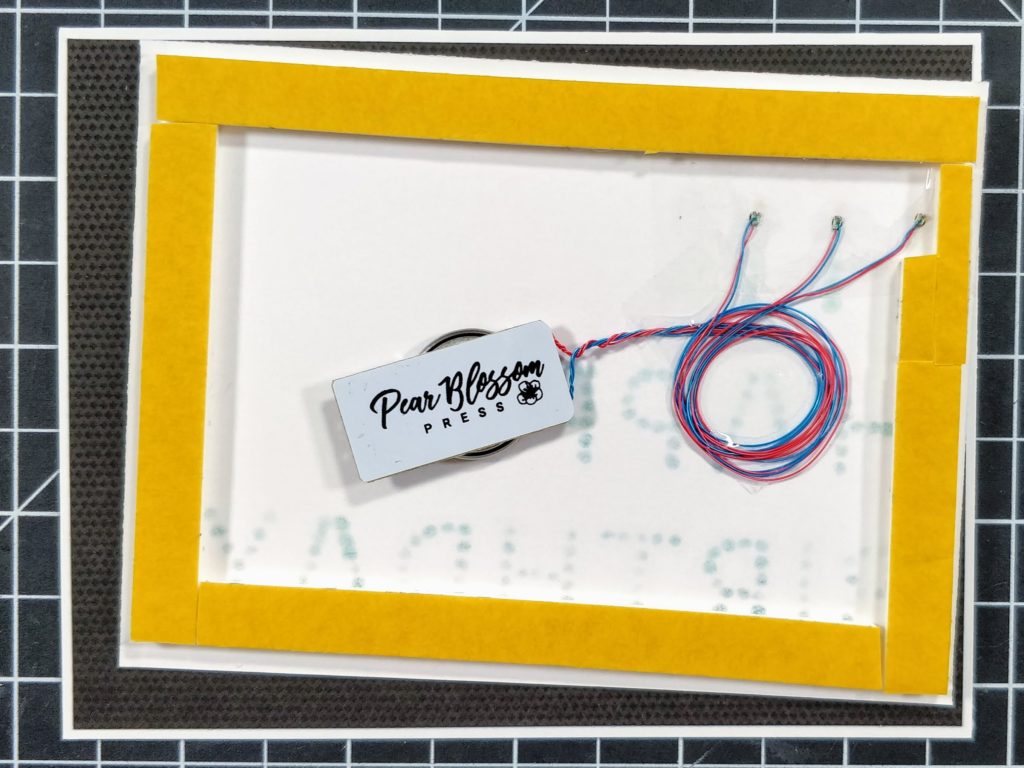
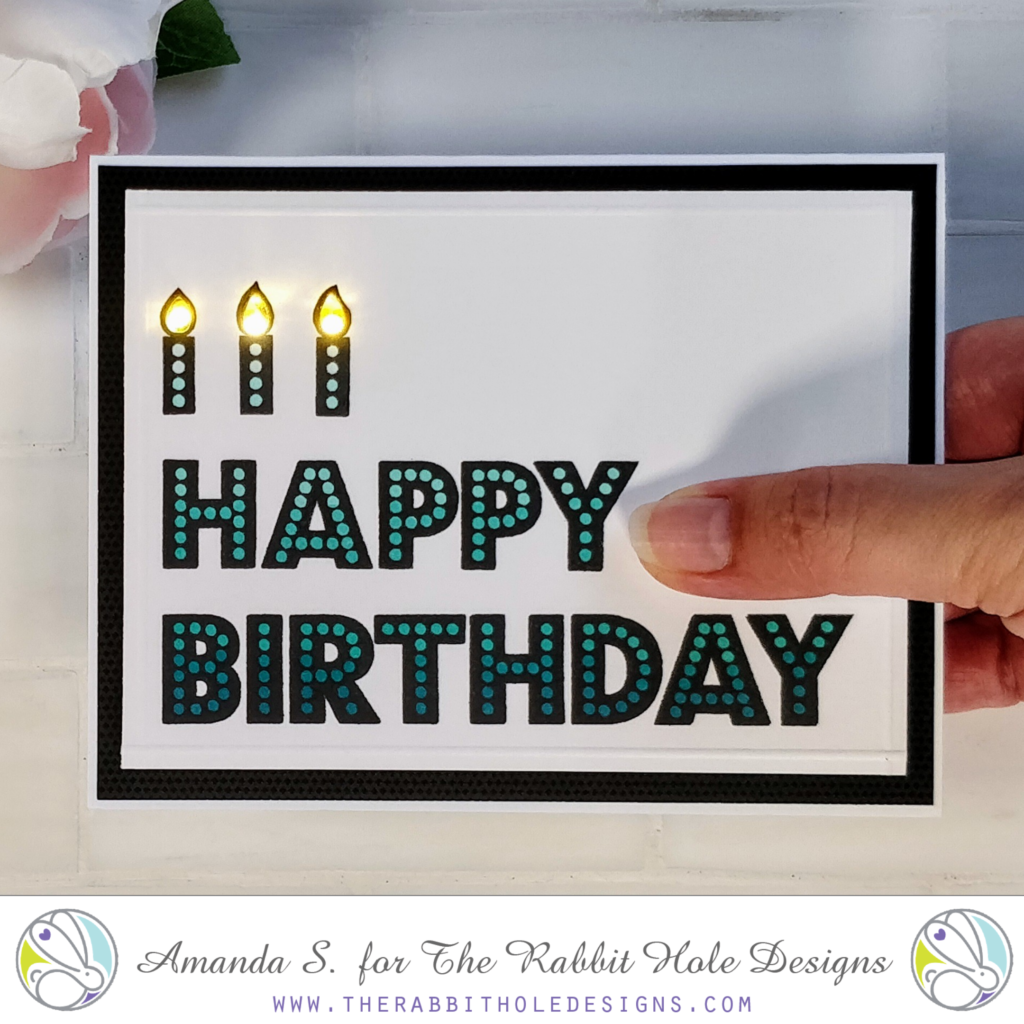
Add lights! Flip your panel over and use double-stick tape to adhere the battery of your EZ-Light to the panel, making sure to line up the button right under PUSH HERE on the other side. Line up the three LEDs with the holes in the candles and secure them with tape. Add a layer of double-thick foam tape around the edges of the panel. I promise, it's really simple. Then you can attach it to the black mat and card base.
STEP FOUR:
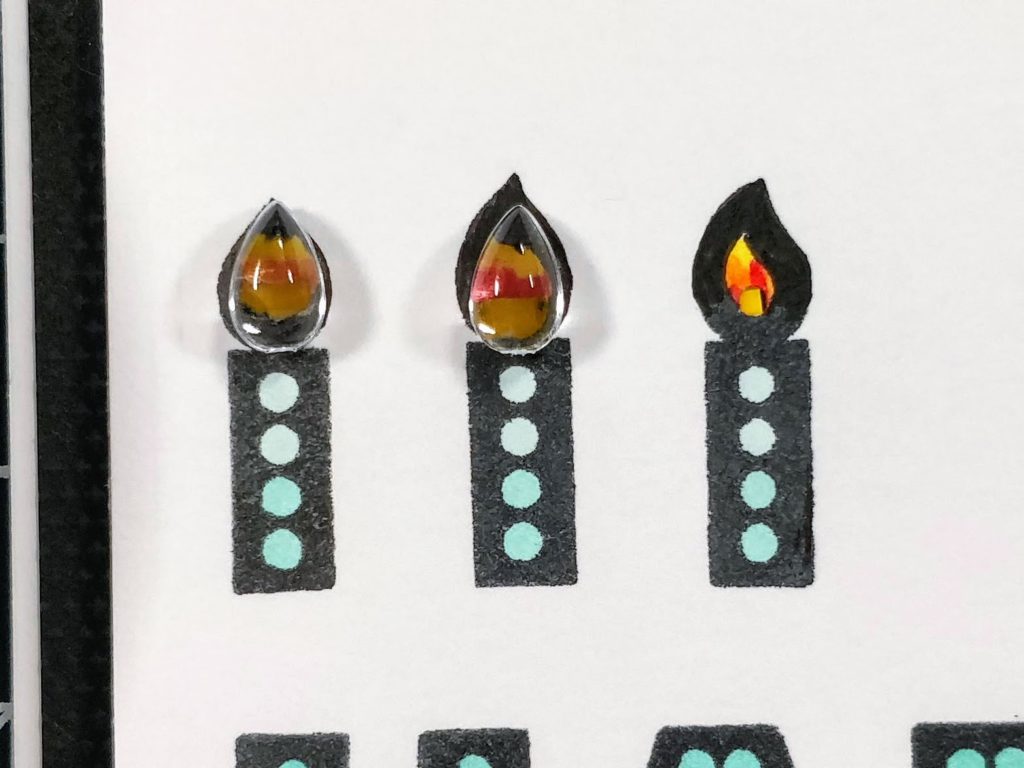
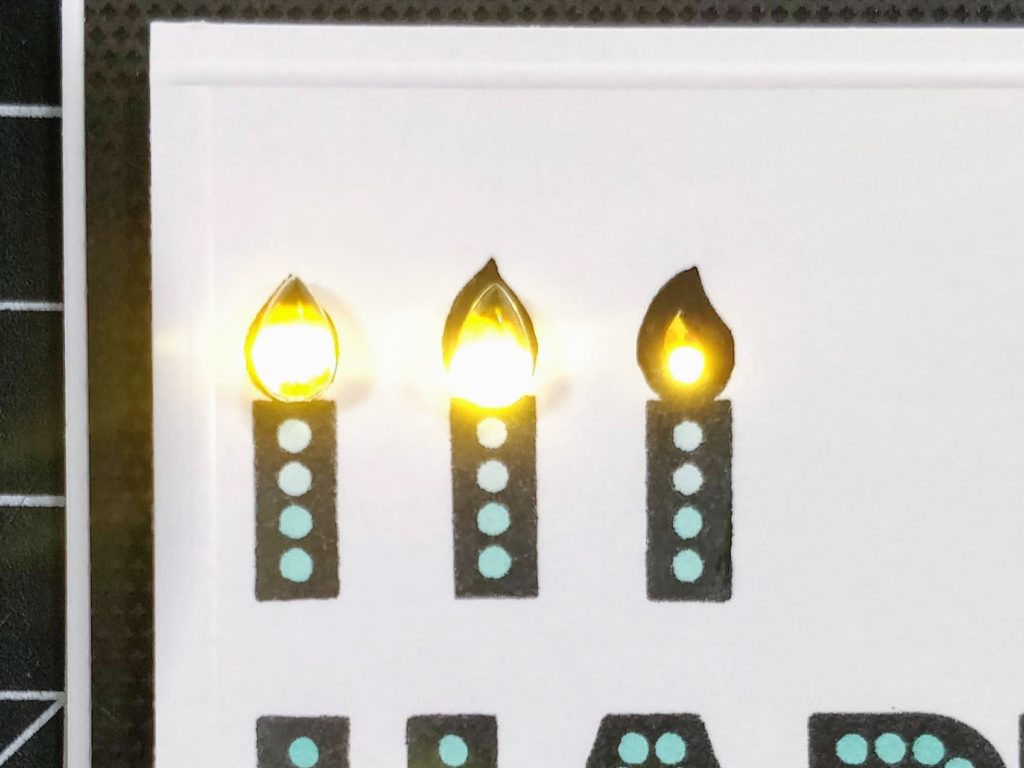
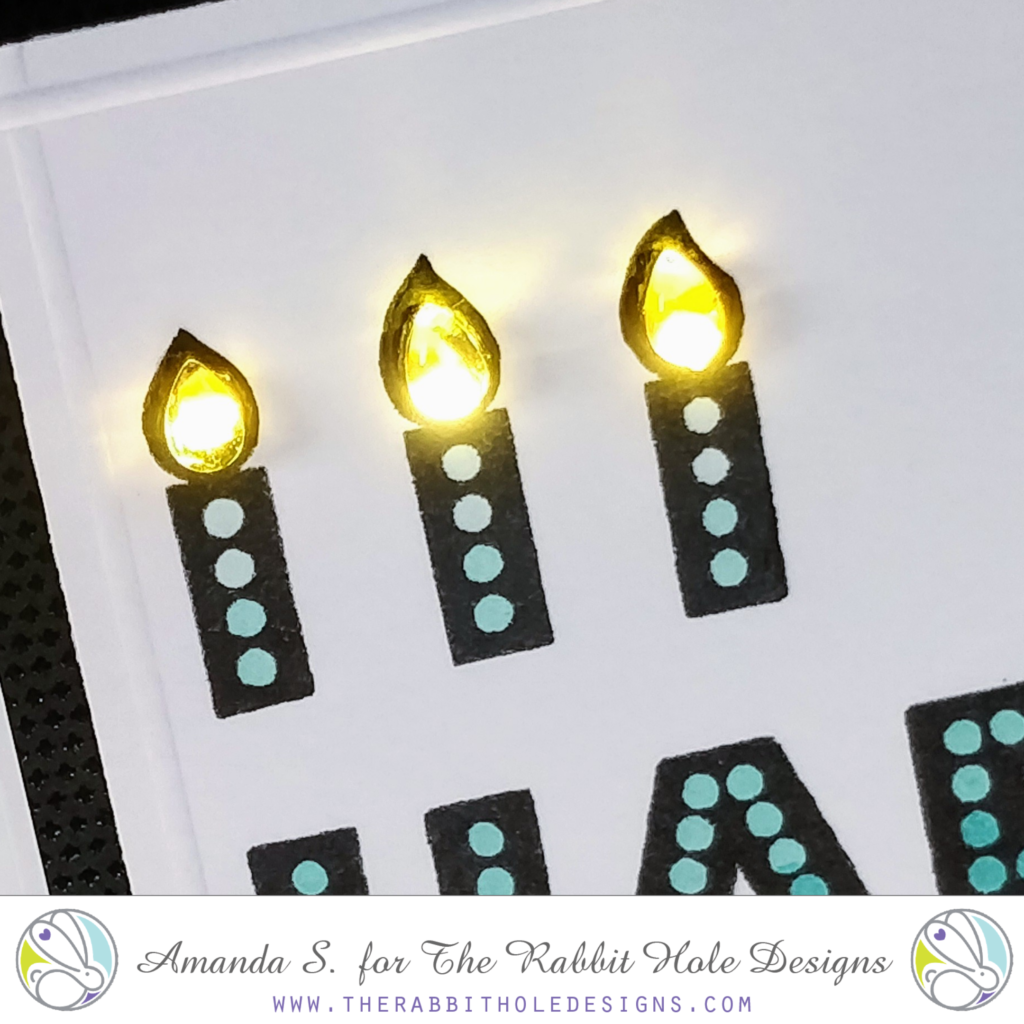
Add clear raindrop gems on top of the flames. I did this on both cards; they're a great detail whether or not they light up. In the pictures below, you can see how the entire gem will light up when you put it on top of a light. You can also see what it would look like if you don't cover up the light...
That's it. Pretty easy, right? Obviously, you can change up the colors, or even stamp on colored cardstock and fill in the dots with a white gel pen if you want a different look. Adding the lights only takes a few more minutes, but the card is great without them too. Here is a look at the finished cards. (The green doesn't have lights, the teal does.)
And here is a closeup of the lights, after the glue is dry. (Make sure to use a glue that will dry clear.) See how the whole gem lights up, instead of just the bottom of the flame? Pretty cool, right? You can use this same trick for other gems too, as long as they are clear or translucent (no silver paint on the back).
What do you think of my clean and simple, masculine cards? I hope I've inspired you to give them a try. Want to see another card made using the Marquee Words stamp set? Check this out. How about another card with gems that are lit up? This Christmas card has lights under the star and Rudolph's red nose.
Thanks for stopping by today! Head on over to my blog, to read the sister article and find links to the specific products I used for today's cards. If you give this a try, tag me on social media so I can see and cheer you on! I'll be back soon with more fun cards to share.
For more inspiration, updates, and news make sure to check out these places:
The Rabbit Hole Designs Instagram
The Rabbit Hole Designs Facebook Page
Hoo's there?
- Die cut a circle from a white panel and set the circle aside.
- Ink blended the main panel like a night sky, splattered with water and gold watercolor. Then layered vellum behind the opening.
- Next ink blended the circle yellow for a moon...or sun, whichever you prefer. This was glued directly to my card front.
- Stamped, colored and cut my owl and die cut a branch for him to sit on. Using my images as a guide I also stamped and heat embossed "push here" where the button would be hiding.
- At this point I laid out and glued my light and circuitry down. Check out Pear Blossom Press for info on that.
- After that was glued down I popped my sky panel up with double-layer foam tape and glued my branch and owl directly to it.
- I stamped and heat embossed a sentiment, cutting it into a strip and popping it up with foam squares.
Here's a look at it all lit up! It's so fun!!! My whole family keeps playing with it. I think this owl might be my favorite in the caffeinated critter collection. Thank you so much for joining me today. I'll chat with you again soon.
Here are the products I used:
Caffeinated Owl
For more information, news and updates check out these links:
Spooky Front Porch Card
Hello my crafty friend, it's Amanda from Pear Blossom Press again! Now that fall is here, I wanted to revisit the Front Porch Card I made over the summer and give it a Halloween makeover. This time I added lights too! Take a look at it in action...
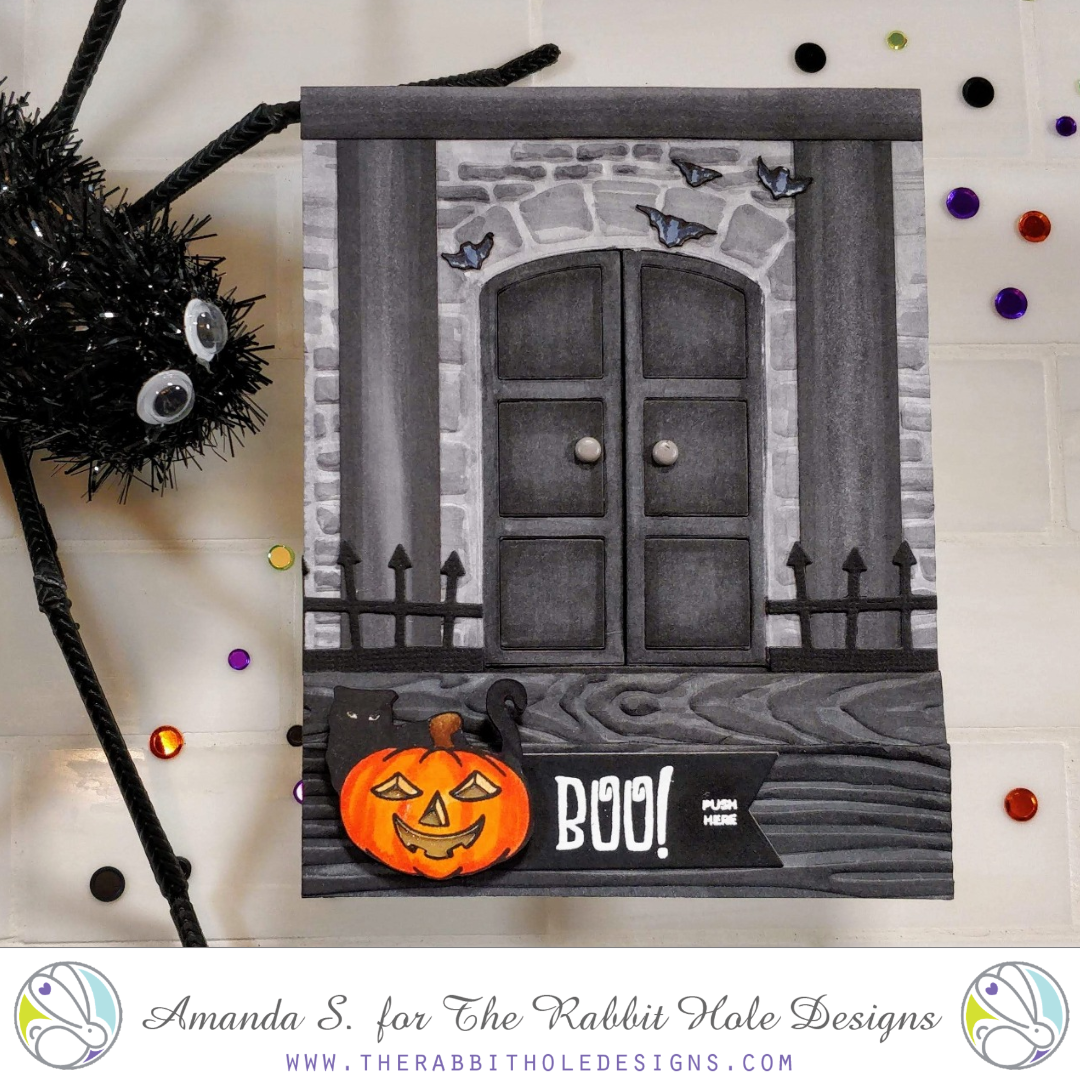
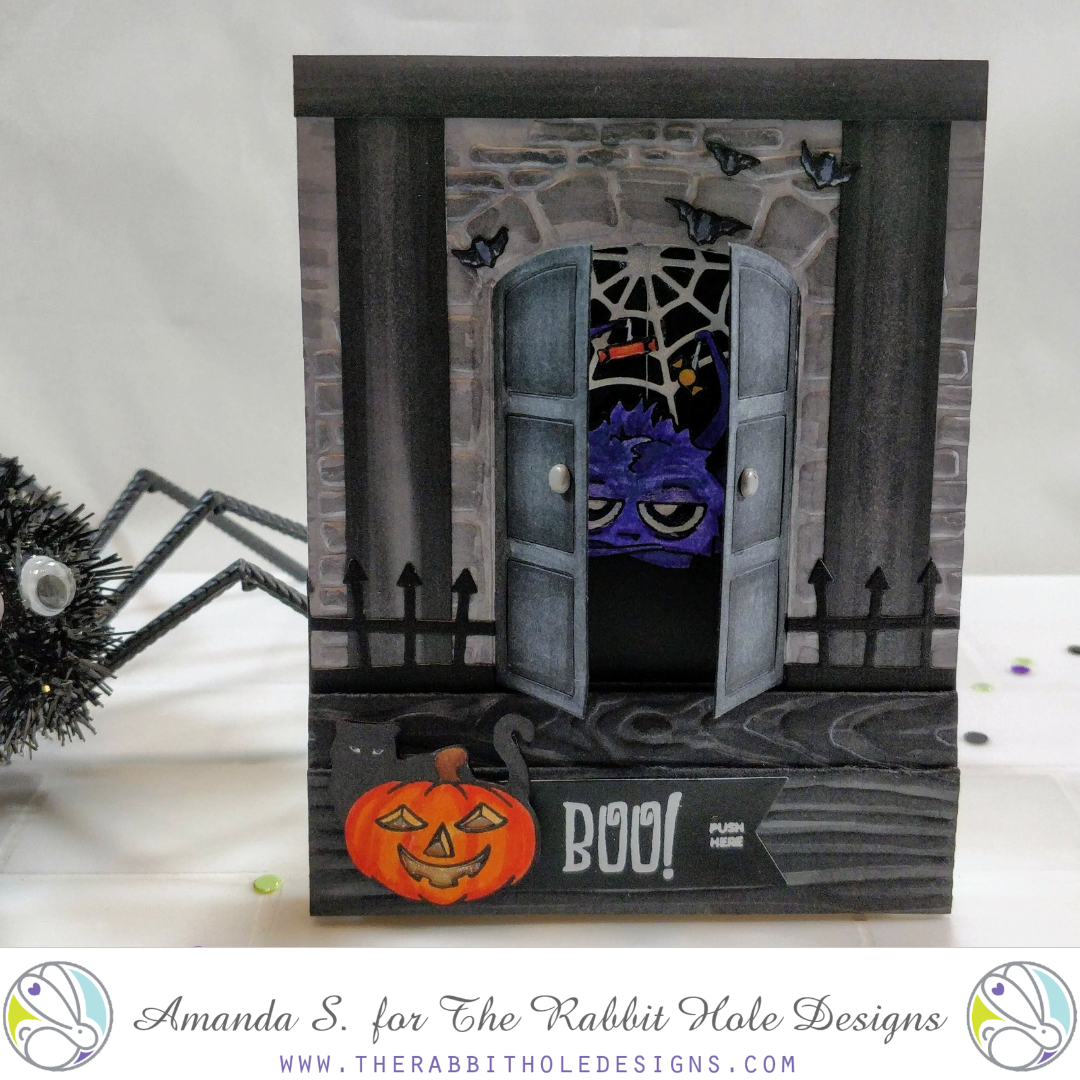
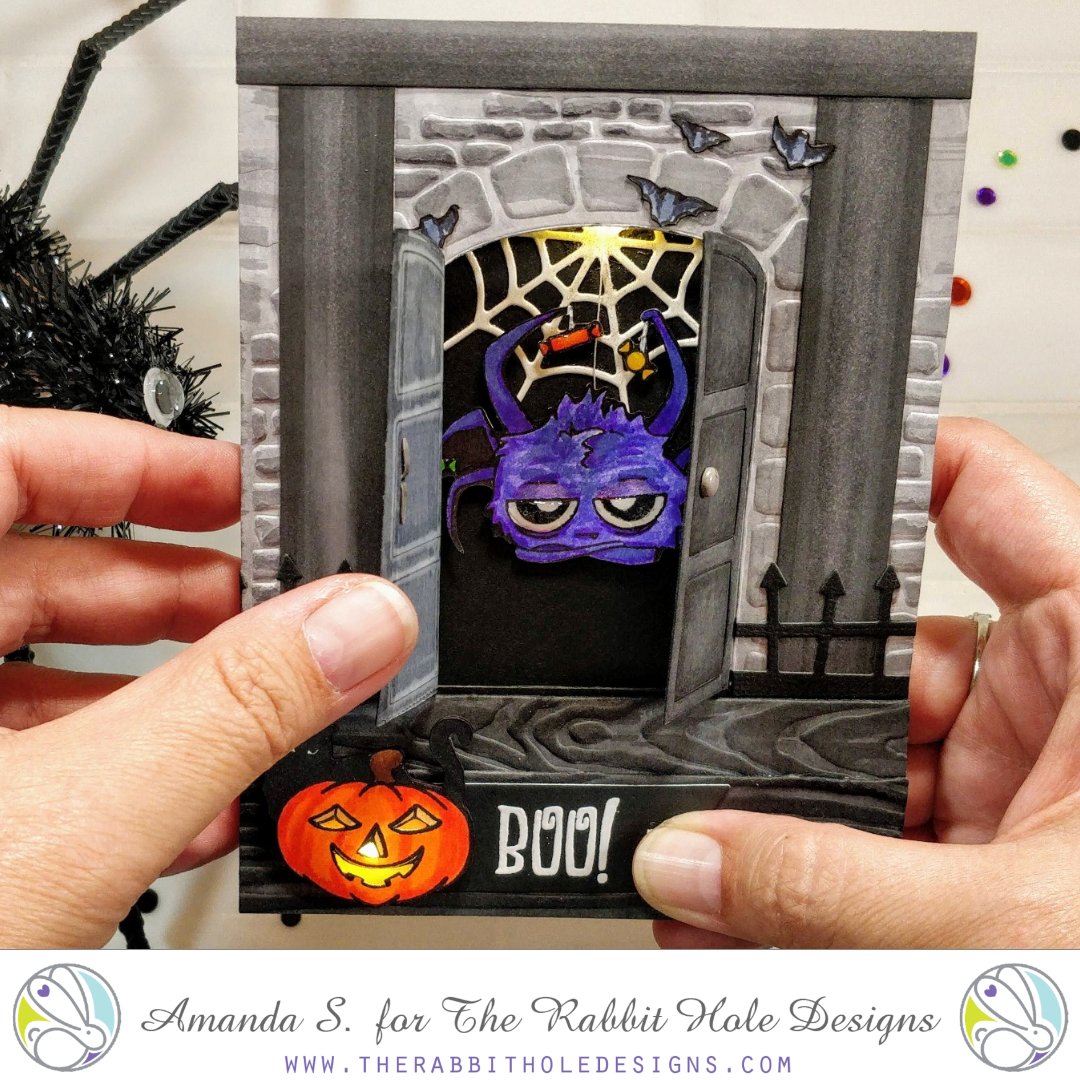
For the spooky version of the card, I switched up the colors and decorative elements. You can see the original card and how to build the frame here. Instead of a white house, I colored it in shades of grey with Copic Markers. This time around, I kept the cutouts from the door panels and taped them back in place. I added a spooky fence in front of the pillars and swapped the flowers and stars for a jack-o-lantern and bats from the Hex Yeah stamp set. Instead of the kissing couple behind the doors, I've got the Caffeinated Spider swinging from a piece of thread. Notice she's holding candy where her coffee mugs usually are. I just masked off the mugs on the stamp before stamping, then stamped candy in their places, and used a Copic liner to connect the legs lines. I embossed boo and push here onto a die cut banner and tucked it behind the pumpkin.
This card has three different interactive elements to it. First, the doors open. The Impresslit I used both cuts the doors, and embosses the stone pattern around them. So all of the work is done with one pass in the Big Shot. The second interactive element is light! I used one of my EZ-Lights and taped the battery to the back of the bottom step (with the switch lined up under the push here stamp). Then, I simply punched a hole through the step, threaded one of the lights through, and taped it in place behind the pumpkin. I taped the other two lights above the center of the doors to light up the spider and her web. The last interactive element is the swinging spider. To do this, I just taped a piece of thread to the back of her, then sandwiched the top of the thread between two layers of foam tape. By using a double layer of foam tape all the way around the back side of the porch piece, it left her plenty of room to swing, and room for the light to bounce around.
I love how this one turned out! In fact, this card actually inspired the first card, even though it hadn't been made yet. Being on The Rabbit Hole Design's design team, I knew the jack-o-lantern stamps were coming and that got me thinking about creating a front porch to put them on. Since it was early summer, and I had been searching for porch decor on Pinterest, my feed was full of great ideas for summery porch scenes. That's when I realized this card base could be adapted to any season. (I already have a Christmas card in mind.) What kind of scene would you make?
You can find the sister article to this post on my blog today, along with links to the specific products I used. Soon, you'll be able to find my EZ-Lights here at The Rabbit Hole Designs. Until then, you can find them here. Be sure to pick up these items to recreate today's card...
Hex Yeah
Boo to You
Caffeinated Spider (available September 30th)
Liquid Pixie Dust
Diamond Glaze
Thanks for stopping by today! I'll be back soon with more fun cards to share!
Anglerfish Light-Up Box Card
Hello my crafty friends, it's Amanda from Pear Blossom Press again! Today I'm sharing a fun box card with an extra surprise; it lights up! I designed this card for a class that I'll be teaching at the Seattle Unstoppable Retreat next week. Woohoo! Who would've ever thought people would want me to travel to teach cardmaking classes? #lifegoals #squee #nowtogetagigonacraftingcruise
The Rabbit Hole Designs is one of the awesome sponsors of this retreat! If you are one of the lucky ducks coming, you'll be making this card in person with me. If not, don't worry, I made a video tutorial and that's just like being there with us. Except we won't know if you didn't get dressed today ;) Okay, enough blabbering from me. Let's put this card together! Step one: watch the video...
Step two: wait, I covered all the steps in the video... Lol, I did promise you links to the products I used though. You'll find the Sofishticated stamp set right here in the shop. For all of the other products I used, including the Power Pack Kit (shameless plug), head on over to my blog... https://pearblossompress.com/anglerfish-light-up-box-card/
Thanks for stopping by today! I'll be back soon with another fun interactive card for you. Until then my friend, stay crafty!
#deathbeforedecaf Light-Up Card
Hello my crafty friend, Amanda here from Pear Blossom Press. Today I've got a fun new light-up card featuring the Caffeinated Dino! I made it for my husband who roasts his own coffee; and man, is it delicious! But this card has a second reference that he will especially love. When we got married, we ordered a custom wedding band for him that incorporates a ring of dinosaur bone and another ring of meteorite. I'm not going to lie, I'm a little jealous. It's a cool ring. So how perfect is this card for him? Coffee, dinosaurs, and a meteorite! And to top it all off, the meteorite lights up so it looks like a ball of fire flying across the sky! He's going to love it!
So how did I make this card? Well, I'm glad you asked! I've got a video for you showing you the whole process right here...
Wasn't that easy? Have you made a light-up card before? I hope this inspires you to give it a try! And don't forget to hop on over to the shop to pick up a Caffeinated Dino of your own! While you're there, check out the Sofishticated set; it has an anglerfish that would be perfect for a light-up card! If you'd like links to any of the other products I used in today's card, hop on over to my blog for the sister article.
Thanks for stopping by. Let me know what you think of today's card down below, or find me in the Facebook group; I'm always popping in there. Until next time my friend, stay crafty!


