Pages

Showing posts with label TRHD edit MS. Show all posts

Life Is Short Get The Extra Scoop!

 Hi everyone! Von Marie here and I am so happy to be on the blog today and I have a fun card to share with you using some of my favorite products from the latest release!


I adore this bunny from Tastes Like Summer. I also used the Tastes Like Summer Dies and the Scooped Three Layers Stencil which I love so much for my card today. I had so much fun making this card. I first stamped this image onto Neenah Solar White cardstock with Jellyfish ink from Lawn Fawn and colored it in with my Copic Markers using a no line coloring method. When I was done I cut my bunny image out with the Tastes Like Summer Dies.

I then cut out some white cardstock and used the cone stencil first with brown ink and my Cotton Tail Blending Brushes. Next, I used the scoop stencil with rainbow colors for my scoop colors. I used my brown ink and water to flick some splatters with a paint brush for interest. When that was dry I cut it out with a scalloped rectangle A2 die. I added my panel with foam tape to a Kraft card base and added my bunny image with foam tape. I stamped the sentiment from the same stamp set onto white cardstock using my Misti. I then used my paper trimmer to make a fishtail banner which was then added with foam tape too. I then added sequins to match. I hope you enjoyed my card. Thank you for stopping by!

TRHD Products used:

Tastes Like Summer Stamp

Tastes Like Summer Dies


Scooped Three Layers Stencil

Cotton Tail Blending Brushes

For more inspiration, updates, and news make sure to check out these awesome places! 

The Rabbit Hole Designs 

The Rabbit Hole Designs Instagram

The Rabbit Hole Designs Facebook Fan Page

The Rabbit Hole Designs Pinterest

The Rabbit Hole Designs YouTube

Thank you for stopping by and Happy Crafting!

Von Marie


Snail Mail with a sparkle!

Hello, Kimberly here with a card featuring Snail Mail Flower from the latest release. I love this cute little snail and wanted a way to easily jazz up this image.


To make this card, I stamped the snail from Snail Mail Flower on white cardstock. I covered it with a mask (image stamped on paper, cut out and placed the image) and then layered a long post it note over it where I wanted the skyline and grass to meet. I blended Mowed Grass distress ink over the exposed bottom of the cardstock. Next I flipped the post it note to expose the top of the cardstock and blended Tumbled Glass distress ink over the top. Once I removed the post it note, I had my background! 

I colored in the snail with Copics and decided I was not crazy about how I colored the shell. So I stamped the image on another piece of cardstock and colored the shell with new colors. I fussy cut the shell out and popped it up with foam tape on the snail on my original panel. Then I blinged it out using some sequins I had in my stash. I really loved this sentiment from Sassy Sentiments and thought it fit perfect with this card so I stamped it directly on the card. I put foam tape on the back of the snail panel and added it to a card base I had prepared for it. I hope you like it!

Thanks for stopping by!
Kimberly

For more inspiration, updates, and news make sure to check out these places


Snail Mail Delivery


Greetings, Rabbit Hole Fans!
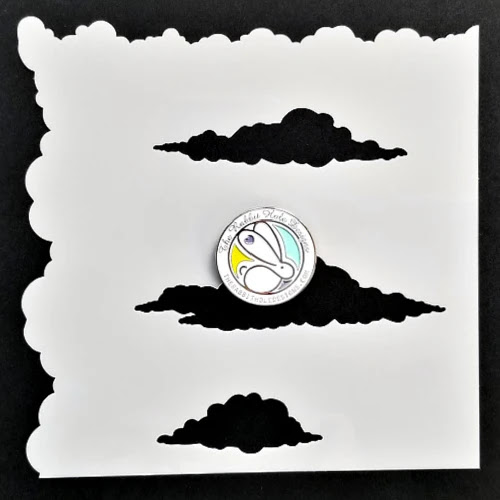
Kelly here and I am sharing this spring inspired card featuring the  "Snail Mail" stamp set, "Amanda" stencil and "Clouds in my Coffee" stencil.
 
I started by stamping the snail on white cardstock, coloring him and die cutting it to get the stitching.  I decided to add the grass and clouds. I used 
"Clouds in my Coffee" stencil with Cotton tail Blending brushes.  I put paper over my snail to keep off the blue ink.  I decided to stamp him again and color the flower section, cut it out and raise it with dimensional foam. I put that panel aside and worked on the top card panel.

I took a piece of smooth white card stock and adhered the "Amanda" stencil with sticky spray.  I inked the panel using a Cotton Tail Blending brush with green ink.  

I adhered my snail panel on top and then put the "hello" on which is covered in glaze.
  
  
Dimension:


 Clouds in My Coffee


Alcohol Ink 1 Line Flower!

Hello, my crafty friends! Today I am sharing one of my favorite techniques! I don't know about you but I have so many alcohol ink backgrounds in my stash I wanted to pull one out for the 1 Line Flower Stamp Set


For the background, I used poppy field, Valencia, dandelion, botanical, glacier, and boysenberry alcohol inks to create the perfect background for this stamp set.
I stamped the 1 Line Flower in Versafine Claire, Twilight. I didn't want to use a harsh black since the flower is so delicate.


There are so many ways to use this set and it has so many great sentiments. I combined both the Be-you-tiful and bloom sentiment and white heat embossed them to make them stand out a little more. You just have to be careful not to burn the yupo paper. 


A Sweet Koala Hi!

 Hi everyone! Von Marie here and I am so happy to be on the blog today. I have a card to share with you using some of my favorite New TRHD products.

I used the Koala Botanical stamp set, Amanda StencilClear Foam Tape 5MM Wideand Space-Miss You Stamp set for my card today. I first stamped my flower and Koala onto Neenah Solar White 80lb. cardstock using my Misti. I then colored up my images using a little No-Line ink coloring with Altenew Artist Markers and Prismacolor Colored Pencils. I chose to fussy cut the flower and put my Koala to the side to work on my background.


I used some Neenah Desert Storm 80lb cardstock and used the Amanda Stencil with Bundles Sage Distress Oxide ink with a Cotton Tail Blending brush. I then sprayed Picket Fence Distress Oxide Spray Stain through the stencil onto my panel. When it was dry I cut it out with a A2 stitched rectangle die. I then chose to cut my Koala out with a oval stitched die and stamp the sentiment "Hi" with green dye ink. I love how the oval frames her. I then glued my flower to my oval and added them with the New Clear foam tape 5mm Wide to my stenciled rectangle panel. I then added sequins to match and white gel accents to my Koala's eyes . My panel was then added to a A2 card base. I hope you enjoyed my card.

TRHD Products Used:


Amanda Stencil


Space-Miss You


Cotton Tail Blending Brush


Clear Foam Tape 5MM Wide


For more inspiration, updates, and news make sure to check out these places

For more information, news and updates check out these links:

 Thank you for stopping by and Happy Crafting!

Von Marie


Hippo Botanical with a twist

 Hello! Kimberly here with a different way to use Hippo Botanical from the new release. I just love the flower from this set and thought it looked really lovely with the new Amanda stencil. I may have an unhealthy obsession with foam tape. I need to pop everything up, so why not make the flower pop?


I started out blending Twisted Citron and Mowed Lawn distress ink through the Amanda stencil on watercolor paper. 


Next, I covered the whole panel with texture paste.


Once that dried, I die cut it down to 4" x 5 1/4" and started with my flowers.


I stamped and fussy cut the hippo flower, the flower and the three lily pad leaves from the Hippo Botanical set. I colored the flowers in using R27, R37, R39, YR12, and YR07. I colored the leaves with YG00, YG05, and YG09. 


Next, I assembled my card. I adhered the leaf panel to my card base and added a brown frame I had in my stash. I added foam tape to the smaller flower. I lined it up to just cover the hippo and added it to the bigger flower. Then I added my leaves and my flower to the card. I stamped out a sentiment from Sassy Sentiments on a strip of white cardstock and layered it over a piece of patterned paper. To finish off with a little sparkle, I ran my clear Wink of Stella over the leaves. I hope you like it! 

Thank you for stopping by!
Kimberly

For more inspiration, updates, and news, make sure to check out these places...


Happy St. Patrick's Day!

 Hello Everyone! Von Marie here and I wanted to wish you a Happy St. Patrick's Day! I hope you are wearing green today. I have a card to share with you today using the New Clover Bunny Stamp Set.


Isn't this Clover Bunny cute? I adore this image. I chose use No Line Coloring technique which is really new for me and I need practice but this bunny doesn't take much coloring so I tried that technique with this image. I first stamped the image with Gina K Designs Skeleton Leaves onto Neenah Solar White 80lb using my Misti. I colored the image in with Copic Markers and used the Clover Bunny Die set to cut my image out.


Sometimes in my stash I have extra scraps that are inked and so I had this ink blended grass scrap of paper that was die cut with a grass die and was ink blended with Mowed Lawn Distress Oxide onto Sweet Sentiment cardstock. I also ink blended some clouds onto Neenah Solar White Cardstock 80lb using Broken China Distress Oxide ink, Clouds in My Coffee Stencil, and Cotton Tail Blending Brushes. I cut out my grass and clouds with a double stitched rectangle and layered them together. I used a A2 rectangle die with the Spring Floral #2 6x6 paper Pack. My sentiment was stamped onto a cloud scrap of paper with green ink that was cut to a banner with a die. Everything was glued with liquid glue to a A2 card base, except my bunny that is popped up with foam tape. Lastly, I added white gel accents with my Signo pen and sequins to match. I hope you like my card.

TRHD Products Used:

Clover Bunny Stamp 3x4


For more inspiration, updates, and news make sure to check out these places


Thank you for stopping by and Happy Crafting!

Von Marie


Come Fly with Me Easy Slider

 Hello my crafty friends! Today I am using the New Come Fly with Me Stamp & Coordinating Die set to make this easy slider slimline card!


I knew I wanted to have a cloudy background so I pulled out the Clouds in my Coffee 6x6 Stencil  I love the realistic look of these clouds! I used a few of my blue distress oxides to add a little definition.


I used my zig markers to add a nice pastel color to the flowers and leaves that are lifting this sweet bunny up in the air. For the slider, I just grabbed a die from my stash and saved the piece it cut out so that I could inlay it back into the card.


I really love the softness I got from using softer colors. For the sentiment, I didn't want a harsh black so I found a blue embossing powder and heat embossed the sentiment, and added another cloud just to keep the theme going


For more inspiration, updates, and news make sure to check out these places.


Bunny... Go With All Your Heart

Hi Rabbit Hole Friends, I hope you're having a fabulous day!  Joy, here with a super fun travel inspired card today featuring the adorable Adventure Awaits stamp set.  I don't know about you, but I'm living vicariously through this little guy!  I may be a little jealous of his travels, but one thing is for sure he goes with all of his heart!  


On this card I wanted the cute bunny from the Adventure Awaits stamp set to be the focal point, so I made a simple background to accent him.  This background was made using alcohol markers.  I just love the way this little guy pops from the page!  


To make this card I stamped the image with an alcohol friendly ink and colored the image using a range of one color family.  I started with the lightest color to prime the paper and then used what I call the scary dark color to get bold contrast.  Those dark colors can be scary, but it is the way your stamps jump off the page. I mentioned making my own background.  When making your own background I suggest using a very light color to map it out so that you aren't stuck with it, if it doesn't work out.  


Let's talk about the bunny a little bit.  When creating a white critter, you still have to add shading to make it pop.  Here I used three cool gray alcohol markers to give the bunny depth and dimension.  I hope that helps?  


I had so much fun creating this card, and I hope it inspires you to create something special today!  You can follow the link HERE to see the entire line from The Rabbit Hole Designs.  

I think that wraps it for me!  You can always find me on my blog,  JoyWilsonInk.  

For more inspiration, information, and updates make sure to checkout these places: 

Bye for now!!!  


Our Friendship is the Greatest Adventure!

 Hello Everyone! Von Marie here and I am so happy to be on the blog today. I have a fun and sweet card to share with you using some of my favorites of TRHD products.


On my Slimline card I used Come Fly With Me Stamp Set, Come Fly With Me Die Set, and Clouds in my Coffee Stencil. I first stamped this image onto Watercolor paper with Lawn Fawn Jet Black ink using my Misti to get a good crisp image. I then colored it in with my Gansai Tambi Watercolors and my Black Velvet brush and some water. I flickered some pink paint splatters when I was done coloring. I then used the dies to cut my image out.


I used a Slimline die from my stash to cut out my background panel with 110lb cardstock. I then used the Clouds in my Coffee stencil with Brocken China Distress Oxide ink and my Cotton Tail Blending Brush. I stamped the sentiment onto white cardstock and cut it out with my trimmer. I added my panel and my image to a Slimline card base. I then added foam tape to the back of my sentiment and added it to my panel. I had this bow on my desk and it matched the flowers so I added it. Lastly, I added drops and sequins to match. I hope you like my card.

TRHD Products Used:

Clouds In My Coffee Stencil

Cotton Tail Blending Brushes

Happy Crafting and Thank you for stopping by!

Von Marie

For more Inspiration, Updates, and News make sure to check out these Awesome Places

The Rabbit Hole Designs

The Rabbit Hole Designs Instagram

The Rabbit Hole Designs Facebook Page

The Rabbit Hole Designs Pinterest

The Rabbit Hole Designs YouTube