Pages

Showing posts with label Cupid Clarence. Show all posts

Sending Some Love Your Way

 Hello crafty friends it's Rick back with you again today sharing another love themed card idea with you using the Cupid Clarence Stamp Set.  Today's card features the left over foil from the last card that I shared with you.  I ran the foil with the stamped outline of Clarence through my laminator with a toner sheet and attached it to a mat layer.  

Cupid Clarence Foiled Card by Rick Adkins

To finish off the card I simply picked one of the beautiful sentiments from the Cupid Clarence Stamp Set and heat embossed it from a heart die cut I had in my stash.  I then finished it off by adding a few of the Matte White Enamel Dots.  

Cupid Clarence Foiled Card by Rick Adkins

There's nothing like a super easy shiny clean and simple card design.  You could totally do this same design by changing out the foiled background and using just a piece of the Spring Floral #1 or Getting Inky Pattern Papers both from the Rabbit Hole Designs.  I encourage you to think outside the box and recreate a version of this card.  

Thanks for dropping by today I hope you have a wonderful day.  

Happy Crafting 

Rick

Head in the Clouds - Interactive Valentine Swing Card


Hello crafty friends!  Jenn Gross here, with and interactive card using stamps and stencils from The Rabbit Hole Designs, You can also find my projects on IG under @journeycoachjenn.  It seems that love is in the air and in the clouds!

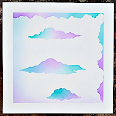
Today I am sharing aninteractive Valentine card.  This swinging cupid card is created with The Rabbit Hole Designs' Cupid Clarence stamp set (a Dusting Pike illustration) I used Cottontail Blending Brushes,  Clouds in my Coffee stencil paired with the radiant die from the You've Been Framed die set for the background.

Let's take a look at how this card is created:
A - I stamp the Cupid Clarence image twice.  I colored the head of one of the images  and the body of the other image using blue violet (BV) Olo Markers.   I fussy cut the colored head and body, leaving about 1/2" of paper above the neck of the body piece to attach Clarence's head with a foam square.  I angle the head at a slight upward angle and secured it to the body.

B - I randomly ink blended a cloud background with the Clouds In My Coffee stencil using Cotton Tail Blending Brushes. and Victorian Velvet, Spun Sugar, Kitsch Flamingo and Wilted Violet Distress Oxide ink on a 4" x 5 1/4' piece of white cardstock.

C & D - Using a standard hole punch, I added a hole 5/8" below the top center of the card front.  I positioned the radiant die from the You've been Framed die set about 1/2' below the hole and die cut the design. 
E - I used the standard hole punch to add a hole on each end of a 2' x 1/2" strip of clear acetate. This will be used for an interactive swing bar.

F - I added small jump rings to  the back of  Clarence's envelope and on the bottom of Clarence's shorts to add a small bit of weight for balance. The jump rings are attached with redline tape and a small piece of paper is glued over the top to secure the jumb rings into place.  I used Gem-Tack adhesive to attach a slider snap on side of the back of Clarence's arrow hand. 

G & H - I let the snap dry in place and attached one hole at the end of the acetate strip over the snap on Clarence's hand and snapped it in place. I snapped the other end of the acetate to the hole on the top of the card and tested the swing movement.  I removed the snap and acetate from the top card hole so I could stamp the sentiment at the bottom of the card.
I & J - I snapped the acetate swing bar to the top of the card front  I used a small cloud die cut from my stash to die cut a cloud to hide the snap attachment at the top of the card.  The cloud is placed over the snap with thick double-sided adhesive foam tape on each side of the cloud.  This space allows the acetate bar to swing freely.

K - I attached the card front to a lilac A2 card base using  double-sided adhesive foam tape completing this fun interactive card. 

Products Used

Thank you, I appreciate you taking time from your day to stop by and check out today’s interactive Valentine card featuring The Rabbit Hole Designs' new Cupid Clarence stamp set.  I hope you are inspired to create something lovely today!


Be Creative ~ Stay Inspired

Jenn Gross


Follow me, Journey Coach Jenn, on 

Instagram - https://www.instagram.com/journeycoachjenn/

YouTube - http://www.youtube.com/c/JourneyCoachJenn

Blog - http://www.journeycoachjenn.com/


For more inspiration, updates, and news make sure to check out these places


The Rabbit Hole Designs

The Rabbit Hole Designs Instagram

The Rabbit Hole Designs Facebook Page

The Rabbit Hole Designs Pinterest

The Rabbit Hole Designs YouTube


Sending Some Love - Cupid Clarence

Hello and welcome to the blog; it's Rick back with you today to share a super cute little Sending Some Love card using the Cupid Clarence Stamp Set.  Cupid Clarence is a 4 x 4 stamp set designed by Dustin Pike for the Rabbit Hole Designs.  It's a fun little set that you can color up Clarence in any media you would like, and has some sweet sentiments as well.  Some of the sentiments include "love" (which we used on today's card), "Happy Galentine's Day",  "Happy Valentine's Day", " sending some love your way", and the sentiment that I used on my last card "You are a little quirky, but that's why I love you".  So, you can see you can pretty much hit up any occasion with this little love themed stamp set.   Here's a look at the card I designed to share with you today.  

Sending Some Love Cupid Clarence Card by Rick Adkins

For my card today I took and stamped Clarence in his little cupid outfit randomly all over the background in a clear sticky ink and covered it in clear embossing powder.  I then heat set the embossing powder and ran the background through my laminator with heat transfer foil in a nice dark pink color.  I then cut out the panel and matted it onto a piece of black cardstock and placed it on my card base.  I then stamped Clarence onto some alcohol marker friendly paper and stamped him in an alcohol marker friendly coloring ink.  I used my alcohol markers to color him in and bring this cute little cupid to life.  

Sending Some Love Cupid Clarence Card by Rick Adkins

Once I had him all colored up I added some white highlights with my white gel pen and cut him out.  There is the coordinating Cupid Clarence Die available to cut him out I didn't have it when I designed today's card so I had to fussy cut him out.  Which wasn't to bad but if I had to do it over I would use the die instead.  To finish off the card I added my sentiment on a strip of white cardstock and popped both him and the sentiment up.  I then added a small heart die cut from my stash with one of the Clear Sparkle Enamel Dots added to it for a little bling.  

Thanks for dropping by today I hope you have a wonderful day and that you found this post helpful. You can find all the supplies that I used on today's cards on my blog post by clicking here!

You can find me on the following Social Media Channels with more crafty inspiration: 
I hope that you have a crafty day.  For more inspiration, updates, and news make sure to check out these places.  

You Are a Little Quirky - Fun Little Valentine's Day Card

 Hello crafty friends, and welcome back to the Rabbit Hole Designs Blog; It's Rick back with you today to share a fun little Valentine's Day card that's perfect for that quirky person in your life.  For my card I used the brand new Cupid Clarence 4 x 4 Stamp Set designed by Dustin Pike for the Rabbit Hole Designs.  I also used the Triangle Mosaic 6 x 6 Stencil for the background.  

Cupid Clarence Valentine's Day Card by Rick Adkins

To add more color to the Cupid Clarence stamp set I used my alcohol markers to color him in and added some fun little gold details with a gold gel pen.  I also added some other little gold foil details as well.  But I thought the fun little gold gel pen accents to his arrow, strings on his head band, and the hearts on his boxers was a fun little touch.  So, don't forget those little details when it comes to making your projects.  Sometimes it's those little touches that takes your cards to the next level. 

Cupid Clarence Valentine's Day Card by Rick Adkins Second view


When I am designing a card I love to take one of the stencils that you normally wouldn't think of for the occasion and add it to the backgrounds of my cards.  For example here I used the Triangle Mosaic Stencil which is not your typical Valentine themed stencil.  But the geometric pattern mixed with the fun Cupid Clarence just works and adds that little whimsical touch to the card.  To finish off the card all I had to do was add a sentiment to the card on a coordinating piece of cardstock.  

I hope this post has given you a little inspiration about combining products that you normally wouldn't put together to create a fun card.  


Remember, it's all about experimentation and finding what resonates with you. And don't forget to share your creations on social media and tag The Rabbit Hole Designs to spread the card-making love.


Thanks for dropping by today I hope you have a wonderful day and that you found this post helpful. You can find all the supplies that I used on today's cards on my blog post by clicking here! 


You can find me on the following Social Media Channels with more crafty inspiration: 

Blog:  https://www.rckinsmonstudio.net/rickadkinscards

Facebook Page:  https://www.facebook.com/rickcraftycorner

YouTube:  https://www.youtube.com/@RickAdkins

TikTok:  https://www.tiktok.com/@rickadkinscardmaker

Instagram:  https://www.instagram.com/rickadkinsdesigns/


I hope that you have a crafty day.  For more inspiration, updates, and news make sure to check out these places.  


The Rabbit Hole Designs

The Rabbit Hole Designs Instagram

The Rabbit Hole Designs Facebook Page

The Rabbit Hole Designs YouTube


Have a crafty day!

Rick 


January 2024 Release

Hello and welcome to the inspiration hop. We are excited for you to join us as we present to you our January 2024 release. Our Brand Ambassadors will be sharing their projects, so be sure to visit their blogs and leave them some crafty love.

The 4 stamp sets with coordinating dies are all available to purchase right now in the shop.

The products being highlighted today are:

Thank you so much for being here for our inspiration hop.

Here is the lineup for today:

The Rabbit Hole Designs

Lauren

Jenn                                

Rick

Tracy

Jessica

Lydia

Deana


GIVEAWAYS:
To celebrate the January 2024 release, The Rabbit Hole Designs is giving away two savings vouchers; one to a lucky Instagram follower from all comments left on The Rabbit Hole Designs Instagram account release post and one to a commenter on the HOP Blog Posts from all of the Brand Ambassadors Blogs. So make sure to head on over to Instagram to look for the giveaway post. Must comment by 11:59 pm PST 01-04-2024

@therabbitholedesignsllc

Winners will be contacted via DM for the Instagram winner and announced on The Rabbit Hole Designs Blog Day 1 Release post  on 01-05-24

The randomly drawn winner from Rick Adkins blog is:

Rick I absolute love your card. It's beautiful. Love your design and the color combination! Thanks for sharing! Happy New Year!!


Carrianne Banul


Please email us to claim your voucher info@therabbitholedesigns.com Subject January Blog Hop (Blog Comment) Winner.

All winners have 1 week to claim or they forfeit all rights to savings voucher(s)

This is the graphic you are looking for on our IG and FB fan page

For more inspiration, updates, and news check out these awesome places! 

Thank you so much for stopping by today!