Pages

Showing posts with label Aim For The Stars Stencil. Show all posts

You Were Born to Sparkle

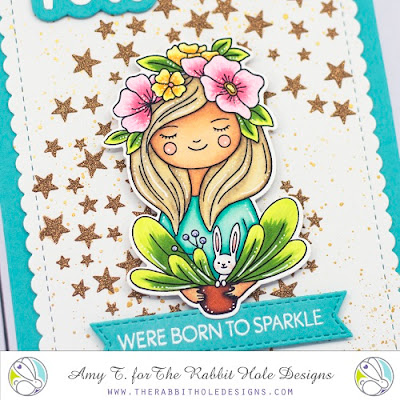
 Hi everybody!  Amy here today sharing this card I created featuring the gorgeous Flowers in her hair Stamp Set illustrated by Tatsiana Zayats.

Flowers in her hair Stamp Set illustrated by Tatsiana Zayats, Aim for the Stars Stencil, You - Scripty Word with Shadow Layer Dies, You - Scripty Stamp Set by The Rabbit Hole Designs #therabbitholedesignsllc #therabbitholedesigns #trhd

I started this card by die cutting a piece of white cardstock and used the Aim for the Stars Stencil with gold glitter paste to create the background.  I then splattered on some gold watercolor paint and set it aside to dry.

Next, I stamped out this beautiful image from the Flowers in her hair Stamp Set illustrated by Tatsiana Zayats, colored it with copic markers, and cut it out using the coordinating die set

Flowers in her hair Stamp Set illustrated by Tatsiana Zayats, Aim for the Stars Stencil, You - Scripty Word with Shadow Layer Dies, You - Scripty Stamp Set by The Rabbit Hole Designs #therabbitholedesignsllc #therabbitholedesigns #trhd

I used the You - Scripty Word with Shadow Layer Dies to create the "You" part of the sentiment.  I then die cut a teal sentiment banner and stamped "were born to sparkle" from the You - Scripty Stamp Set, and white heat embossed.

I assembled my card using teal cardstock for the base, and foam tape to pop up the image and sentiments for some dimension!

Flowers in her hair Stamp Set illustrated by Tatsiana Zayats, Aim for the Stars Stencil, You - Scripty Word with Shadow Layer Dies, You - Scripty Stamp Set by The Rabbit Hole Designs #therabbitholedesignsllc #therabbitholedesigns #trhd

For finishing touches on this card I added white gel pen accents, and glitter with a glitter pen.  Thank you and I hope you enjoyed my card today!

August 21st Guest Designer Bri Firth

We are pleased to bring you another guest designers for the month of August; Bri Firth.


We sent Bri the new Cocktail Witch stamp set and the Aim for the Stars stencil. 
To see all of the details please click here ---> Just a Little Wicked!


This is what Bri had to say out our Cocktail Witch stamp set ...

"The Cocktail Witch stamp set is a sassy take on the retro, pin-up cartoon style art. I really enjoy the cuddly cat friend and the bubbly concoction! This image can be colored in a bunch of wickedly fun variations. This stamp set is frighteningly fun!"


You can find Bri here at her blog ------> Bri Firth Creates 
You can also find her IG here ------> @brifirthcreates

Make sure you stop back next Thursday August 27th, to see what our next guest designer has to share with us.

~


Thank you so much for stopping by today!

BOO Ya'll

Hello Rabbit Hole Fans!
It's Kelly here and today I am sharing a card featuring the 
new set "Country Witch" by The Rabbit Hole Designs

To make this card, I started with a soft blend of blue and green ink on the background panel using Cotton Tail Brushes.   Next, I used blue glitz glitter gel on the "Aim for the Stars" stencil.  While that dried, I stamped out, colored and cut out the images (dies are now available!)   

After the glitter dried I stamped the sentiment from the set and arranged the images.  The witch and cat are raised on foam.  

There's a bit of shimmer pen on the witch's shirt and hat rim.  
It's a fun card to wish anyone a Happy Halloween! 


 Aim for the Stars Stencil


 Cotton Tail Brushes


For more inspiration, updates, and news make sure to check out these places


Let's Get crafty!
Kelly
@kelbertram 


Love is in the Stars Card


Hello Everyone! Justin here, and I today I am incredibly excited to be sharing this card I made using the new Aim for the Stars Stencil!

I figured this stencil paired so well with the balloon couple from the Love You More set, so I took the idea and just ran with it!

First, I colored up my couple with Copic Markers, fussy cut them out and set them aside.

Next, I die cut a stitched panel with stitching from white cardstock, a scalloped rectangle from navy cardstock, and cut an A2-sized piece of blue patterned paper. I also die cut another stitched panel from white cardstock, and then cut it with a cloud border die.

I took my white rectangle stitched panel and used a cloud stencil to blend clouds that went from pink, to purple, to navy with Oxide Inks. I also took my cloud border and distressed the bottom edge with pink oxide ink. I stamped the sentiments "love" and "is in the air" from Love You More in purple ink, along with some hearts from the set as well in various ink colors.

On my cloud panel, I took the Aim for the Stars stencil, put it into place, and applied a solid layer of purple Glitz Glitter Gel. I carefully removed my stencil and set my panel to dry entirely. I also cleaned off my stencil right away.

Once my stars had dried entirely, I adhered my cloud banner and couple with foam tape to this panel. I then adhered this layer to the scalloped navy panel, adhered the scalloped navy panel to the A2-sized blue patterned paper panel, and then adhered the whole unit to an A2-sized card base.

I finished my card off by adhering a few The Rabbit Hole Designs sequins, and was done!

This project uses the following products:


For more inspiration with your The Rabbit Hole Designs Creations, be sure to follow along at these other locations:


For more details about products used in this post, you may also follow along at my personal blog, Just a Note by Justin, as well!

I cannot wait to see what you craft up using these amazing new June release products, especially this fun stencil! Be sure to share them in The Rabbit Hole Designs Fan Page (and don't forget about the Anything Goes Challenge Album as well!

Happy Crafting!

Aim for the Stars!


Hey there Rabbit Hole fans, thanks for stopping by today! 
It's Lisa here from Oh So Cute By Lisa and I have an out of this world card to share with you today using one of the newest stamp sets from The Rabbit Hole Designs. It's called Space - Infinity and Beyond and it has the most adorable little astronaut holding the moon on a balloon string! I just love that image and I decided to go with a rainbow theme for this card. I also used the brand new 
Aim For The Stars Stencil on my card for the background and the sentiment.


To begin I stamped my astronaut directly on to my card panel and colored him up with my copic markers.  I decided to color the little strip on his chest in rainbow colors to match the theme of the rest of the card.  The stars at the top of the card and the sentiment were both done with the Aim For The Stars Stencil. I selectively stenciled the sentiment in rainbow colors and added white highlights with my gel pen. I matted the stamped panel on to a piece of rainbow patterned paper and added both panels to my card base.

I don't usually make one layer cards but I really like how this card came out. It's simple but colorful and I love how this stencil can be used in so many ways.


For more information, news and updates check out these links:


Have a great day, I already am!
👨‍🚀💫 Lisa  ðŸ’«ðŸ‘¨‍🚀 

Stenciling with Karin Markers


Hey crafty friend, it's Amanda from Pear Blossom Press again. Well, I did it. I couldn't resist the new Karin markers. I was trying to be strong. I've been building my Copic collection, and since I have full-set-itus (it's a real thing), I wanted to complete that collection before starting another. But there was a sale. And Jenn Gross has been creating the coolest backgrounds with them. And I couldn't hold out anymore...

So I've been testing them out! They are highly pigmented, waterbased markers, with nice nylon brush tips. I love them! Let me show you a card I created with them...


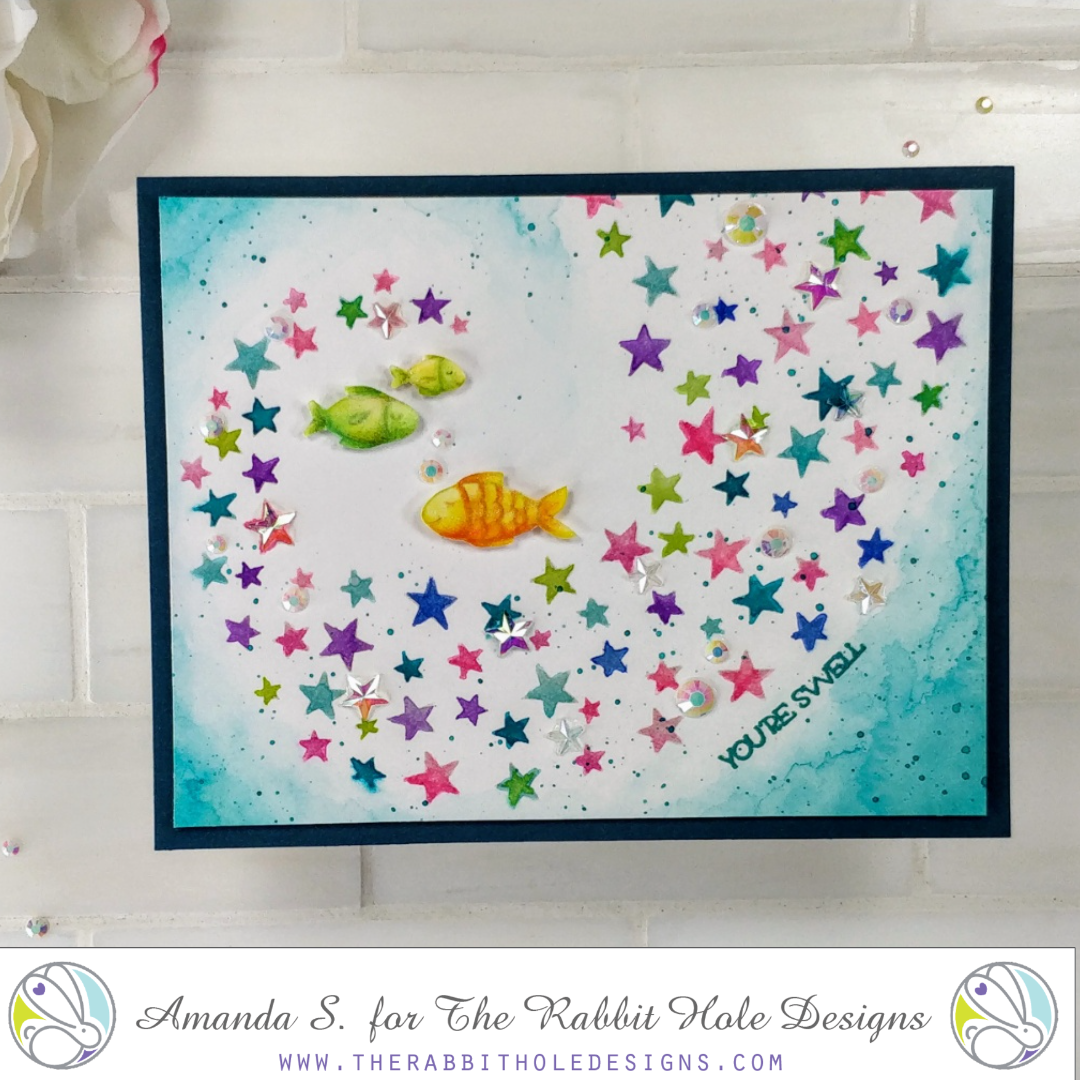
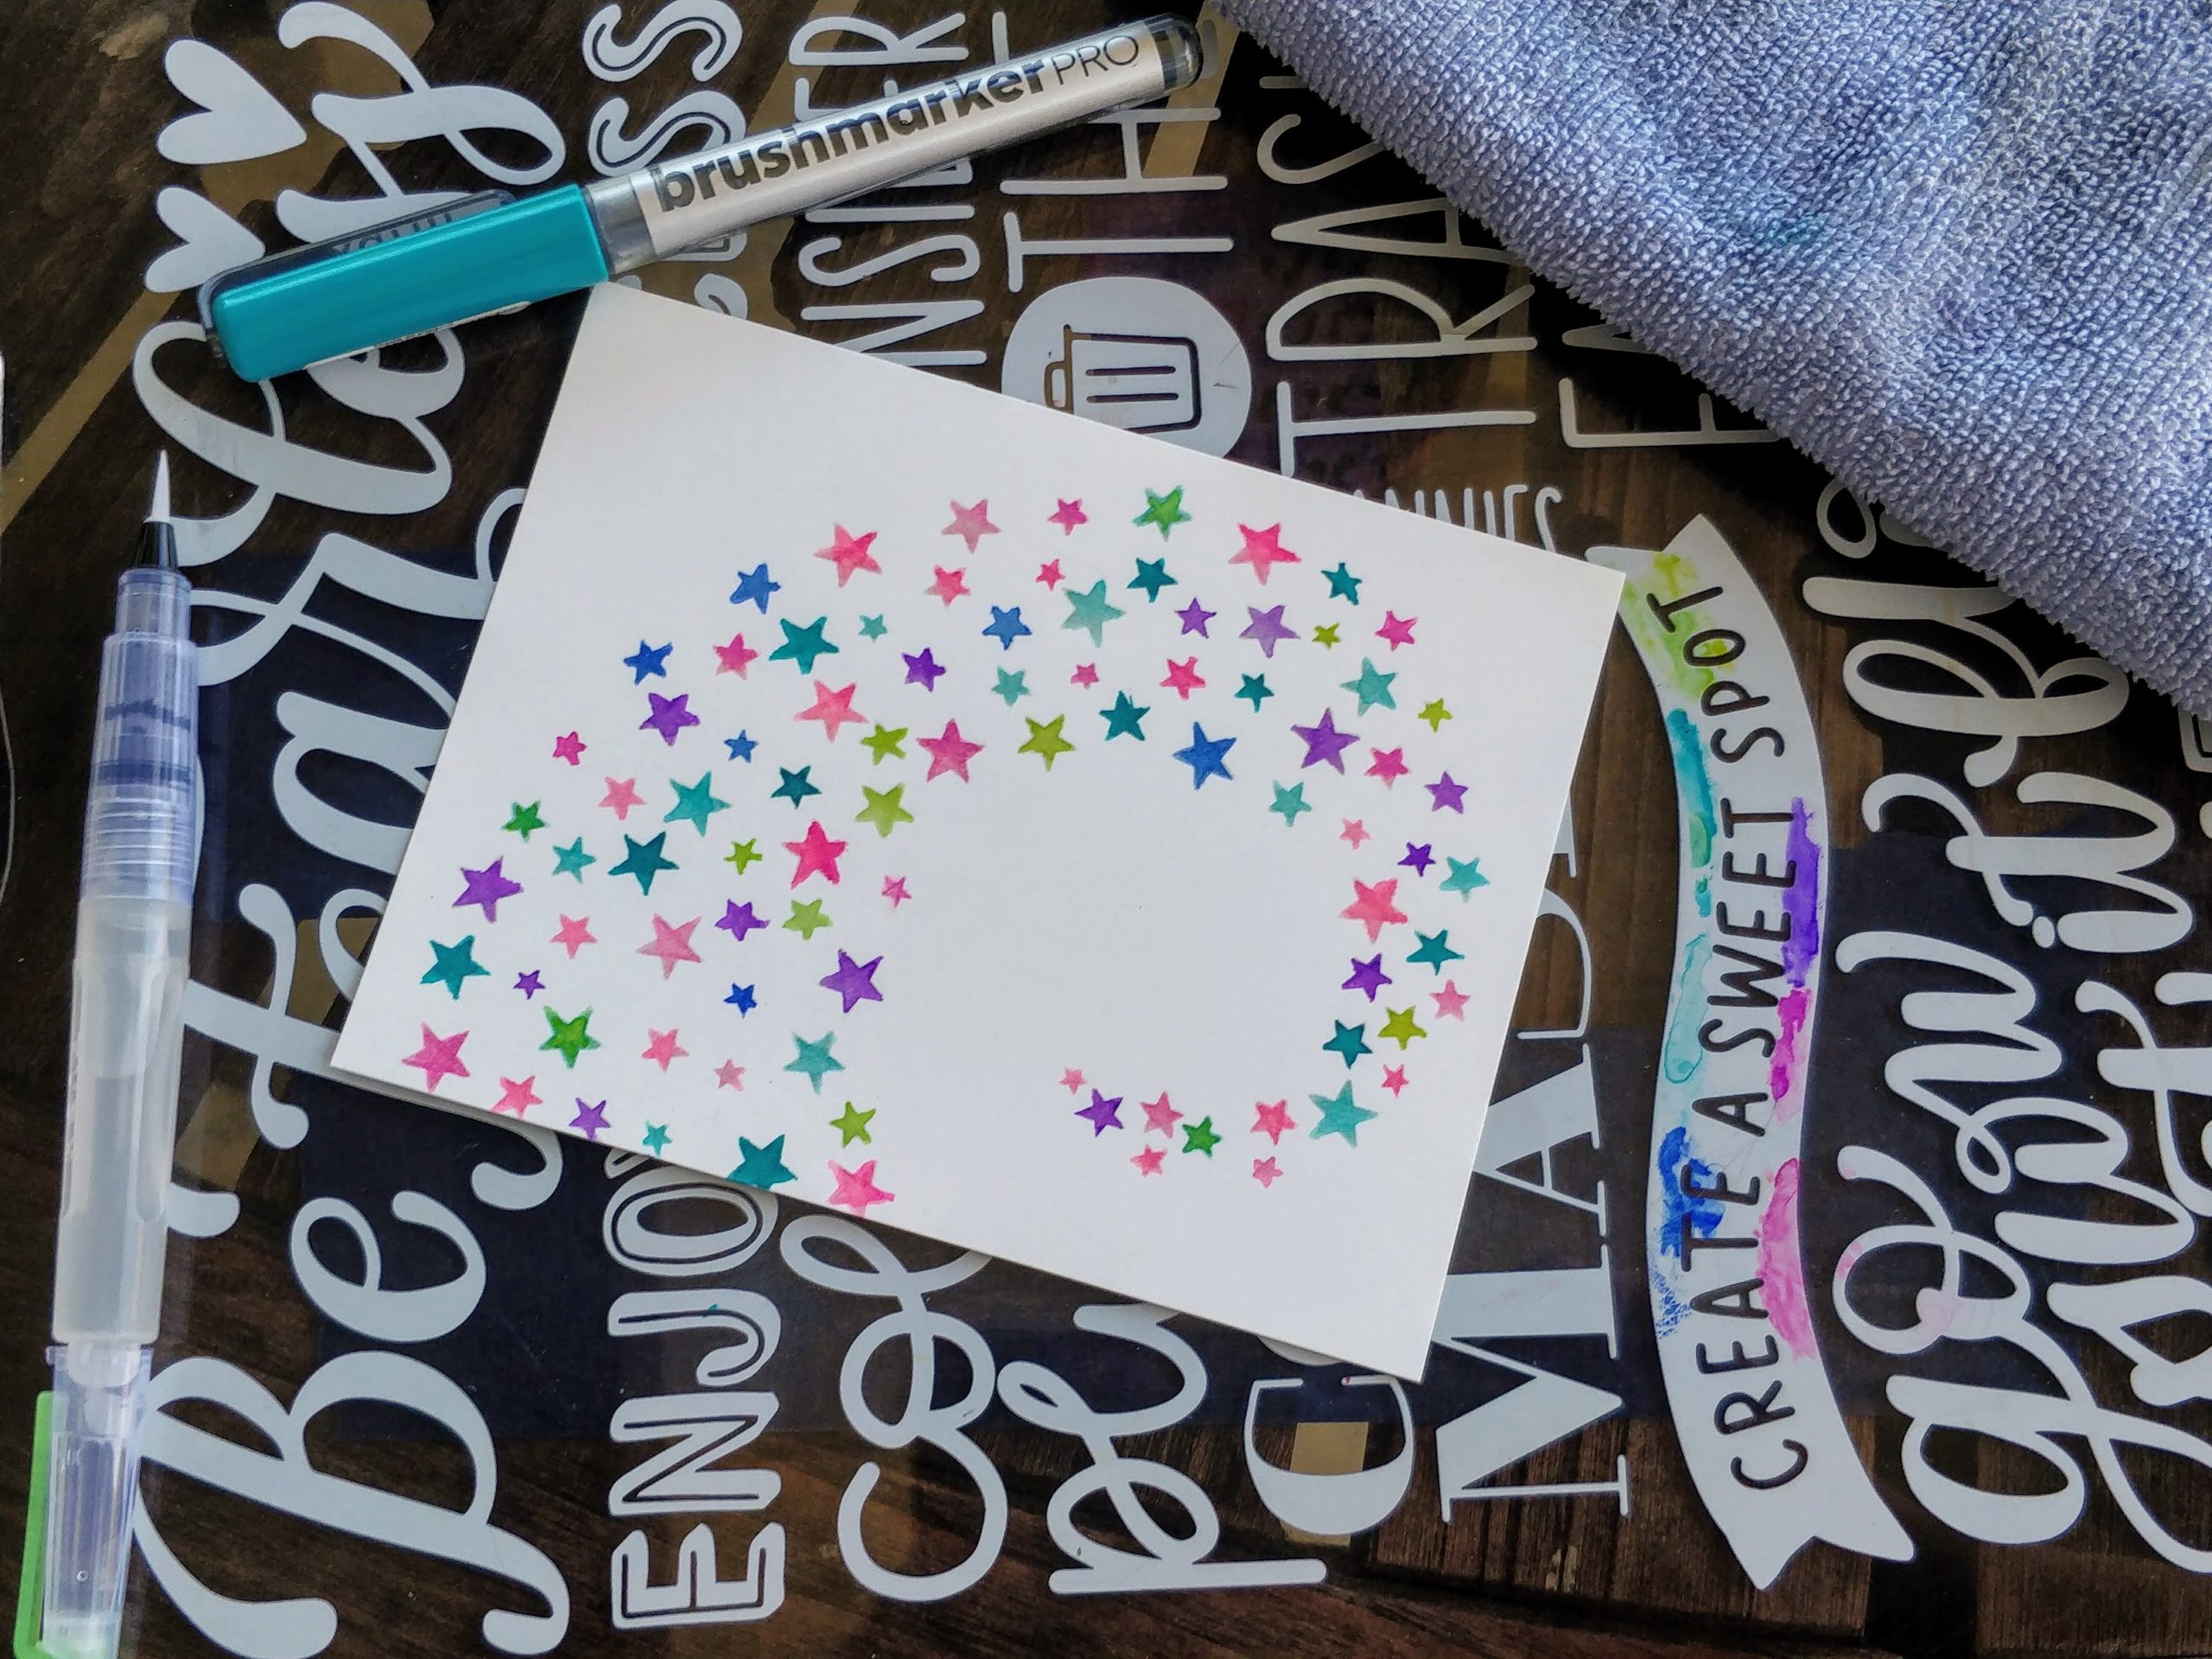
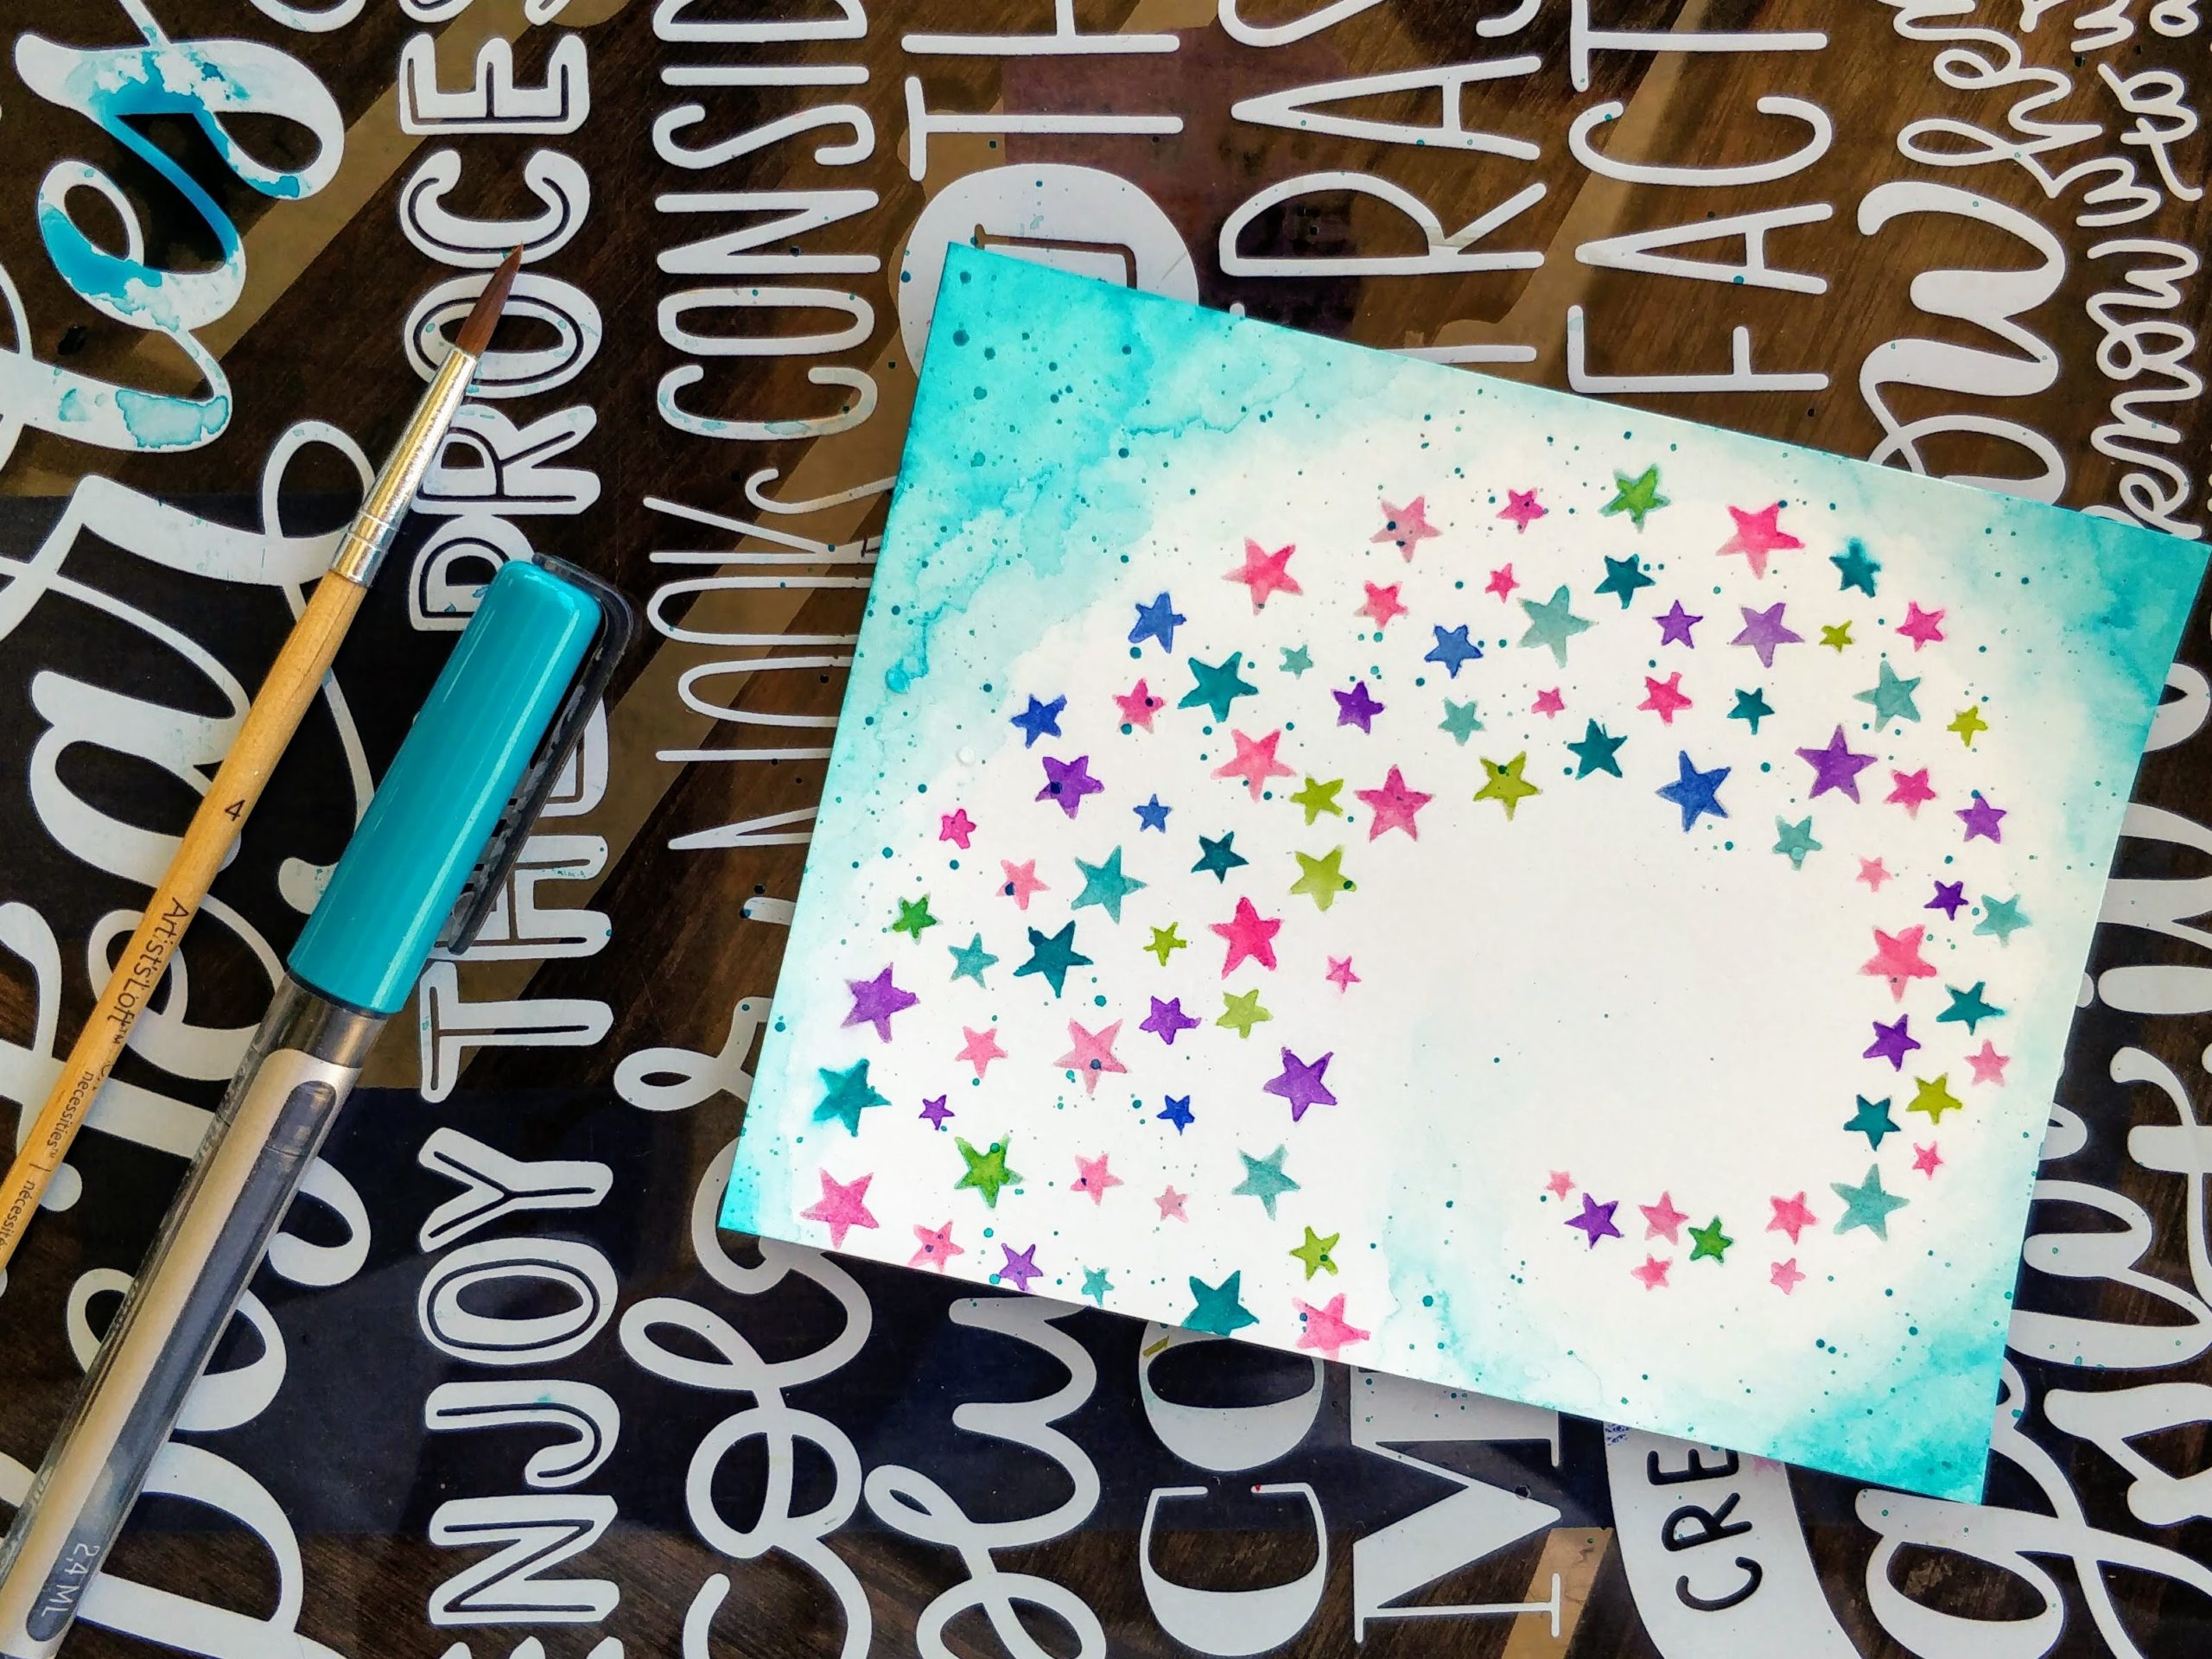
I saw Kathy Racoosin stencil a light, neutral colored ink onto a background, and then watercolor it. It's such a cool technique! For this card, I stenciled Fadeout ink through the Aim for the Stars stencil. I was just playing, so I used a panel of Neenah that I had handy. I probably should have grabbed watercolor paper, but since there was so much pigment in the markers, I didn't actually get the panel too wet, and it worked just fine.

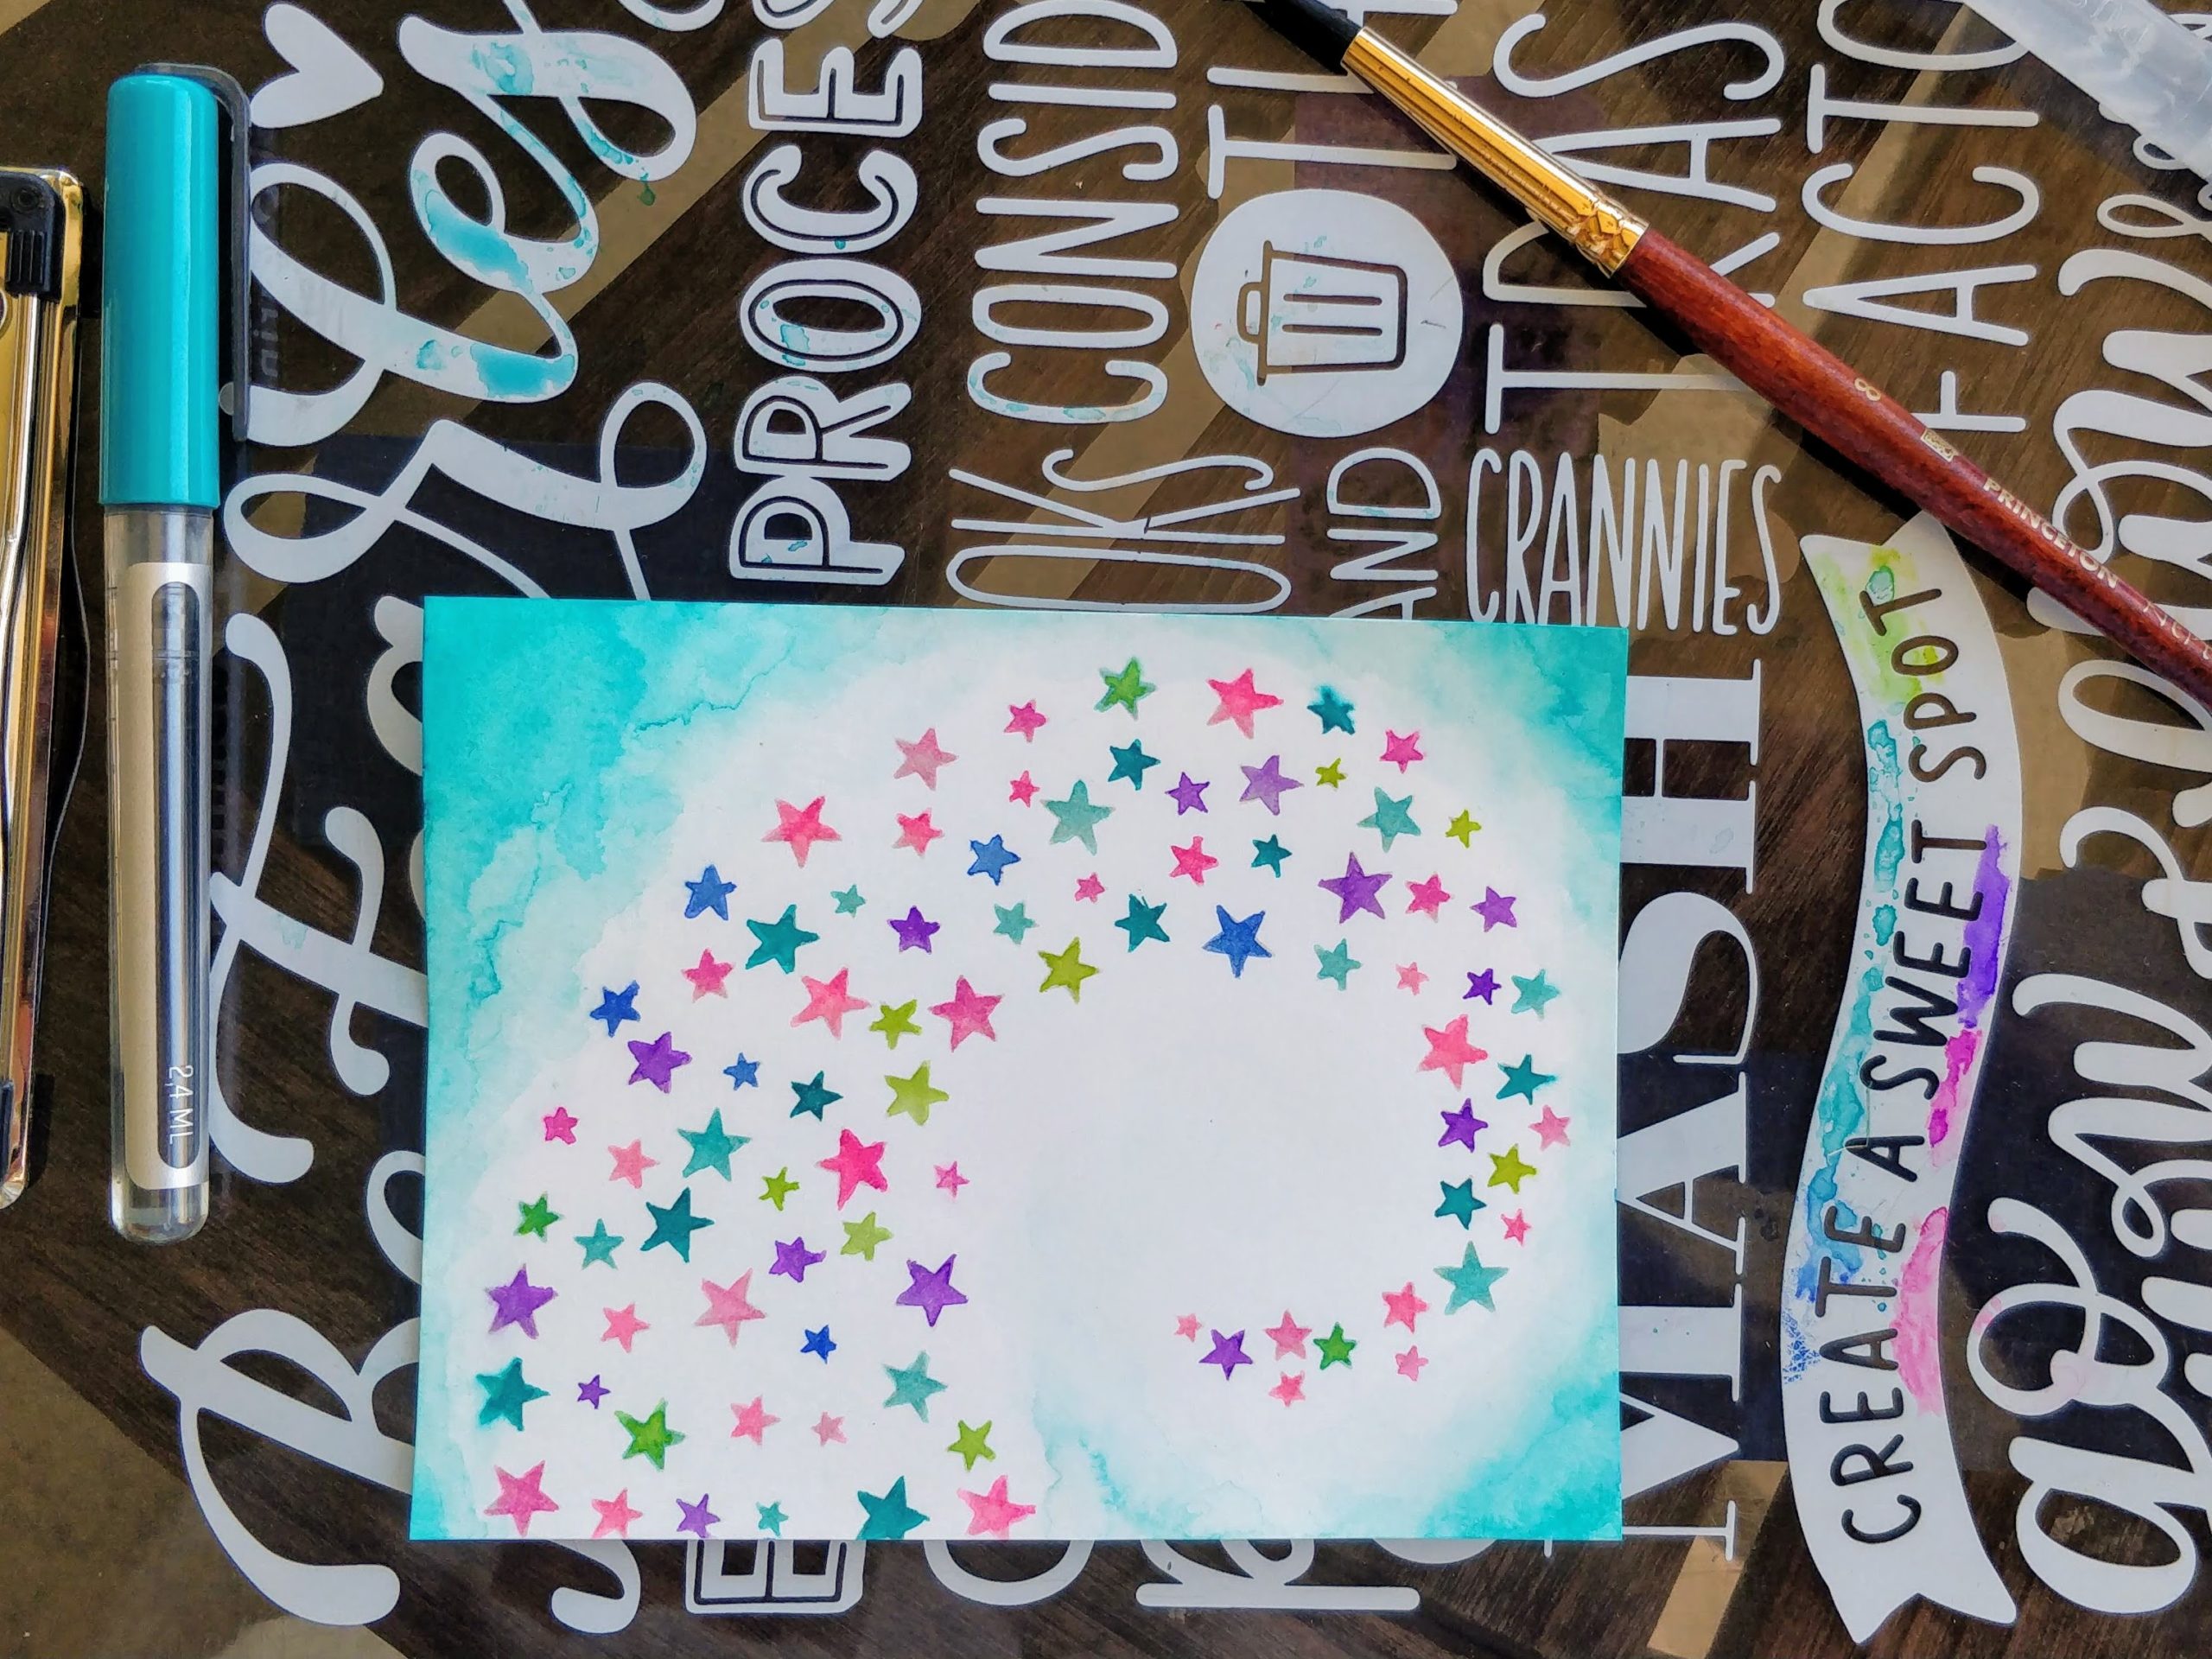
After I stenciled on the Fadeout ink, I scribbled several colors of markers onto my clipboard and picked them up with a waterbrush. I colored over the stars. Then, I added watered down turquoise to the sides (this is where watercolor paper would have been a better idea, but again, it worked just fine). To add interest, I splattered on concentrated color.


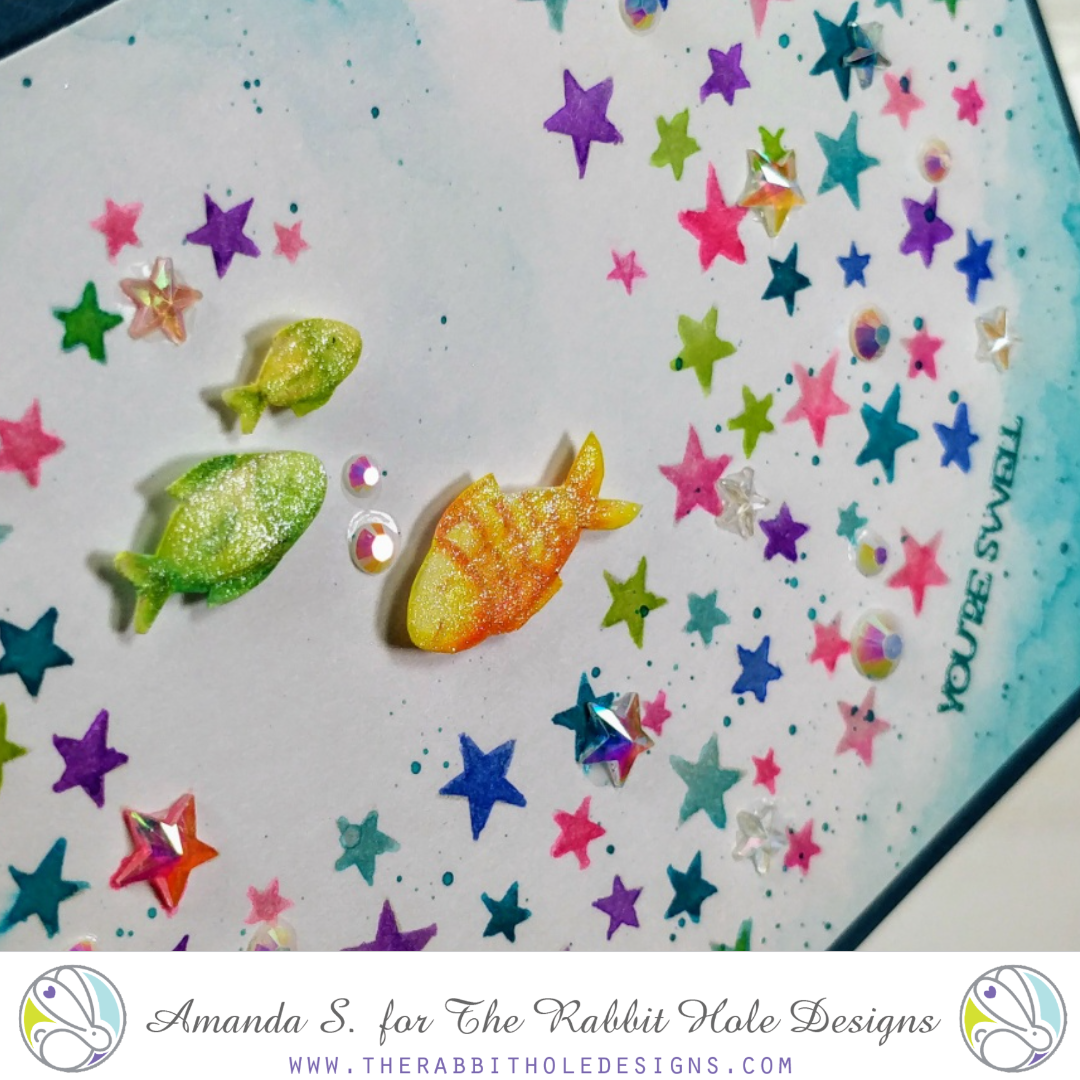
While I was rotating and trimming the panel down, the swirl of stars kind of reminded me of a mermaid tail, or waves. So I decided to turn it into an underwater background. Still wanting to play with the new markers, and with the Fadeout ink already out, I stamped the three fish in the Mermaid Hair stamp set to try no-line coloring again. (You may recall this no-line disaster, but I figured fish would be more forgiving images.) I watercolored them in the same way I did the stars, then fussy cut them. 

To pull the card together, I curved and stamped the sentiment YOU'RE SWELL from the Beach Day stamp set (on sale right now!) and embossed it on the background. I popped the panel up on a dark teal card base with fun foam, and popped the fish up with foam tape. Shimmer pen highlights, and flat-backed stars and gems add sparkle.


What do you think? Have you tried coloring a stenciled image? How about the Karin markers? Are you a fan of no-line coloring? I definitely need more practice with all three, but I'm enjoying the learning process. 

Thanks for stopping by today. You can find the sister article to this on my blog. Head on over for more inspiration and links to the specific products I used. I'll be back soon with another fun card to share. 

For more inspiration, updates, and news make sure to check out these awesome places! 

I'd Give You the Moon

Hello! Alison here with a card using a couple of the newest release items from The Rabbit Hole Designs. I really love the June release's theme of outer space, as I have always enjoyed learning about it. So working with these stamps and stencils is a win for me!

I used the Space- Infinity and Beyond stamp set as my jumping off point. I really wanted to do something with just the moon, so I inked only that up (and used some tape to mask off the string) and stamped it repeatedly using Silvery Shimmer Delicata Ink on black cardstock. Also from that stamp set is my sentiment, which I heat embossed with silver powder on purple cardstock.
I really wanted an all-over star pattern in my background so I applied the new Aim for the Stars stencil a couple of times to cover my gray cardstock. I used VersaMark ink and then applied a glittery purple embossing powder to give it some sparkle and shine. I also added some purple ink to my white card base to tie the purples together.
If you would like more information on my card, please visit my personal blog HERE. I hope you can look at your sets a little differently, and see how masking off certain elements can completely change the look of your creations.


Have an inspiring day!
-Alison


Thanks for joining us today on the blog!
Come back for more inspiration using The Rabbit Hole Design products. 

For more information, news and updates check out these links:

WISH- Birthday Card

Hi There!  
It's Kelly and today I am sharing a card featuring one of the newest stencils by The Rabbit Hole Designs, "Aim for the Stars".  What a versatile stencil to enhance your focal images. 
I paired it with "Celebrate With Cake"


To make this card I used Glitz Gel with the "Aim for the Stars" stencil on heavy weight blue cardstock.
Once it dried, I added the word "WISH" from the stencil using a dauber and Versamark ink. 
I stamped, colored and fussy the cake with tall plate and added it to the card with dimensional foam.
I also added gloss to the blue star, bow and circles and red glitter to the hearts. 
This color scheme is great for all genders and ages or even a July birthday!


Thanks for joining us today on the blog!
Come back for more inspiration using The Rabbit Hole Design products. 

For more information, news and updates check out these links:


Mad for Stencils, Hi!


Hey yall!  Happy Wednesday!  Tangii here with another creation from the June release! I hope you are having a great week and doing something happy!  For my card today, I am using the NEW Aim for the Stars Stencil and pairing it up with the Spell-It stencil!

I started off using a scrap frame piece from one of my June peek cards.  I centered it on my scalloped rectangle base for a visual and then lined up the Aim for the Stars Stencil right where I wanted it.  Most of the stars are inside the frame, but I wanted some to spill outside the frame as well.  Once this was done I taped it off and blended in those stars!  I love the bright yellow, I feel it kind of brightens up those darker colors on the frame.

Next I layed the frame over the base piece again so that I could place my Spell-It stencil.  I taped off the letters I wanted (easy since they're right by each other, lol) and then added some Glitter Gel.  The card still seemed a little "flat" to me so I added a few sequins (you know the pretty ones MaryAnn sends in your packages sometimes?).  Voila!  Easy, peasy!  

All of the items I linked in my post are available at The Rabbit Hole Designs which is open & shipping!

You can also read about this card on my blog, here with links to the products I used, etc.  Thanks for popping by, come back again soon!

Under The Stars


Hi Everyone! Amy here and I’m excited to share with you a card that I made using the Aim for the Stars Stencil from the June 2020 Release! 


For this card I wanted to do something really special with the brand new Aim for the Stars 6x6 Stencil. So I made the stars GLOW IN THE DARK! I started by ink  blending deep blue colors to look like a night sky. Then, I used clear embossing ink through the new stencil. You can do this with the pad directly or with a blending tool. I then heat embossed some glow in the dark embossing powder to really bring this scene to life. I stamped and cut out the hilarious Caffeinated Dragon and used some pattern paper and a paper piecing technique to give him  some extra flair. I then selected one of the sentiments from the Caffeinated Unicorn stamp set and completed the scene. I just love how the different TRHD products work so well with each other, and you can mix and match so many of the items. 


You can find these items and much more here


Thanks for checking out my project and have a great day!
Amy


For more inspiration, updates, and news make sure to check out these places.


June Release Inspiration Hop ~ Day 2


Hello and welcome to Day 2 of the Inspiration Hop. We are so excited for you to join us as we present to you our June release. Our fabulous Design Team will be sharing their projects over the next couple of days, so be sure to visit their blogs and leave them some crafty love.


 The 2 new stamps sets and 2 new stencil are all available to purchase right now in the shop.


The two new stencils that are being highlighted today are

Aim For The Stars Stencil

Ribbon Star Stencil
Make sure you come back tomorrow for Day 3 of our Inspiration Hop.


___________________


**Giveaway**


To celebrate the June release, The Rabbit Hole Designs is giving away two gift certificates; one to a lucky Instagram Follower and one to a lucky Fan Page follower.  Winner will be chosen at random from the comments left on the INSTAGRAM post, and tagging friends, and also from commenting on the Fan Page post.  So make sure to head on over to INSTAGRAM and look for the giveaway post @therabbitholedesignsllc and look for the post at The Rabbit Hole Designs Fan Page by 11:59 p.m. PST 05-28-2020.  Winner will be announced on The Rabbit Hole Designs blog 05-29-2020.

This is the graphic you are looking for on our IG and FB


___________________


For more inspiration, updates, and news make sure to check out these awesome places! 


Thank you so much for stopping by today!