Pages

Showing posts with label handmade cards. Show all posts

Plane Awesome!


Hello again! Lauren here today sharing this cute card that features my favorite stamp set, Sail & Soar illustrated by the talented Tatsiana Zayats. This is such a playful set that's full of possible adventures for these sweet bunnies!

I started out by creating my cloud filled background. I prepared an A2 sized (4.25X5.5) blue cardstock panel for heat embossing. To do this, I used the excellent Cottontail Embossing Powder tool. I then stamped clouds randomly over my panel using the included cloud stamp with an embossing ink pad. I then covered the clouds with white embossing powder, tapped off the excess and heat embossed them.


After heat embossing, I colored in the clouds using a white colored pencil. Then I die cut the panel using a scalloped, stitched rectangle die from my stash. I then adhered the panel onto a white A2 sized card base.

Next, I stamped my cute airplane bunny image onto white cardstock in black ink. I used colored pencils for this cute image as well. Once he was all colored up, I used the coordinating die that is available, to die cut him out and also 4 extra blank shapes from blue cardstock. I adhered them all together in a stack with the colored one on top and adhered the stack onto my card.


I prepared a piece of blue cardstock with the Cottontail Embossing Tool to create my sentiment. Then I stamped the sentiment onto blue cardstock using embossing ink, covered it in white embossing powder, tapped off the excess and heat embossed it. I then die cut it out using a banner die from my stash and then also 3 extra blank banners. I adhered them all in a stack with the sentiment on top, then adhered it onto my card, below the plane. 


I think this is a super cute card that would bring a smile to many an adventurer's face! Thanks so much for visiting.

Here are the links for The Rabbit Hole Designs products used for this card:


Sail & Soar Coordinating Die Set: Sail & Soar Dies – The Rabbit Hole Designs


Past Favorite, Joyful Greetings Times Two!


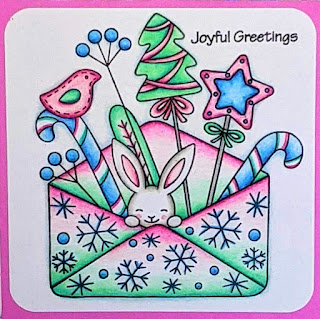
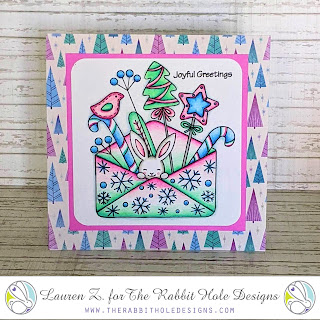
Hi there. It's Lauren sharing another of my favorites from this past year. This one is a two for one! I loved coloring this image so much that I did two color schemes and then couldn't decide which one I preferred! 

Hello and welcome to day 3 of The Rabbit Hole Designs New Release and Inspiration Hop. Today I have this square card featuring the so very adorable Hoppy Holidays stamp set illustrated by Tatsiana Zayats.

This was a super simple card to make. I started out by stamping the image in black onto white cardstock. I then colored the whole image using Prismacolor pencils. I stuck with a traditional Christmas color palette.


I then die cut the image out using a rounded corner square die from my stash and stamped my sentiment in the top right corner. I adhered it onto a square kraft cardstock panel

Next, I found a coordinating patterned paper and trimmed it to 5.5 x 5.5 and adhered it to a top folding card base of the same size. Then I adhered the panel I had created onto the patterned paper.

I enjoyed colouring this image up so much that I decided to make the same card but this time in non-traditional Christmas colours.


I cannot decide which card I prefer! Which one is your favorite?
For more inspiration, updates, and news make sure to check out these awesome places! 


Looking Back on a Favorite - Snail Mail


Hi everyone. Lauren here. This month we are taking a look back at some of our personal favorite cards we have created this past year. This cute card featuring the Snail Mail Flower stamp set is one of my favorites because it was the first actual card that I made using a gel press. I was so tickled by how this turned out!

I started out with an A2 (5.5x4.25) sized white cardstock panel and a small round Gel Press plate. Hold on...don't let the gel plate scare you! They are so fun AND easy to use!!


Onto the gel press, I smooshed Kitsch Flamingo, Cracked Pistachio and Peacock Feathers Distress Oxide ink. I used a small brayer to gently and lightly smooth any sharp lines in the ink.


Then, I laid the new Amanda, leaf stencil on top of the ink and carefully pressed it down with my fingers making sure that the stencil was making contact with the whole gel press. I lifted off the stencil and laid my white cardstock panel over top of the inked gel press. I rubbed back of the paper to make sure the paper was in full contact. Then I slowly lifted the panel off.


I let the ink on the panel dry then stamped the snail using Versamark Onyx Black ink. I also stamped the small "Hi" sentiment from the Miss you Space set because I think that's what the little snail is thinking!


To finish my card, I trimmed the panel using a wonky stitched rectangle die from my stash. Then, I backed it with a pink A2 cardstock panel and adhered it to a top folding card base!


I hope you like my sweet snail mail card and that it inspires you to give this technique a try!

Thanks for visiting!