Pages

Showing posts with label die cutting technique. Show all posts

Pulling Rabbits Out of a Hat


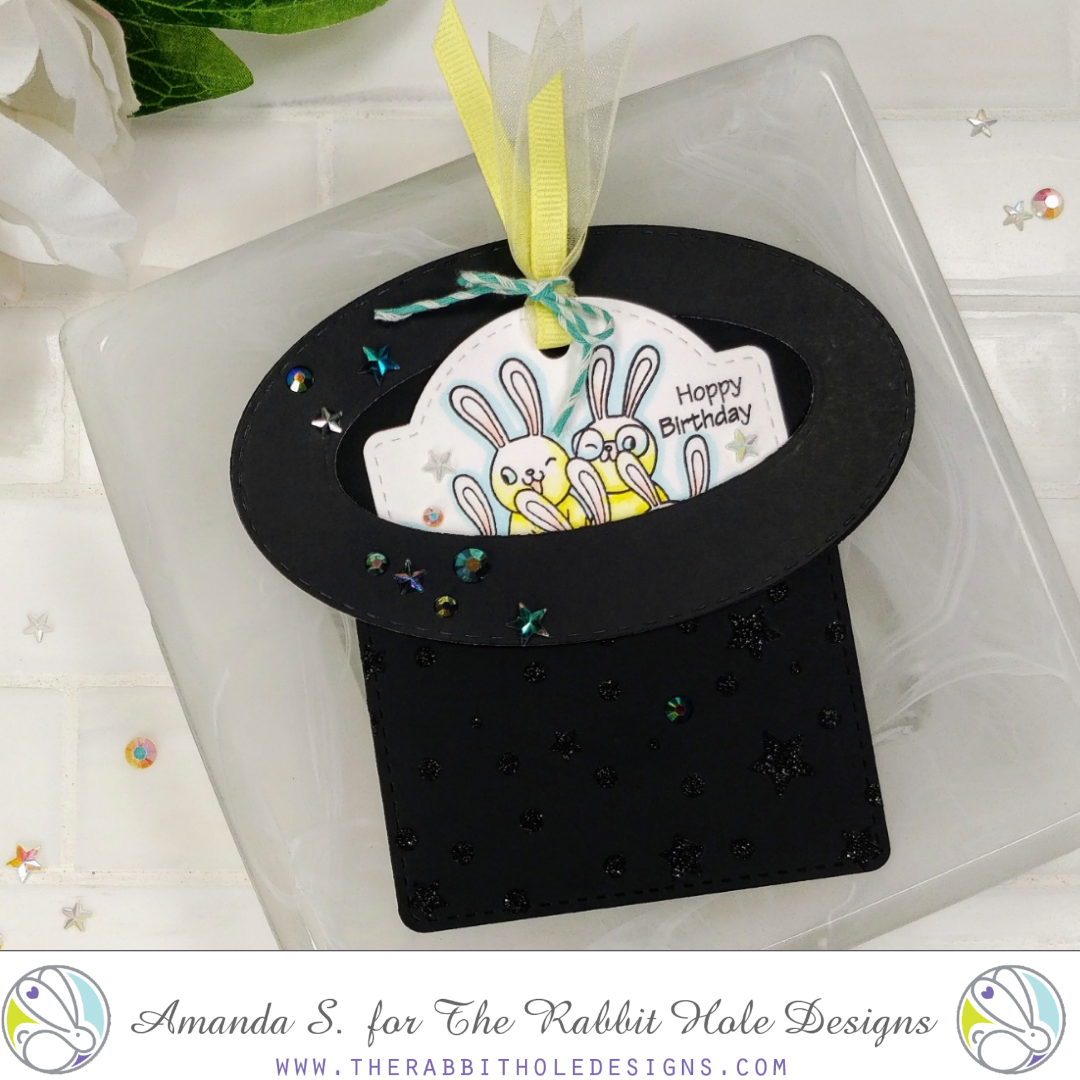
Hey crafty friend, it's Amanda from Pear Blossom Press again with a fun new interactive card! I haven't been shy about saying the All Ears set is my favorite of the new release. As soon as I saw the image, I knew I wanted to create a pocket card shaped like a top hat and have the cute little bunnies pull out. And I'm happy to report, this card came out as cute in real life as it was in my head! (Lol, that isn't always the case.)


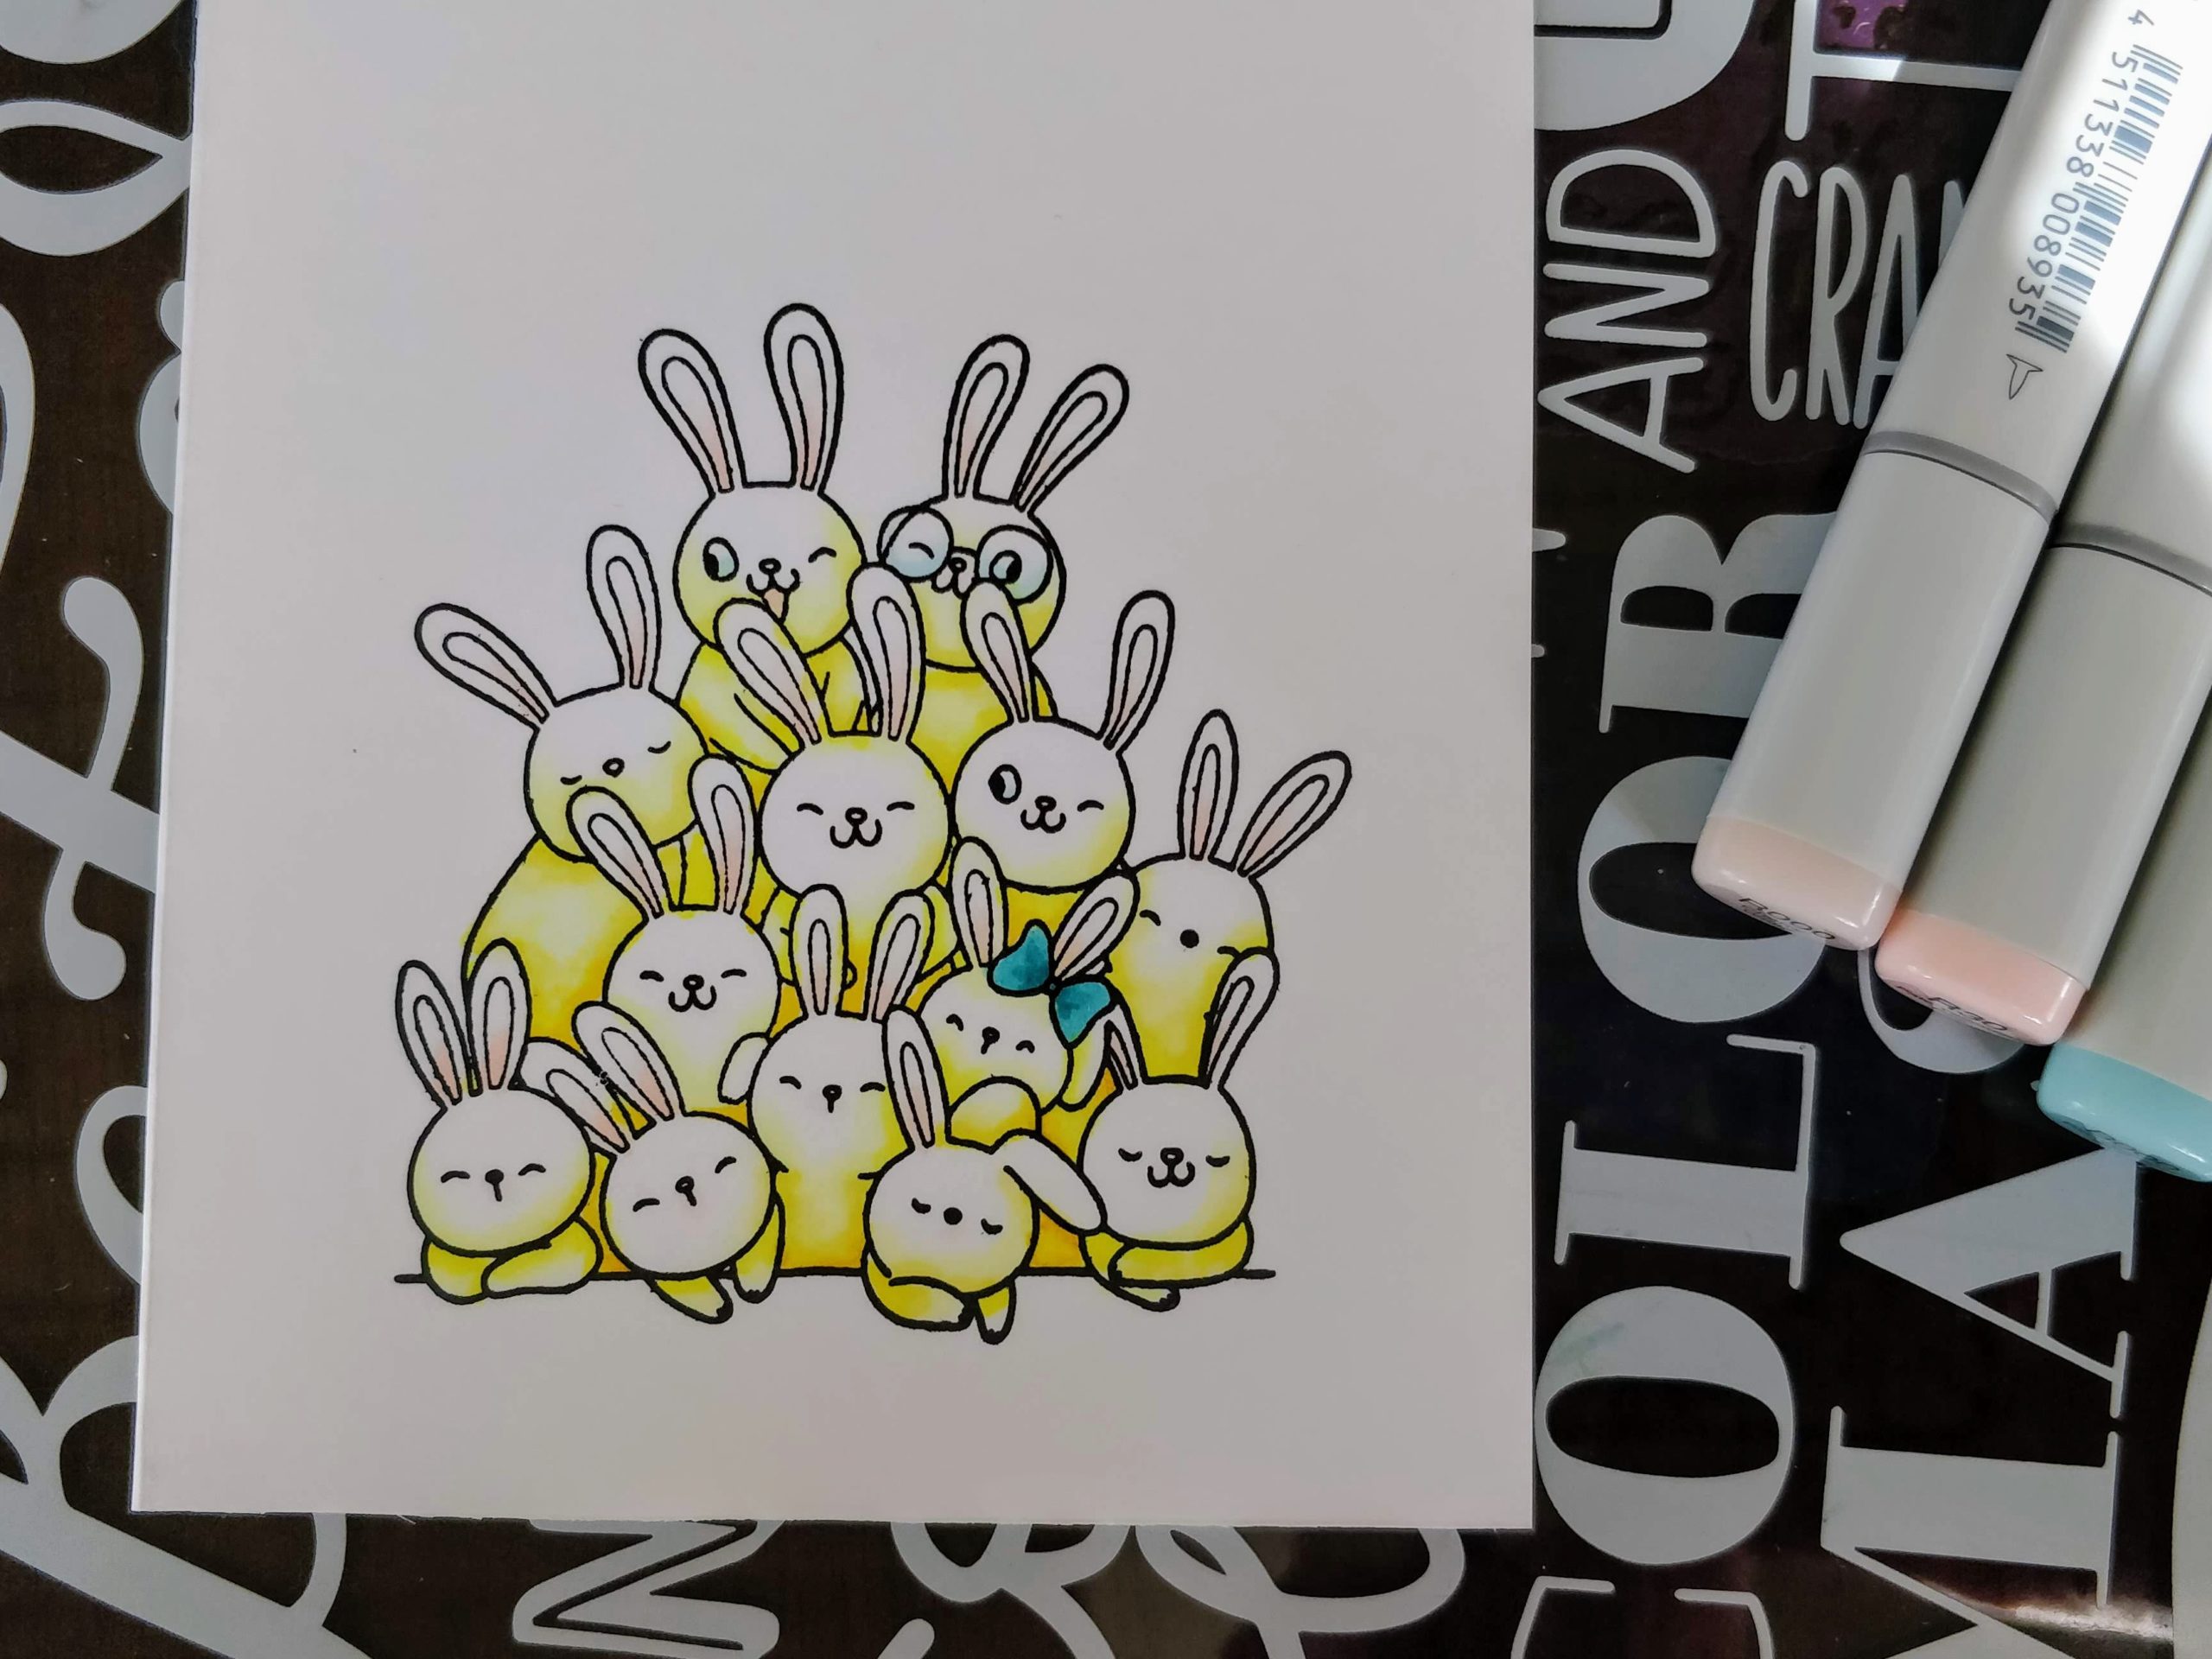
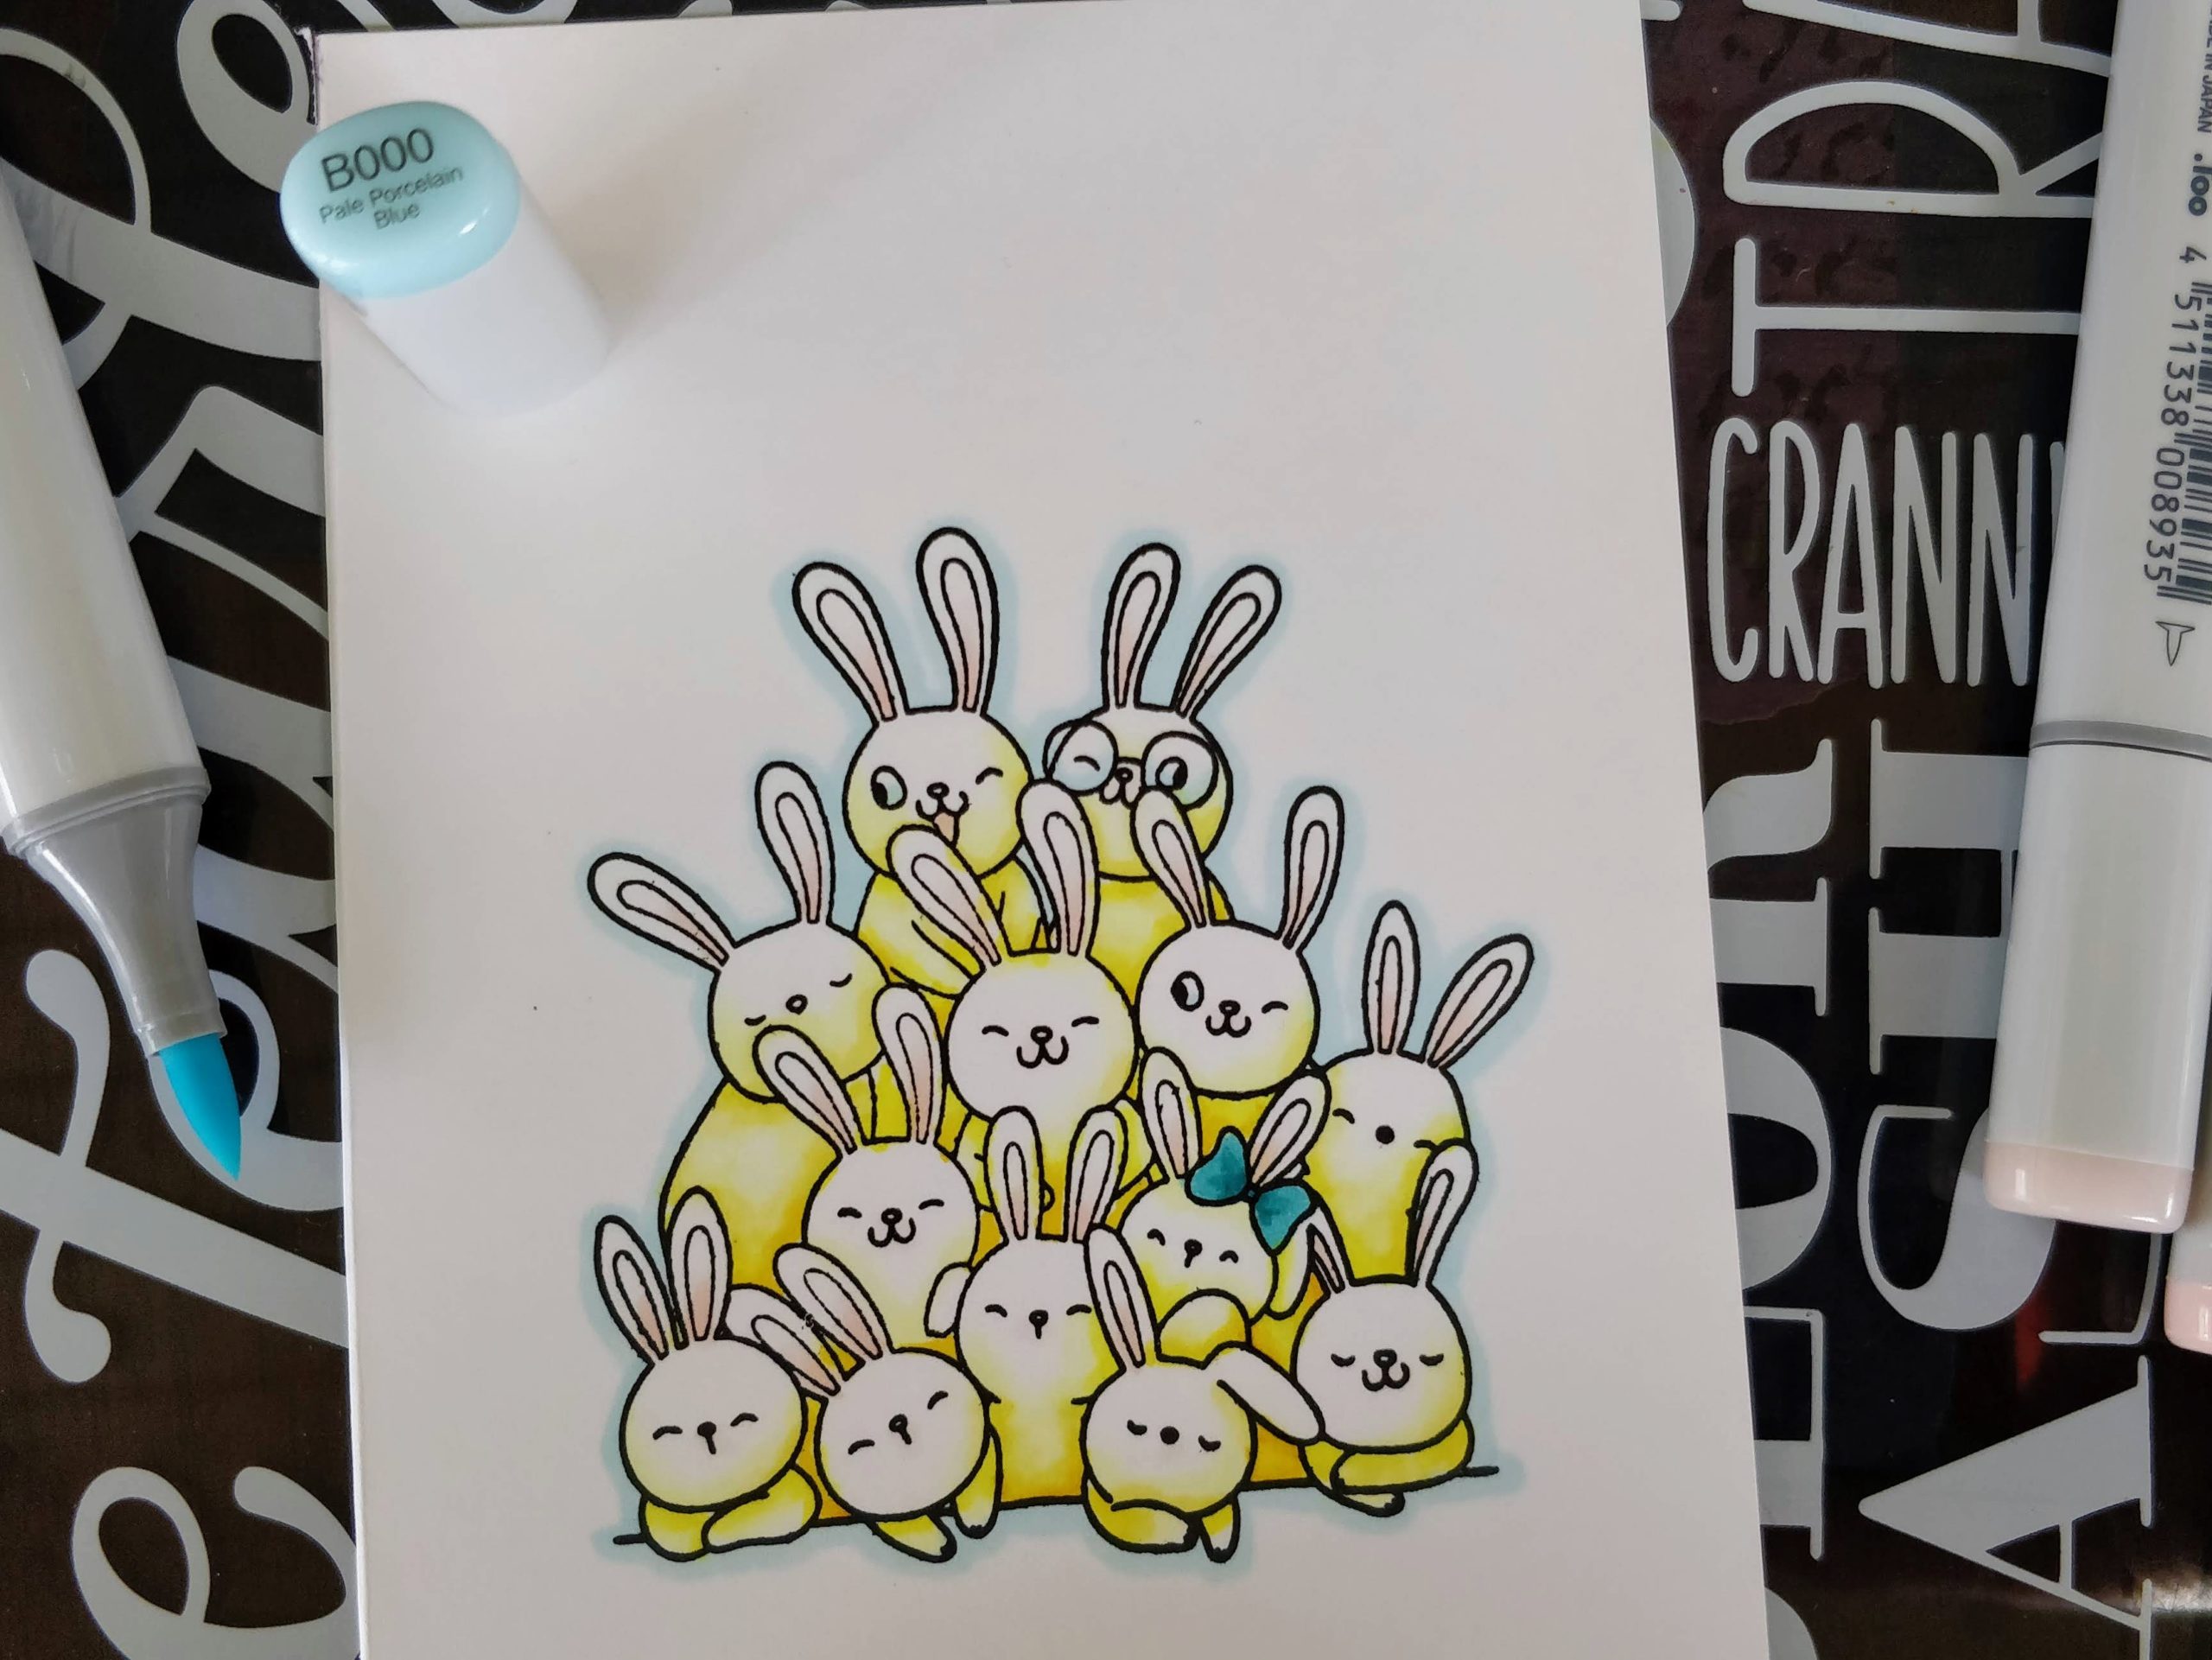
I stamped the bunny pile onto a panel and channeled my inner Mona Toth for coloring inspiration (she does yellow and turquoise like nobody's business!) I used Copic markers to color the bunnies, then added a drop shadow around the outer edge with a pale blue marker. You can see how that little bit of color helps the image not look so flat. (By the way, it's day 2 of the new 30 Day Coloring Challenge; are you coloring along with us?)

Rabbit Out of a Hat Pocket Card Rabbit Out of a Hat Pocket Card

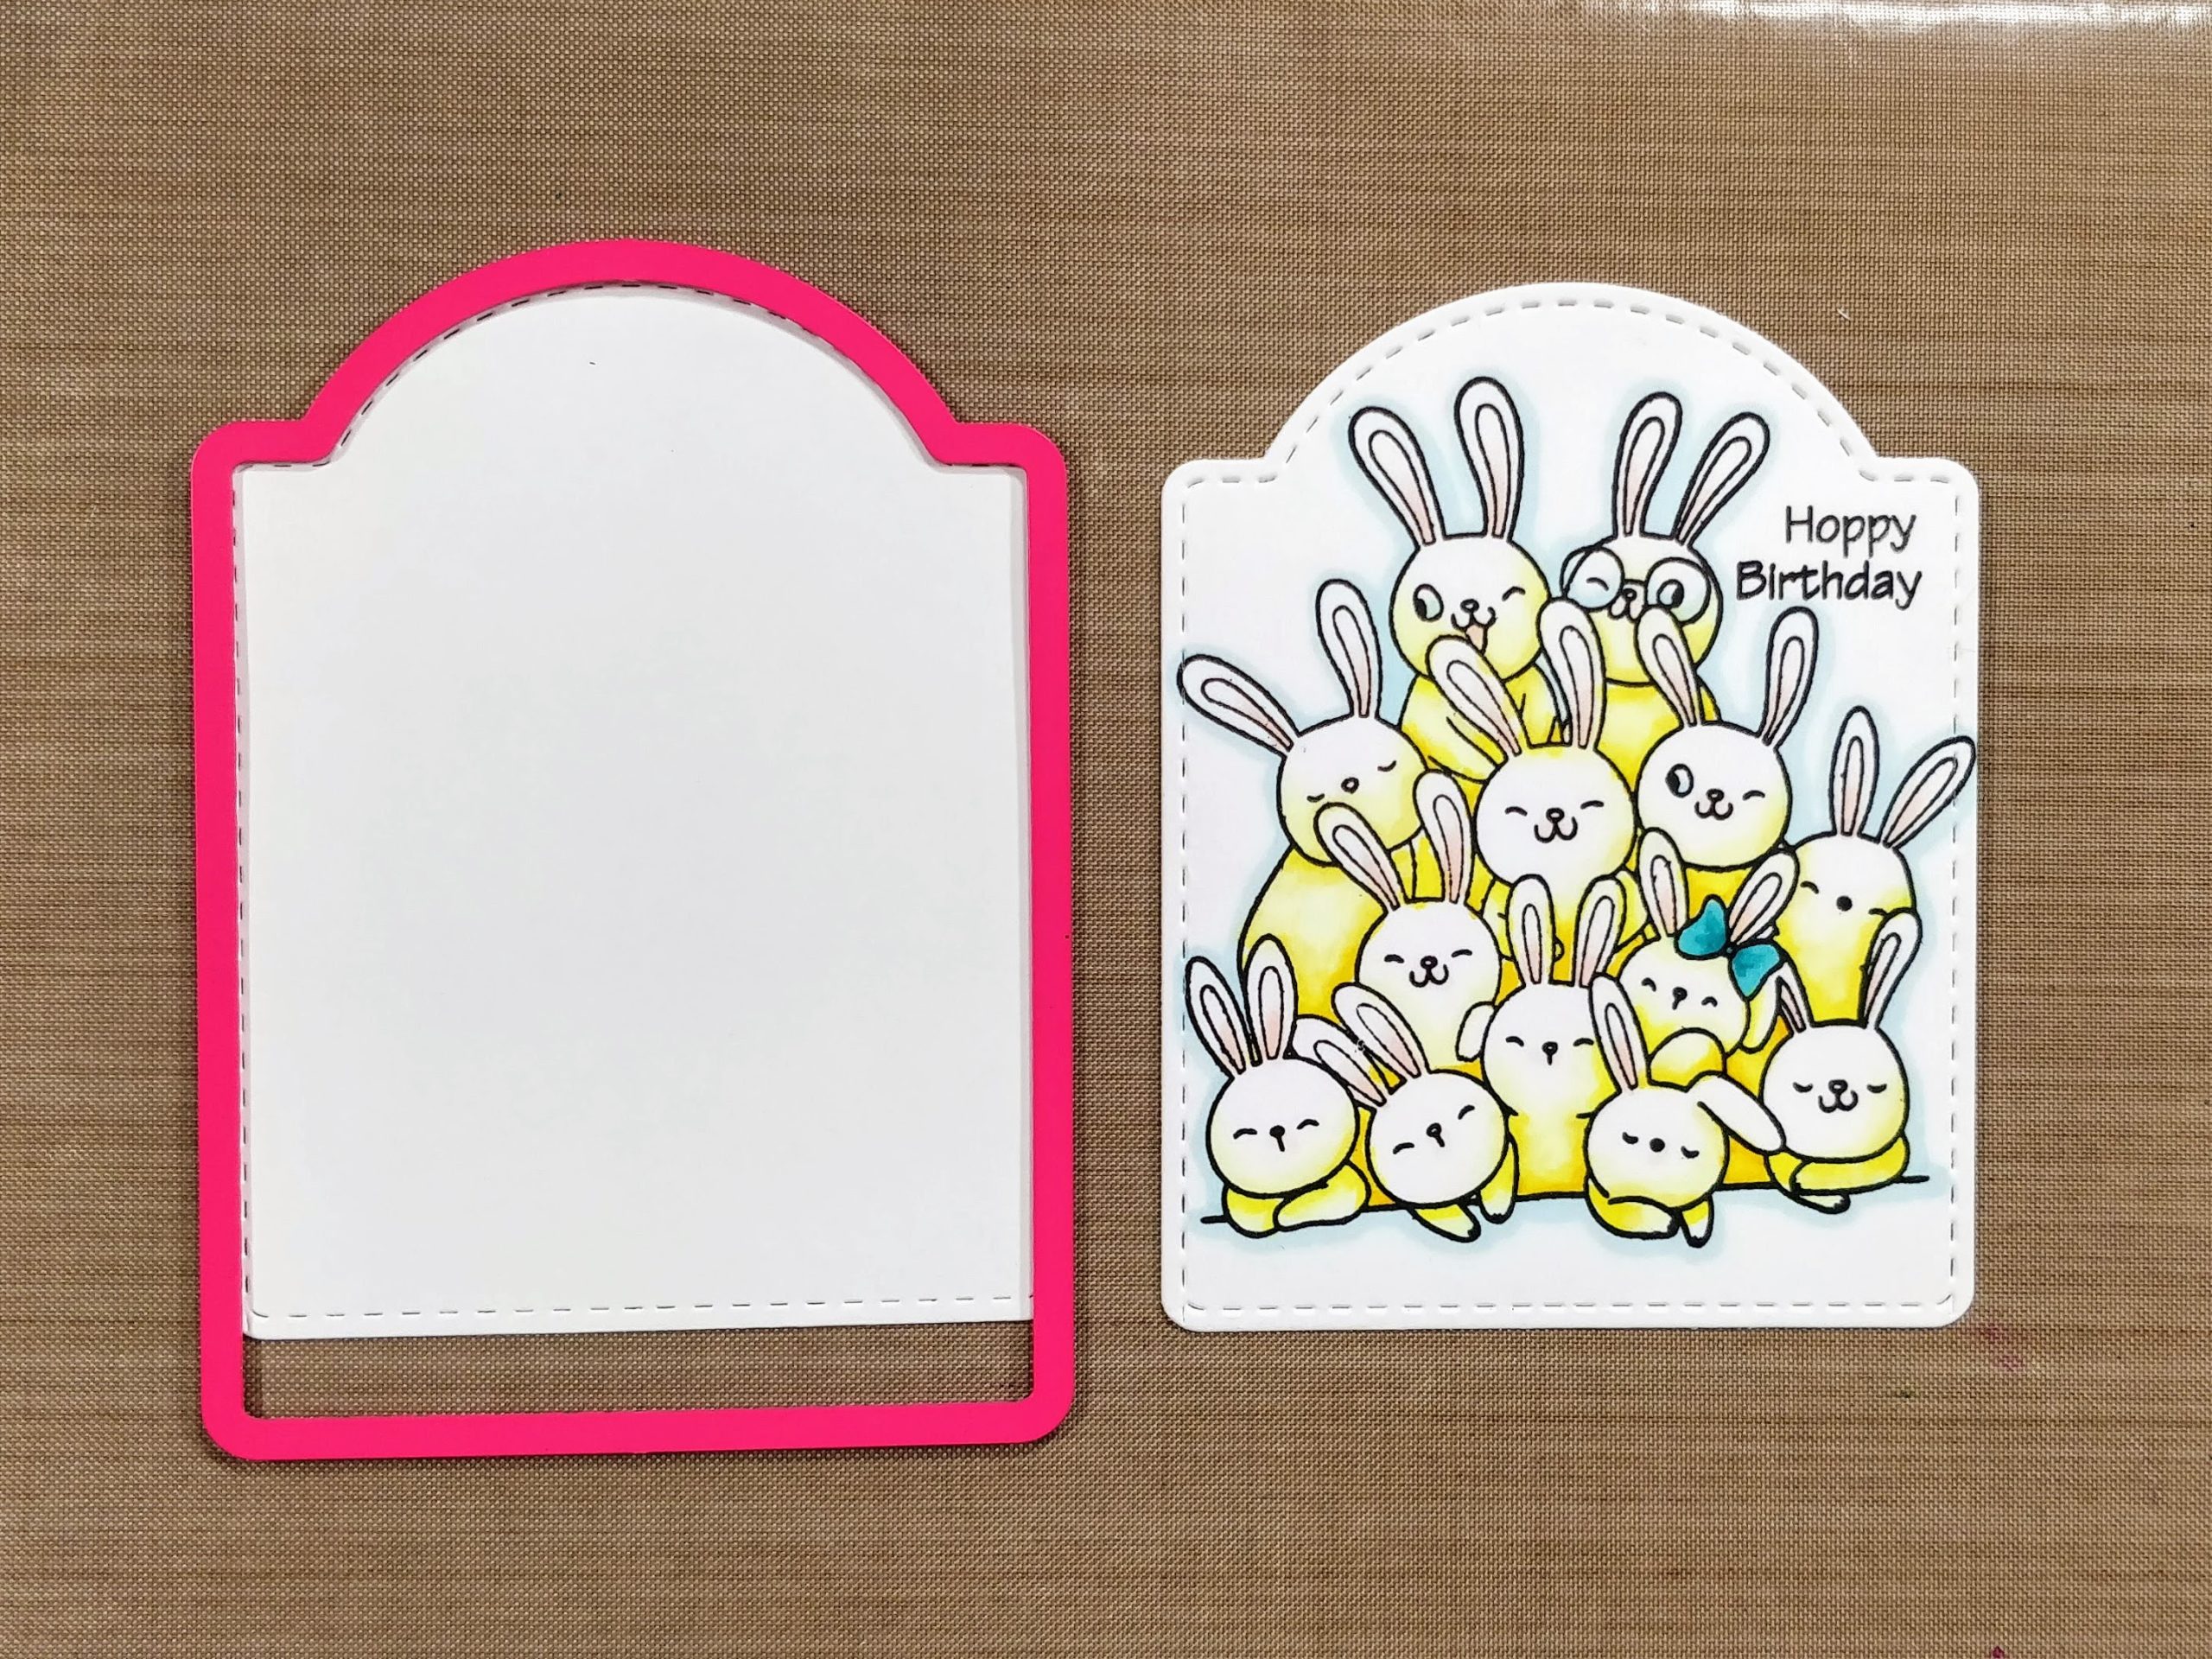
I stamped my sentiment and cut the panel out with a tag die. Because I used Copic markers, I cut a second tag to layer behind to cover the bleed through. The tag I used was a little long for my image, so I slid the die up and re-cut the bottom to shorten it.

Rabbit Out of a Hat Pocket Card

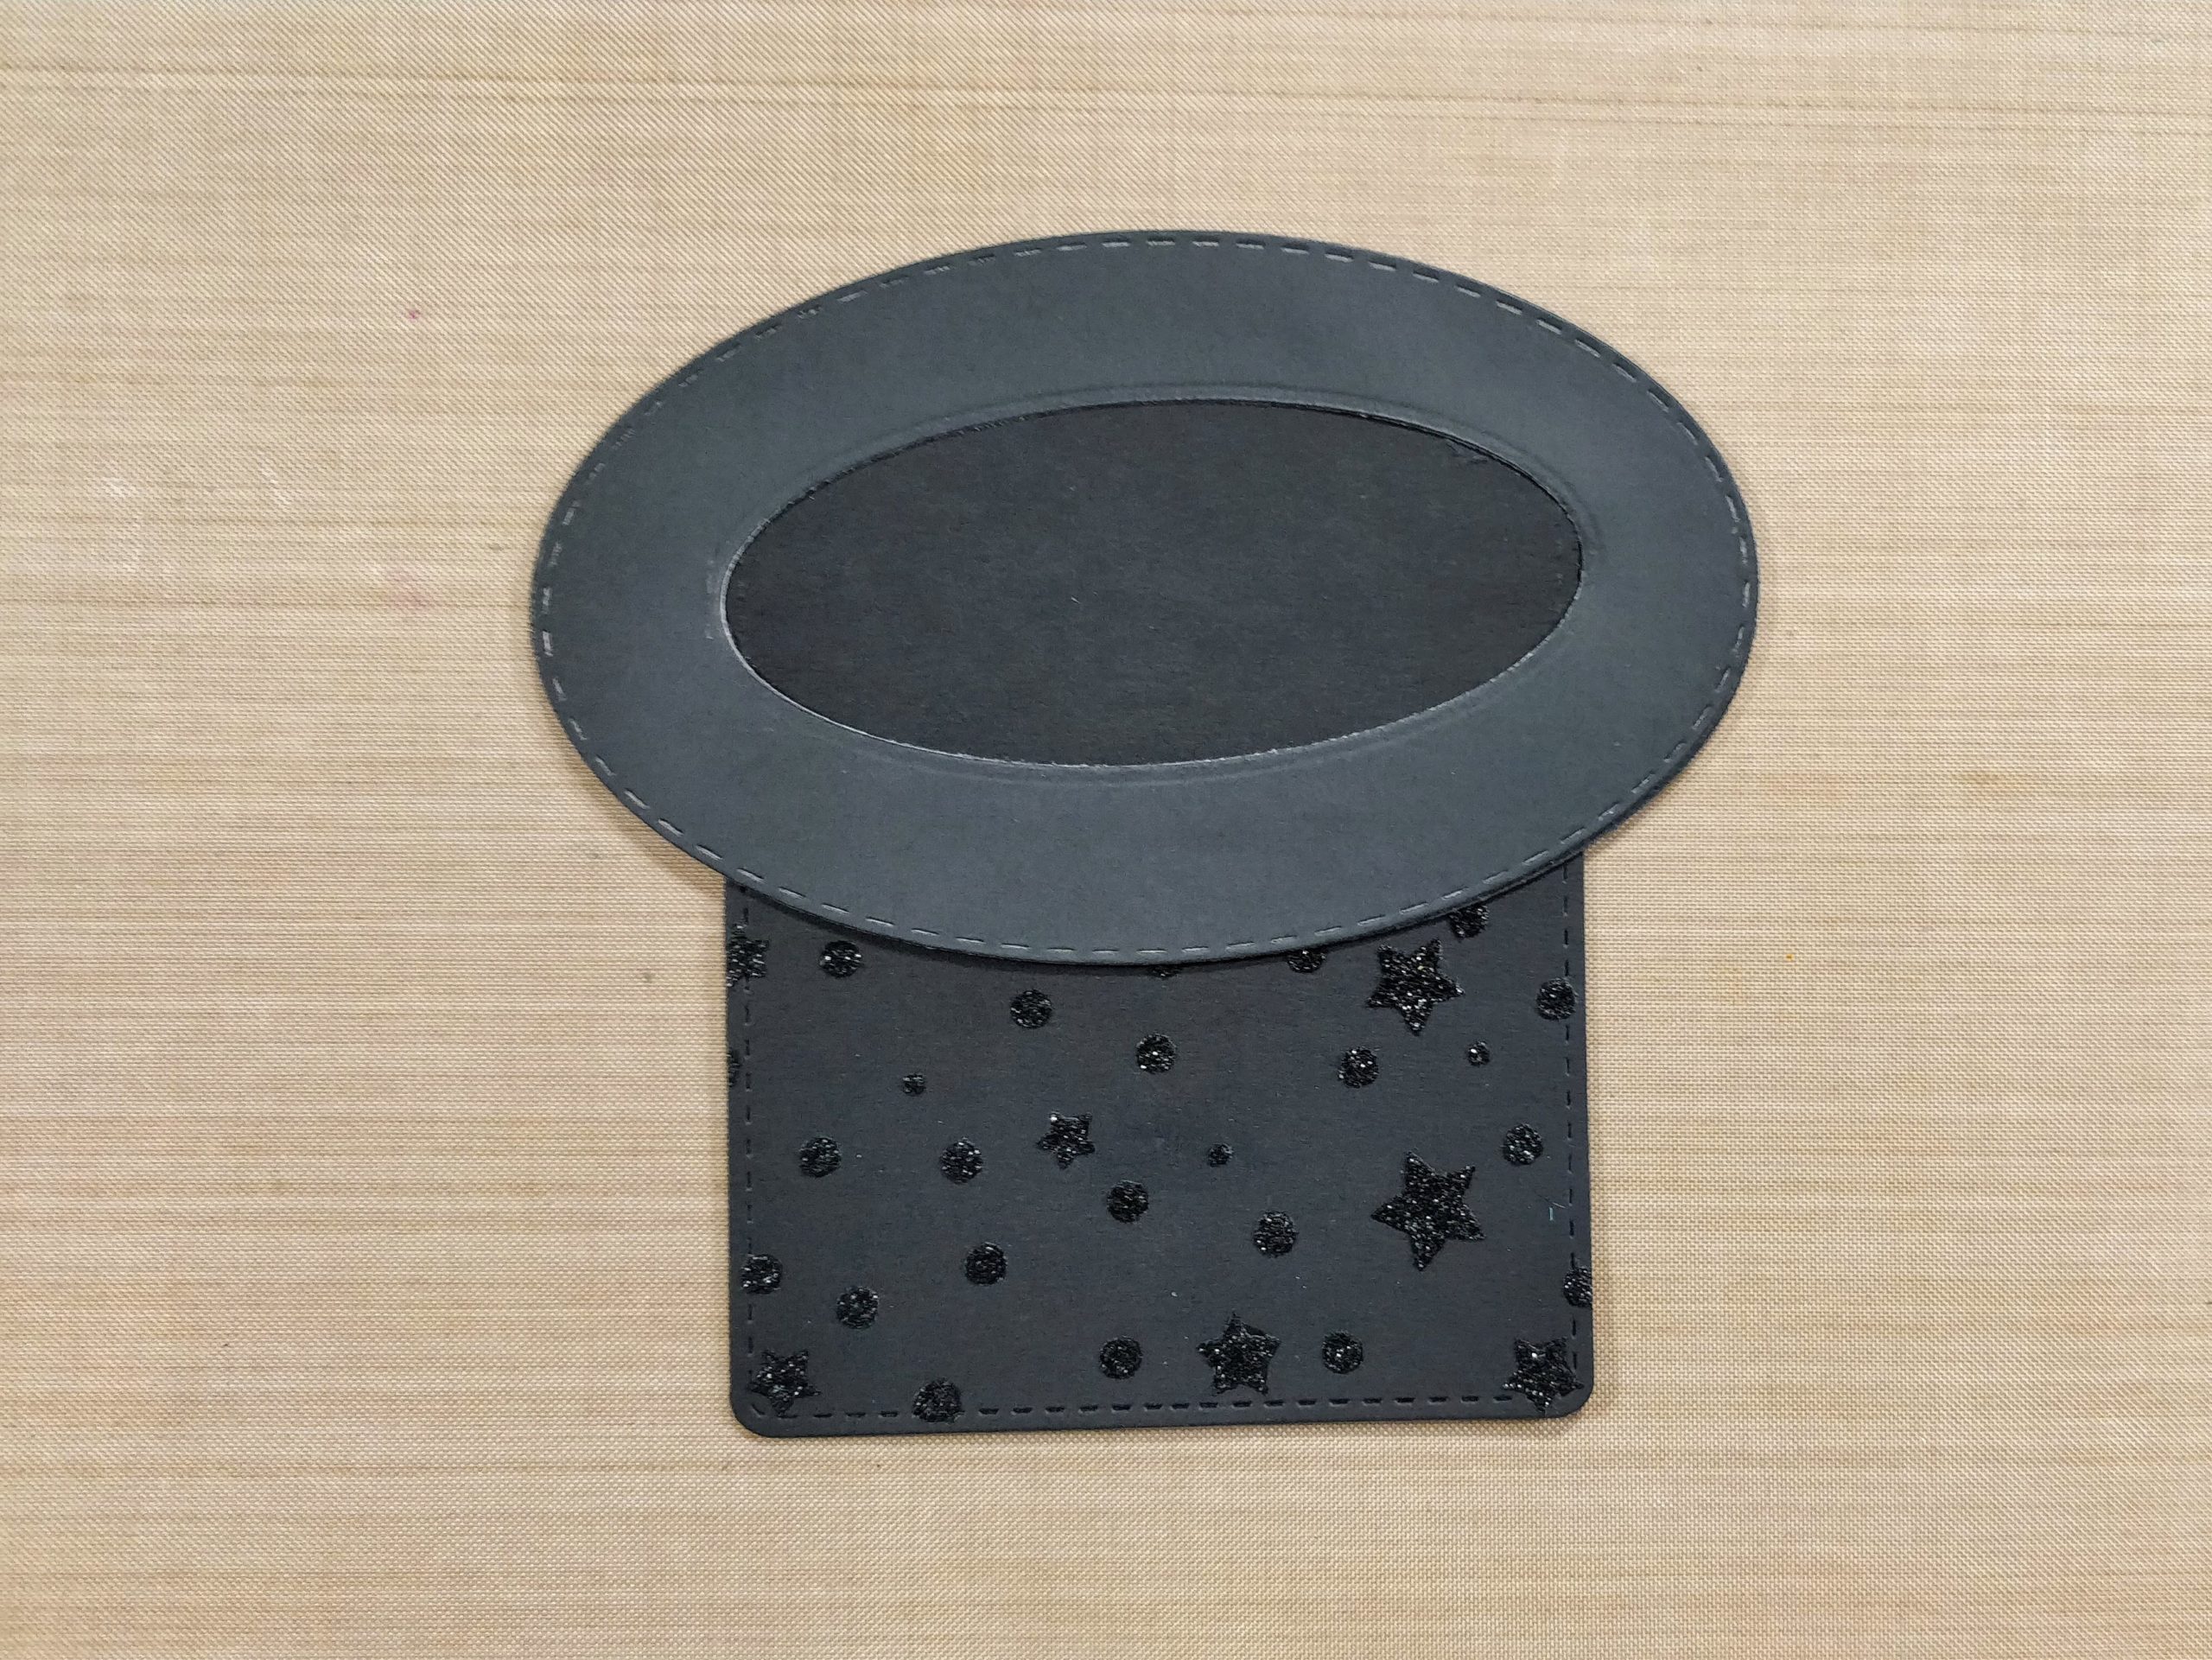
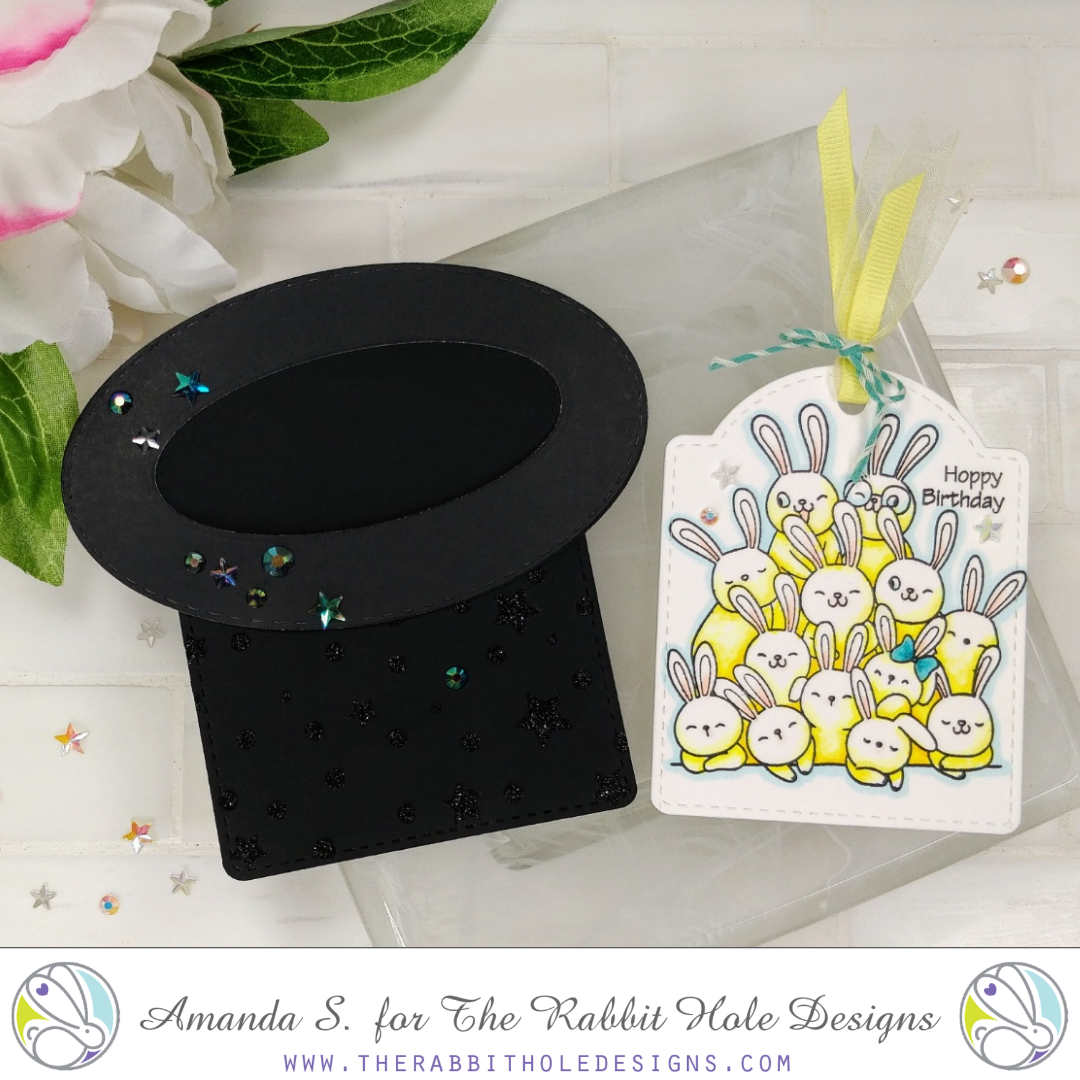
The top hat might look a little complicated, but it was actually pretty easy to make, and I've got step-by-step pictures to help guide you through. Basically, I cut a pair of oval donuts, and a pair of tags (slightly larger than the tag I used for the bunnies). Some black Glitter Glitz Gel stenciled on the tags give the top hat some pizzazz and lend to the magical feeling I was trying to create.

Rabbit Out of a Hat Pocket Card Rabbit Out of a Hat Pocket Card

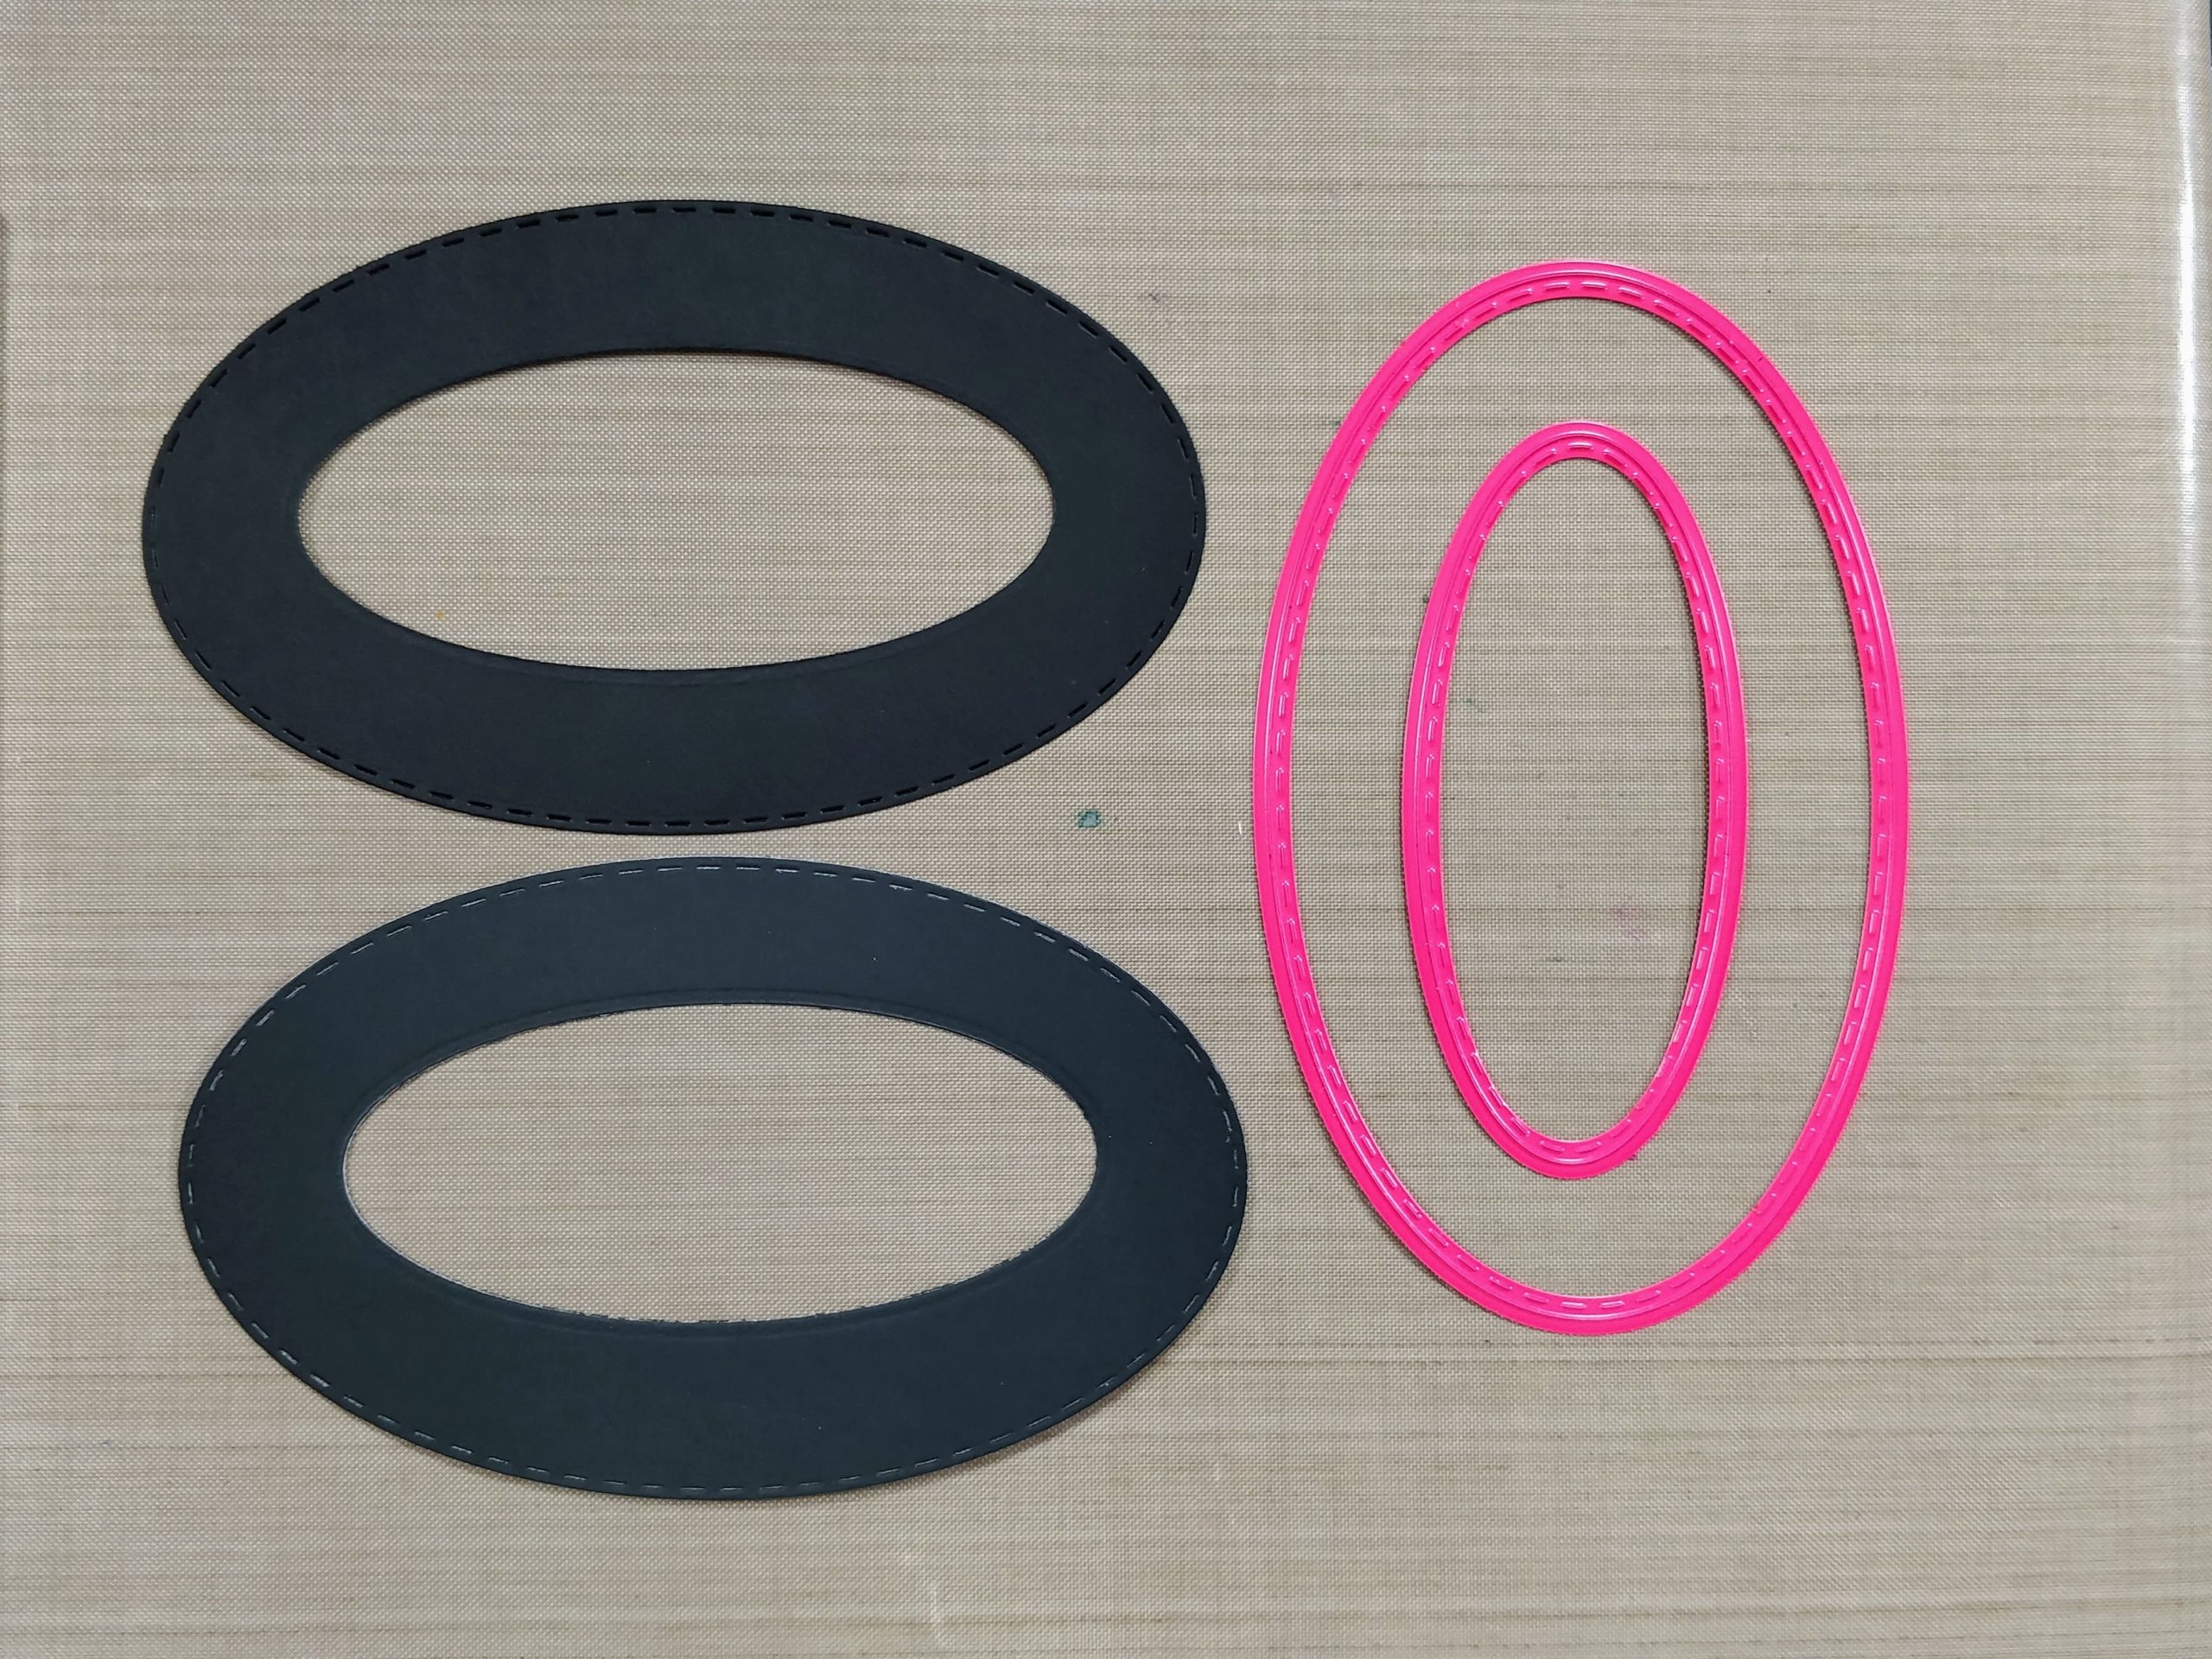
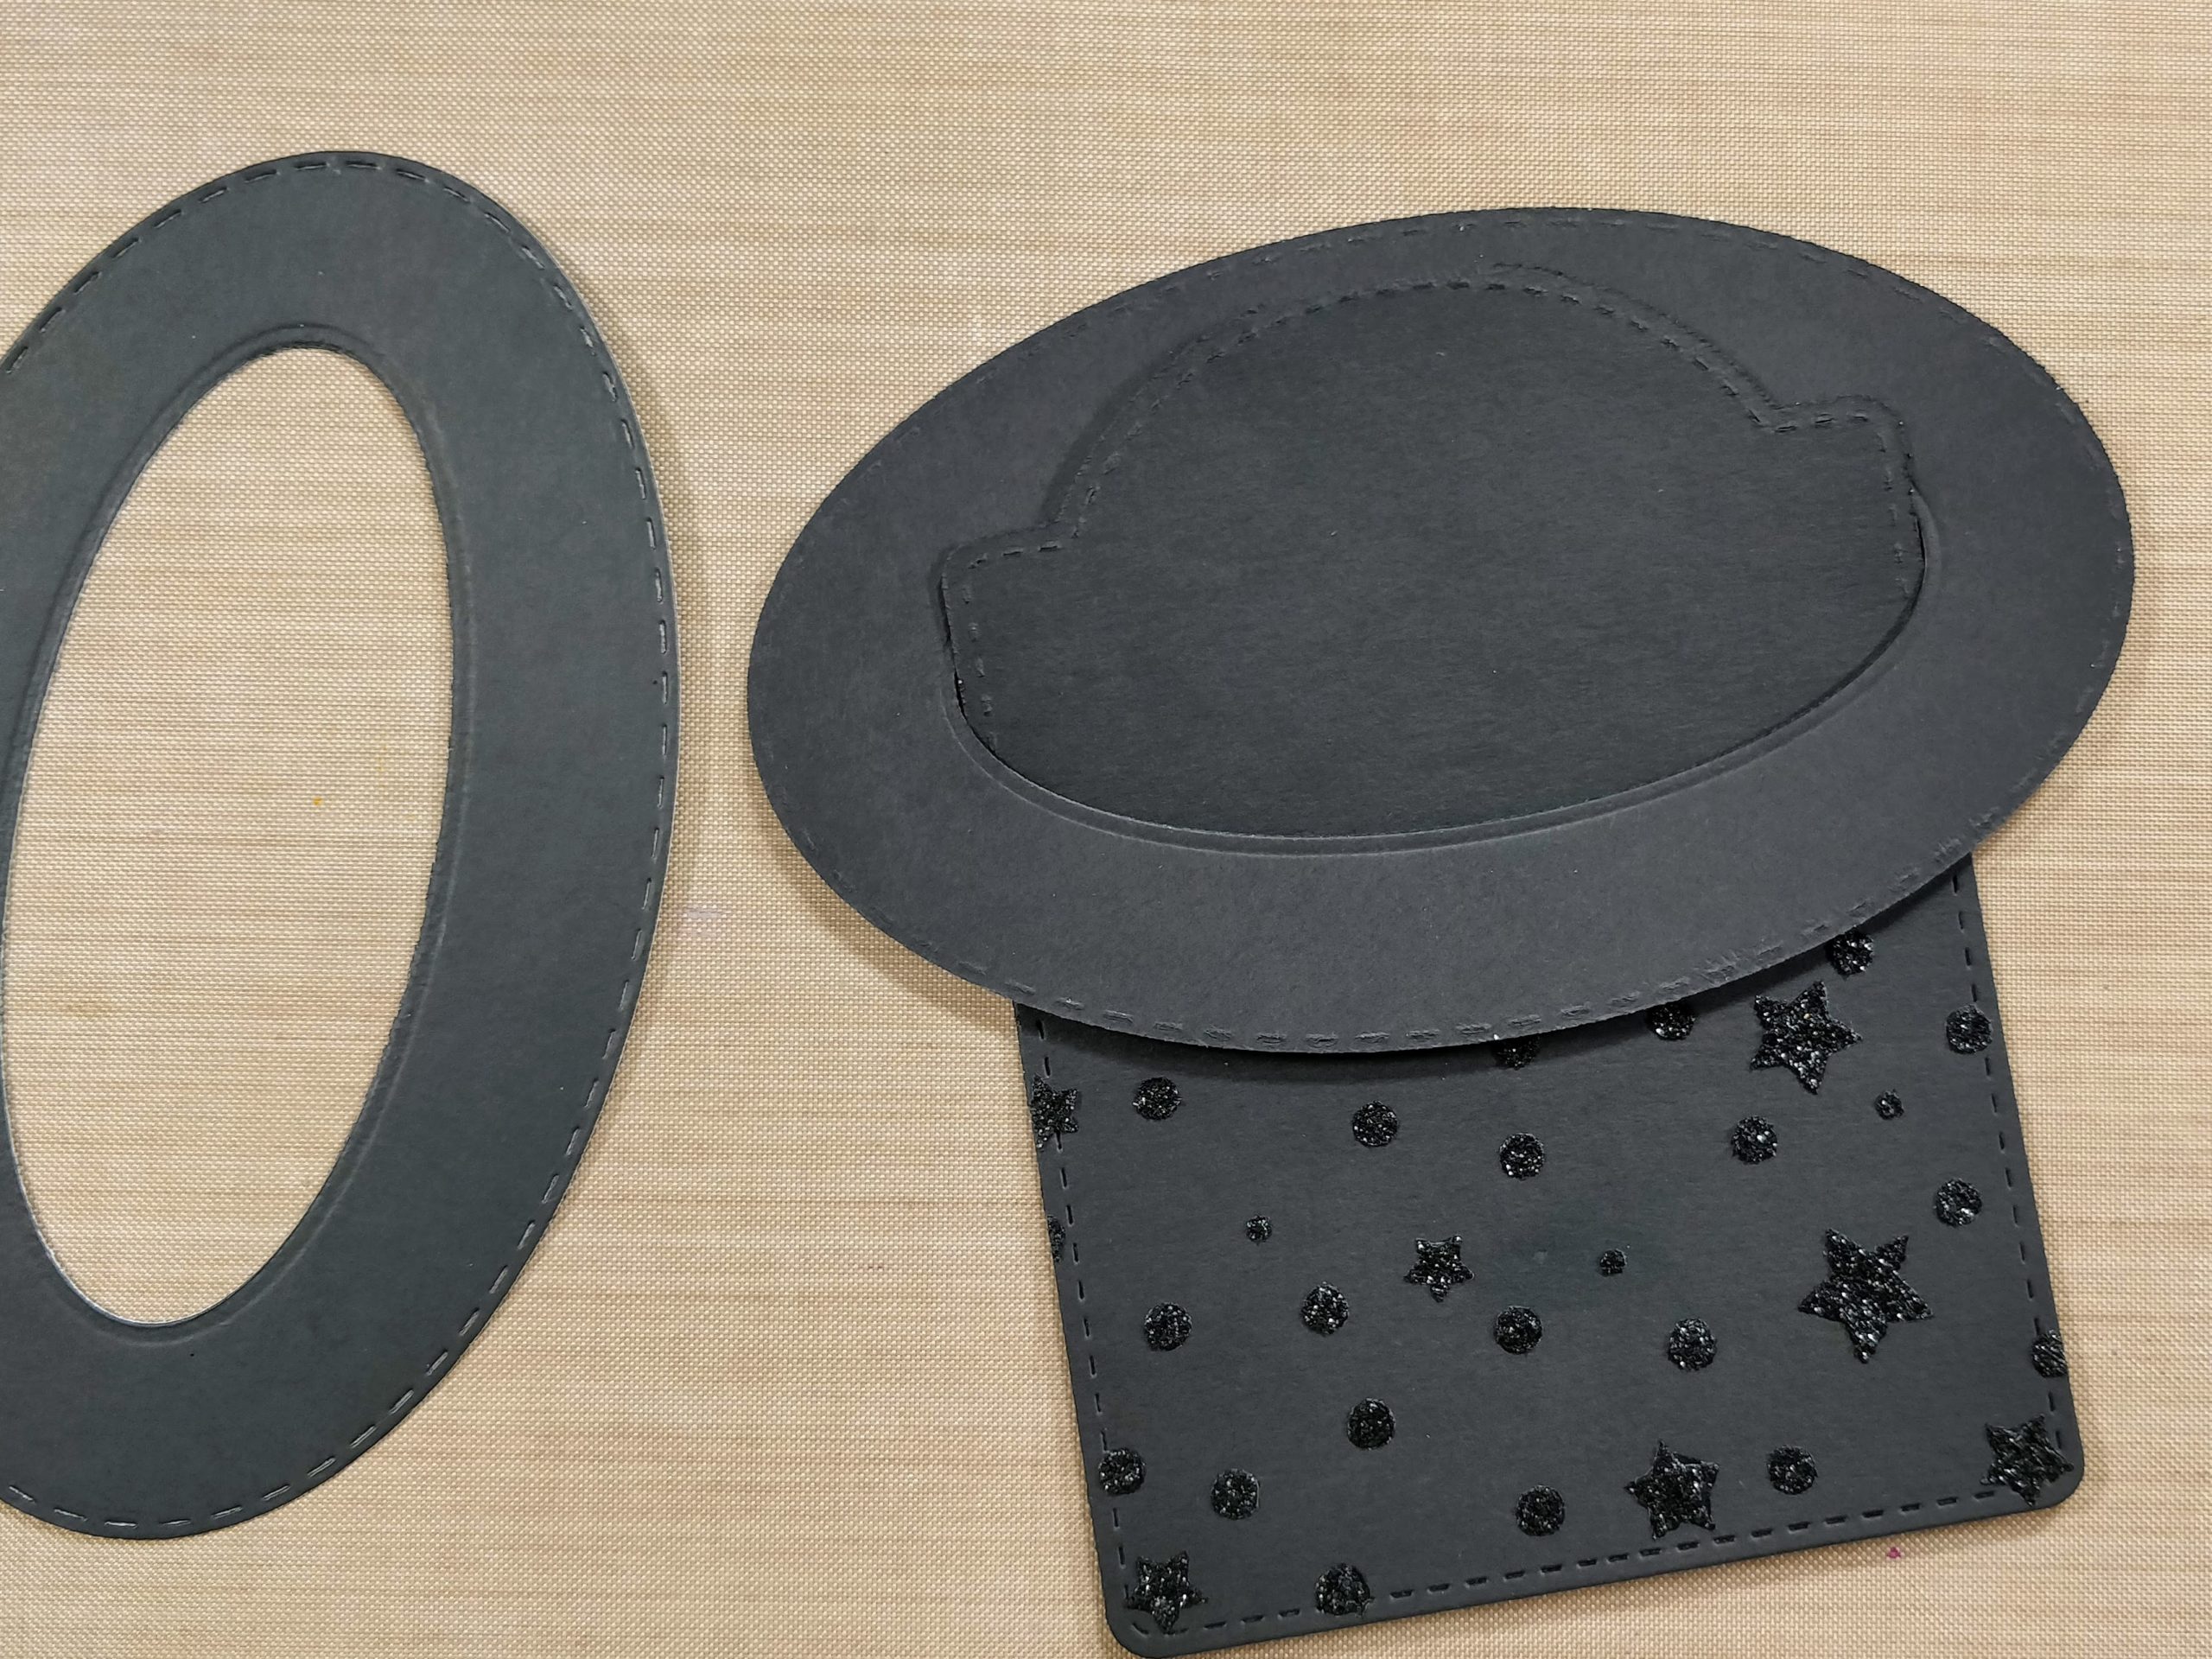
The tags I used for the hat are the same width as the inner oval, so they slip right inside.* I trimmed the front tag down with the inner oval die so when I glued outer the edges together, they created a library pocket.

Rabbit Out of a Hat Pocket Card

Next, I slipped the pocket in through the center of the first oval and lined it up with the pocket opening. I glued it in place. (It's going to look weird and you're going to wonder if you're doing it right. Don't worry, if it looks like the picture below, it's right.) Now to fix the weird lines at the top, I glued the second oval on top of the first oval. (It doesn't slide around anything, just gets glued right on top.) This hides the top edge of the back of the pocket and makes it look like a hat brim. Test to make sure no glue has seeped out and sealed your pocket shut.

Rabbit Out of a Hat Pocket Card Rabbit Out of a Hat Pocket Card

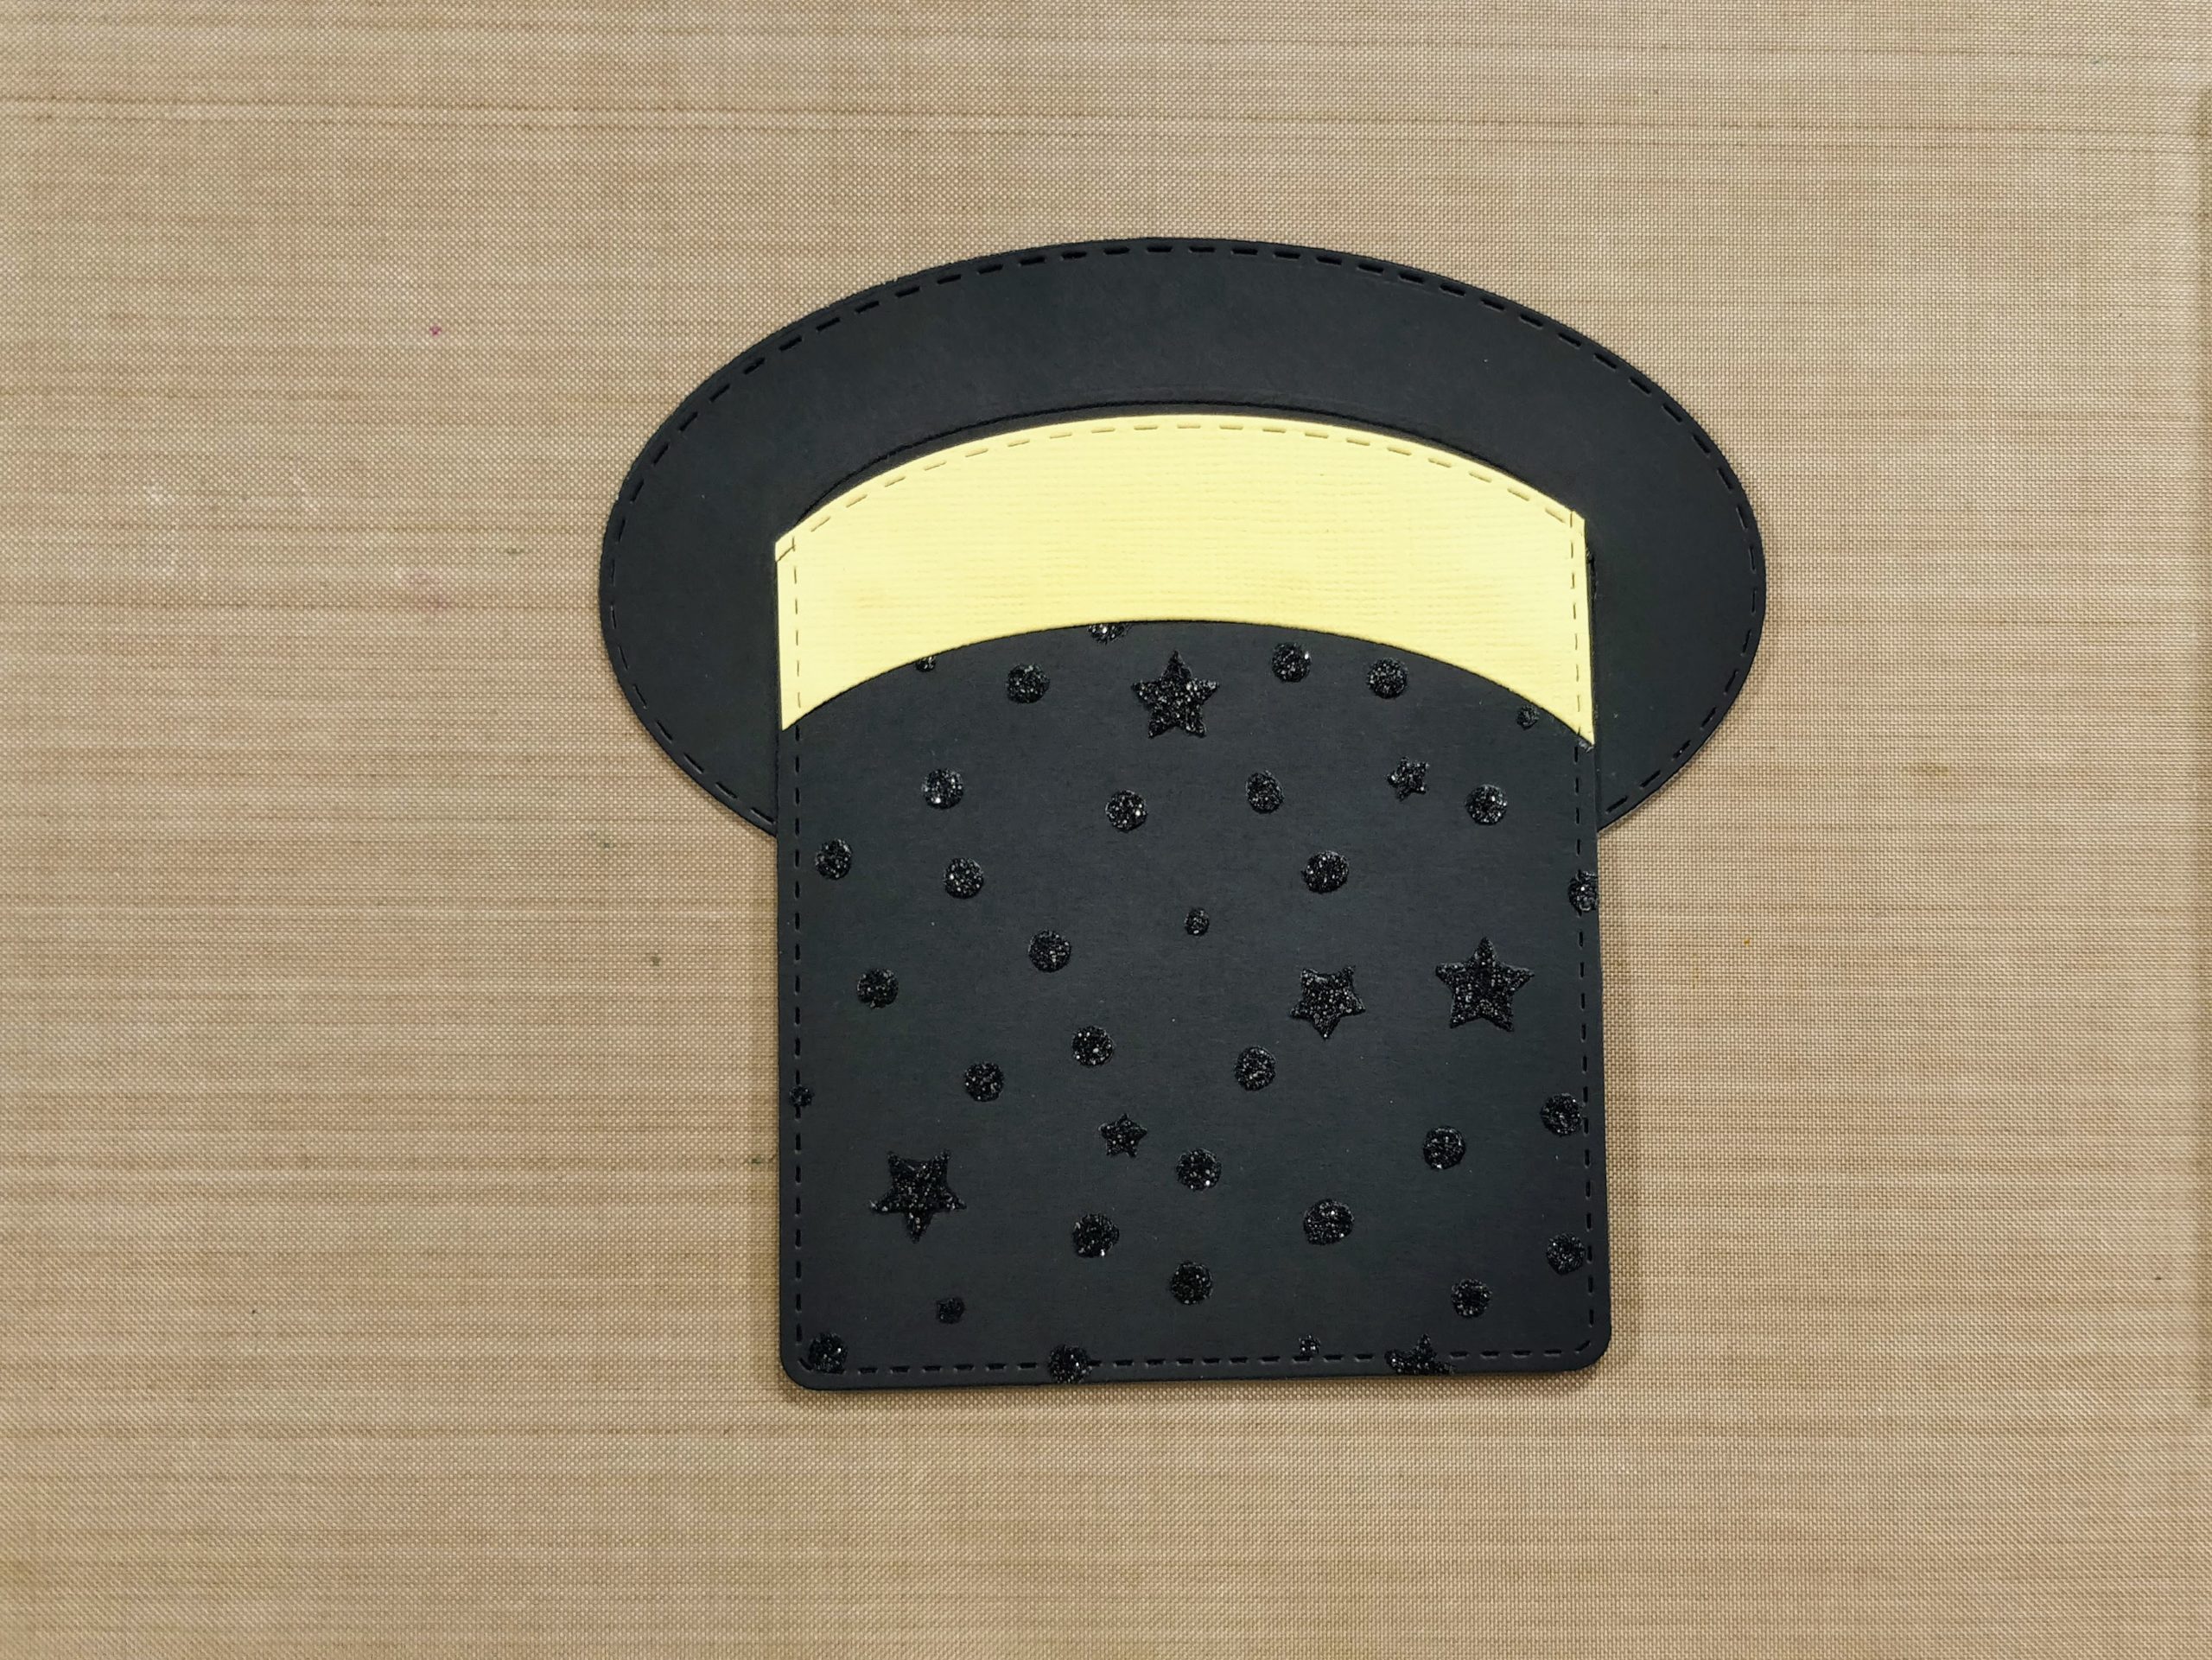
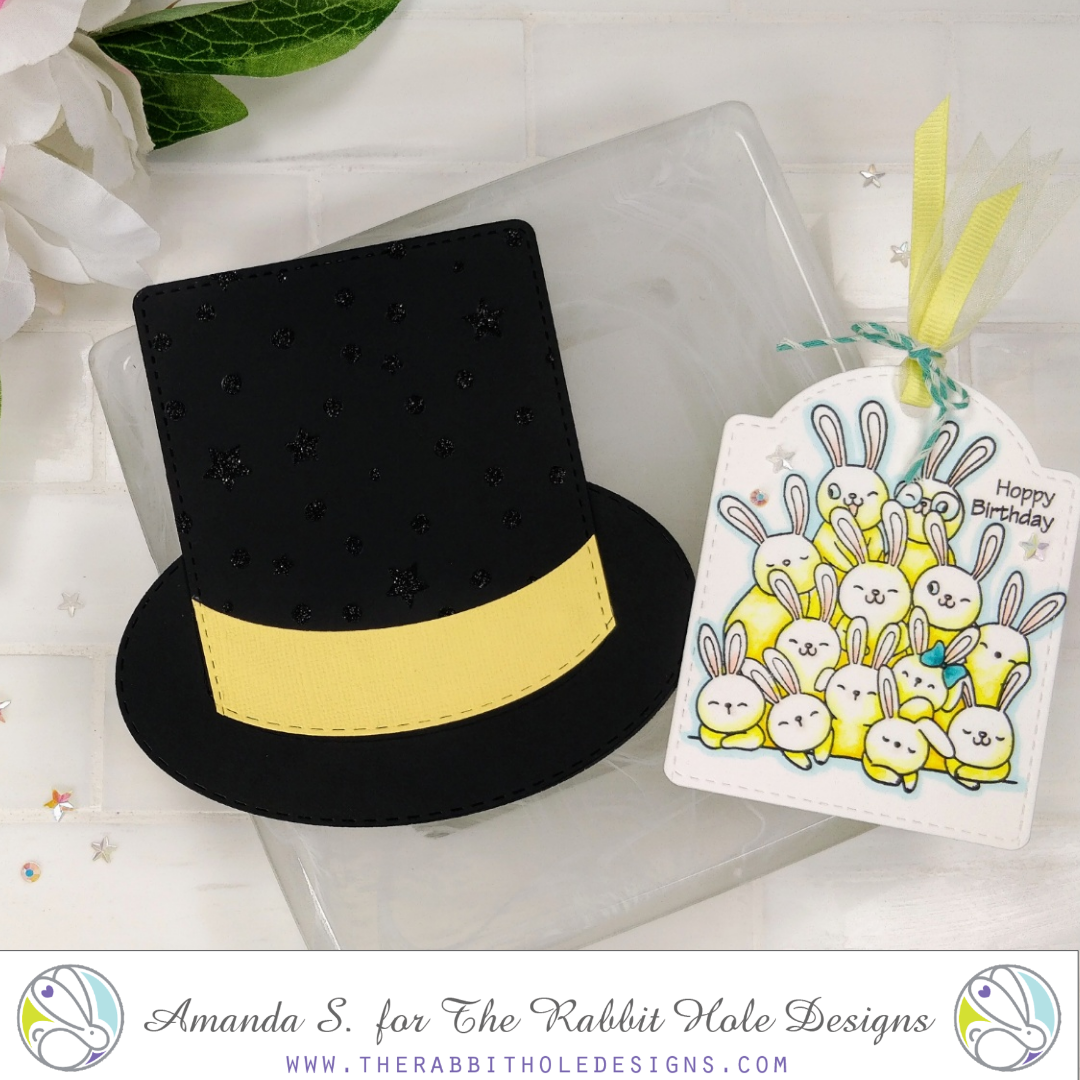
Every dapper top hat has trim, and I decided to add a yellow band to the back of mine. (From the front side's perspective, you wouldn't be able to see the band, so I only added it to the back.) I used the same larger tag and smaller oval dies to cut it out, then I glued it to the hat.

Rabbit Out of a Hat Pocket Card Rabbit Out of a Hat Pocket Card

To finish the card, I punched a hole in my bunny tag, tied on some ribbon and twine, then added some flat-backed stars and gems to both the tag and hat. I love it! It's all ready for a very magical birthday...my Grandpa's 90th! (I'll let you know what he thinks of it ☺️)

Rabbit Out of a Hat Pocket Card Rabbit Out of a Hat Pocket Card Rabbit Out of a Hat Pocket Card Rabbit Out of a Hat Pocket Card

Thanks for stopping by today! You can find the sister article to this on my blog, along with links to the specific products I used. Hop on over for more inspiration. If you'd like to see another card I made using this stamp, check this out. I'll be back soon with another fun card.

*If you don't have tag or rounded rectangle dies that are wide enough to fit the exact opening of your inner oval, just cut the right size panels with your paper trimmer and use a corner rounder at the bottom. If your die is too wide, you can cut the panels out, then slide your die over and trim the panels down with it in a second pass through your machine (like I did to shorten the bunny tag).


For more inspiration, updates, and news make sure to check out these places


Partial Die Cutting to Create Easel Cards


Hey crafty friend, it's Amanda from Pear Blossom Press again. In my last video, I explored several different ways to use your dies. I showed a lot of samples, so I've been breaking the different cards out into separate posts to go into a little more detail on each one. Today's card is the Caffeinated Dragon Easel card.

For this technique, you'll want to start with a top folding card base. Stamp and color a scene, then take a coordinating die from your focal image and line it up. You'll position it in your die cutting machine with the top plate only covering the top half of the die. After you run it through, the portion of the die that was under the plate will be cut out, leaving the bottom still connected to the scene.


Next, line the card up in your Scor-Pal and score a line on either side of where your cut stops. You don't want to score the image you partially cut. Now, when you fold the front of your card in half, the top of the image will pop up! You need to add something inside to catch the bottom of the card when it's popped up. You can add a sentiment strip with foam tape, or like I did for this card, a large flat-backed gem.


Check out the video, if you want to see exactly what I mean...


For this card, I just created the background scene on my card base. I stamped and cut out the Caffeinated Dragon separately and layered it on top, lining it up with my partial cut. This was because I wanted to color him with Copic markers and they bleed through. The technique works exactly the same way though. I also added sentiments inside and out from the Steeped in Happiness set

Speaking of the background scene I created, I used a second die cutting trick for that. Since I don't have cloud or grass stencils, I used border dies to create my own. This is a great way to stretch your supplies, and it also gives you both the positive and negative halves to use as masks, if needed. I taped my grass and cloud borders down, but did you know that you can use Pixie Spray on the back of your homemade stencils too? It's much less expensive than masking paper. ðŸ˜‰

Thanks for stopping by today; I hope you'll give these techniques a try and let me know what you think. You can find the sister article to this on my blog, along with product links and more inspiration.

Tomorrow kicks off the new release inspiration hop. If you like to color, you're definitely going to want to come back all week! (Also, the next 30 Day Coloring Challenge starts March 1st, so get ready!)

Follow The Rabbit Hole Designs for more inspiration:


Make a Window Card with Coordinating Dies


Hey crafty friend, it's Amanda with Pear Blossom Press, and I'm back to spotlight the Caffeinated Dragon window card I made in my last video. This is a fun technique that you can use with any stamp and die combination, but it is especially effective with coordinating sets. 

Caffeinated Dragon Window Card The Rabbit Hole Designs Caffeinated Dragon Window Card The Rabbit Hole Designs

The idea is simple. Stamp your image inside your card, then use a die to cut a window from the front of the card to see the stamped image inside. There is trick to getting the window lined up correctly. Line your stamp up in your Misti, then stamp the inside panel. Close your card, stamp the image again, and use that to line up the die before cutting the window. 

For this card, I stamped the Caffeinated Dragon on an A2 white panel and colored it with Copic markers. I stamped the image again on the front of a red card, lined up the coordinating die and cut the window. Then, I trimmed the white panel down on all four sides and glued it inside the red card. I finished it up with a Perfectly Blended sentiment on a die cut banner, and a few red gems on front. 

You can see the process, along with several other unique ways to use your dies in this video...


Thanks for stopping by today! You can find the sister article to this post on my blog, along with links to the specific products I used. If you'd like to see more cards featuring this stamp set, check out this article

For even more inspiration, updates, and news make sure to check out these links.

Turkey and Pie - Therm-O-Web Collaboration


Hello again my crafty friend, it's Amanda from Pear Blossom Press! Have you been hopping along with The Rabbit Hole Designs and Term-O-Web for the collaboration this week? I'm back with another fun card, this time for Thanksgiving! I was Pinspired to create a die cut pumpkin pie to go along with the hilarious Caffeinated Turkey. I just love the way this one turned out. And check out the shine of the Opal Foil on the whipped cream layer, and the Gold Metallix on the serving plate at the bottom!


For this card, I started by die cutting several circles to create the pie. I covered the largest one with Gold Metallix gel. For the whipped cream layer and the word thankful, I covered a piece of white cardstock with Deco Foil Liquid Adhesive and foiled it with Opal Foil. Then I die cut the word and nested a pair of scalloped circle dies to cut out the whipped cream. To give the pie the look of depth, I actually cut two kraft circles for the pie crust and slightly offset the bottom layer when I glued it all together.

After I stamped, embossed, and Copic colored the Caffeinated Turkey, I cut him out with the Coordinating Die. The card front was watercolored, with more paint concentrated at the bottom for an ombre effect, and to give the word a darker background to pop off of. As I was layering the pieces, I felt like the word was getting lost with the busy layers behind it, but I didn't want to loose the coloring of the turkey's shorts, so I scanned the word in my Scan N Cut, added a border, then cut it out of vellum. (You can use that trick with any die cut word or shape that doesn't include a halo die.) Once I glued the layers together, I finished the card with a few orange sequins left over from my Halloween blend that came free in my last order from The Rabbit Hole Designs. A little Diamond Glaze over the sequins, and the turkey's eye and mug, give this card some extra sparkle.


I don't send out a lot of Thanksgiving cards, but now that my son has moved to Florida for work, I want to send him a special one. It will be our first Thanksgiving apart. I know, I have to let him grow up, but I was hoping he'd get his first place down the street, not 3000 miles away. Luckily, he came home to visit for a few days last week. And I'll see him again in December, so this card will tide us over. Do you send out Thanksgiving cards?


Thanks for stopping by today, I really appreciate it. Don't forget to keep hopping along with The Rabbit Hole Designs and Therm-O-Web for lots of inspiration and your chance to win! All of the details can be found here. You can find links to the specific products I used in the sister article on my blog.

Caffeinated Fox by Martha Lucia

Hi there, Martha Lucia here!
I’m back with with one of my favorites stamp sets Caffeinated Fox.


I stamped the images from the Caffeinated Fox stamp set with Memento Tuxedo Black Ink and colored the fox with Spectrum Noir Alcohol Markers . I fussy cut the fox with my scissors. 

For the background, I blended distress inks on five different colors over a whisper white card layer and ran the inked layer with the On the Curve Cover Panel from Reverse Confetti though my die cutting machine. After have the cover plate cut from the layer and without remove it from the die cut.


I pasted double sided foam tape over the negative curve designs. I placed my card base over the cover plate and used only the negatives to save the traditional die cut to other project.

I love how this card turned out. The colors and dimension of all curves made this a really special card. For me it is also special because this is my last card as designer of The Rabbit Hole Designs. Thank you for let me share my talents with you.

Thanks for stopping by and see you soon!