Pages

Showing posts with label Copic. Show all posts

Clarence Good Egg Easter Card

Hi Friends! Kelly here & for todays card I used the newly released Clarence Good Egg.
To start off I stamped my image in Memento Tuxedo black ink & colored it with copics in a Warm gray & rainbow theme. 
I used a wonky circle die to cut him out,  cut a hole with a hoke punch & added mint colored velvet trim & then added foam tape to the back of it. 
I used SSS mint cardstock & embossed it with an Embossing Folder for some texture. I added a white & mint mat onto a white card base. 
Next I stamped all my sentiments & cut them apart to create a label look and added a black marker on the edges.
I added some white gel pen & shimmer pen to my image. 
To finish it off I added some iridescent gems and that's it. 
Thanks so much for stopping by!

Not All Witches Ride Brooms

Greetings! Alison here. Did you know that not all witches ride brooms? Some ride bicycles! Today, my card uses the Bicycle Witch from The Rabbit Hole Designs, and this marks my last post for The Rabbit Hole Designs Team. I have had an amazing time being on this team, and I look forward to seeing what they'll have next. This is an incredible group of very talented and kind people, and I am so happy to say that I've become friends with them.

Sometimes I like to just sit and create backgrounds. Sometimes they're mono prints, sometimes they're with Distress Oxides, sometimes they're with alcohol inks, etc. I wanted my witch to appear like she was moving, so I used an alcohol ink background that I made some time ago, where I just swiped colors across some glossy photo paper.
I colored my witch and her little kitty with Copics, using some bright colors that worked really well with my alcohol inked background. This wasn't planned, as I chose the background after I had finished coloring the witch.
I added a sentiment with StazOn, a mat of Bo Bunny cardstock with cute teal dots, and put everything on to a gray card base. But she needed some sparkle, of course, so I added some sequins from a few different Sparkle Blends from Doodles Paper Playground coming off the back of the bicycle, as if she was leaving a trail of magic behind.
I love the colors on this card. This is definitely not a witch to fear, and I like that about all of the witches from TRHD. I want to thank The Rabbit Hole Designs for having me on their amazing Design Team over the last few months. I had a blast, and will truly miss working with them. But, you'll still see me using TRHD on my own blog. Please visit me HERE. Thanks so much for stopping by. Have an inspiring day!

For more inspiration, updates, and news make sure to check out these places:

Harvest Witch

Hello Everyone! Justin here and today I am sharing a project using the new Bicycle Witch set, which is part of The Rabbit Hole Designs August Release!

I wanted to give this project a very autumn feel, so I used a lot of yellow and oranges in this project, along with a few color pops!

First, as always, I colored up my Bicycle Witch and a few bats using Copic Markers. I fussy cut them out and set them aside to work on my other pieces

I took an A2-sized piece of black cardstock, placed the Drop It Stencil over it, and applied a layer of Black Glitter Glitz Gel. I set this layer aside to dry.

Taking a 4" stitched circle die, I cut a piece of harvest floral patterned paper. I set this piece aside.

Using a 3" stitched circle die, I die cut a circle from white cardstock, applied the Diamond Flower Stencil over it, and blended up a Yellow to Orange to Black ombré using the Cotton Tail Blending Brushes. I adhered this circle to the center of my harvest floral circle, and adhered my bats directly to this piece.

I heat embossed the sentiment "Salem Bicycle Society" in white powder onto black cardstock, trimmed it to a strip and added a few white gel pen dots to give it a bolted look.

I now was able to begin piecing my card together. I adhered my circle unit directly to my Drop It background. I then used foam tape to adhere my Bicycle Witch directly on top of the circle. I also adhered my sentiment strip using foam tape as well. To finish this card off, I adhered a few sequins from a Rabbit Hole Designs sequin pack and then mounted this panel to an A2-sized card base.

And that's how I made my card!

This project uses the following Rabbit Hole Designs products:


For more inspiration with your The Rabbit Hole Designs Creations, be sure to follow along at these other locations:


For more details about products used in this post, you may also follow along at my personal blog, Just a Note by Justin, as well!

I cannot wait to see what you craft up using these adorable new witches from the Halloween Release! Be sure to share them in The Rabbit Hole Designs Fan Page (and don't forget about the Anything Goes Challenge Album as well!

Happy Crafting!

Love is in the Stars Card


Hello Everyone! Justin here, and I today I am incredibly excited to be sharing this card I made using the new Aim for the Stars Stencil!

I figured this stencil paired so well with the balloon couple from the Love You More set, so I took the idea and just ran with it!

First, I colored up my couple with Copic Markers, fussy cut them out and set them aside.

Next, I die cut a stitched panel with stitching from white cardstock, a scalloped rectangle from navy cardstock, and cut an A2-sized piece of blue patterned paper. I also die cut another stitched panel from white cardstock, and then cut it with a cloud border die.

I took my white rectangle stitched panel and used a cloud stencil to blend clouds that went from pink, to purple, to navy with Oxide Inks. I also took my cloud border and distressed the bottom edge with pink oxide ink. I stamped the sentiments "love" and "is in the air" from Love You More in purple ink, along with some hearts from the set as well in various ink colors.

On my cloud panel, I took the Aim for the Stars stencil, put it into place, and applied a solid layer of purple Glitz Glitter Gel. I carefully removed my stencil and set my panel to dry entirely. I also cleaned off my stencil right away.

Once my stars had dried entirely, I adhered my cloud banner and couple with foam tape to this panel. I then adhered this layer to the scalloped navy panel, adhered the scalloped navy panel to the A2-sized blue patterned paper panel, and then adhered the whole unit to an A2-sized card base.

I finished my card off by adhering a few The Rabbit Hole Designs sequins, and was done!

This project uses the following products:


For more inspiration with your The Rabbit Hole Designs Creations, be sure to follow along at these other locations:


For more details about products used in this post, you may also follow along at my personal blog, Just a Note by Justin, as well!

I cannot wait to see what you craft up using these amazing new June release products, especially this fun stencil! Be sure to share them in The Rabbit Hole Designs Fan Page (and don't forget about the Anything Goes Challenge Album as well!

Happy Crafting!

Diamond Flower Girl Card


Hey Everyone! Justin here, and today I'm featuring an A2-sized card made with the new set Beautiful Disaster, part of the March Release!

What I love about the girl in this set is there are so many variables to color up and entirely change the feel of the image. There are so many skin and hair tones to pick from, and that slouchy sweater can be any color or pattern you want (and could be really fun to pattern paper piece together with the right print)!

For this card, I was inspired by a Pinterest swatch I saw for inks, and decided to use those colors (they're also pretty close to the Rabbit Hole Designs Colors too!).

First, I took a 4.125" x 5.375" panel of white cardstock and stamped my girl in Alcohol Ink Compatible Black Ink in the lower left corner. I colored up my girl with a vibrant purple sweater and some dusty brown hair. I loved how she turned out!

Next, I knew I wanted to use a stencil with this project as well. Instead of fussy cutting out my colored image, I decided I wanted to stencil directly onto that panel. So, I stamped my girl again on a piece of scrap paper for a mask, and left a little bit of blank paper at the bottom of my image for how I was going to adhere it. I fussy cut my mask out and covered my image in a way I hadn't done before. Because my colored image was at the very bottom of the panel, I took a piece of washi tape and stuck it to the back side of the card, so that some of the sticky side was visible on the bottom edge of the panel (maybe about .25" worth of a strip). I took my mask, positioned it, and adhered the bottom portion to my washi tape. I knew I was going to use a light tack spray adhesive for my stencil, which would help keep the mask in place, so long as I didn't move it around too much.

So, following my plan, I applied my Diamond Flower stencil with the light tack adhesive over the masked panel. I then took blending brushes and applied ink in diagonal lines, repeating 3 colors in the same order. Before removing my mask, I flicked some specs of the same ink colors all over my card for a little bit of texture.

I removed my stencil and mask, and was so happy with how my panel turned out!

I mounted my panel to an A2-sized turquoise panel. I then heat embossed my sentiment in white powder on purple patterned paper (if you clock a splotch on the purple paper, it's actually intentionally there by the patterns design and not an accident!), and mounted the sentiment piece on a turquoise frame.

I finished my card by adhering some Rabbit Hole Designs sequins and mounting the card to an A2-sized card base!

Here are the products I used in this card:


For more inspiration with your The Rabbit Hole Designs Creations, be sure to follow along at these other locations:


For more details about products used in this post, you may also follow along at my personal blog, Just a Note by Justin, as well!

There are so many things to love about this new release! I hope this card sparked some ideas and inspiration for your next project!

Dance your heart out!

Hey everyone: it's Jammie here with a little inspiration post for you today.

I sat down at my desk to make this card and literally had NO IDEA what I wanted to make... so... I just went for it.  I grabbed the "You make my heart dance" stamp set and stamped it out using Momento Desert sand Ink onto Sweet Sentiment Coloring paper so that I could color in the "no lines" technique.  Then I just stared grabbing markers.

I use Copic markers, and in all honesty, I didn't write down the ones I used because I was literally just coloring for my mental health.  You know how it goes this time of year right?  You just wanna color or make something and not have to think about it.  So, that's exactly what I did!


I had so much fun making this little card.  Well, I suppose it's not little as it is a 5.5" x 5.5" square card, but you get the point. For the background I used the "Diamond Flower" stencil and Distress Oxide Inks.  I also added a ribbon and some Black Nuvo drops to complete the card and add a little dimension.  

I hope this project has inspired you and I hope to see you use this stamp set on your future projects.  Hope you have a wonderful weekend!  Toodles! 

For more inspiration, updates, and news make sure to check out these places

Put a Bow on it...for Christmas!

Hey everyone, DT Jammie here with another awesome way to use the "Put a Bow On It" stamp set.  I love this set because it is super versatile and I can use it for nearly any holiday, and birthdays, and even sympathy.  Today, I've decided to use it for CHRISTMAS!!!!! Yup... check it out:


Pretty sure I used almost every G and YG marker that Copic has to offer, and if they had more, I'd likely have used those too!  But it was so fun to create this gradient of green bows!!! 

This is the stamp set I used named "Put a Bow On It" and here's the link to purchase it from:

For more inspiration, updates, and news make sure to check out these places


I hope this card inspires you and I really hope to see some of your projects using this awesome stamp!  Happy Holidays from my family to yours!
Toodles!!!!
-Jammie 

Deck the halls!

Hey everyone, DT Member Jammie here wish a fun little card for you to see...
I used the new set from the November release "Love you more" but I modified it just a bit.  I used the image where the two little people are decorating the Christmas tree and changed it just a touch. Take a look:


I placed them at the front stoop of their little apartment decking the halls!  They really should invest in a ladder! I can totally Identify with this girl though, I want to decorate all the things! Lol! 

I hope that this project inspires you and I really hope that you can look at your stamps and make something different out of them, think outside of the box.  I love figuring out different ways to use my stamps, it just makes them so much more versatile.  I cannot wait to see all of the fun things you create with this adorable little stamp set! 

Hope you all have a wonderful holiday!  Tootles! -Jammie

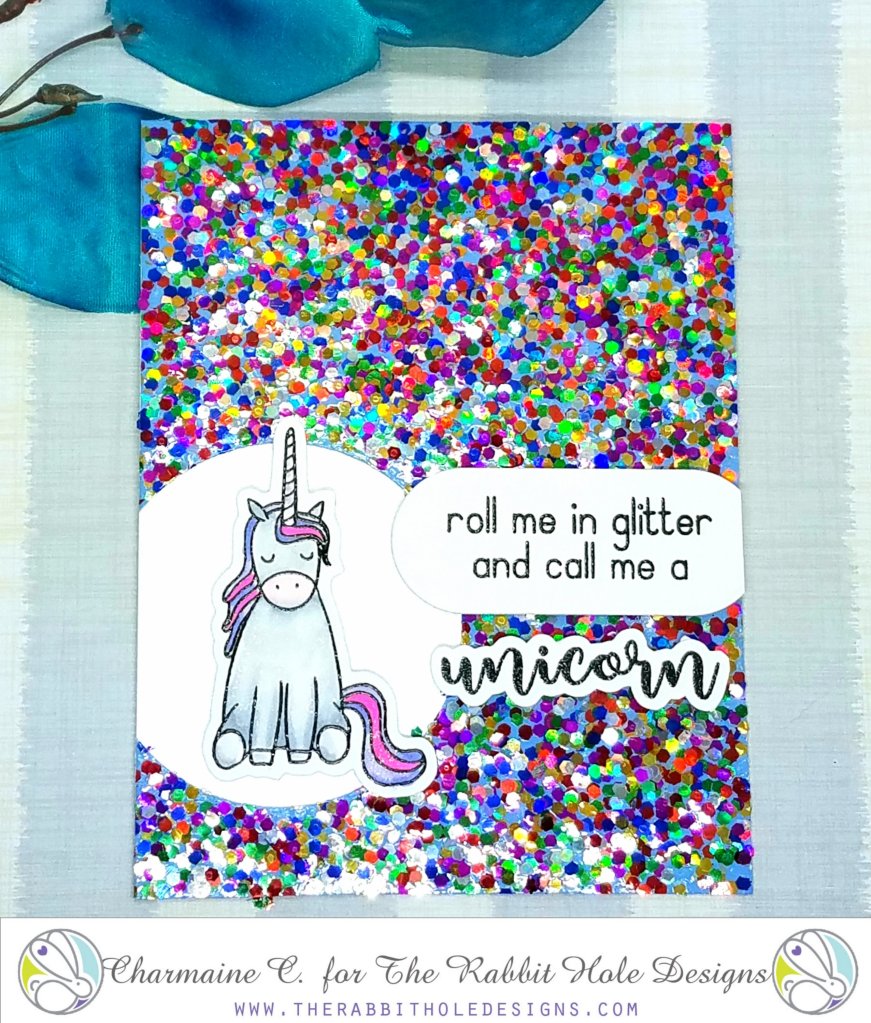
Roll me in Glitter!


After a very rough week and illness we shared liked M&M's in my house, nothing makes me happier than making a card. And my subject? Our trusty sassy unicorn!


This stamp is available at The Rabbit Hole Designs and at Simon Says Stamp.


Here is what I did:
1. I have had this fabulous glitter cardstock for years and decided today was the day to use it. I die cut a circle off center from the left corner.
2. Add silver vellum in the open circle spot.
3. Stamp, cut and color the unicorn.
4. I used my Brother Scan N Cut to cut the unicorn and the word unicorn.
5. This is a top folding card, 4.25 x 5.5.


I hope you can make this easy card that will make a friend's day brighter!
Unicorn kisses,
Charmaine
www.facebook.com/charcards2017

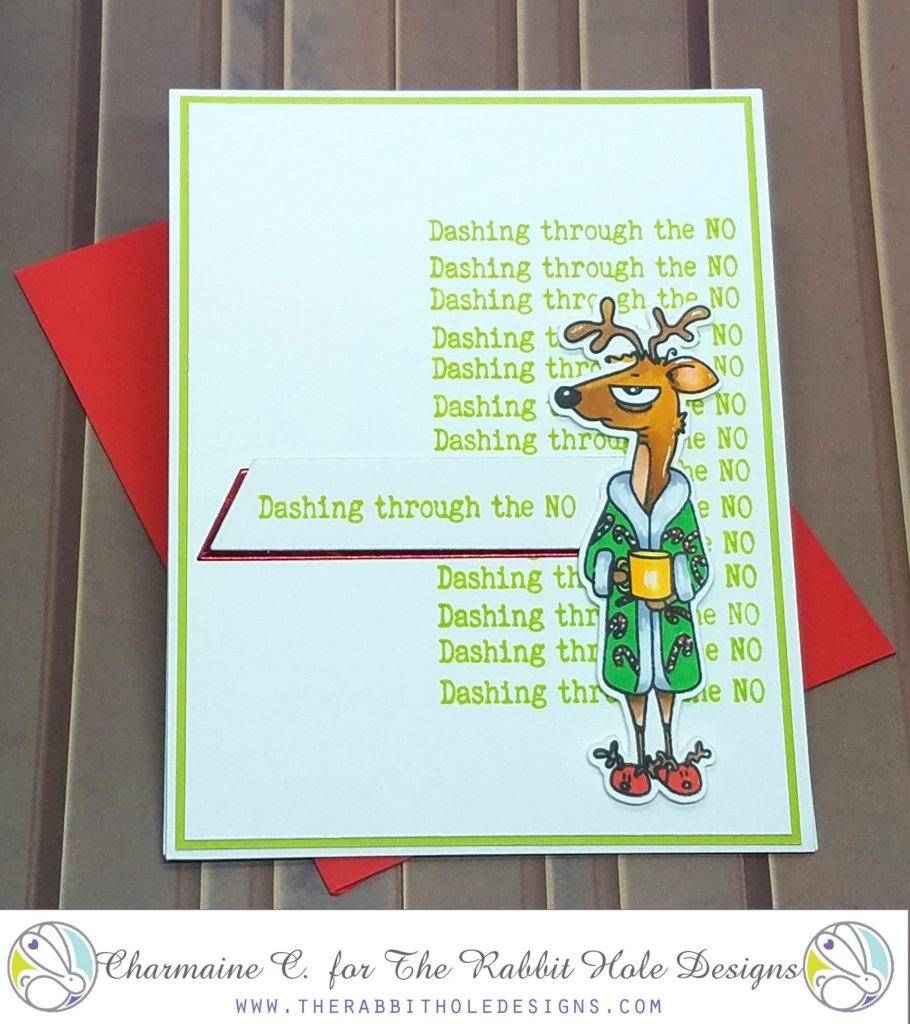
Dashing through the NO!


Good morning my caffeinated critters!
Charmaine with CharCards "on the sleigh"!
 I like to make extravagant cards that take hours but decided that I need a quick card with a punch!
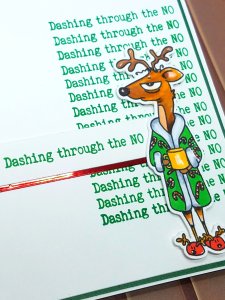
Well, here he is in all his Christmas glory!


This caffeinated reindeer stamp and metal die are available at the Rabbit Hole Design and Simon Says Stamp stores.


                                             Here is what I did:

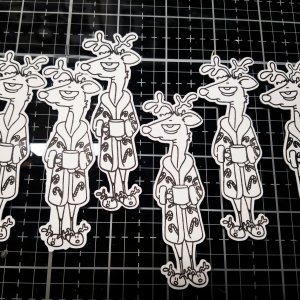
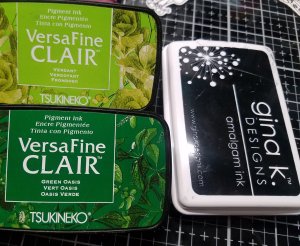
1. I stamped a few reindeer on Neenah 110 lbs card stock and fed it through my Brother Scan N Cut. You can also use the metal die cut. I used Gina K Amalgam ink (Copic friendly) to stamp.


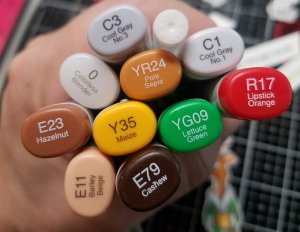
2. I used Copics to color this reindeer. Use a white Gelly pen for highlights and candy canes.


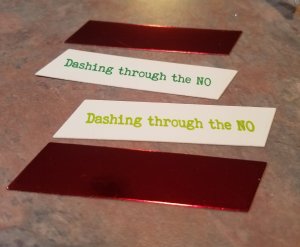
3. Using a 4 x 5 1/4 white card stock piece, I stamped the "dashing through the no" multiple times, 1/4 apart, with my Misti. I like using VersaFine Claire ink for sentiments! I made two different cards with a green variety.


4. Stamp the sentiment and cut with a metal sentiment die. To add some shine to the card, also cut a red piece from red mirror card stock. Assemble with double sided tape.


5. Attach a matching green card stock to the stamped base's back. This should be about an 1/8th bigger than the stamped base.


6. This is a  4 1/4 x 5 1/2 top folding card. Attach the sentiment with double sided tape and the reindeer with dimensional foam tape.
7. For the inside of the card, cut a piece of 60 or 80 lbs colored paper, 4 1/8 x 10 1/2. Fold at center, stamp sentiment and adhere with double sided tape.


8.  Match your envelope and you're done! I made 4 cards under two hours with distractions from my own village.


I hope you will give this a try! Clean and simple for the win! Leave me a comment or better yet, post your creation on our fan page!

Reindeer kisses,
Charmaine


Miss Your Face!

Hello everyone!


It's Niccole from Nic & Viv Designs back again to share another card I made using one of The Rabbit Hole Designs stamp sets. 

For today's card I used the Diamond Flower Stencil, The Sassy stamp set, and the Sassy Sentiment stamp set.  


How to create this card:


  • Cut an A2 size black card base
  • Stencil image with fuchsia ink on a white piece of paper
  • Die cut large circle from stenciled image (circle die from my stash)
  • Die cut small white circle (circle die from my stash)
  • Die cut cloud image out of white paper (cloud die from my stash)
  • Glue circles to black base
  • Stamp sentiment from Sassy Sentiments to the front of cloud
  • Add cloud to card with foam tape
  • Copic color Unicorn and fussy cut
  • Add Liquid Pixie Dust to Unicorn
  • Add Unicorn to white circle with foam tape
  • Add crystal gems to card
Here is one more picture of the full card ...


TRHD Products used:

Diamond Flower Stencil

For more inspiration, updates, and news make sure to check out these places

The Rabbit Hole Designs YouTube


I have had so much fun playing with the 

Thank you so much for stopping by and spending some time with me.

Until next time ... Hugs & inky fingers!   -Nic-

Paws-ing To Say Thanks!


Hello everyone!!! 

It's Niccole from Nic & Viv Designs back again to share another card I made using one of The Rabbit Hole Designs stamp sets. 

For today's card I used the Doggone stamp set. This set was just released this month. It is quickly becoming on of my favorites.


How to create this card:
  • Light blue A2 card base
  • Add polka dot pattern paper to left half of the card base
  • add skinny strip of gold glitter paper to side of polka dot paper
  • Stamp Doggone dog on white card stock
  • Copic color Doggone dog and cut him out 
  • Attach Doggone dog to the light blue and cream circle
  • Add light blue and cream circle to the larger kraft circle
  • Glue circles  onto card
  • Stamp sentiment on top and bottom of circle, centered.


Here is one more of the full card ... 


TRHD Products Used:

Doggone


For more inspiration, updates, and news make sure to check out these places

The Rabbit Hole Designs YouTube


I have had so much fun playing with the 

Thank you so much for stopping by and spending some time with me.

Until next time ... Hugs & inky fingers!   -Nic-