Pages

Showing posts with label Lauren Z. Show all posts

Elegant Christmas Card- Revisited


 Hi there! It's Lauren here revisiting my easy yet elegant Christmas card using the beautiful Poinsettia & Pinecones stamp and die sets illustrated by Kelly Taylor.

I first prepared my white 4.23x5.48" cardstock panel for embossing by using the Cottontail Embossing Powder Tool. I then lined up and stamped my image onto the cardstock using my embossing ink pad. I covered the image with silver embossing powder, tapped off the excess and then heat set it. 

I then repeated the process, stamping the Merry Christmas words, embossing them in silver and then using the coordinating dies to cut them out. I also die cut 3 extra blank words and adhered them behind the corresponding embossed words. 


Finally, I adhered the embossed poinsettia panel onto a white, A2 sized (4.25x5.5) top folding card base. Then, I adhered the Merry Christmas words on to finish my card.

I hope this has inspired you to give this easy technique for creating a beautiful Christmas card a try. Thanks for visiting! 

 *Disclosure: I use affiliate links where I can. This does not add any extra cost to you, but I do receive a small amount which helps keep me creating. Thank You*

Here's my links to the sets I used to create this card:

Poinsettia & Pinecones Stamp Set: https://shrsl.com/47y0j

Poinsettia & Pinecones Die Set: https://shrsl.com/47y0l

Cottontail Embossing Powder Tool: https://shrsl.com/3f0uo

Sparkly Congratulations Card


Hello! Lauren here today sharing this pretty, sparkly congratulations card I created using the new Paisley Bandana stencil set and Sentimentally Speaking stamp set. 

You can watch me create it in this quick video on my YT channel: 


Below you will find links to the products I used, below. Thanks for visiting!


I use affiliate links when I can. This does not add any extra cost to you, but I do receive a small commission which helps keep me creating.
Thank you for visiting!

 Paisley Bandana, 2 Layer Stencil, The Rabbit Hole Designshttps://shrsl.com/4lmc4

Sentimentally Speaking Stamp Set: https://shrsl.com/4lmc6


Creating A Pretty Mermaid Scene


Hi friends! It's Lauren here today with this sweet mermaid card I created using the new High Tide stamp set illustrated by Agota Pop! I had such a fun time coloring this lovely mermaid. 

I created a tutorial video showing how I created this fun scene. Here's the link to it:
                                              

I am really pleased with how my card came together. I hope I've inspired you to create your own mermaid scene. I've linked the products I used, below. Thanks for visiting!

Disclosure:
I use affiliate links when I can. This does not add any extra cost to you, but I do receive a small commission which helps keep me creating.
Thank you for visiting!

*You can use code Lauren10 at checkout to save on your purchase.*

High Tide Stamp Set, The Rabbit Hole Designs: https://shrsl.com/4in95

Salty Air Stamp Set, TRHD: https://shrsl.com/4jf9u

Making Waves Stencil: https://shrsl.com/45syq 
  Cottontail Blending Brush: https://shrsl.com/3htkd


Pretty Pink Poinsettia


Hello again. It's Lauren here with this pretty pink poinsettia card with touches of gold. I used the beautiful, Poinsettia & Pinecones stamp and coordinating die set along with the Garden Trellis hot foil plate to create my holiday card. 

I have created a video showing how me create it. You can watch it here:
https://youtu.be/8X6Bt8PeBfo 

Below are links to the products I used:


Thanks for visiting! 


Elegant and Easy Christmas Card


Hi there! It's Lauren here to share an easy yet elegant Christmas card using the beautiful new Poinsettia & Pinecones stamp and die sets illustrated by Kelly Taylor.

I first prepared my white 4.23x5.48" cardstock panel for embossing by using the Cottontail Embossing Powder Tool. I then lined up and stamped my image onto the cardstock using my embossing ink pad. I covered the image with silver embossing powder, tapped off the excess and then heat set it. 

I then repeated the process, stamping the Merry Christmas words, embossing them in silver and then using the coordinating dies to cut them out. I also die cut 3 extra blank words and adhered them behind the corresponding embossed words. 

Finally, I adhered the embossed poinsettia panel onto a white, A2 sized (4.25x5.5) top folding card base. Then, I adhered the Merry Christmas words on to finish my card.


I hope this has inspired you to give this easy technique for creating a beautiful Christmas card a try. Thanks for visiting! 

Here's a link to the sets I used to create this card:

Poinsettia & Pinecones 6x8 – The Rabbit Hole Designs

Poinsettia & Pinecones Dies – The Rabbit Hole Designs


Arctic Fox Card, Turning the Fall Foxes Wintery


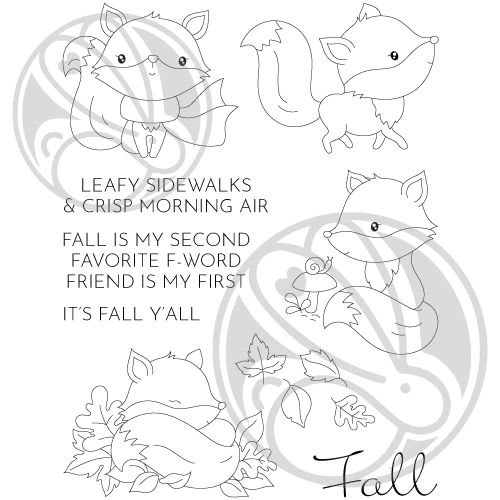
Hi! Today I have a cute arctic fox winter card to share. I took this cute image from the Fall Foxes stamp set, illustrated by Agota Pop, and set him in a wintery background. 

I started by stamping the image onto a white cardstock base measuring 4.23x5.48 and then colored him using colored pencils. I also stamped a fussy cut a mask and placed it over my colored image. 


I then used the Making Waves stencil to mask off a hill and ink blended a blue sky. 


I wanted my fox to have a colorful scarf, so I decided to stamp the leaves included in the stamp set onto a separate scarf then fussy cut it out and adhered it over the uncolored scarf. paper piecing it on. (Head over to my blog to watch a short video of how I did it).


Next, I added some shading to the snow and beneath my fox using my colored pencils. 


To make it extra wintery, I splattered some white acrylic paint all over my panel.


When the splatters where dry, I stamped on my sentiment then adhered the panel onto a white, top folding card base.

I hope my card inspires you to color up these cute foxes in a wintery way! Thanks for visiting!

Here are links to the products I used to create this card:

Fall Foxes 5x6.5 – The Rabbit Hole Designs

Cute Fall Fox Card


Hello! It's Lauren here today with this cute, dimensional, Fall fox card. I just love coloring up the cute fox images included in the new Fall Foxes stamp set illustrated by Agota Pop!

I started out by stamping and coloring my fox image onto a 4.23x5.48" cardstock panel. I used a no line ink pad and then colored pencils. I also stamped colored and die cut a bunch of extra leaves.


I wanted to really show the fox cuddling into that big floofy tail, so I stamped colored and fussy cut 2 extra tails and an extra head. 


I then added double sided foam squares to the back of them and stacked them on top of each other, then onto the fox on the panel. 


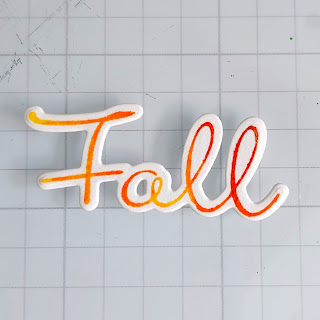
Next, I stamped the word "Fall" using a few different colors of ink on the stamp. Then I die cut it out.


I then added the extra leaves to the panel, leaving room for my sentiment. I also added foam squares to a few of the leaves. 


I then cut brown cardstock to 4.23x5.48" and adhered it to a top folding white A2 sized (4.25x5.5") card base. Then adhered my fox panel on top to finish the card.


I hope this card inspires you to create a cute fall fox card! Thanks for visiting! 

Here are links to the products I used to create this card:

Fall Foxes 5x6.5 – The Rabbit Hole Designs