Pages

Showing posts with label Wedding. Show all posts

Versatility on Your Stamps


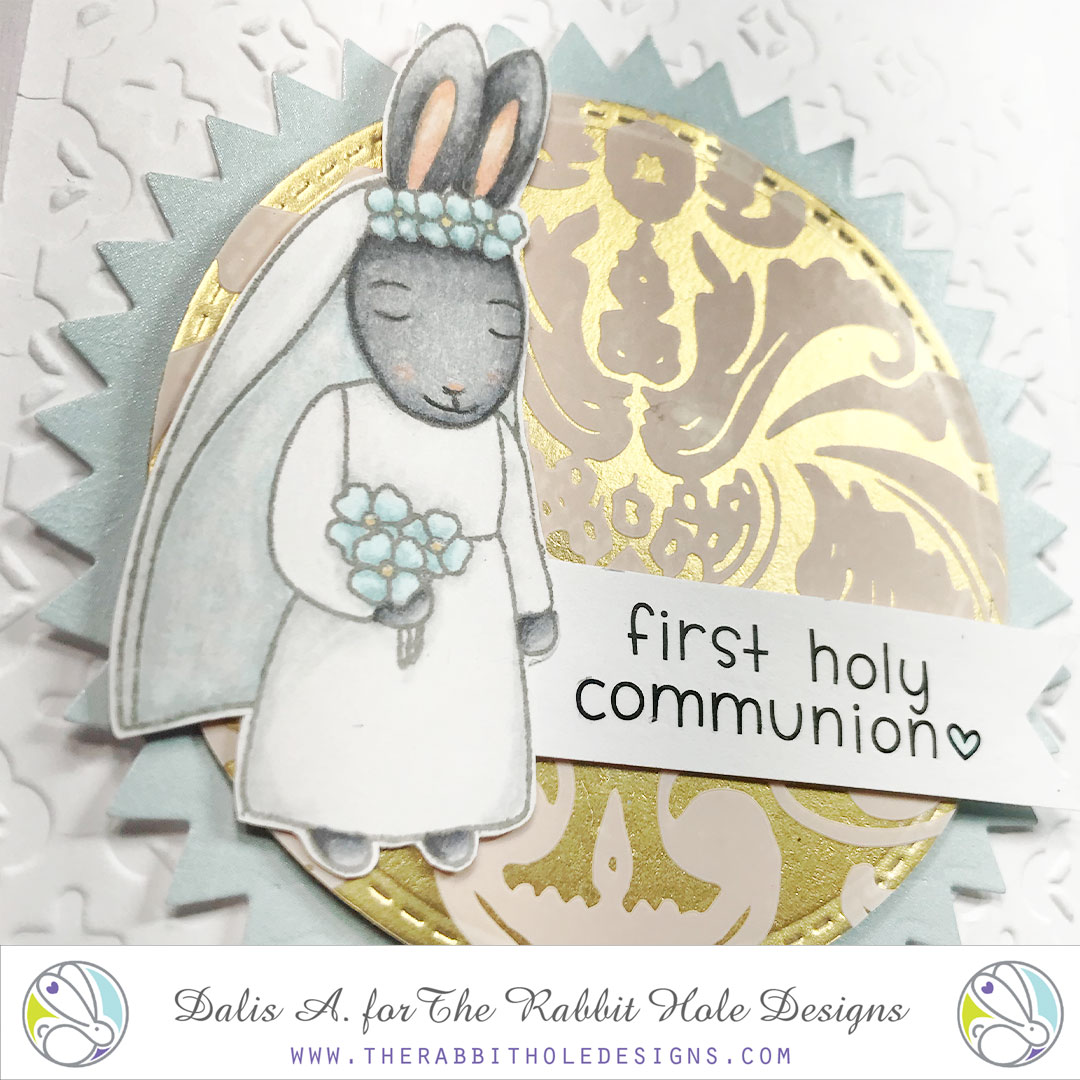
Looking at your stamps in a different way is always the best part of getting a new stamp set. The "Happily Ever After" is a sweet wedding stamp set, but what else can it be? If you mask the groom bunny out of the picture you get this adorable girl bunny that is perfect for a First Holy Communion card. What else do you see when you look at the Happily Ever After couple? Maybe a PROM card, if you mask the veil of the bride? 
After coloring the bunny with alcohol markers, I decided to create the golden backdrop with some stickers to convey the idea of the osties. The embossed folder used even though does not have a cross image, it does bring an idea of a cross, helping bring the theme and the card all together.


For more inspiration, updates, and news make sure to check out these places:

The Happy Couple


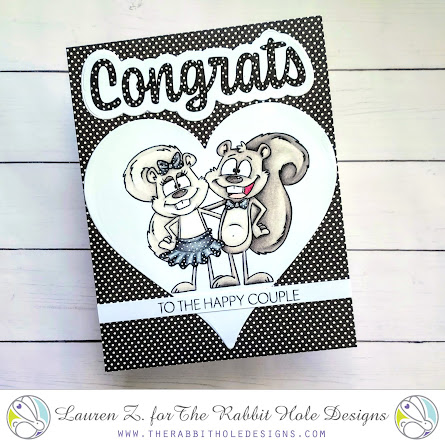
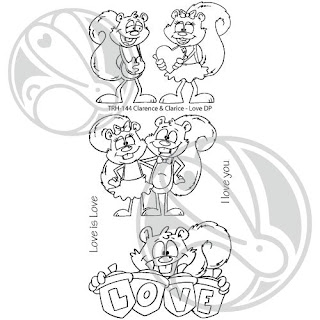
Hello! Lauren here today sharing my cute polka dotted Clarence and Clarice card. I love these adorable squirrels illustrated by Dustin Pike. This image is included in the newly released Clarence & Clarice - Love Stamp set. I thought it would make a cute engagement or wedding card when paired with the Congrats Scripty stamp set. 

I started by stamping my image in black onto white cardstock. I then colored it using colored pencils. I wanted them to match and be a little formal so I chose to color the bows and skirt in shades of cool gray. I used a white gel pen to add the polka dots to the bows and skirt.


With the coloring done, I die cut out the happy couple using a heart die from my stash. 

I then adhered the heart to a black polka dotted A2 (4.25x5.5) panel, then onto a white A2 sized card base. 

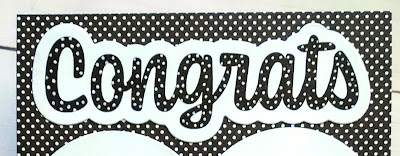
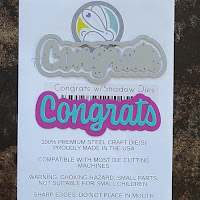
Next, I stamped the word Congrats and also the sentiment "to the happy couple" in black onto white cardstock. I used the coordinating congrats shadow die to cut out the word. I trimmed the sentiment down and added it to the card, below Clarice and Clarence. I waited for the ink of the Congrats to dry fully before using my white gel pen to add polka dots to it too. Then I adhered it to the card above the heart.


I love how this polka dotted card turned out! I think Clarence and Clarice look super cute fancied up! I hope you enjoy this card too! Thanks for visiting! 

For more inspiration, updates, and news make sure to check out these awesome places! 


It's an elegant Celebration!

Hello Rabbit Hole Designs Fans!! DTM Shanna here today a clean and simple celebration card using the Celebrate with Cake stamp set and Twisted Sunshine stencil!  


For this card, I opened for a very clean look with white on white with a touch of silver for the sentiment.  I used a micro glass bead gel over the Twisted Sunshine stencil on white cardstock to create my background.  While that was drying, I heat embossed the "celebrate" sentiment in sterling.  I actually heat embossed over the sentiment a total of 3 times, layering more embossing powder for a thicker, smoother finish.


I popped the sentiment onto the card using foam tape and I had a elegant Celebrate card fit for many occasions.  Wedding, baby shower/gender reveals, job promotions....the list goes on!  Celebrate with Cake can be used for SO much more than birthdays!!  


That wraps up my post for today, I will be back soon for another trip down The Rabbit Hole!  Until then you can find me over on my blog, Caffeinated Craftiness or over on Instagram-Shanna


For even more inspiration, updates, and news make sure to check out these links.

Happily Ever After Stenciled Rose Cards


Hi, everyone! It's Lynnea Hollendonner and I'm here with two cards using the Happily Ever After stamp set! I hope you enjoy my stenciled background and learning how to use up "leftovers" to create a second card!


How - To 

  • Stencil rose background with red and green inks and trim background to 4" x 5 1/4"
  • Color couple from the Happily Ever After stamp set. Cut out and adhere to card. 
  • Stamp sentiment with black ink from the Happily Ever After stamp set
  • Adhere background to card front with fun foam. 


How - To

  • Without cleaning the stencil from the first card - spritz the leftover ink with a mist of water. 
  • Press watercolor cardstock onto the top of the stencil. 
  • Stamp sentiment from the Happily Ever After stamp set.


Product List


For more inspiration, updates, and news make sure to check out these places


Thank you all so much for stopping by! I hope you're inspired to use up the "leftover" ink on your stencils! See you soon! 

Happily Ever After Times 2


Hello Rabbit Hole fans, It's Lisa here with you today and I have 2 
classy cards to share with you using the Happily Ever After stamp set.
I'm so smitten with these stamps and I had an idea for a card
using the sweet images and some really pretty flowers.


For my first card I used a background die that had thick black stripes and 
I adhered it to a white card base.  I wanted a black and white background 
so that the pretty red roses would really stand out.
I colored the sweet couple from Happily Ever After with my Copic markers 
and cut them out with my scan n cut machine.
I watercolored the layered roses and leaves and arranged them in a bouquet
in the top left corner. I popped my sweet couple up on foam tape in the
bottom right corner and added a few sparkly jewels for some sparkle and shine.
For my sentiment I added a large "Love" die cut in 
silver foil layered on a vellum background.


For my second card I used the same couple but with a much lighter
and softer background. I used a background die again but instead of 
cutting it out, I decided to emboss it instead. I love the subtle texture it gives
to a card background. I colored the couple with my Copic markers and
sent them to the scan n cut once again. For my flowers on this card I decided
to use smaller roses in a simple cluster at the top middle of the card.
I added the same sparkly jewels for shine and I embossed the sentiment
from Happily Ever After to a piece of vellum at the bottom of the card.

One stamp set with 2 very different looks!
I hope you enjoyed my 2 cards today and if you are interested in any
of the products I used today, please head over to my blog for more information.


For more inspiration, updates, and news make sure to check out these links.

Thanks for stopping by today.
Have a great day, I already am!
👰🏼Lisa 🤵🏼

Mr. & Mrs Wedding Card


Good Morning Rabbit Hole Designs Fans

Today is my day here on The Rabbit Hole Designs blog and I want to share an easy to make card with you that features the one of the images from
The Rabbit Hole Designs set Happily Ever After

Today's card was easy to make and required very minimal supplies which in the end really gave this card a very rustic yet sophisticated look


Card Recipe
  • I took a piece of cream colored shimmer paper from my local craft store and cut a 5x5 inch square from it and stamped the couple dead center with Memento Tuxedo Black ink and set it aside to dry
  • I then took a 8.5 x 11 inch piece of kraft card stock and cut it down to 5.5 x 11 inches and scored in the center creating a 5.5 x 5.5 card base.
  • Another piece of kraft cardstock was used to create a 5.5 x5.5 inch panel. 
  • From my stash I had already chosen a heart shaped die that fit perfectly around the couple and still fit on the kraft panel, I die cut the heart from the center of this panel then stamped the Mr. & Mrs. in the lower right corner.
  • I picked a few colors of Copics in the grey and pink family and gave a quick color to the couple as shown, then applied some adhesive and attached it to the center of the folded kraft card base
  • Double sided foam tape attached to the backside of the die cut panel was all that I needed to finish this card off and add a bit of dimension
For more inspiration, updates, and news make sure to check out these places.

That is all for me today.  I hope I have inspired you to maybe give this technique a go and create some fast and easy cards.
~
Thank you for falling down The Rabbit Hole for a few minutes!
MaryAnn
~

Release Hop for April ~ Day 1 ~ Happily Ever After


Hello and welcome to Day 1 of the release hop. We are so excited for you to join us as we present to you our April release.  Our fabulous Design Team will be sharing their projects today featuring the stamp set Happily Ever After.  So please, be sure to visit their blogs and leave them some crafty love. 

All of the new stamp sets are available to purchase right now in the shop.

FREE SHIPPING 
on orders of $25 or more before taxes and shipping
(applies to US orders only)
No code necessary, exclusions apply


The stamp set that is being spotlighted today is: 

Happily Ever After


**Giveaway**
To celebrate day 1 of the release, The Rabbit Hole Designs is giving away the stamp set Happily Ever After to one lucky winner.  Winner will be chosen at random from the comments left on participating blogs, so make sure to visit each stop and leave a comment.  Leave comments by 11:59 pm PST 03-28-2019 on all participating blogs. Winner will be announced on The Rabbit Hole Designs blog 03-29-2019

Here is the line up for the hop:

Lisa Golzbein
Katie Brooks
Maria Russell
Lynnea Hollendonner
Amanda Stevens
Martha Lucia Gomez
MaryAnn Samuelson

Make sure you come back tomorrow for Day 2 of our release HOP.


For more inspiration, updates, and news make sure to check out these inspiring places! 

The Rabbit Hole Designs 

Thank you so much for stopping by today!