Pages

Showing posts with label Ocean Card. Show all posts

A Look Beneath the Surface - In-FIN-ity Shaker Card

Hello crafty friends, Jenn here, you can also catch me on social media @journeycoachjenn.  Today I am sharing an A2 infinity shaker card using The Rabbit Hole Designs new Fin-tastic stamp set.  It is paired with the Harmony stamp set and coordinating dies an A2 Shaker Acetate Sheets, and I have a clever way to use the Clear Enamel Dots. 
1 - I colored the koi image from the Harmony stamp set with OLO marker in Violet and die cut it out with the coordinating dies. 

 2 & 3 - I turned the fish over and added about 8 small dots of liquid glue stratigically to the underside of the tail and body of the fish and added the small Clear Enamel Dots over the glue. 

4 - Adding the Clear Enamel Dots will allow the koi fish to swim/slide in the shaker. The card base is a piece of 4 1/8 x 5 3/8"  printed cardstock.   I attached the A2 Shaker Acetate Sheets to the card base leaving the top open to add shaker bits and the fish slider before sealing it closed.
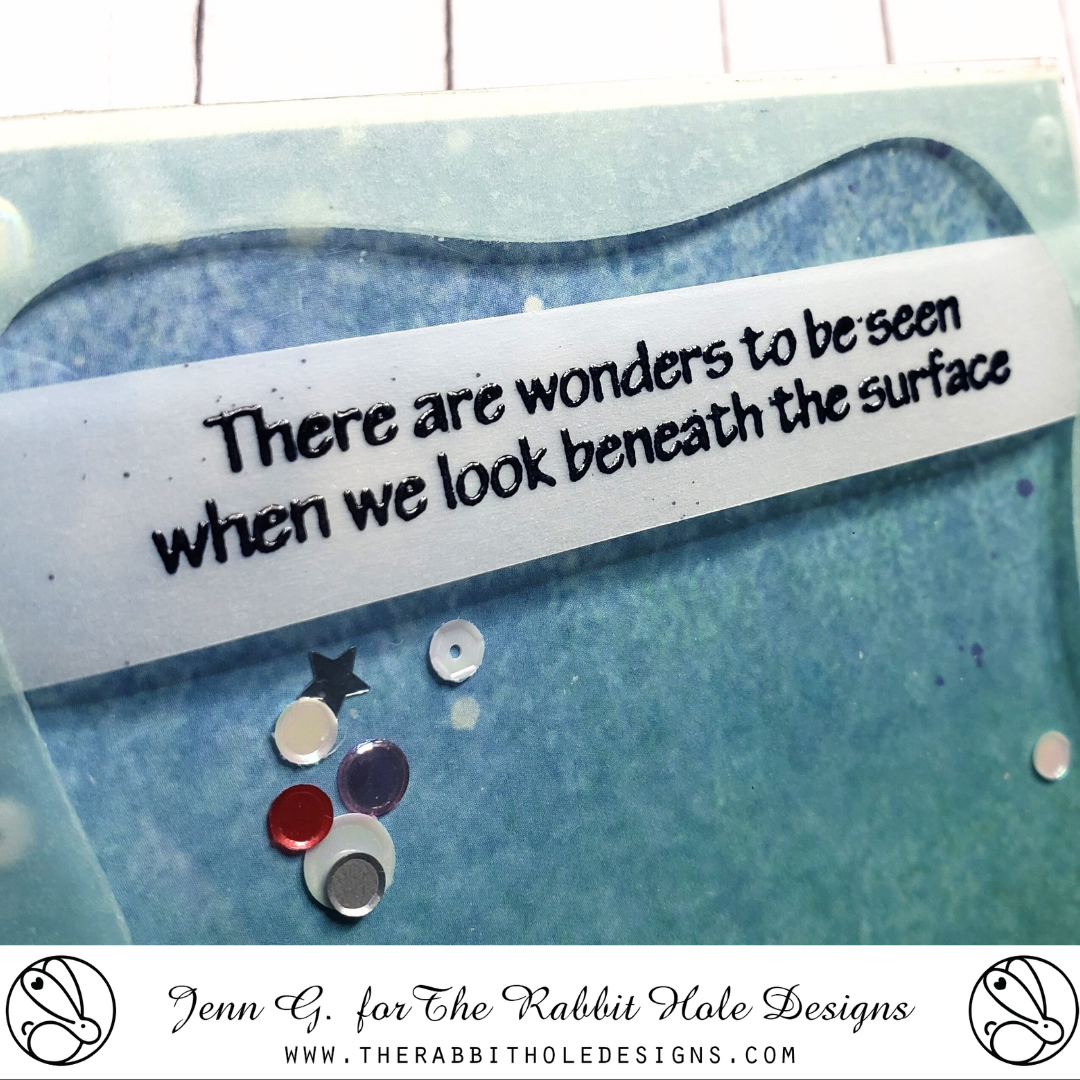
I treated a piece of 5 1/2" x 3/4" Heat resistant vellum with the Cottontail Embossing Powder Tool and stamped the sentiment from the Fin-tastic stamp set ant heat embossed it with black embossing powder.  It is added the sentiment to the card front across the top of the shaker.
The acetate shaker card front is adhered to a white A2 card base. What a fun interactive shaker card with a surprise koi shaker piece.


The Rabbit Hole Design Supplies


Thank you, I appreciate you taking time from your day to stop by and check out today’s The Rabbit Hole Design project.  I hope you are inspired to create something lovely today!


Be Creative ~ Stay Inspired

Jenn Gross


Follow me, Journey Coach Jenn, on 

Instagram - https://www.instagram.com/journeycoachjenn/

YouTube - http://www.youtube.com/c/JourneyCoachJenn

Blog - https://journeycoachjenn.blogspot.com/  


For more inspiration, updates, and news make sure to check out these places


The Rabbit Hole Designs

The Rabbit Hole Designs Instagram

The Rabbit Hole Designs Facebook Page

The Rabbit Hole Designs Pinterest

The Rabbit Hole Designs YouTube


I am here to kelp! - a Fin-tastic interactive wobbler card.


Hello crafty friends!  Jenn here! You can also find me on social media @journeycoachjenn.  Today I am on The Rabbit Hole Designs Blog sharing an adorable  interactive wobbler card.  It is created with The Rabbit Hole Designs new Fin-tastic stamp set (an Agota Pop illustration) paired with the Deco Flowers layered stencil, You've Been Framed dies, Splish Splash Stencil and the Making Waves stencil.
I colored the Mermaid with OLO markers using YG 8.3, 8.5 and 8.7 for the hair. The skintone is BG 7.0, 7.2, and 7.3.  The mermaid tail is colored with BG 2.1, 2.3 and 2.4.  The sea shells and coral are colored with R 2.2 , 2.4 and OR 1.3 and 1.6. She has been cut out and a wobbler has been attached to her back and then to the card panel. 

I created the card background by lightly stenciling the Splish Splash stencil in a light blue. I added the kelp using 3 of the stencil layers from the Deco Flower stencil. The ocean floor is stenciled in brown gray ink using the Making Waves stencil.

The sentiment is stamped on a blue cardstock  and fussy cut. I use the You've Been Framed dies to cut out the card front and the blue layer, before attaching them to an A2 kraft cardstock card base.

Supplies List
Action Wobblers 
Liquid glue

Thank you, I appreciate you taking time from your day to stop by and check out today’s The Rabbit Hole Design project.  I hope you are inspired to create something lovely today!


Be Creative ~ Stay Inspired

Jenn Gross


Follow me, Journey Coach Jenn, on 

Instagram - https://www.instagram.com/journeycoachjenn/

YouTube - http://www.youtube.com/c/JourneyCoachJenn

Blog - https://journeycoachjenn.blogspot.com/  


For more inspiration, updates, and news make sure to check out these places


The Rabbit Hole Designs

The Rabbit Hole Designs Instagram

The Rabbit Hole Designs Facebook Page

The Rabbit Hole Designs Pinterest

The Rabbit Hole Designs YouTube


Back to the Beach

Hello my crafty friends!  Shall we go back to the beach today?  This month, The Rabbit Hole Designs' Brand Ambassadors are re-sharing some of our favorite cards from the past year.  This card will provide you with your daily Dose of Vitamin Sea!

It is created with the Starfish in the Sand stamp set from the April 2021 release.  The illustrations is by Tatsiana Zayats.  I love how this sun bunny is soaking up rays in the sand.

Revisit the blog here! 

Be Creative ~ Stay Inspired

Jenn Gross


Follow me, Journey Coach Jenn, on 

Instagram - https://www.instagram.com/journeycoachjenn/

YouTube - http://www.youtube.com/c/JourneyCoachJenn

Blog - http://www.journeycoachjenn.com/


For more inspiration, updates, and news make sure to check out these places


The Rabbit Hole Designs

The Rabbit Hole Designs Instagram

The Rabbit Hole Designs Facebook Page

The Rabbit Hole Designs Pinterest

The Rabbit Hole Designs YouTube


Stenciling with Karin Markers


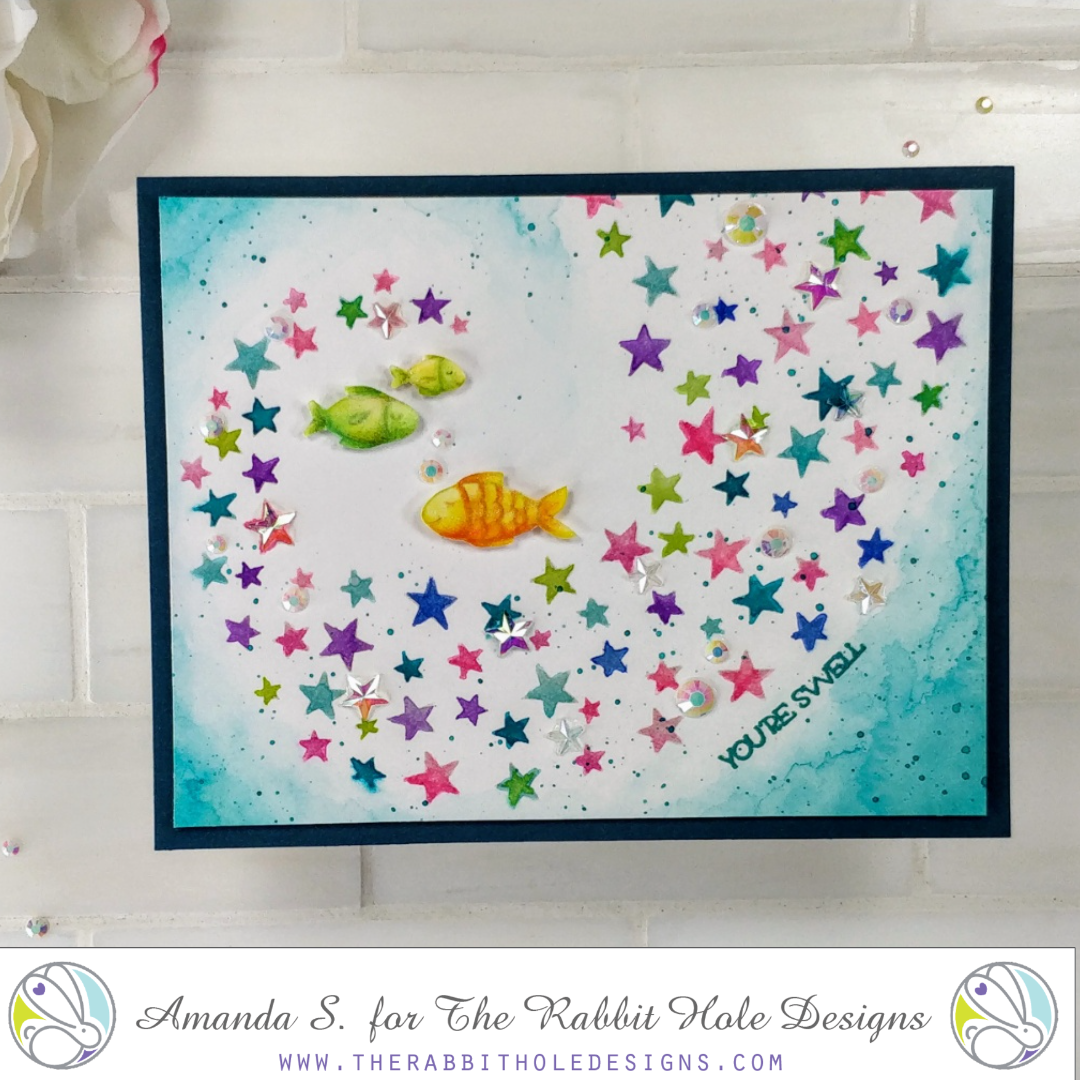
Hey crafty friend, it's Amanda from Pear Blossom Press again. Well, I did it. I couldn't resist the new Karin markers. I was trying to be strong. I've been building my Copic collection, and since I have full-set-itus (it's a real thing), I wanted to complete that collection before starting another. But there was a sale. And Jenn Gross has been creating the coolest backgrounds with them. And I couldn't hold out anymore...

So I've been testing them out! They are highly pigmented, waterbased markers, with nice nylon brush tips. I love them! Let me show you a card I created with them...


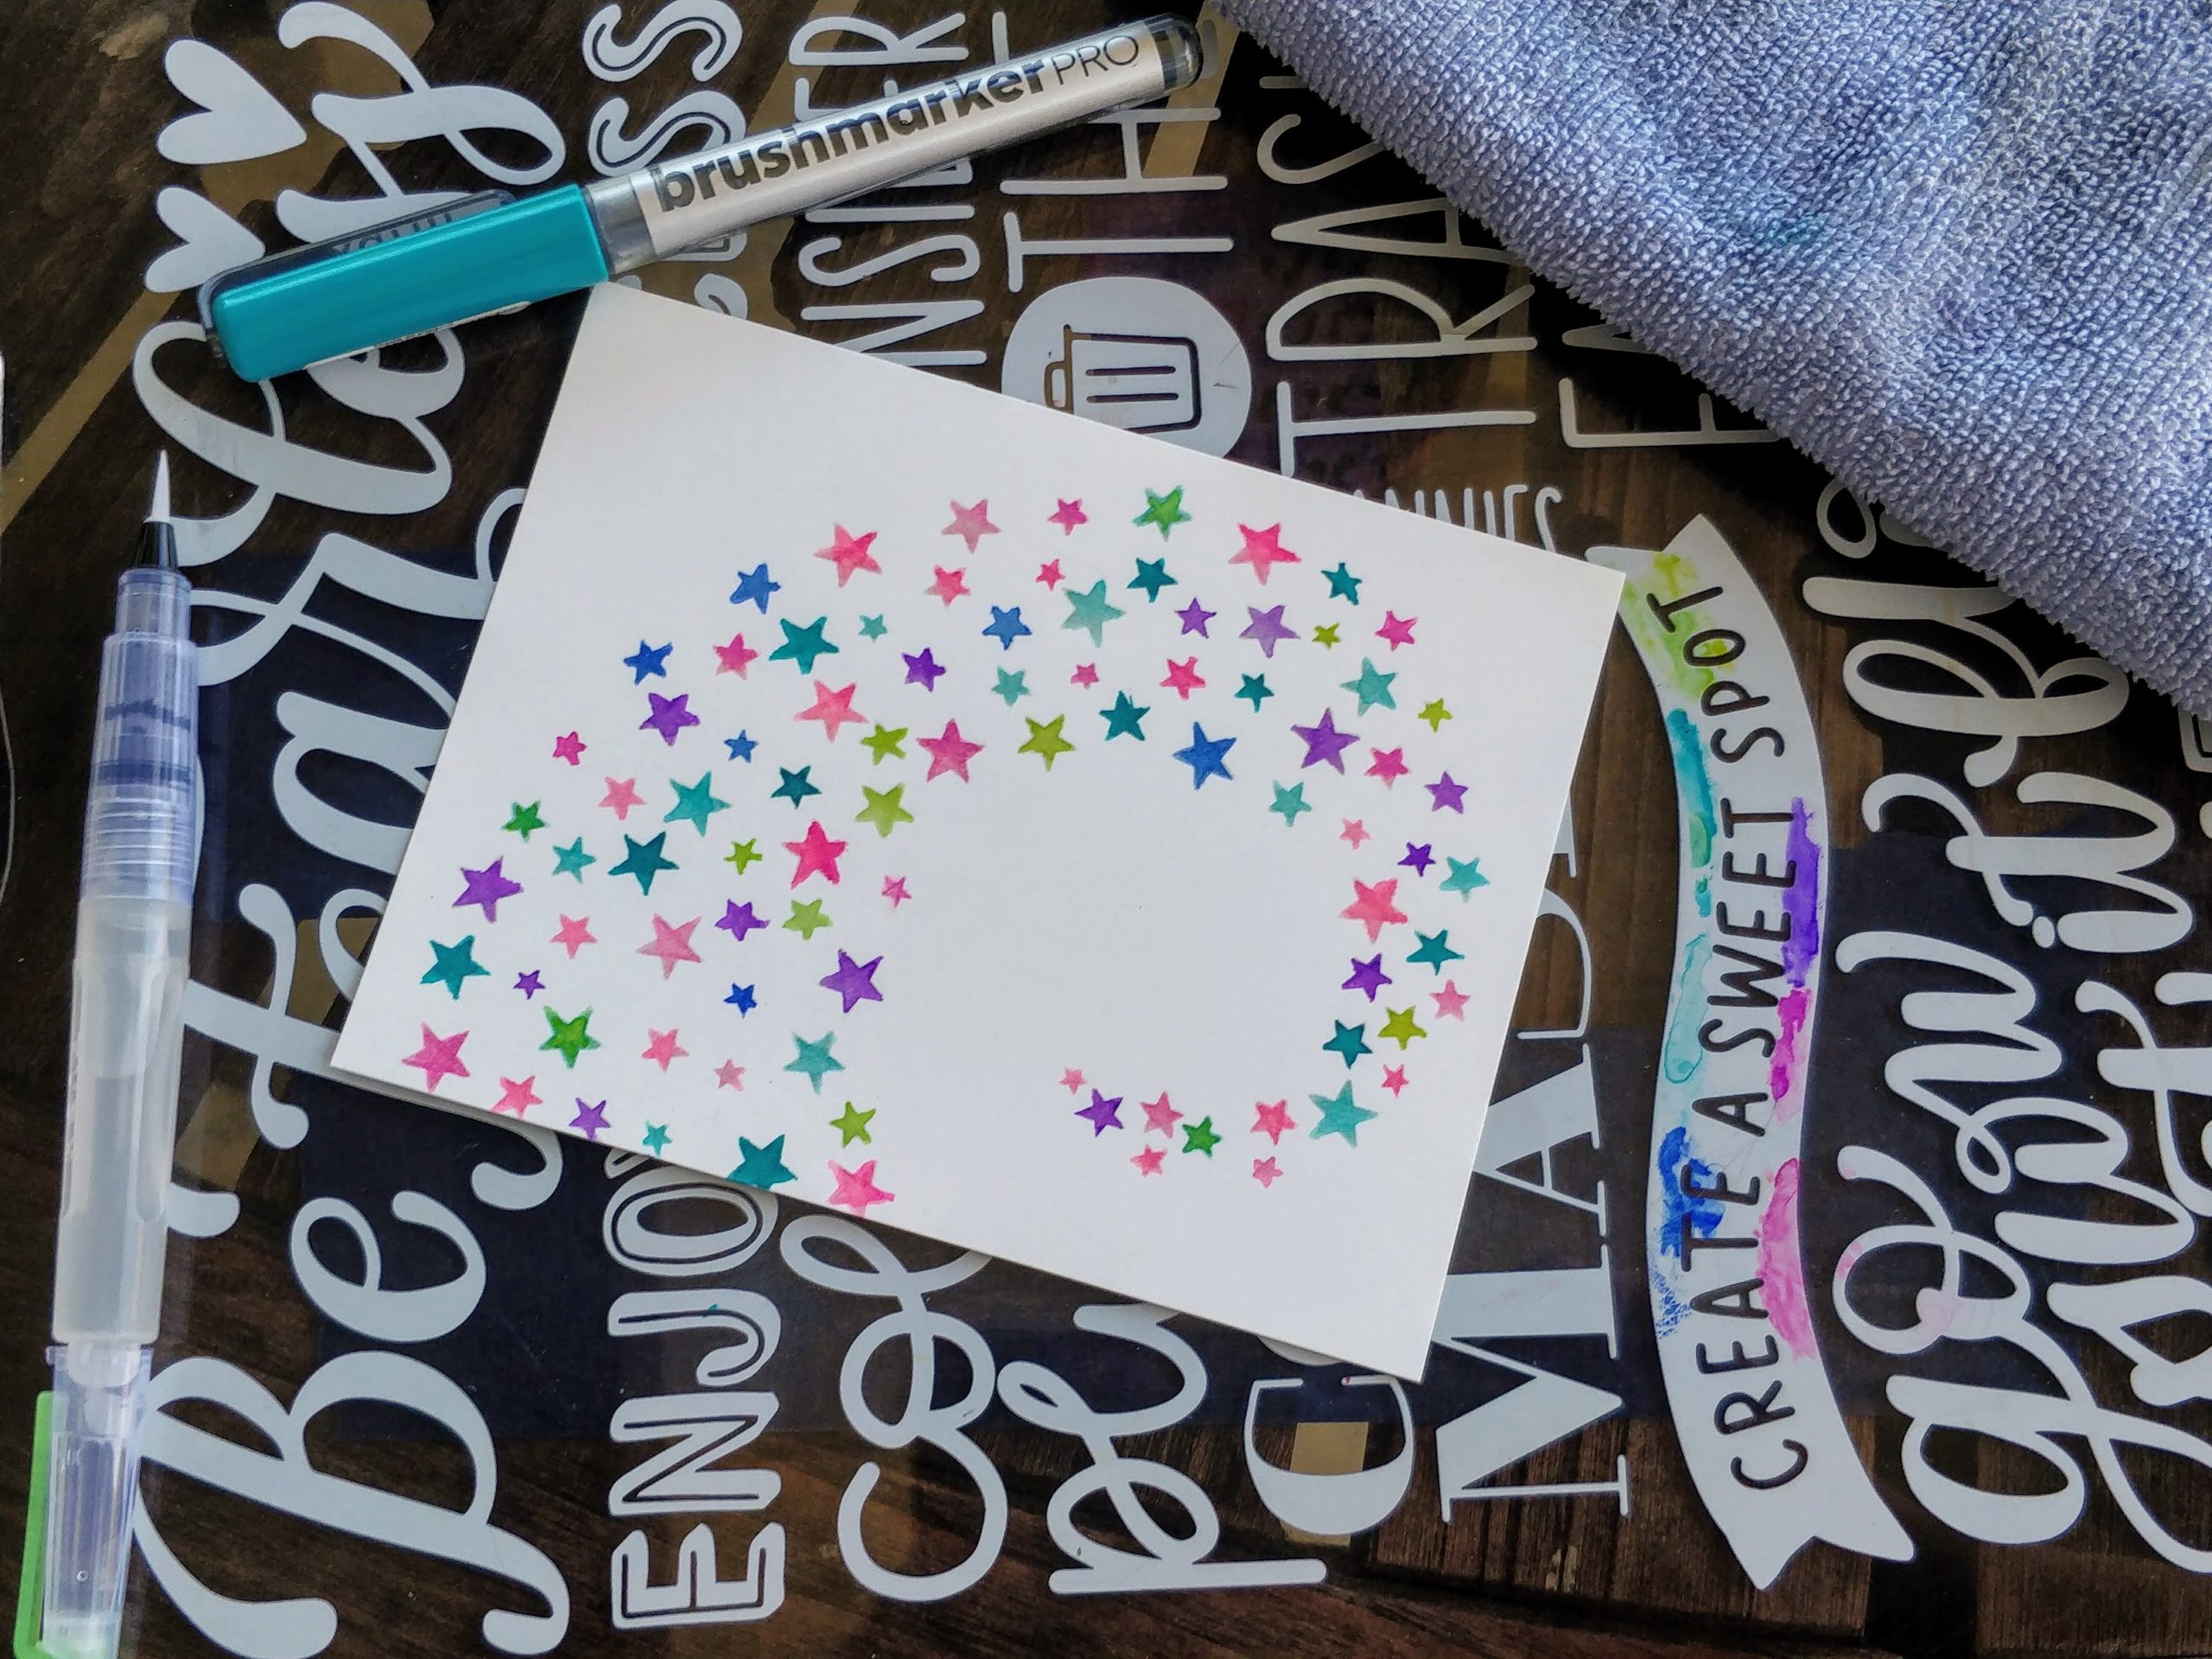
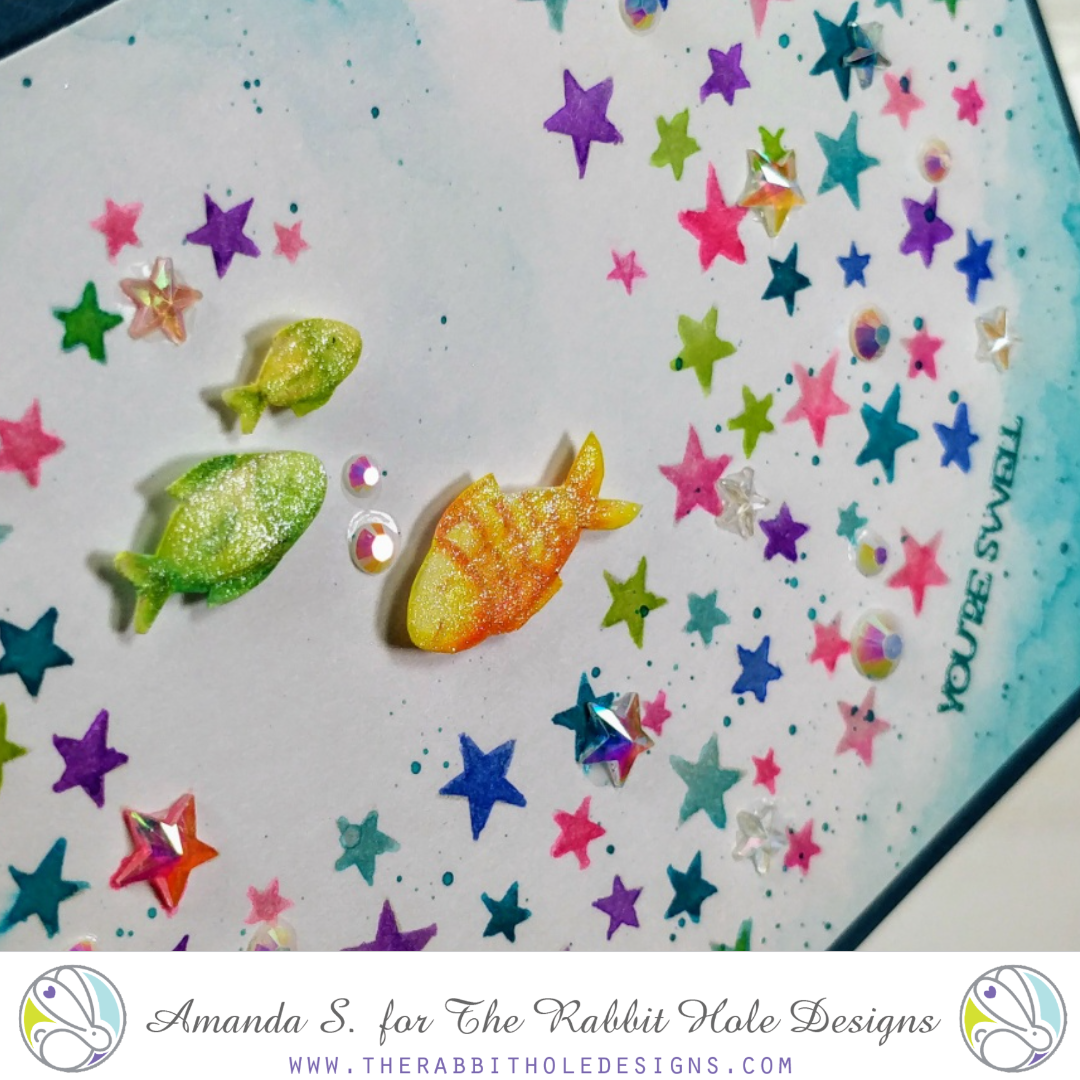
I saw Kathy Racoosin stencil a light, neutral colored ink onto a background, and then watercolor it. It's such a cool technique! For this card, I stenciled Fadeout ink through the Aim for the Stars stencil. I was just playing, so I used a panel of Neenah that I had handy. I probably should have grabbed watercolor paper, but since there was so much pigment in the markers, I didn't actually get the panel too wet, and it worked just fine.

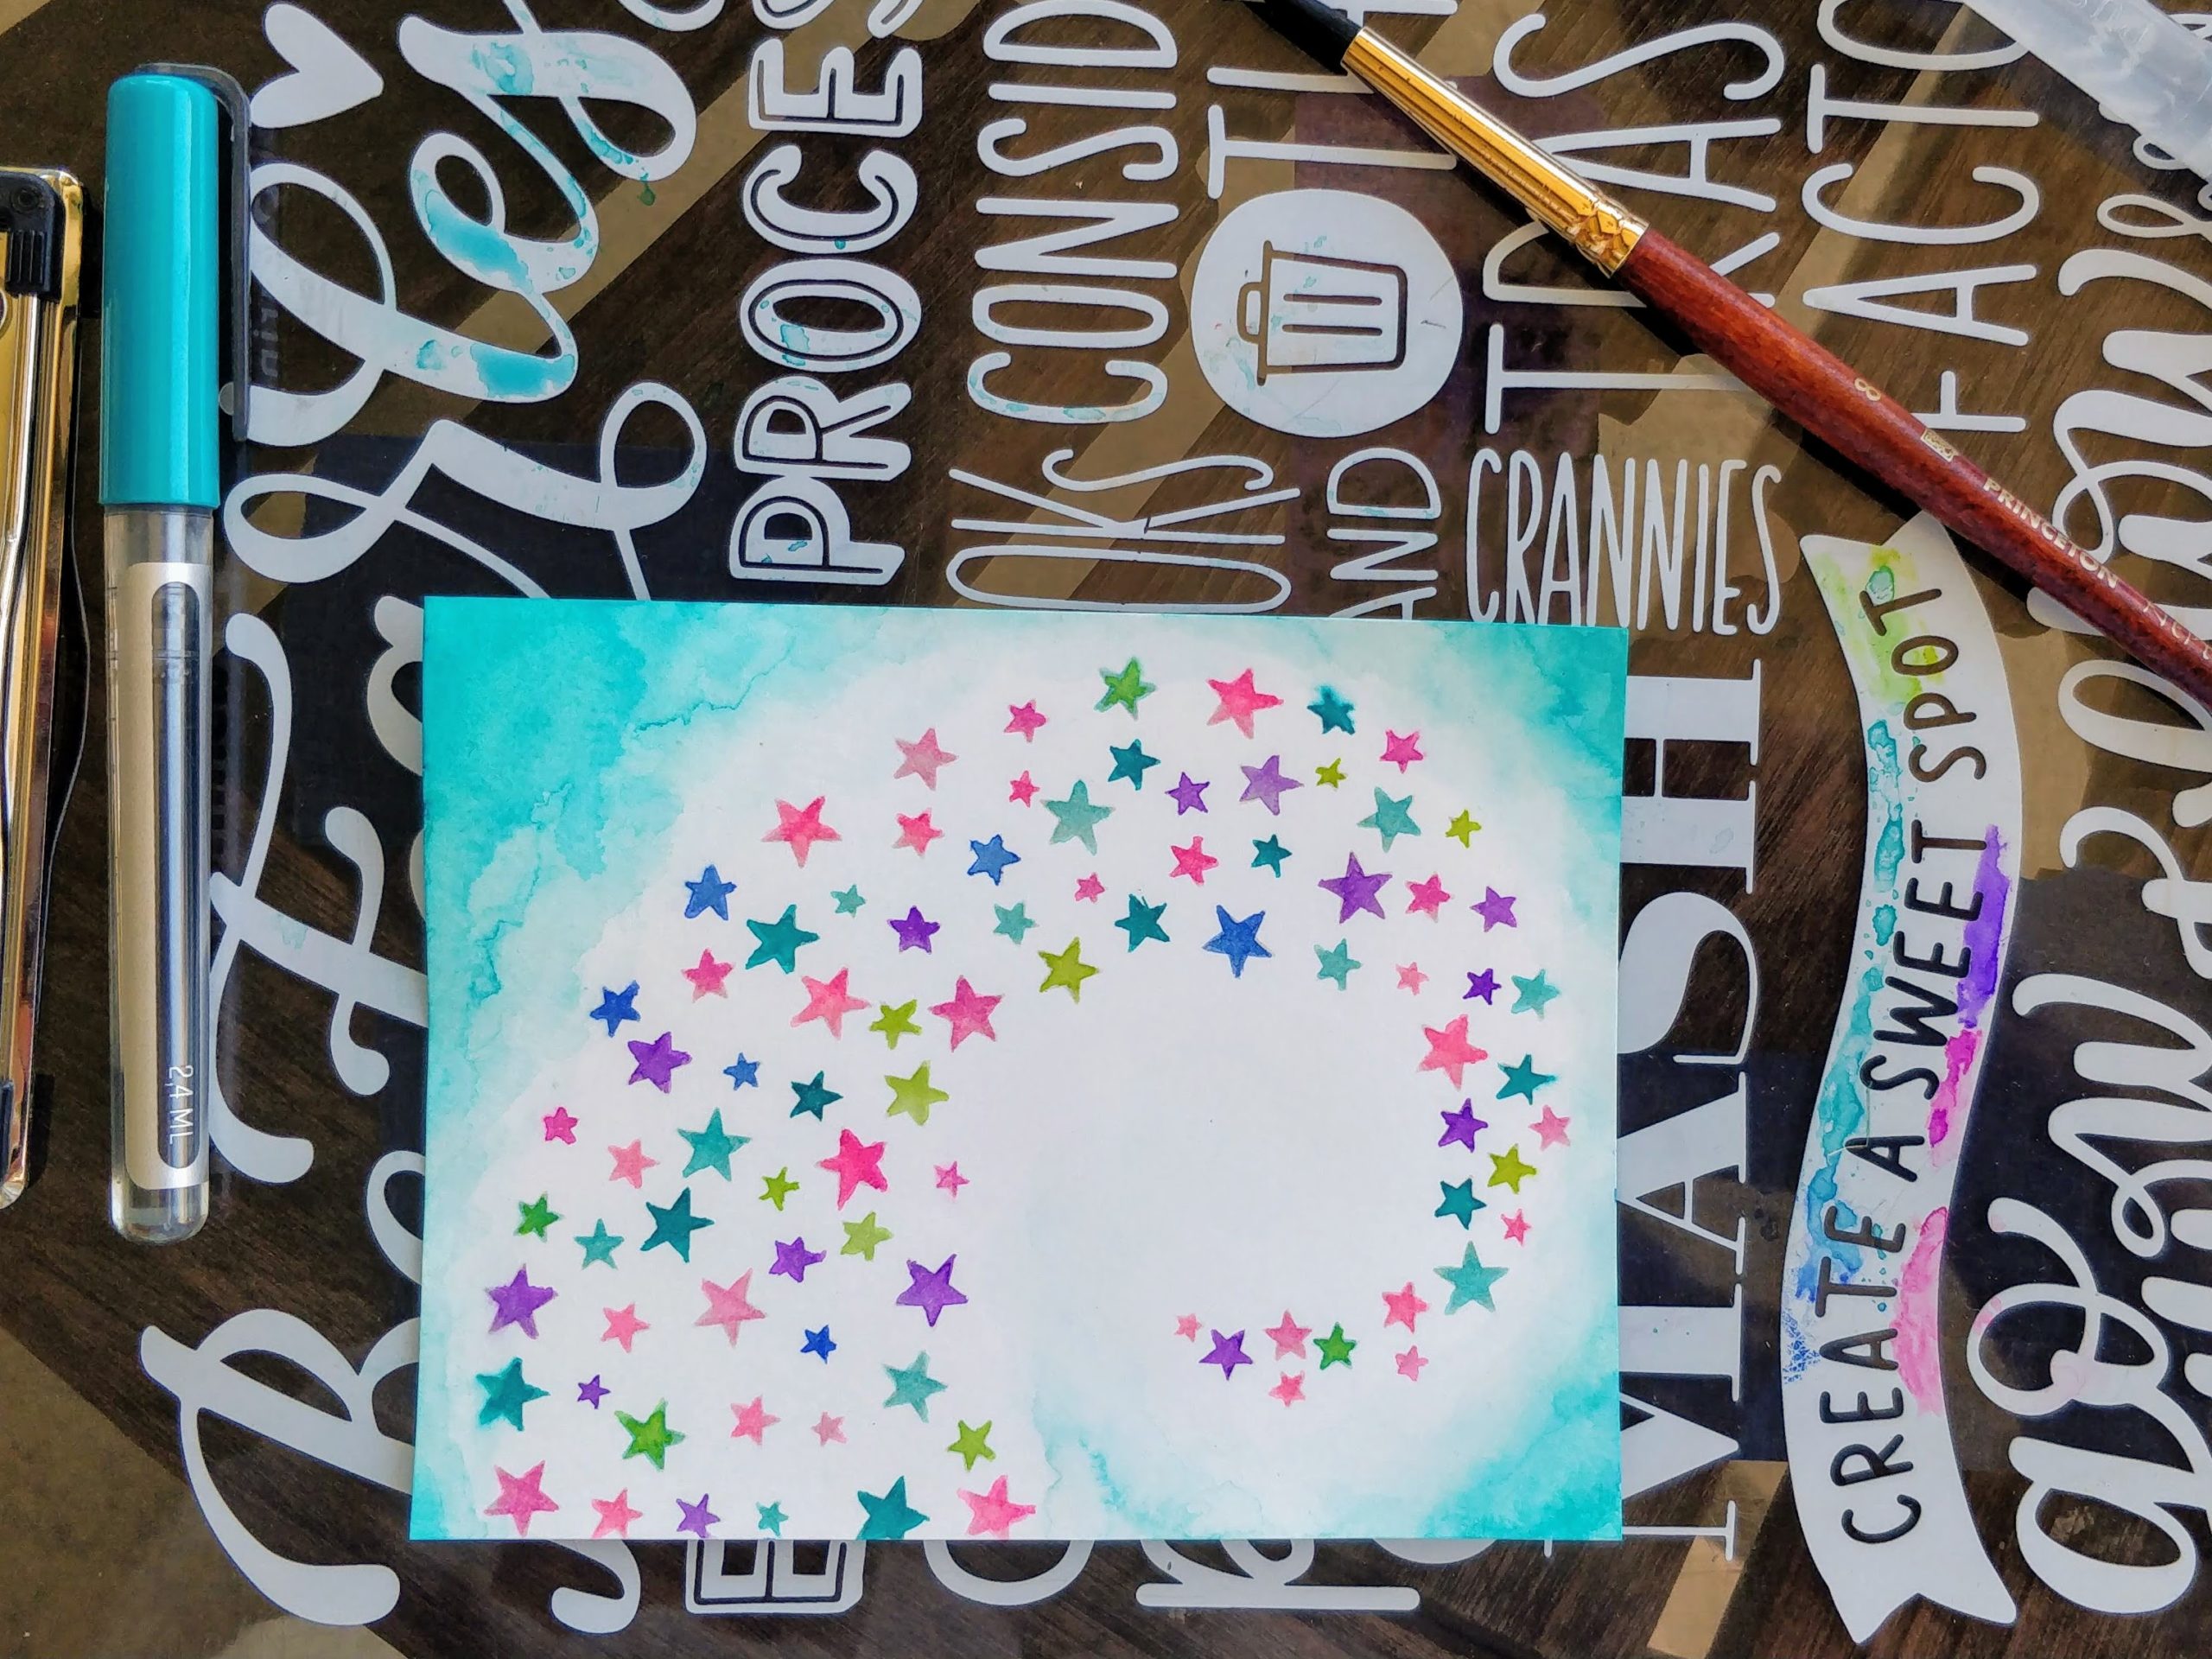
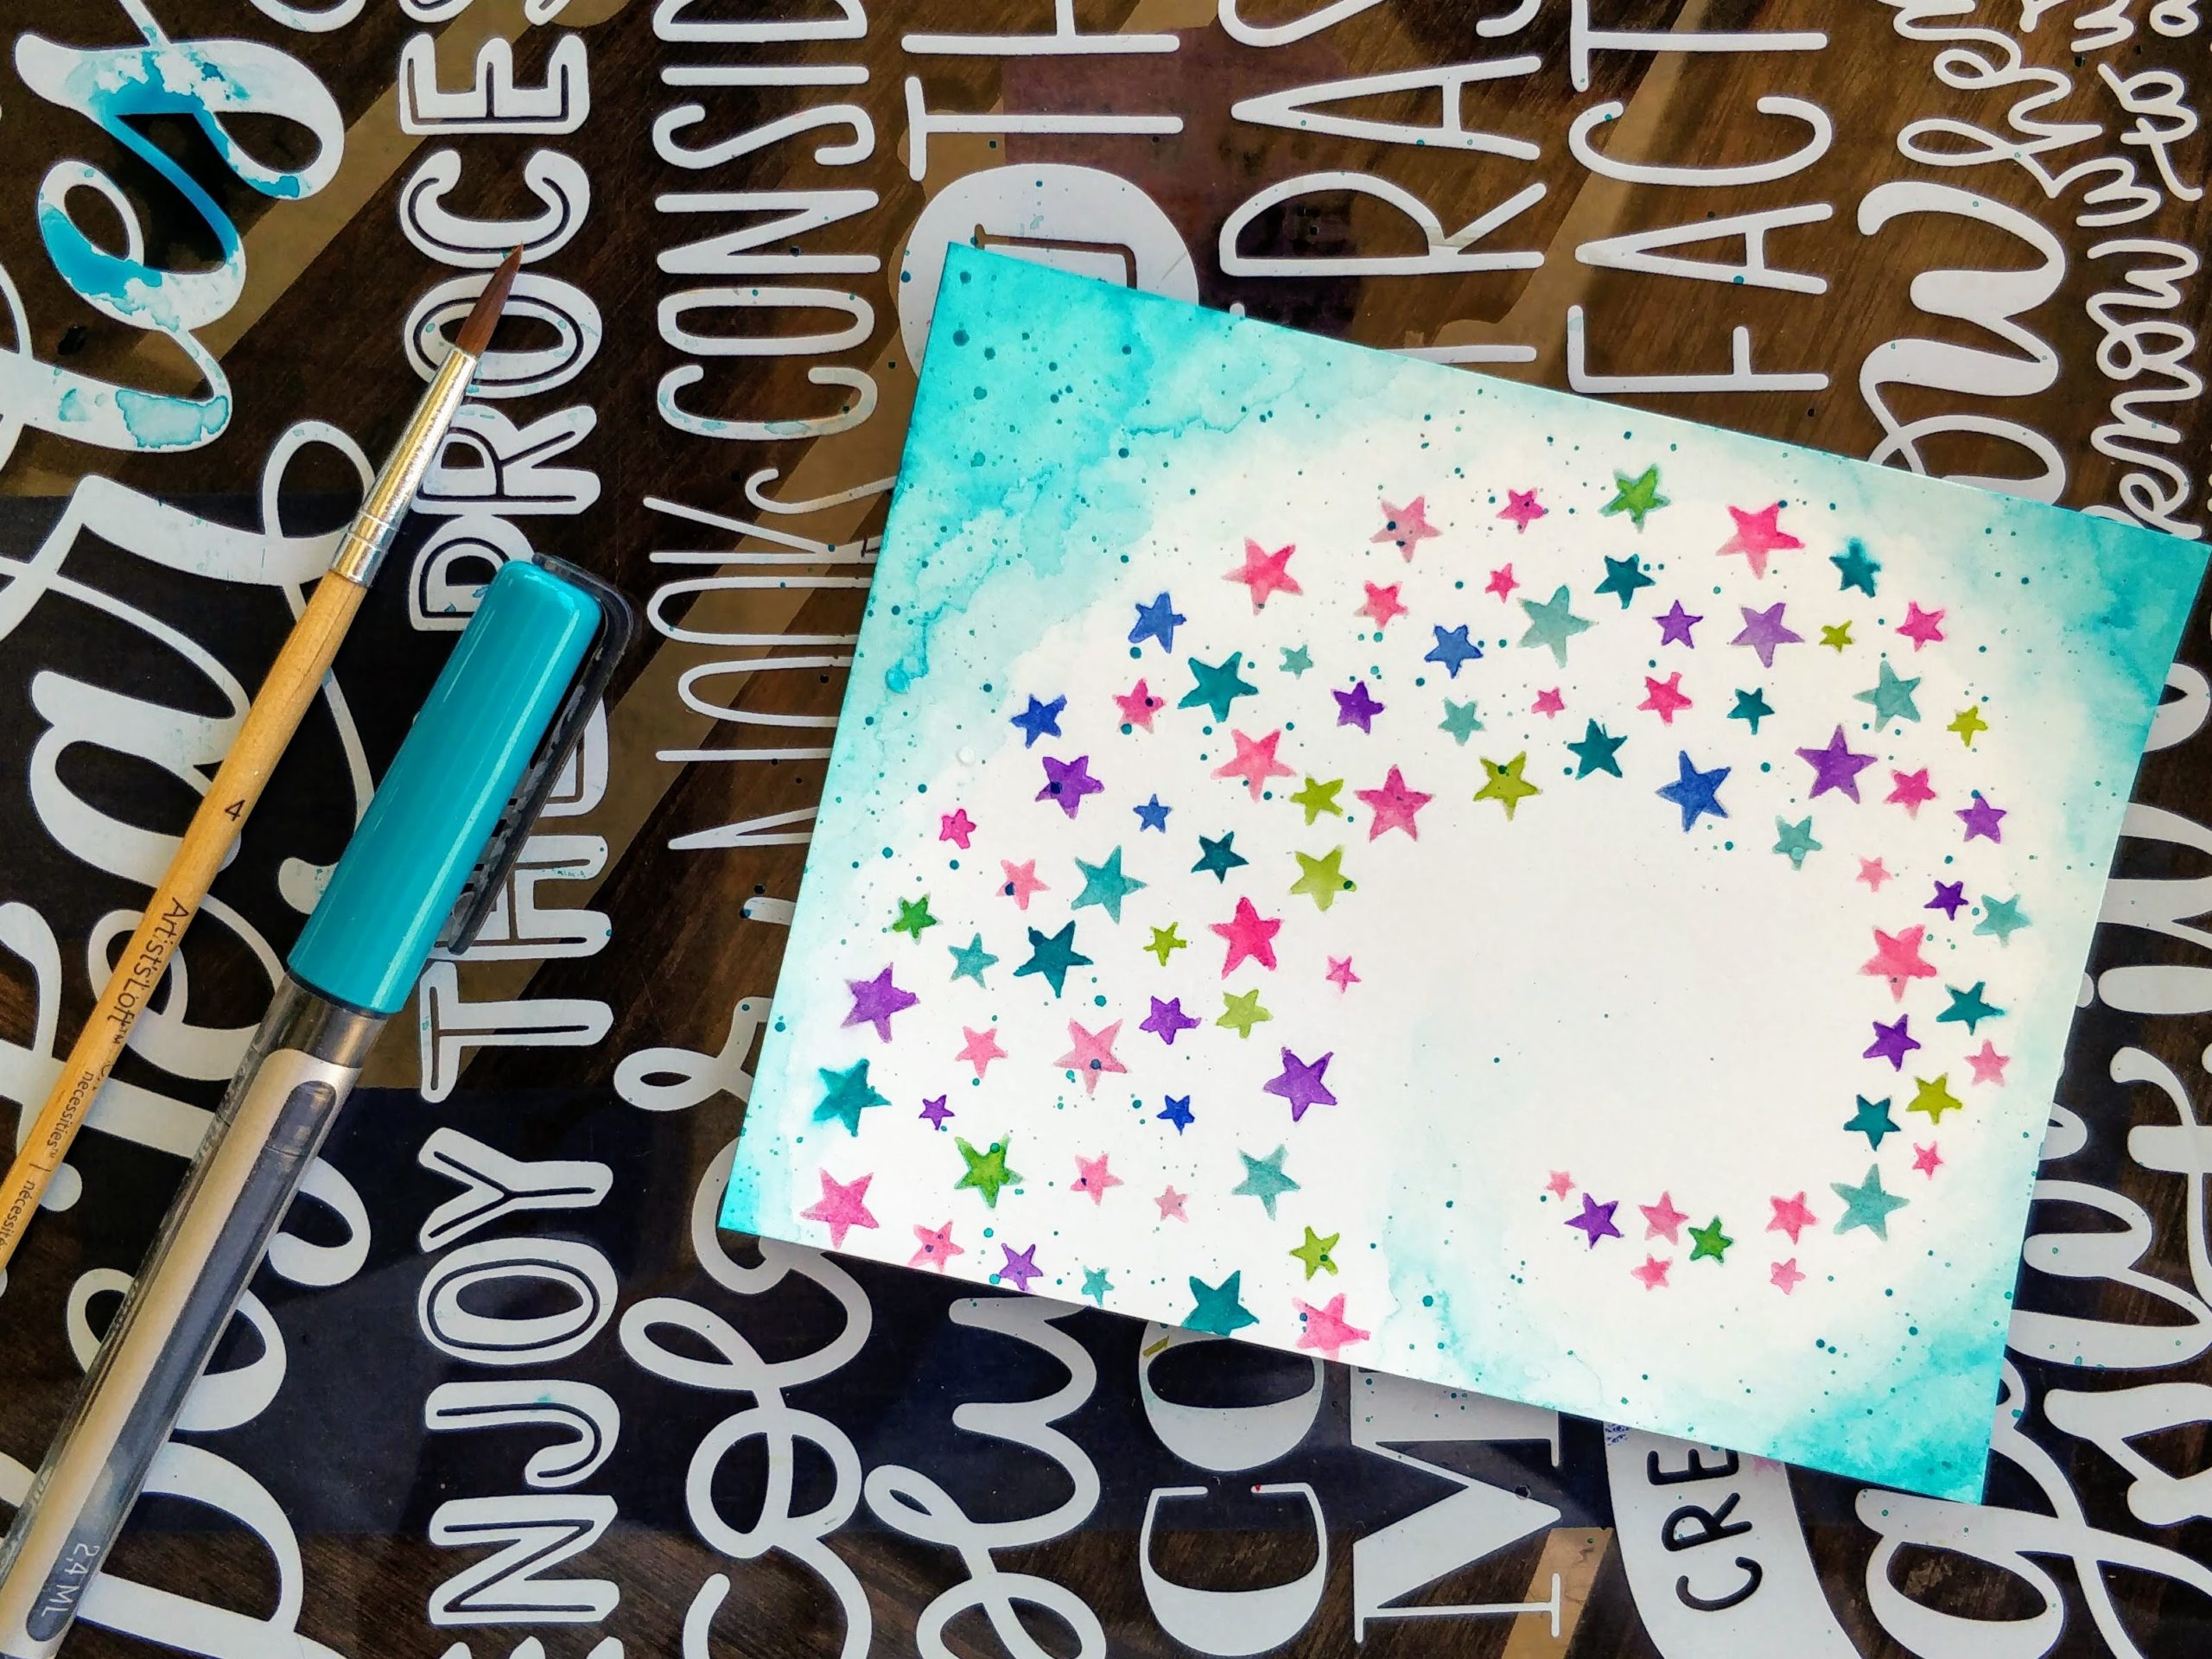
After I stenciled on the Fadeout ink, I scribbled several colors of markers onto my clipboard and picked them up with a waterbrush. I colored over the stars. Then, I added watered down turquoise to the sides (this is where watercolor paper would have been a better idea, but again, it worked just fine). To add interest, I splattered on concentrated color.


While I was rotating and trimming the panel down, the swirl of stars kind of reminded me of a mermaid tail, or waves. So I decided to turn it into an underwater background. Still wanting to play with the new markers, and with the Fadeout ink already out, I stamped the three fish in the Mermaid Hair stamp set to try no-line coloring again. (You may recall this no-line disaster, but I figured fish would be more forgiving images.) I watercolored them in the same way I did the stars, then fussy cut them. 

To pull the card together, I curved and stamped the sentiment YOU'RE SWELL from the Beach Day stamp set (on sale right now!) and embossed it on the background. I popped the panel up on a dark teal card base with fun foam, and popped the fish up with foam tape. Shimmer pen highlights, and flat-backed stars and gems add sparkle.


What do you think? Have you tried coloring a stenciled image? How about the Karin markers? Are you a fan of no-line coloring? I definitely need more practice with all three, but I'm enjoying the learning process. 

Thanks for stopping by today. You can find the sister article to this on my blog. Head on over for more inspiration and links to the specific products I used. I'll be back soon with another fun card to share. 

For more inspiration, updates, and news make sure to check out these awesome places! 

Inking of You Pull-Tab Card

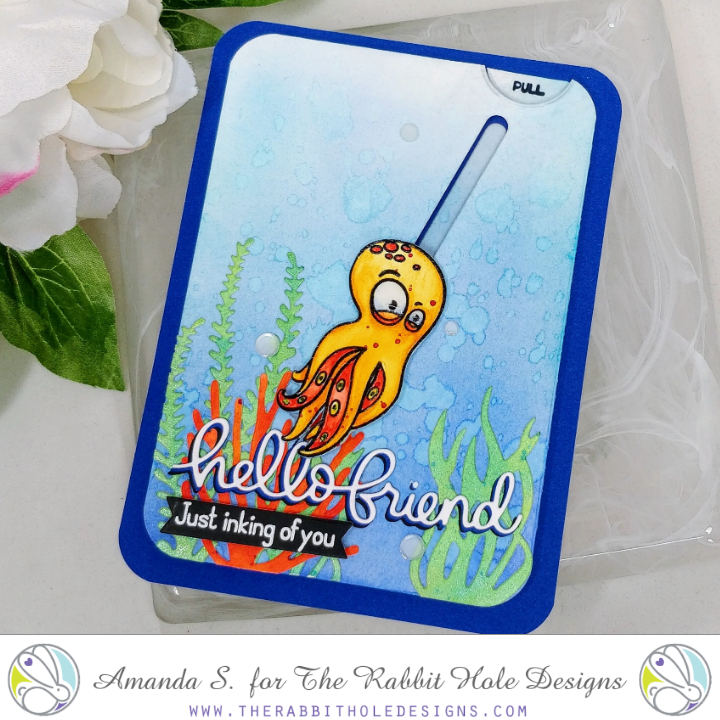
Hey crafty friend, it's Amanda from Pear Blossom Press back with another fun, interactive card! I've wanted to make this card since I first saw the new Inky stamp set. The set has three adorable octopi, several punny sentiments, and a pair of ink blots. I thought it would be really fun to have an octopus on a pull-tab, and have an ink blot under him, that only becomes visible as it swims away.
See what I mean? Isn't it cute?! I love the punny sentiment, combined with the ink blot. This card was pretty simple to make too. To start, I created an A6 card base from white cardstock. I cut blue and white panels to layer on top. I ink blended Chipped Sapphire and Mermaid Lagoon Distress Oxide Inks onto the white panel with a makeup brush, fading the color out almost to white at the top. I splattered on water to lift some color, then trimmed ½" from the top and side. I used a corner rounder to shape the edges of all three pieces.

Next, I stamped, embossed and watercolored my octopus. Then I cut him out with my ScanNCut. I painted a large scrap of watercolor paper with green and orange watercolor and die cut several pieces of seaweed from the green, and a piece of coral from the orange. I stamped and embossed my sentiment onto black cardstock and die cut it with a fishtail banner. I also die cut "hello friend" from white, blue, and black cardstock, gluing them together slightly offset.
Once I had my embellishment pieces cut out, I laid them out onto the ink blended panel and decided on placement for my slider track. I used a small slider die and a circle die to cut the track and finger notch into the panel, reserving both pieces that I cut out. Before I assembled the sliding mechanism, I stamped and embossed the ink blot onto the panel. Then, I glued the seaweed, coral and hello friend sentiment flat to the panel. At this point, I glued the solid blue panel to the card base, then lined up the ink blended panel and used it as a guide to glue the reserved piece cut out with the slider die. (That way the track would have the ink blended piece behind it, and you wouldn't see a big dark blue line.)

To assemble the sliding mechanism, or pull tab, I flipped the ink blended panel over and added double thick foam tape around the edges and inside, leaving a gap for a 1" x 4" strip of acetate over the track. (I left the release paper on the outer layer of foam tape because I wasn't ready to stick it to the card yet.) I used a powder tool on the sides of the track and the foam near the acetate strip, so it would be able to glide freely. I glued the reserved finger notch piece to the top of the acetate, making sure it lined up evenly with the top of the inked panel. I stamped and embossed "pull" on it. With the acetate strip slid down the track, and the pull tab lined up with the edge of the panel, I glued a Slider Element (looks like a plastic Tic Tac) to the acetate at the very bottom of the track. Then I glued the top of the octopus' head to the element. This locks the octopus to the front of the panel, and the acetate strip to the back, so I could remove the release paper from the foam tape and stick the panel to the card. I made sure to line it up so the track was right over the piece I'd already glued down. To finish the card, I popped the banner sentiment up with foam tape and glued on a few white sequins. To add a little more shine to the card, I covered the eyes and sequins with a coat of Diamond Glaze.


So what do you think? Pretty cute, right? I hope you love the new Inky set as much as I do because I have a bunch more ideas for it! If you'd like to see another set of fun cards I made with this set, check out Liquid Shaker Cards. You can also find the sister post to this on my blog today with links to the specific products I used to create this card. Hop on over for more inspiration! I'll be back soon with another fun card.


Tropical Vibes Rocker Card


Hello my crafty friends, it's Amanda from Pear Blossom Press again. Today I'm sharing a rocker card with an extra surprise; there's a pendulum hanging under the Caffeinated Shark, so he sways on the tide as the card rocks.

This is the second card I designed to teach at the Unstoppable Retreat in Seattle this past weekend. (You can find the first one here.) The plan was to film it live, so you'd be able to watch us craft in real time and make one with us if you'd like. Unfortunately, we ran long with the first card and didn't get to do this one together. I passed out kits for this card to all of the attendees and I shot a quick video in my hotel room after. My apologies for the lighting and such; it's so hard to find a hotel that offers a full service filming studio ;)


For this card, you'll need the following stamps and dies (head on over to my blog for links to specific products):
  • Caffeinated Shark Stamp Set
  • Nesting Circle Dies (5½", 1¼", and ¾")
  • Stitched Wave Border Dies
  • Stitched Hillside Border Dies
  • Tropical Dies
  • Scalloped Circle Dies
You will also need a strip of paper that measures ¼" x 2½" and a penny to create the pendulum. The hardest part was die cutting all of the pieces. Which, to be honest, isn't actually hard, just time consuming. Especially, when you are cutting for 30 cards. I'd really like to thank the awesome ladies that sat around the dining room table with me the night before class and helped me finish cutting the pieces, Alison, Robin, Ernylee, Rachel, and Brianne, you ladies are fabulous!!!

I have to take a second to gush a little about the retreat...it was so much fun! I got to meet several of my online friends in person, and a whole new group of amazing ladies that I now get to call friends too! We were in a gorgeous setting and had a wonderful time crafting, chatting, laughing, and forging new friendships. We shared great meals and silly jokes all day, and funny stories and cocktails all night. I can't wait to do it again next year! A great big thanks to Beth Duff for organizing the retreat, and The Rabbit Hole Designs for being one of the generous sponsors. I was so happy to show off some of their fun stamps in my class!

Thanks for stopping by today; I'll be back again soon with another fun card for you!