Pages

Showing posts with label Boo To You. Show all posts

Light Up Halloween


Good morning! It's Lisa here with you today and I am up on the
 blog with a fun Halloween card for you!
You've got to love a holiday that says......"It's ok to combine orange and purple with each other!"
You wouldn't think that these colors would look good together but I just love them
blended next to each other! Maybe it's that they are so opposite, they do say opposites attract!
Anyway, I just love the color combination and I love the way this card turned out!


The best part about this card is the light up pumpkin!
I used the EZ Lights by Pear Blossom Press.
These lights are super easy to use and make easy work of making light up cards!
They consist of one battery pack attached to 3 mini lights.
I placed the 3 lights under the pumpkins eyes and nose.


Here is a quick recipe for my card:

1) I used a Wavy Wonky Rectangle die to cut a panel out of Bristol Smooth 
card stock. (I love this paper for blending Distress Oxide Inks)

2) Blend Distress Oxide inks: Carved Pumpkin into Spiced Marmalade on the bottom and
Wilted Violet into Shaded Lilac at the top. Next I spritzed the panel with water and 
dried it to give my background a distressed look.

3) Stamp Happy Halloween from the "Boo To You" stamp set in black
ink at the top of the panel and add the little spider around the words.

4) Add a grassy border at the bottom of the panel to ground your card.  
I also sponged the top of the grass with dark green ink to give it a little depth.

5) Stamp the pumpkin image from "Hey Gord-geous" in hybrid black ink
and color with Copic markers. I added Gina K Glitz Glitter Gel to
hat, eyes and mouth for a little sparkle. Die cut pumpkin with matching die.

6) Lastly tape the EZ Light battery pack to a piece of black cardstock measuring
5 1/2" x  4 1/4" and place foam tape all over panel avoiding battery pack.
I placed my battery pack on the bottom left of the card
and threaded the 3 lights up through the bottom right of the main panel. I adhered the
3 small lights to the back of the pumpkin behind the eyes and mouth. I placed my pumpkin on foam tape to leave room for the lights and then I adhered the main panel down to the black panel.
Press purple button on battery pack and prepare to be amazed!


** I added a small half circle over the battery pack and hand wrote
"push here" however there are stamp sets available that already have these sayings.


This card was so much fun to make and the EZ lights make quick work of light up cards!
In no time you can have a fun interactive card that will amaze your recipient!

Thanks so much for stopping by my blog today!
Don't forget that you can purchase The Rabbit Hole Designs products at

For a completed listing of supplies used with links please head to my blog


For more inspiration, updates, and news make sure to check out these links.


Have a great day, I already am!
🎃Lisa 🎃

Spooky Front Porch Card


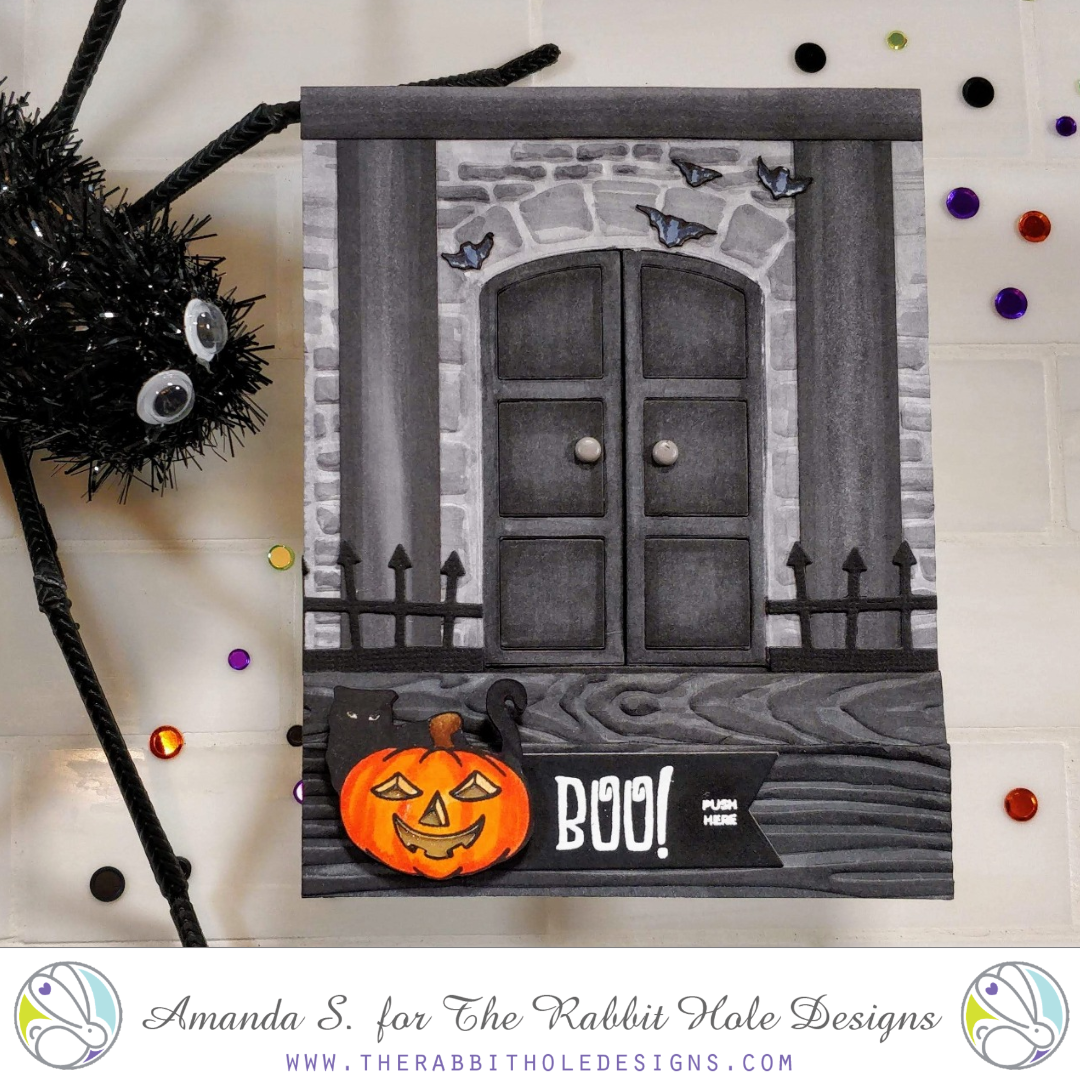
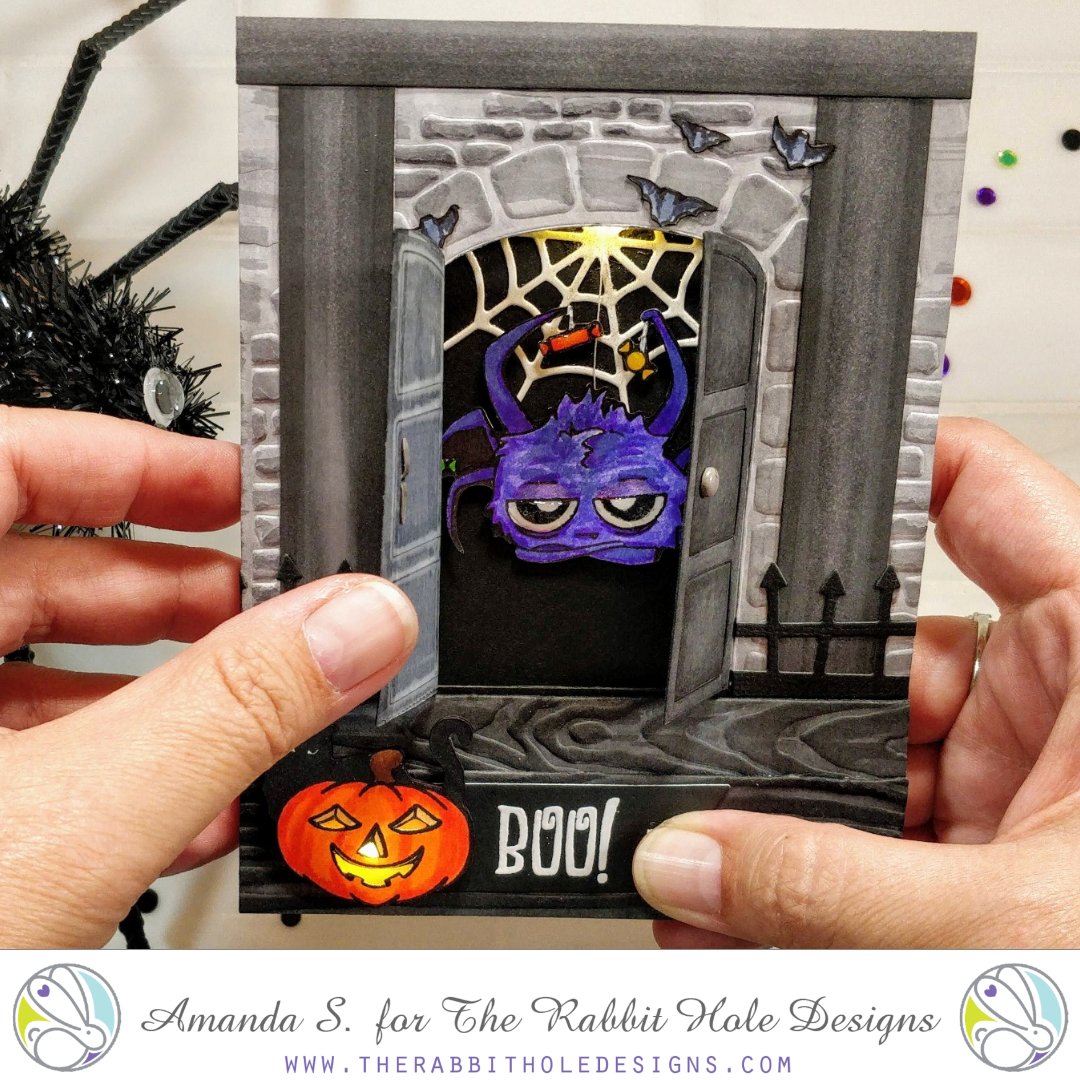
Hello my crafty friend, it's Amanda from Pear Blossom Press again! Now that fall is here, I wanted to revisit the Front Porch Card I made over the summer and give it a Halloween makeover. This time I added lights too! Take a look at it in action...


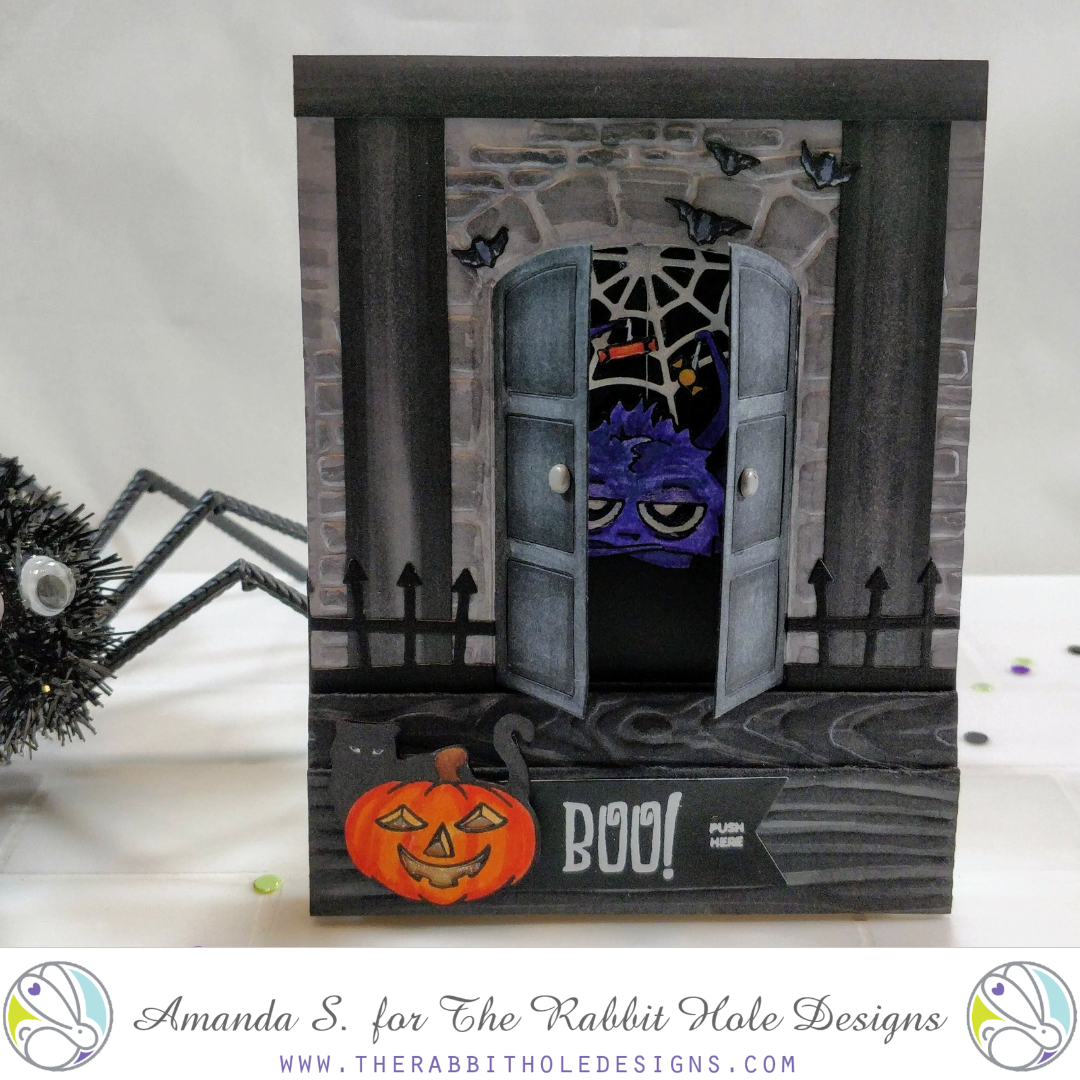
For the spooky version of the card, I switched up the colors and decorative elements. You can see the original card and how to build the frame here. Instead of a white house, I colored it in shades of grey with Copic Markers. This time around, I kept the cutouts from the door panels and taped them back in place. I added a spooky fence in front of the pillars and swapped the flowers and stars for a jack-o-lantern and bats from the Hex Yeah stamp set. Instead of the kissing couple behind the doors, I've got the Caffeinated Spider swinging from a piece of thread. Notice she's holding candy where her coffee mugs usually are. I just masked off the mugs on the stamp before stamping, then stamped candy in their places, and used a Copic liner to connect the legs lines. I embossed boo and push here onto a die cut banner and tucked it behind the pumpkin.

This card has three different interactive elements to it. First, the doors open. The Impresslit I used both cuts the doors, and embosses the stone pattern around them. So all of the work is done with one pass in the Big Shot. The second interactive element is light! I used one of my EZ-Lights and taped the battery to the back of the bottom step (with the switch lined up under the push here stamp). Then, I simply punched a hole through the step, threaded one of the lights through, and taped it in place behind the pumpkin. I taped the other two lights above the center of the doors to light up the spider and her web. The last interactive element is the swinging spider. To do this, I just taped a piece of thread to the back of her, then sandwiched the top of the thread between two layers of foam tape. By using a double layer of foam tape all the way around the back side of the porch piece, it left her plenty of room to swing, and room for the light to bounce around.


I love how this one turned out! In fact, this card actually inspired the first card, even though it hadn't been made yet. Being on The Rabbit Hole Design's design team, I knew the jack-o-lantern stamps were coming and that got me thinking about creating a front porch to put them on. Since it was early summer, and I had been searching for porch decor on Pinterest, my feed was full of great ideas for summery porch scenes. That's when I realized this card base could be adapted to any season. (I already have a Christmas card in mind.) What kind of scene would you make?

You can find the sister article to this post on my blog today, along with links to the specific products I used. Soon, you'll be able to find my EZ-Lights here at The Rabbit Hole Designs. Until then, you can find them here. Be sure to pick up these items to recreate today's card...

Hex Yeah
Boo to You
Caffeinated Spider (available September 30th)
Liquid Pixie Dust
Diamond Glaze

Thanks for stopping by today! I'll be back soon with more fun cards to share!

I Put A Spell On You by Niccole

Hello everyone!


It's Niccole from Nic & Viv Designs back again to share another card I made using one of The Rabbit Hole Designs stamp sets. 

For today's card I used the Hex Yeah, Gourd-geous, and Pumpkin Friends stamp sets.


How to create this card:


  • Standard black A2 sized card 
  • Add white piece stamped with the Hex Yeah sentiment, and Pumpkin Friends image
  • Copic color the big pumpkin
  • Stamp the pumpkin from Gourd-geous stamp set and Copic color him on a scrap piece of paper
  • Fussy cut him out or use a Scan-N-Cut like I did
  • Cover up the small pumpkin on your white panel with the Gourd-geous pumpkin
  • I used foam tape to make him pop
  • Add black and white stripe paper to top and bottom of your card
  • Finish with some crystal gems
Here is one more picture of the full card ...


TRHD Products used:

Pumpkin Friends

Hex Yeah

Gourd-geous

For more inspiration, updates, and news make sure to check out these places

The Rabbit Hole Designs YouTube


I have had so much fun playing with the Hex Yeah, Pumpkin Friends, and Gourd-geous stamp sets.

Thank you so much for stopping by and spending some time with me.

Until next time ... Hugs & inky fingers!   -Nic-