Pages

Showing posts with label Love You More - Christmas Frost. Show all posts

Christmas is... Creating a fun and easy stenciled background.


Hello Rabbit Hole Design Fans! Today I am sharing this fun winter card called "Christmas is..."  using the Slice of Christmas stencil to create a frosty striped background with the Love You More - Christmas Frost stamp set.
  

I stamped the image  of this couple in the middle of  holiday shopping a on to a piece of 4" x5 1/4" white cardstock. I colored the image with Triblend alcohol markers.  I masked of the image with a  scalloped circle cut from cardstock. 


I used speckled Egg Distress Oxide Ink , a Cotton Tail blender brush and the snow drift from the Slice of Christmas stencil to create a organic striped background.  I splattered a few taps of Bubble Gum Silk to add small specks  of color to the card front.  I removed the scalloped circle mask and stamped  the "All I want for Christmas is you" Sentiment at the top of the card.  I tied a white organza ribbon in to a bow and secured it to the top  of the card just under the sentiment.  I attached the Card front to a Pink A2 Card base to complete the card.

Here are The Rabbit Hole Design products used in this card:


Thank you so much for stopping by The Rabbit Hole Designs Blog today.  I hope you enjoyed this easy to stencil card featuring the Slice of Christmas stencil and the Love you More - Christmas Frost stamp setI love hearing from you. Leave me a message letting me know in what month do you start making your Holiday cards?   


Be Creative ~ Stay Inspired
Jenn Gross

Follow me, Journey Coach Jenn, on 

Glimmery Shimmery Candy


Hey yall!  Happy Friday!  Tangii here with another creation from the July release! I hope you've had a great week and have something fun planned for the weekend!  Every time I look at the Candy Twist Die I keep thinking "shaker"... so here we go!

I started off embossing some paper with red, green and silver glitters.  I used a Cotton Tail Blending Brush for covering the paper with the embossing ink.  Next I used the Candy Twist Die in all 3 sections.  I used the frames of the red and green only, the silver was just to give me a few wedges for filling in.

With all of that done, I adhered the glittery pieces to my acetate, and adding a red frame around (to cover my foam tape frame).  I shook out some sprinkles on to the acetate and then adhered the backing.

Finally I added a sentiment from the Christmas Frost stamp set and popped it up.

All of the items I linked in my post are available at The Rabbit Hole Designs.

You can also read about this card on my blog, here with links to the products I used, etc.  Thanks for popping by, come back again soon!

Love, under the sea

Hello there! Michelle here
With Valentine's Day approaching, love is in the air....and the sea!
I combined a few stamp sets and some masking to create this no line coloring card.
I love this cutie from Mermaid Hair and used her as my focus.
I used the big heart from Sassy Sentiments- Anti Valentine.
After my coloring was complete, I used stars and part of a sentiment from 
Love You More- Christmas Frost. The 'love' sentiment is from Put a Bow on It.


I began with a mask for both the mermaid and heart...
A. Mask the place where you want to stamp your mermaid, than stamp your heart.  
B. Remove the mask and cut along the heart outline on the mermaid body...this is
your second mask.


C. Place the second mask in it's original position and D. Stamp your mermaid.
 Using a Misti makes this a lot easier.


E. Remove the last mask and stamp the heart again. My placement was not
so perfect, but using antique linen distress ink for no line coloring allows
you to color over your mistakes!!
F. Start coloring...and have fun!!!
Here is a list of Copic colors:
fin, bubbles and bikini: BG11, BG13, BG18
body: E000, E00, E11, E93
hair: V000, V01, V12, V17, V17
heart: R24, R27, R29, R39
water: B32, B93, B24, B37
sand: E11, E13, E17
colorless blender for rays.
I stamped the stars with white ink and 'love' with festive berries distress oxide ink.
I added some white accents with a gel pen and shimmer with 
stickles glitter glue.


That's it for today!
Thanks for taking a trip down the rabbit hole!!!

Michelle

For more inspiration, updates, and news make sure to check out these places.


A Hoggy Post Holiday Card


Hello everyone and happy day after Christmas!
I have family in Iowa and live in So Cal, so speaking to them on Christmas they were at 58 degrees and beautiful weather with no snow and we were at 54 degrees with rain and wind, so it was a bit backwards for us.  I hope you all had nice weather, good food and took time to be present.  We celebrated with our oldest son, his wife and their one year old (my very active toddler grandson), my dad and my husband's sister.  Our youngest son and his little family were ill and spent the day at home recuperating. But we had a grand visit and some good food and it was a beautiful day! 

I have a fun card to share with you that showcases our Hoggy Holiday's stamp set and our Light Me Up stencil and I used the sentiment "Let it snow" from our Love You More- Christmas Frost stamp set. So let's get started on how this card came to be:


I started with a piece of Simon Says Stamp Card Stock in Schoolhouse Red cut to 4.25" x 5.5"
I then took our Light Me Up stencil and using White Pigment Ink and a blender brush, I stenciled the snowflake all over the card stock.  I then used the brush and blended more white ink all along the edges of the card stock.  I love how it looks like those frosted windows you see around the holidays with the center being the focal point.  I then let the panel dry.  I then used Ink On 3's Liquid Pixie Dust and splattered the background liberally, and oh my how I am in love with this!  I then used some white ink and watered it down and splattered the background with that as well..... and if I wanted to leave it at that I believe that would have carried this card, it was such a great panel.  But, I had this little piggy all colored up and could not wait to use him! I love his scarf and shirt and that hat... he is adorable!!!  So I cut him out, popped him up on fun foam and put him on the bottom left of the card.  Then I stamped the sentiment on black card stock 3 times with clear sticky ink and heat embossed with white, fine detail embossing powder and cut out small banners and popped them onto some foam as well.  After I placed all the elements on the card front and placed my panel onto a white A2 sized card base, I then took some Vicki Boutin Iridescent Texture Glitter Paste and put it on the tops of my sentiment strips and under neath my piggy, and since sparkle and glitter is AWESOME- I then sprinkled some Unicorn Glitter on top while the texture paste was still wet for more fun.


Hopefully you can see some of the chunks and sparkle in the close up pictures.... it is so pretty in real life.  I also put some glitter gloss on the white parts of the piggy's hat and then used a white gel pen and added some lines here and there for some added interest.


If you have any questions for me please feel free to leave me a message, and from my family to yours I hope you all had a wonderful Christmas!  I added links to the sets I used in the body of the post.  You can also get our stamp sets and stencils at Simon Says Stamp or at The Rabbit Hole Designs.


Love You More Christmas Card


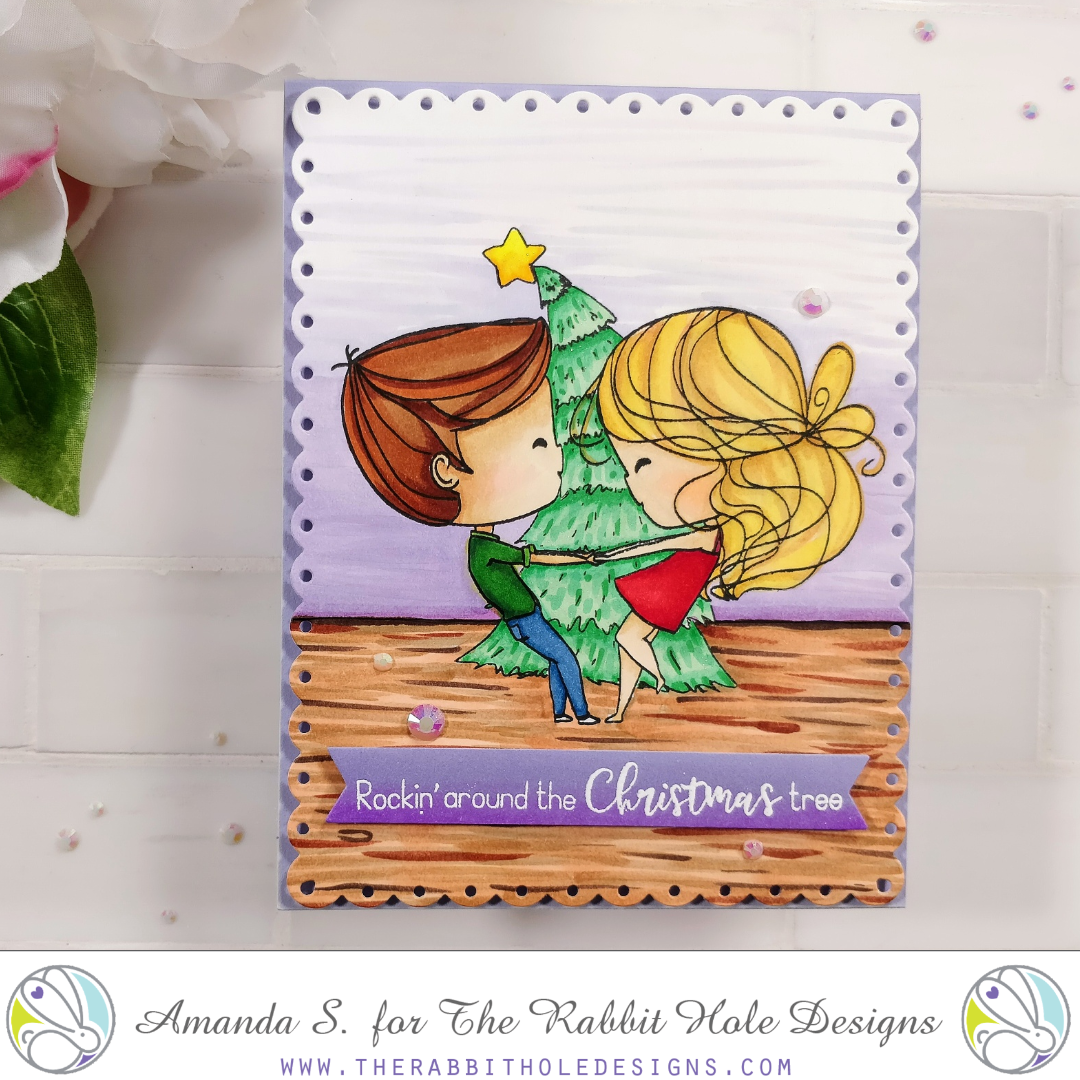
Happy Christmas Eve! It's Amanda from Pear Blossom Press and I wanted to share one last Christmas card with you this year. I stepped outside of my comfort zone to color a whole scene. I really tried to create a flat, one-layer card, but in the end, I couldn't do it. Lol, one of these days I'll actually make a completely flat card. Maybe that can be one of my new year's resolutions? (Who am I kidding, I won't keep that one either!)


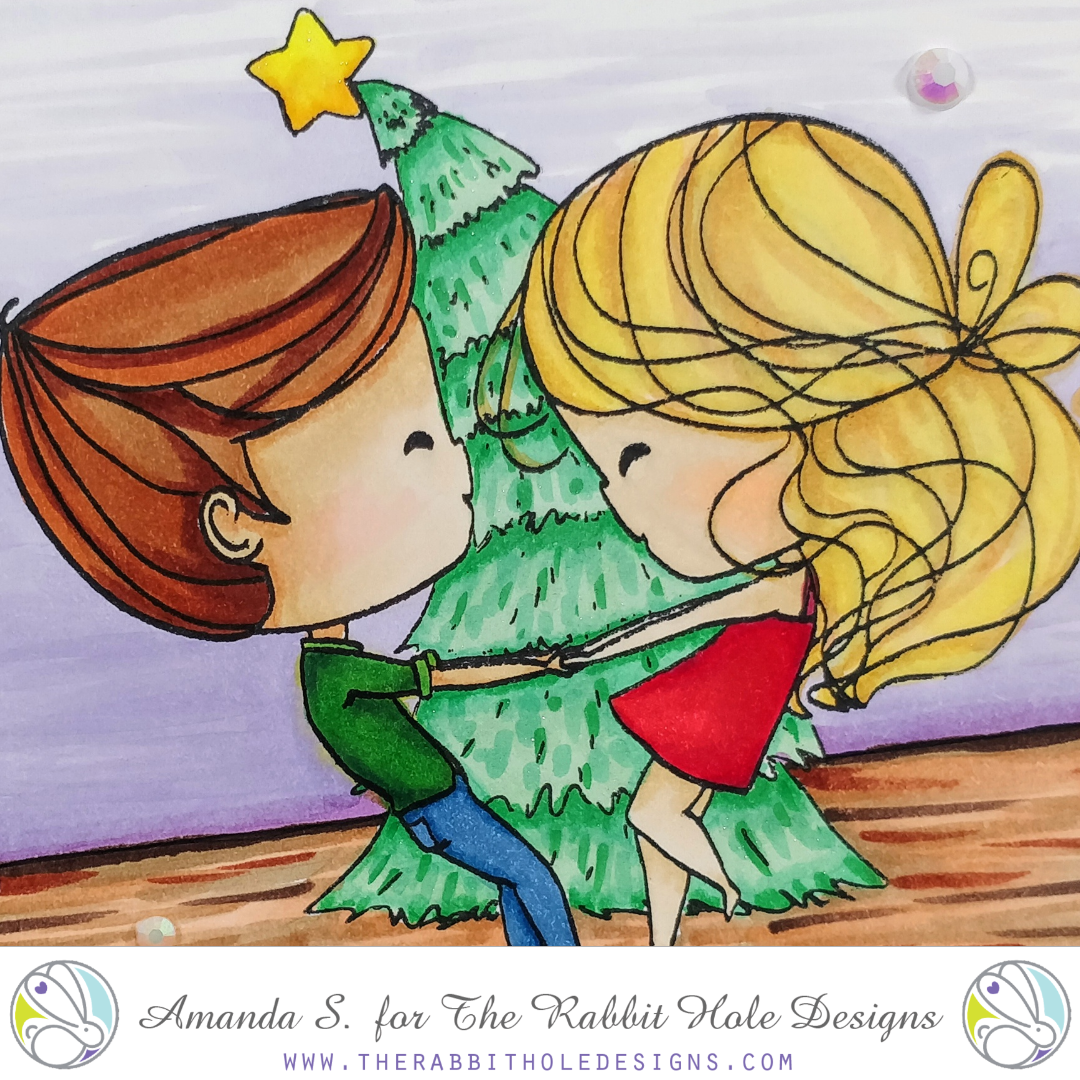
This card was very simple to make. I stamped the couple from the Love You More Heart Dance set. Then, I masked them off and stamped only the Christmas tree from the Love You More Christmas Frost set on top. When I removed the mask, the tree appeared to be in the background behind them. I used Copic markers to color the images, as well as the floor and wall. It was surprisingly easy to create the wood floor. I just used a ruler to mark a straight line separating the floor and wall. Then, I used several shades of E markers (browns) to draw in lines and a few ovals. I used the last and lightest shade to color over the whole floor. That toned down the contrast and helped blend the colors a little. For the wall, I used three shades of BV markers (blue violet), darkest at the bottom and worked my way up to feather off into white. I used the 0 Blender marker to soften the last lines at the top and help them blend. I really like the wispy lines at the top; they give the wall texture without too much contrast. 


My plan was to stamp the sentiment onto the wood floor, but I was afraid it would get lost. So I stamped it onto a piece of pale violet cardstock and die cut it with a fishtail banner. At this point, I knew the card wasn't going to be a single layer, so I decided to decorate it a little more by cutting the scene out with a scalloped rectangle and layering it onto a pale violet card base. I used foam to pop up both the scene and the sentiment. Yes, that means my flat card has three layers, but that's still less than normal for me, right? I played with the placement of the flat-backed gems, trying them first as ornaments on the tree, but I decided I liked them scattered on the scene better. To keep the tree from feeling naked, I added some sparkle with an Aqua Shimmer pen. 

What do you think of my almost flat card? Do you prefer lots of layers, or stamping/drawing a scene? If I had thought about it more, I probably could have moved the images down on the panel and stamped the sentiment at the top. Then I might have actually made it one layer. Knowing me, I probably wouldn't have been happy with it though. 

Happy holidays my crafty friend! I'll be back soon with more fun cards! (It's almost time for the new release; I hope Santa brings you a gift certificate because you are going to want it all!) In the mean time, you can find more inspiration with the Love You More sets here and here. Head on over to my blog for links to the specific products I used.

December Guest Designer Jessica Frost-Ballas

As December wraps up; We are pleased to bring you one more card from one of our December 2019 Guest Design Team Members ... Jessica Frost-Ballas.
We sent Jessica the Love You More - Christmas Frost stamp and we think she knocked it out of the park with this project. 

To see all the details please click here -> Love You More - Christmas Frost


This is what Jessica had to say about our Love You More - Christmas Frost stamp set ...

"I'm LOVING this set!! The Love You More - Christmas Frost is a charming set for the holidays with a loved one and the sentiments are perfect!  I love the slightly nerdy look of the husband and he reminds me a lot of my own husband who is super patient with me when it comes to holiday shopping and decorating! 😉" 

You can find Jessica here at her blog ------> All The Sparkle

You can also find her IG here ------> @jessicafrostballas

Make sure you go back and see Jessica's post from Friday December 13th, to see what Jessica originally had to share with us. 
~

Thank you so much for stopping by today!

December Guest Designer Jessica Frost-Ballas

We are pleased to bring you another one of our December 2019 Guest Design Team Members Jessica Frost-Ballas.


We sent Jessica the Love You More - Christmas Frost stamp and we think she knocked it out of the park with this project. 

To see all the details please click here -> Love You More - Christmas Frost


This is what Jessica had to say about our Love You More - Christmas Frost stamp set ...


"I'm LOVING this set!! The Love You More - Christmas Frost is a charming set for the holidays with a loved one and the sentiments are perfect!  I love the slightly nerdy look of the husband and he reminds me a lot of my own husband who is super patient with me when it comes to holiday shopping and decorating! 😉" 


You can find Jessica here at her blog ------> All The Sparkle

You can also find her IG here ------> @jessicafrostballas

Make sure you stop back on Monday December 23rd, to see what Jessica has to share with us one more time.
~

Thank you so much for stopping by today!

The Most Wonderful Time of the Year!


Good morning everyone, Lisa here from the DT!

I'm so excited because tomorrow starts the New Release Reveal
for The Rabbit Hole Designs and I'm anxious to share all of the
new products with you.  I have been busy creating lots of cards
to show you and you are going to love the new release!

As for today I have one more card to share with you using the
Love You More - Christmas Frost stamp set from this month's release.
I just love this sweet couple, they epitomize the family fun that everyone
looks forward to on the holidays! Whether it's decorating the tree or lighting
the menorah, holidays are meant for family!

Card Recipe

For today's card I started out with a piece of smooth cardstock and 
the Diamond Flower Stencil.  I taped the stencil down and blended
some Tattered Rose Distress Ink over it getting lighter at the edges.

I colored that sweet couple with some watercolor pencils, cut 
them out and popped them up over the stenciled pattern.
I stamped a sentiment in the top right corner from the 
Hoggy Holidays stamp set in black ink.

Lastly I added a scalloped border with some glittered cardstock
and used the same cardstock to cut out a star for the tree.


I am so pleased with how this card came out and apparently so was my
mom because she snatched it up to give to a friend.
It makes me so happy when she gives my cards away!

Thanks so much for stopping by today and make sure 
to check back tomorrow for the December New Release!
There will be lots of fun, inspiration and as always
an awesome giveaway!

For more inspiration, updates, and news make sure to check out these links.


Have a great day, I already am!
🎄Lisa 🎄

All I Want for Christmas

Hello there!


DTM Michelle here from My Passion for Crafting.  
Today I am sharing a slim line card using the stamp set
This card measures 3 1/2 by 8 1/2. I inked up the card
base with shabby shutter and black soot distress oxide inks.
Than I embossed the background with stars and white embossing powder.
To finish the background I splattered some gold paint. 


I colored the adorable couples with Copic Markers. 
I added some Stickles glitter glue for a hint of shimmer.
All sentiments were embossed with white powder.


Thanks for stopping by today!

Michelle

For more inspiration, updates, and news make sure to check out these places.

All I want for Christmas...

Happy Saturday! Charmaine from CharCards here to post my last blog entry for The Rabbit Hole Designs. It has been a blast working with so many incredibly talented people!
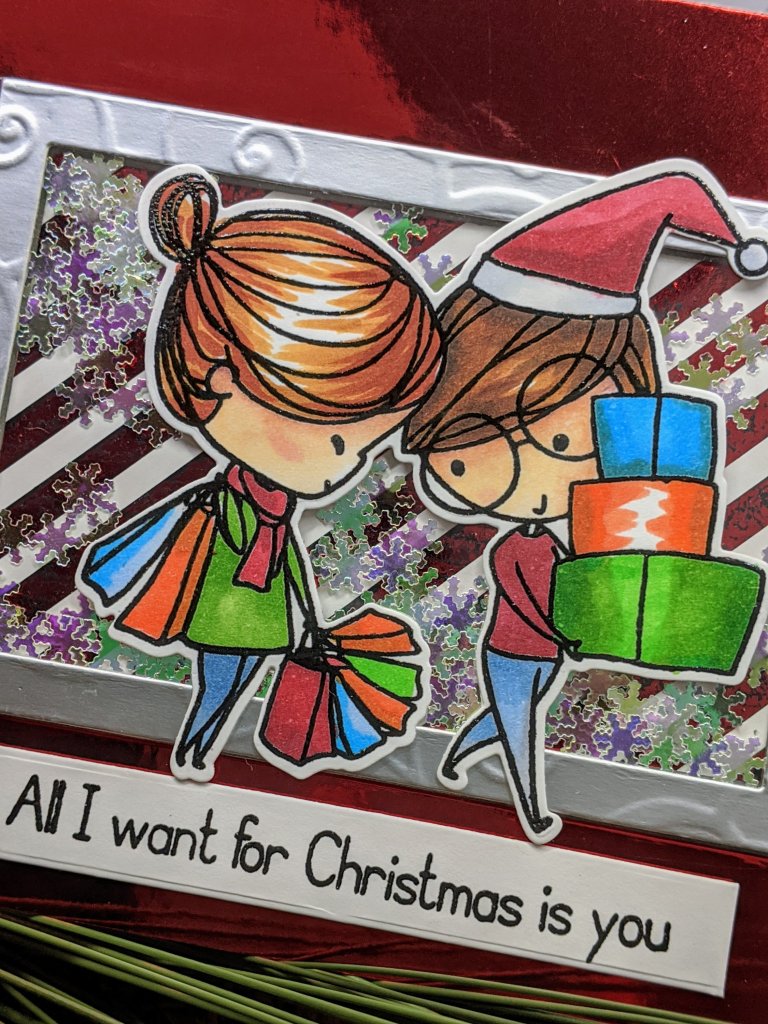
I hope you like my last card featuring this beautiful and sweet Love you more Christmas Frost stamp and die set. How appropriate for me to end with a shaker card!

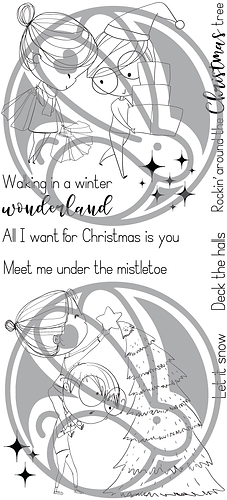
Love you More - Christmas Frost 4x8

This stamp and die set is also available at Simon Say Stamp.


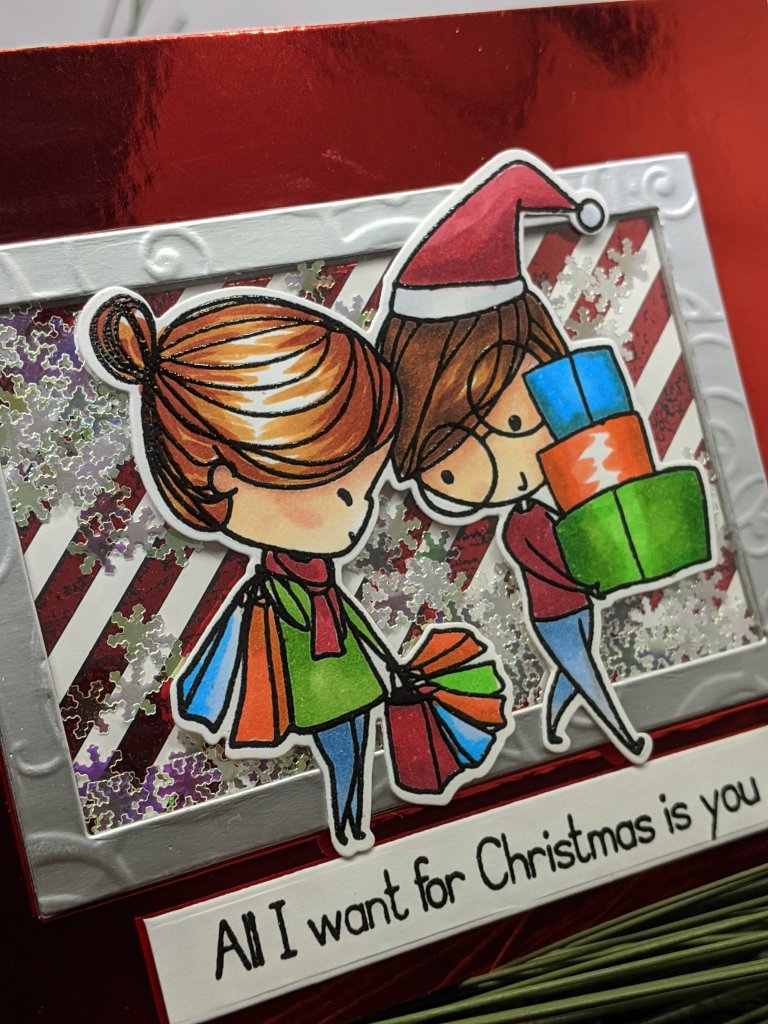
This was a very simple card to make. Basic shaker elements, a little bling and a beautiful stamp. I feel it is necessary to buy the coordinating die as even my Brother Scan N Cut had some difficulty cutting the space in between the lovebirds.


I used Copic markers for the stamp and red and silver mirror card stock for the background. The frame inside is easy to create; MFT carries a metal die set that will cut three different sizes of frames. I used the medium size for the silver frame.
Quick Tip: If you use shakers and want some shakers to stay more to the top instead of all being at their feet, glue some shaker elements with some clear glue. 
Also, don't be afraid of color! See what works. This is what I imagined looking like walking down the streets after shopping!


For more inspiration, updates, and news make sure to check out these awesome places!

The new release is around the corner and if you love this couple as much as I do, you don't want to miss it!

Hope to see you around and keep on crafting!
Hugs and Kisses,
Charmaine Canham
www.facebook.com/charcards2017


One Set Wonder - Christmas Frost


Hey crafty friend, it's Amanda from Pear Blossom Press again! It's getting to be the time of year where we have to stretch our crafty pennies, so we can afford all of the gifts and goodies we want to share for the holidays. I thought it would be nice to show you an idea for a Christmas card that is not only quick and easy to recreate, but only uses one stamp set! Just because it's quick and easy doesn't mean that it has to be boring though, right? There's an Action Wobbler under the image, so this card is fun to play with too! See...


For this card, I stamped, embossed, and Copic colored the couple from Love You More - Christmas Frost. I used my ScanNCut to cut the image out, but there are coordinating dies available if you prefer. My background was ink blended directly onto a white card base. I just taped off strips and used makeup brushes to blend on several shades of distress oxide inks. Once the background was dry, I stamped and embossed the sentiment on the left side and popped the image up with a Mini Action Wobbler. To finish the card, I glued sequins on, and added Aqua Shimmer highlights, plus a coat of Diamond Glaze, to his glasses and the star. After the Diamond Glaze was dry, I added white reflections to the glasses, star, and top of the tree. Easy peasy, and fast!

If you have children that like to craft with you, it would be sweet to let the kids color the images while you ink blend the backgrounds. That way the whole family gets to help! I don't know about you, but I cherish the cards I've received that were obviously made by children. Don't forget to have them sign the backs too!

Thanks for stopping by today. I hope I've inspired you to create a few one-set-wonder cards yourself! If you'd like to see more inspiration using this stamp set, you might like this article, or this one. You can also find the sister article to this post on my blog today, with links to the specific products I used. I'll be back soon with another fun card to share.

November Release Inspiration Hop ~ Day 1


Hello and welcome to Day 1 of the Inspiration Hop. We are so excited for you to join us as we present to you our November release.  Our fabulous Design Team will be sharing their projects over the next 3 days, so be sure to visit their blogs and leave them some crafty love.

 The 4 new stamp sets, coordinating die's & 1 Stencil are available to purchase right now in the shop.
~
Every order placed will be eligible for a 10% discount. Discount Code TRHD2019 this code will only be accepted until Friday 11-01-2019 12:01 am PST. Excludes Crafters Essentials. Not applicable to previous orders. May be used more than once. Does not apply to shipping and tax.
**Please Note: Free Shipping WILL NOT be available during the time this discount code is in effect. **
~

The stamp set that is being highlighted today is:

Love you More - Christmas Frost


**Giveaway**
To celebrate day 1 inspiration The Rabbit Hole Designs is giving away the stamp set Love you more - Christmas Frost to One lucky winner. Winner will be chosen at random from the comments left on participating blogs, so make sure to visit each stop and leave a comment. Leave comments by 11:59 pm PST 10-31-19 on all participating blogs. Winner will be announced on The Rabbit Hole Designs blog 11-01-2019


Here is the line up for the hop:
Amanda Stevens
Amanda Wilcox
Lisa Golzbein

Make sure you come back tomorrow for Day 2 of our Inspiration Hop.


Thank you so much for stopping by today!