Pages

Showing posts with label masking technique. Show all posts

Hello Gorgeous!
 

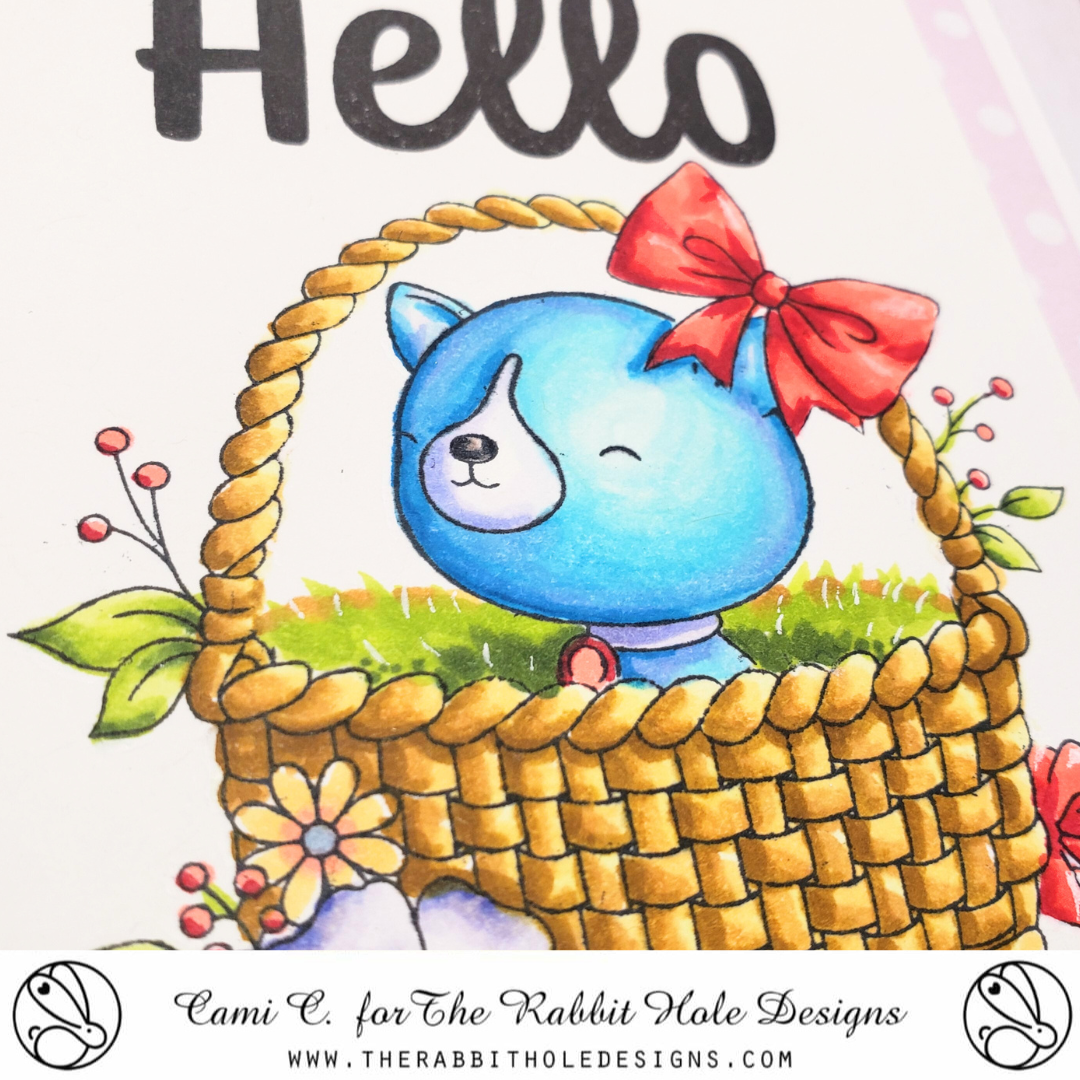
Hey there crafty friends! Now here is a basket full of adorable!  This little blue dog is content sitting outside in the sun just soaking in the beautiful day!

Today I am sharing this lovely card featuring The Rabbit Hole Designs' new Easter Basket stamp set paired with the Year 5 Birthday stamp set (both are illuastrated by Agota Pop) and the Hello word stamp set. 

I started by stamping the Easter Basket stamp on a piece of Masking Magic. I cut the basket out and used a craft knife and cutting mat to carefully cut out the inside area with the eggs. I use this part to mask off the inside of the basket, when I stamped it on coloring cardstock. This way the basket appears empty.  I remove the inner mask and placed the basket mask over the stamped basket image and stamped the dog to sit inside the basket and his bone to the right side of the basket. After removing  the basket mask,  my image is ready to color. 

I colored the dog with blue (B) OLO markers and the basket with orange (O) and orange red (OR) OLO markers. I added grass to the basket using green (G) and yellow green (YG) OLO markers.

The sentiment is from the Hello Word stamp set.  I stamped Hello and gorgeous on the card front using Versafine Black Onyx ink. The finished card panel is trimmed and glued to a 4" x 5 1/4" pale purple polka dot cardstock and attached to an A2 card base completing the card.

Supplies used 

Thank you, I appreciate you taking time from your day to stop by and check out my Hello Gorgeous card on The Rabbit Hole Designs Blog. I hope you are inspired to create something lovely today!


Be Creative ~ Stay Inspired

Jenn Gross


Follow me:

Instagram - https://www.instagram.com/journeycoachjenn/

YouTube - http://www.youtube.com/c/JourneyCoachJenn

Blog - http://www.journeycoachjenn.com/


For more inspiration, updates, and news make sure to check out these places


The Rabbit Hole Designs

The Rabbit Hole Designs Instagram

The Rabbit Hole Designs Facebook Page

The Rabbit Hole Designs Pinterest

The Rabbit Hole Designs YouTube


Yappy Birthday! - The Rabbit Hole Designs 5 Year Celebration!


Hello my crafty friend!  Hope your new year is off wonderful start. The Rabbit Hole Designs is celebrating 5 years, Happy Birthday!


Let's get this pawty started and take a closer look at how I created this card!
I started with a piece of 4" x 5 1/4" premium coloring cardtock.  I stamped the image of the dog with balloons in the center using a stamp positioner.  I stamped a second image on a piece of Masking Magic. This is a reusable delicate tack adhesive backed paper used to block of areas on a project. You can either fussy cut the mask image or die cut it using the coordinating dies. I placed over the stamped image on the cardfront.  

I used a low tack sticky mat under the card front to hold it while I ink blended the background with pink and purple Distress Oxide inks.  I placed the Mid-Century Modern #2 layering stencil, the starburst layer, over the top of the ink blended card front.  It is a 6x6 stencil and grips to the sticky mat over the A2 card front.  For this technique you can use a damp baby wipe or damp paper towel to daub over the starburst openings.  Daubing the slightly damp cloth will lift off some of the ink color on the blended background.  When you remove the stencil, you will see the starburst shapes show up lighter on the background.
I moved the card front from the sticky mat to a splatter box and a proceeded to add splatters of white ink using a paint brush and slightly diluted white liquid ink.
I pealed off the Masking Magic and colored the birthday balloon dog image with OLO Alcohol Markers.
I die cut the Happy, Birthday, and You Scripty Word and Shadow Layer dies from pale pink cardstock. I used the "Y" from You to replace the "H" in Happy making it read "Yappy Birthday" for the sentiment. I glued the sentiment into place and added Clear Sparkle Enamel Dots to the front of the card.  The finished card front is attached to an light pink A2 card base.

The Rabbit Hole Designs Products

Thank you, I appreciate you taking time from your day to stop by to celebrate 5 year with The Rabbit Hole Designs.  I hope you are inspired to create something lovely today!


Be Creative ~ Stay Inspired

Jenn Gross


Follow me, Journey Coach Jenn, on 

Instagram - https://www.instagram.com/journeycoachjenn/

YouTube - http://www.youtube.com/c/JourneyCoachJenn

Blog - http://www.journeycoachjenn.com/


For more inspiration, updates, and news make sure to check out these places


The Rabbit Hole Designs

The Rabbit Hole Designs Instagram

The Rabbit Hole Designs Facebook Page

The Rabbit Hole Designs Pinterest

The Rabbit Hole Designs YouTube

A Look Back at 2023 - Fun Holiday Birthday Card

Hello there crafty friends! We are looking back at a sweet winter birthday card create this past summer using two stamps sets from The Rabbit Hole Designs - Christmas In July Release from 2023.

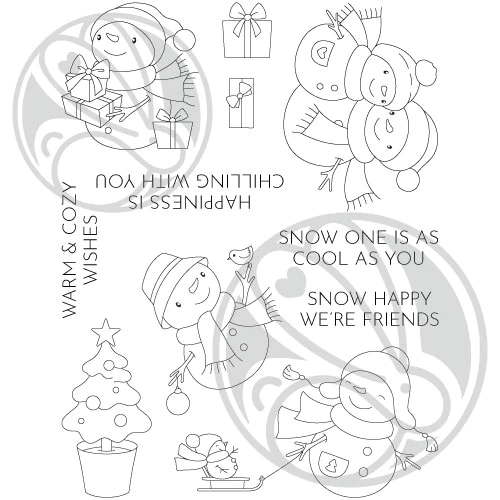
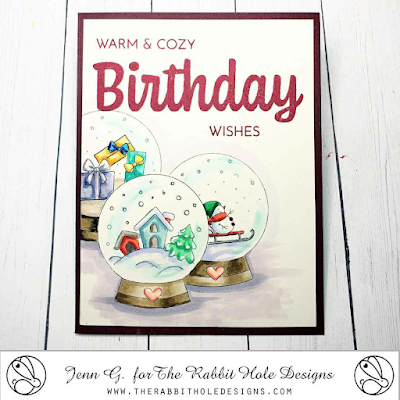
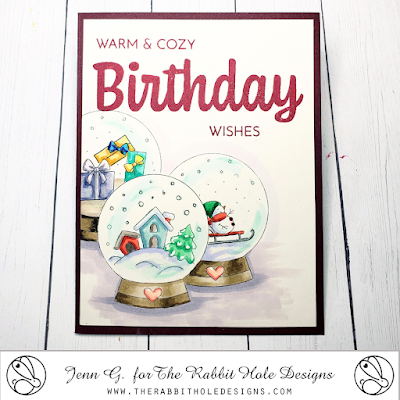
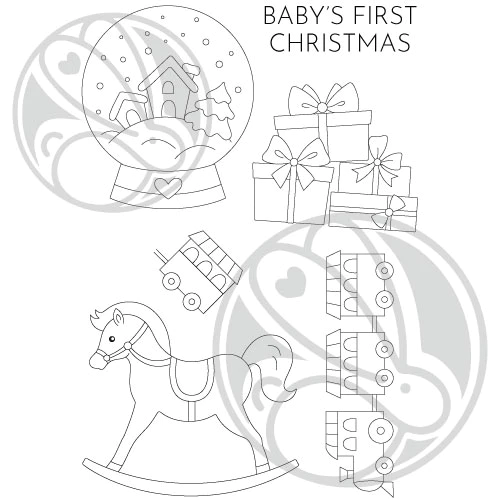
The Rabbit Hole Designs Baby's 1st Birthday stamp set, Warm & Cozy stamp set, and Birthday Scripty stamp set were combined to create this A2 Snowglobe Birthday Wishes card.

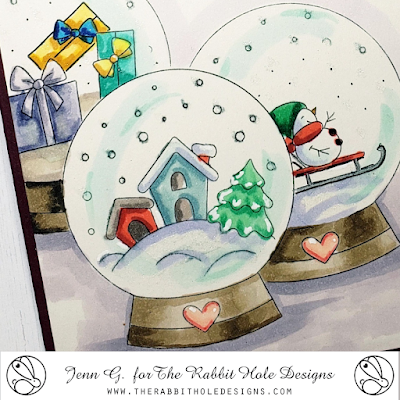
I stamped the snowglobe image on a 4" x 5 1/4" piece of coloring cardstock and masking it off.  I stamped the snowglobe two more times masking the middle of these two globes.  I added the sledding snowman image to the partial snowglobe on the right and the gifts to the partial snowglobe on the left.
I colored each of the snowglobe images and added shading using OLO Markers. A sparkle pen is used to add glitter to the snowglobes.
I positioned and stamped the sentiment in red ink and glued the card front to a dark red A2 card base.


Thank you for stopping by check out today's look back at one of my 2023 The Rabbit Hole Designs card.  I hope you are inspired to create something lovely today!

Be Creative ~ Stay Inspired

Jenn Gross


Follow me, Journey Coach Jenn, on 

Instagram - https://www.instagram.com/journeycoachjenn/

YouTube - http://www.youtube.com/c/JourneyCoachJenn

Blog - http://www.journeycoachjenn.com/


For more inspiration, updates, and news make sure to check out these places


The Rabbit Hole Designs

The Rabbit Hole Designs Instagram

The Rabbit Hole Designs Facebook Page

The Rabbit Hole Designs Pinterest

The Rabbit Hole Designs YouTube 


Hello friends,

I'm back with this fall foxy friends. Isn't he the cutest strutting little fella?

For this card, I used the little plastic pop-outs from the Falling Leaves stencil, placed them on the white cardstock, and then spritzed the background. After it dried I removed the plastic pieces and then splattered the cardstock with gold.

The Fall Foxes stamp set and the Falling Leaves Stencil are such a perfect pair. 

I hope you enjoy this card.

Hugs,

Wendy

Snowglobe Birthday Wishes


Hello there crafty friends!  Thank you for stopping by to check out today's fun snowglobe birthday card!

This card is created with two stamps sets from The Rabbit Hole Designs new Christmas In July Release and inspired by the Craft Roulette weekly card challenge. The card needed to includes these parameters:
1) Type of Card - a Birthday card 
2) Colors - picnic colors (red and white)
3) Theme -  a collection (3 snow globes)
4) Random - black dots (snowman buttons)

I am using The Rabbit Hole Designs Baby's 1st Birthday stamp set, Warm & Cozy stamp set, and Birthday Scripty stamp set for this A2 Snowglobe Birthday Wishes card.

I stamped the snowglobe image on a 4" x 5 1/4" piece of coloring cardstock and masking it off.  I stamped the snowglobe two more times masking the middle of these two globes.  I added the sledding snowman image to the partial snowglobe on the right and the gifts to the partial snowglobe on the left.
I colored each of the snowglobe images and added shading using OLO Markers. A sparkle pen is used to add glitter to the snowglobes.
I positioned and stamped the sentiment in red ink and glued the card front to a dark red A2 card base.
 
The Rabbit Hole Designs Products 

Thank you for stopping by The Rabbit Hole Designs Blog to check out today's card.  I hope you are inspired to create something lovely today!

Be Creative ~ Stay Inspired

Jenn Gross


Follow me, Journey Coach Jenn, on 

Instagram - https://www.instagram.com/journeycoachjenn/

YouTube - http://www.youtube.com/c/JourneyCoachJenn

Blog - http://www.journeycoachjenn.com/


For more inspiration, updates, and news make sure to check out these places


The Rabbit Hole Designs

The Rabbit Hole Designs Instagram

The Rabbit Hole Designs Facebook Page

The Rabbit Hole Designs Pinterest

The Rabbit Hole Designs YouTube


Sweet Summer Watermelon Card


Hope you are keeping cool!  We have been in the high 80° (F) in the Midwestern U.S. and cold watermelon is delicious on a hot summer day! 

I am using the One in a Melon stamp set with the coordinating dies to create this fun summr treat of a card!  Join along as I share the stamp, ink blend and heat emboss steps for today's card.
I started out by die cutting a heart shape from Masking Magic.  I peeled off the release paper and positioned it in the upper middle of a 4" x 5 1/2" piece if off-white colored cardstock. Using the Cotton Tail blending brushes, I ink blended a shade of pink watermelon ink around the masked off heart shape and used a green ink to frame the perimeter of the card.  I stamped the watermelon wedge image in a random pattern using a darker green ink.  I splatter the card front panel with dark brown liquid pigment.

I removed the heart mask after the ink and splatters dried and rounded the corners of the card front.

I stamped out the You are one in a Melon sentiment with green VersaMark ink and stamped the same image directly over the first with clear embossing ink before heat embossing it in clear embossing powder. The sentiment is then cut to a rectangle.

The watermelon popsicle is colored using OLO markers.  I used a clear embossing pen over the pink watermelon and heat set clear embossing powder over the top befor cutting out the image.

 Both images are positioned in the heart and adhered with forma squares. The light pink A2 card base also has it's corners rounded before gluing on the watermelon card front.


The Rabbit Hole Designs Products
Cottontail Blending Brushes
Adhesive Foam Squares

Thank you, I appreciate you taking time from your day to stop by and check out The Rabbit Hole Designs June Release Blog. I hope you are inspired to create something lovely today! 


Be Creative ~ Stay Inspired

Jenn Gross


Follow me, Journey Coach Jenn, on 

Instagram - https://www.instagram.com/journeycoachjenn/

YouTube - http://www.youtube.com/c/JourneyCoachJenn

Blog - http://www.journeycoachjenn.com/


For more inspiration, updates, and news make sure to check out these places


The Rabbit Hole Designs

The Rabbit Hole Designs Instagram

The Rabbit Hole Designs Facebook Page

The Rabbit Hole Designs Pinterest

The Rabbit Hole Designs YouTube

Versatility on Your Stamps


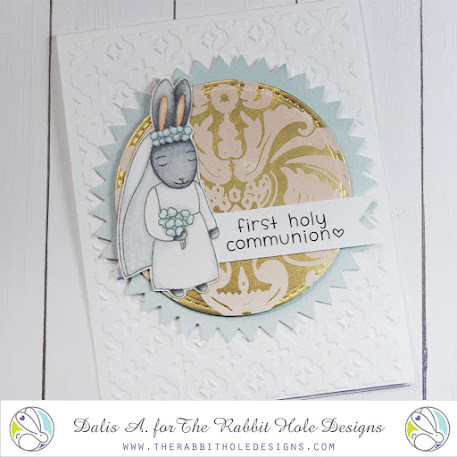
Looking at your stamps in a different way is always the best part of getting a new stamp set. The "Happily Ever After" is a sweet wedding stamp set, but what else can it be? If you mask the groom bunny out of the picture you get this adorable girl bunny that is perfect for a First Holy Communion card. What else do you see when you look at the Happily Ever After couple? Maybe a PROM card, if you mask the veil of the bride? 
After coloring the bunny with alcohol markers, I decided to create the golden backdrop with some stickers to convey the idea of the osties. The embossed folder used even though does not have a cross image, it does bring an idea of a cross, helping bring the theme and the card all together.


For more inspiration, updates, and news make sure to check out these places:

Floral Flamingo Friend - A2 Stenciled Card


Hello my crafty friends!  Welcome to todays The Rabbit Hole Design blog. I love all the sentiments that come with the Flamingo Botanical stamp set. you really need to check it out!  This sentiment I chose for this card reads: "If I had a flower for every time you made me smile and laugh I could walk in my garden forever".  Don't you just love it? I am featuring the Flamingo Botanical stamp set, the Circle Illusion stencil, and the Cotton Tail Blender Brushes.


The stenciling is super simple.  I used a low tack tape to secure an open circle mask/stencil on a piece of 4"x 5 1/4" white cardstock on the lower right . I stamped the Circle Illusion stencil over the top of the  open circle.  I chose Speckled Egg and Shaded Lilac Distress Oxide inks for the stencil blending with my Cotton Tail Blender Brushes.  

I stamped the gorgeous sentiment to the top left of the card front, attached it to a slightly larger piece of pink cardstock.  I tied a thin black organza ribbon around the car just under the sentiment and tied a bow.  

I colored the Flamingo image from the Flamingo Botanical stamp in pink and coral alcohol markers, fussy cut it out and attached it to the card from with double sided foam tape. I added a few of the sequins to the lower front left of the card front and attached it to a navy A2 card base completing the card.


Here are The Rabbit Hole Design products used in this card:


Flamingo Botanical stamp set 4x6


Circle Illusion stencil 6x6


Cotton Tail BlenderBrushes 


I hope you enjoyed this fun flamingo card featuring the Flamingo Botanical stamp set, the Circle Illusion stencil, and Cotton Tail Blender Brushes   I love hearing from you. With The Rabbit Hole Design Release next week, what do you hope to see?    


Be Creative ~ Stay Inspired

Jenn Gross


Follow me, Journey Coach Jenn, on 

Instagram - https://www.instagram.com/journeycoachjenn/

YouTube - http://www.youtube.com/c/JourneyCoachJenn

Blog - http://www.journeycoachjenn.com/


For more inspiration, updates, and news make sure to check out these places


The Rabbit Hole Designs

The Rabbit Hole Designs Instagram

The Rabbit Hole Designs Facebook Page

The Rabbit Hole Designs Pinterest

The Rabbit Hole Designs YouTube


Cookin' Up a Brew

Hello Everyone! Justin here, and today I am sharing a project I created using the Spellcaster Witch set and the Things a Witch Might Say set, part of the August Halloween Release!

To make this project, I stamped the witch and cauldron from the Spellcaster Witch set, colored them with Copic Markers and fussy cut them out.

For my backgrounds, I cut a 4.25" and 5.25" square piece of white cardstock, and then a 4.5" and 5.5" square piece of black cardstock.

For the 4.25" piece, I used a wreath creator tool to help use the detail stamps and create a circular pattern. I colored all the elements with Copic markers and then masked them all. I ink blended over them using purple die inks and then removed the masks. I adhered this panel to the 4.5" square piece to give it a black frame.

For the 5.25" piece of white cardstock, I created an ombré using red, pink and purple dye inks. I spritzed this layer with water, let it dry, and then placed the Twisted Sunshine stencil over top. Using a black dye ink, I applied a solid layer over the stencil. I removed the stencil and adhered this panel directly to the 5.5" piece of black cardstock to give it a frame.

I then took the smaller square panel and adhered it to the center of the larger square panel.

Using the Things a Witch Might Say, I heat embossed the sentiment "You had the power all along my dear", in white powder on black cardstock, trimmed it to a strip and then framed it with hot pink cardstock.

I now was able to finish up my card. I adhered my witch, cauldron and sentiment using foam tape, and then adhered a few Rabbit Hole Designs sequins to the card for embellishment. I adhered my panel to a 5.5" square card base and my project was finished!

This project uses the following Rabbit Hole Designs products:


For more inspiration with your The Rabbit Hole Designs Creations, be sure to follow along at these other locations:


For more details about products used in this post, you may also follow along at my personal blog, Just a Note by Justin, as well!

I hope this project leaves you inspired for your next witchy project!

Happy Crafting!