Pages

Showing posts with label Beach Day. Show all posts

Beach Bunny Shaker


Hello all! Lauren here today sharing my bunny shaker card. I used the Starfish in the Sand stamp set and a sentiment from the Beachin' stamp set. Both are from the April release.

I started out by stamping the bunny image onto white cardstock using Fadeout ink. I then colored the whole image using Prisma color pencils. The colors I used were:
Bunny: 10, 20, 30% French Gray, Eggshell
Ears and cheeks: Hot Pink, Pink
Shells: Lemon Yellow, Canary Yellow, Sunburst Yellow, Cream
Lavender, Mulberry, Violet
Process Red, Hot Pink, Pink
Light Green, True Green, Parrot Green
Starfish necklace: True Blue, Copenhagen Blue
Background: True Blue, White


Next, using a large round die, I cut a circle out of a 5.5x5.5" white cardstock panel. I then stamped and embossed the shells from the stamp around the rim of the circle. I used Versamark and white embossing powder.


Once the shells were embossed, I used a Cotton Tail blending brush to blend Antique Linen Distressed Oxide ink overtop the whole panel. I then wiped the ink off the embossing with a soft paper towel.


Next, I flipped the panel over, and adhered acetate over the circle.


I added double sided foam tape all around the rim of the circle making sure not to leave any gaps that shaker bits could escape from. I also added foam tape all along all sides of the panel. I added my shaker bits inside the circle on top of the acetate.


Then, I removed the backing paper from the tape and carefully placed the colored bunny panel over the top of the foam tape. I flipped the shaker over and adhered it to a 6x6" top folding seafoam card base.


I stamped my sentiment onto white card cardstock using a Versamark ink pad. Then heat embossed it using white embossing powder. I ink blended the Antique Linen over top and wiped away the excess ink off the letters. I trimmed the sentiment using a banner die then adhered it to the front of the card.


I am so delighted how this card turned out! It is such a fun image to color up  create with. Thanks so much for stopping by.


Products used were:


Stenciling with Karin Markers


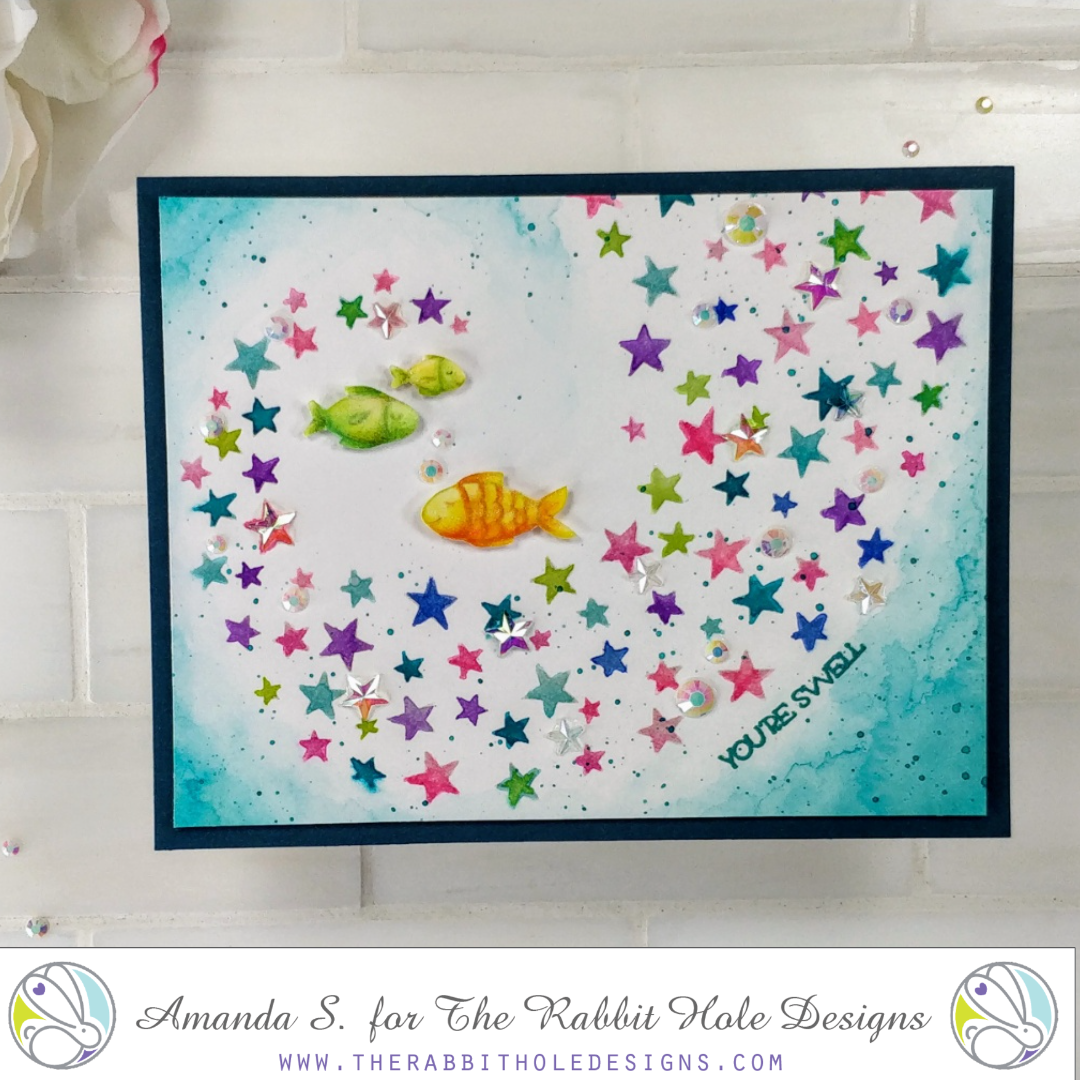
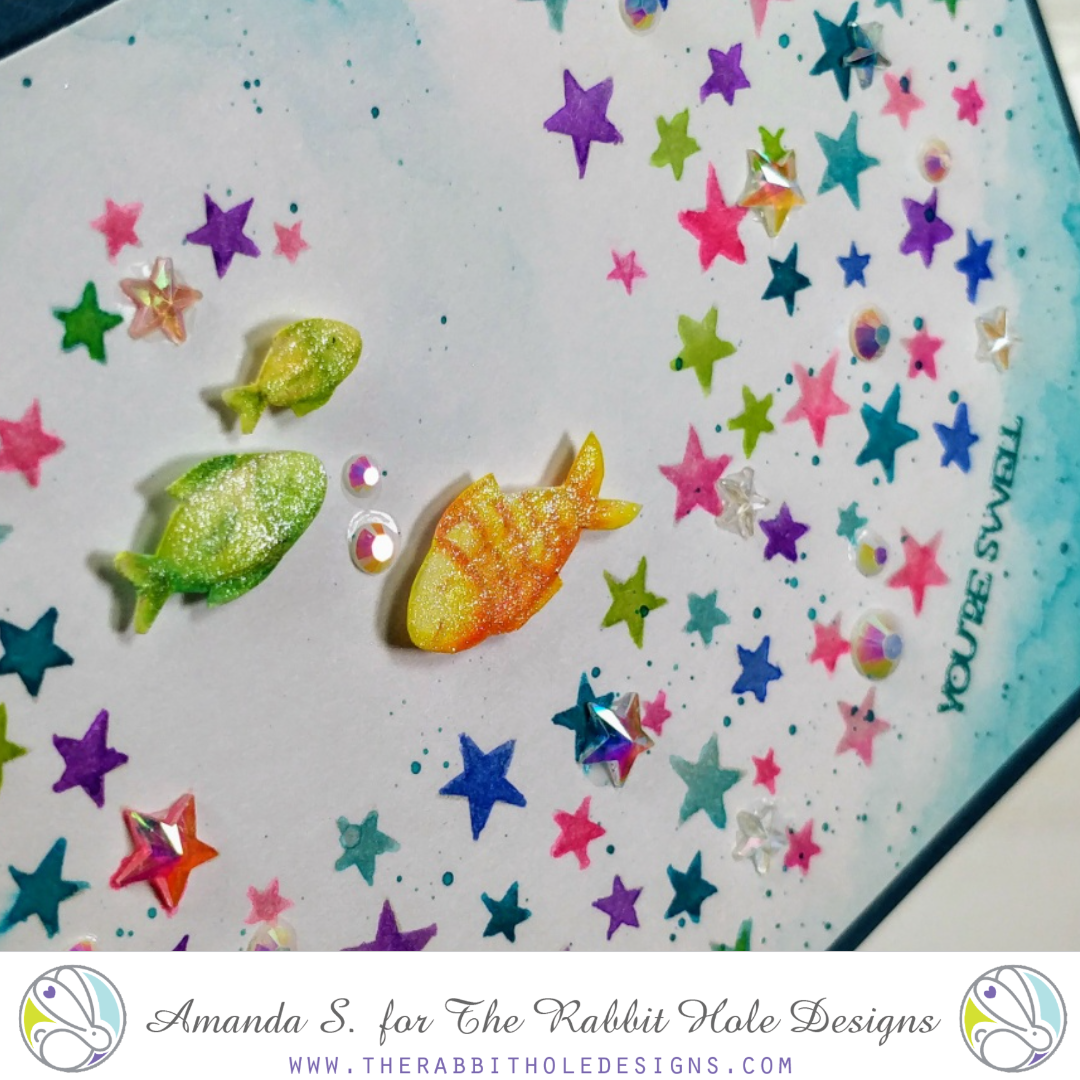
Hey crafty friend, it's Amanda from Pear Blossom Press again. Well, I did it. I couldn't resist the new Karin markers. I was trying to be strong. I've been building my Copic collection, and since I have full-set-itus (it's a real thing), I wanted to complete that collection before starting another. But there was a sale. And Jenn Gross has been creating the coolest backgrounds with them. And I couldn't hold out anymore...

So I've been testing them out! They are highly pigmented, waterbased markers, with nice nylon brush tips. I love them! Let me show you a card I created with them...


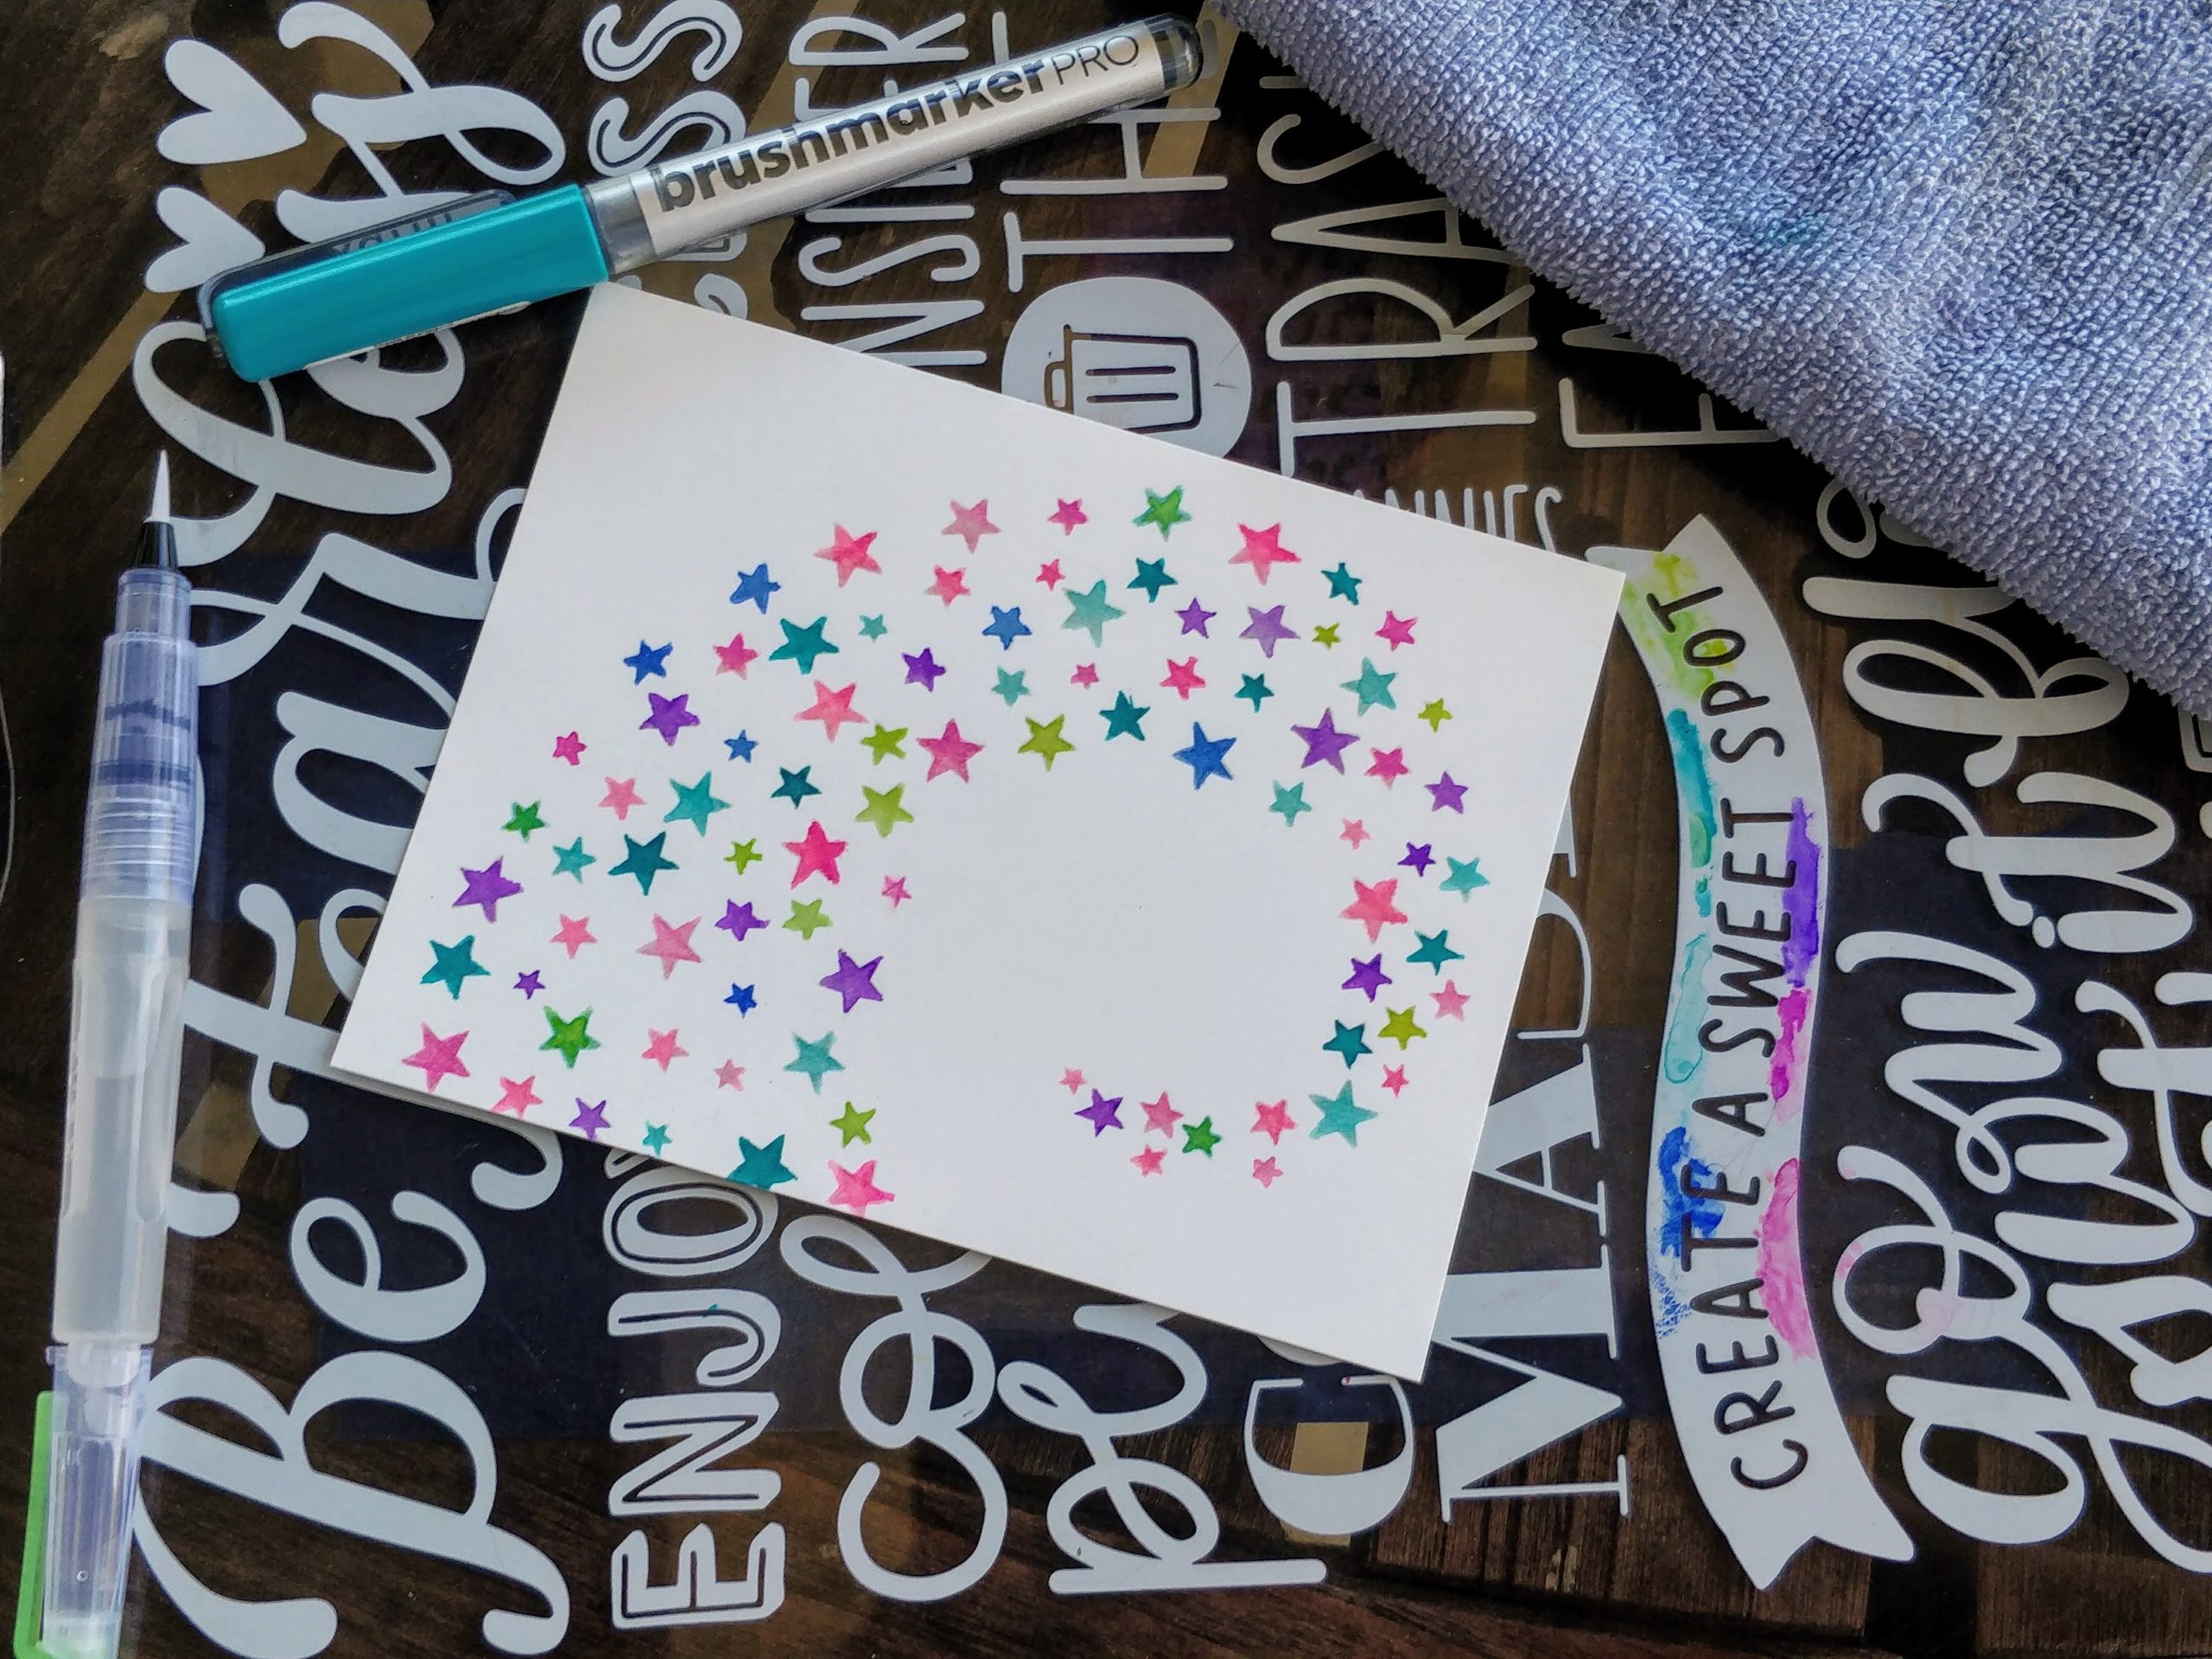
I saw Kathy Racoosin stencil a light, neutral colored ink onto a background, and then watercolor it. It's such a cool technique! For this card, I stenciled Fadeout ink through the Aim for the Stars stencil. I was just playing, so I used a panel of Neenah that I had handy. I probably should have grabbed watercolor paper, but since there was so much pigment in the markers, I didn't actually get the panel too wet, and it worked just fine.

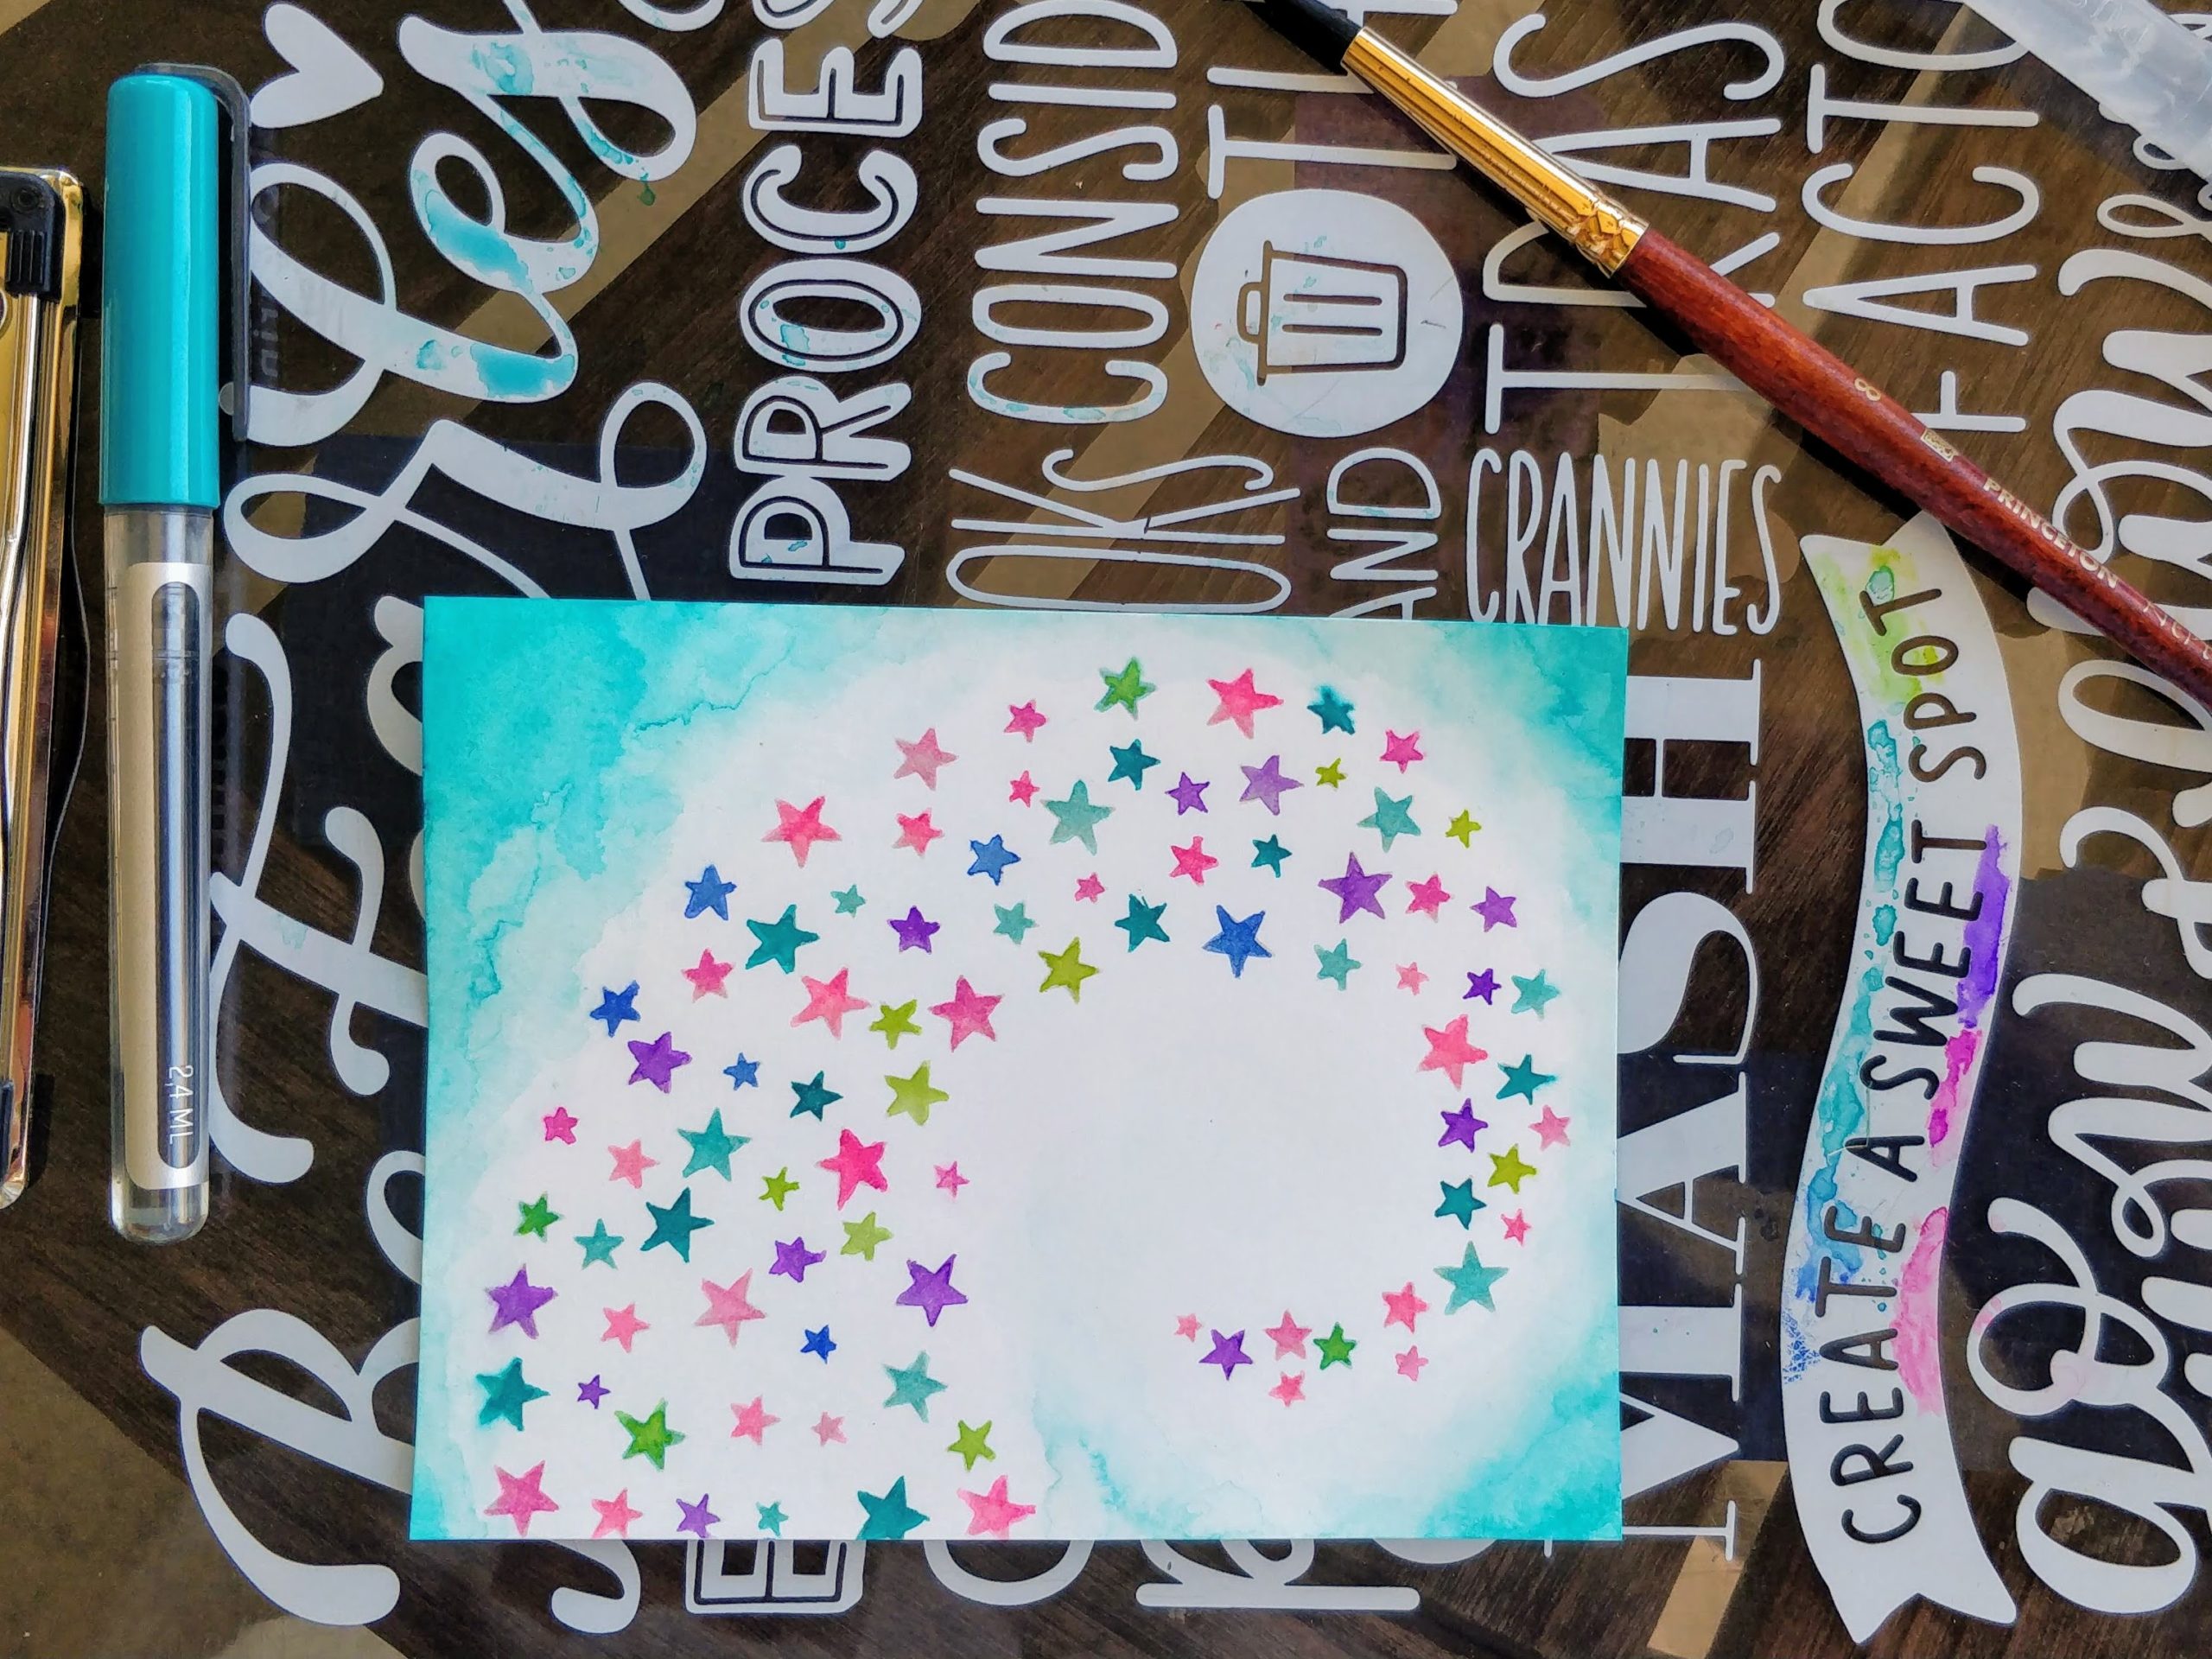
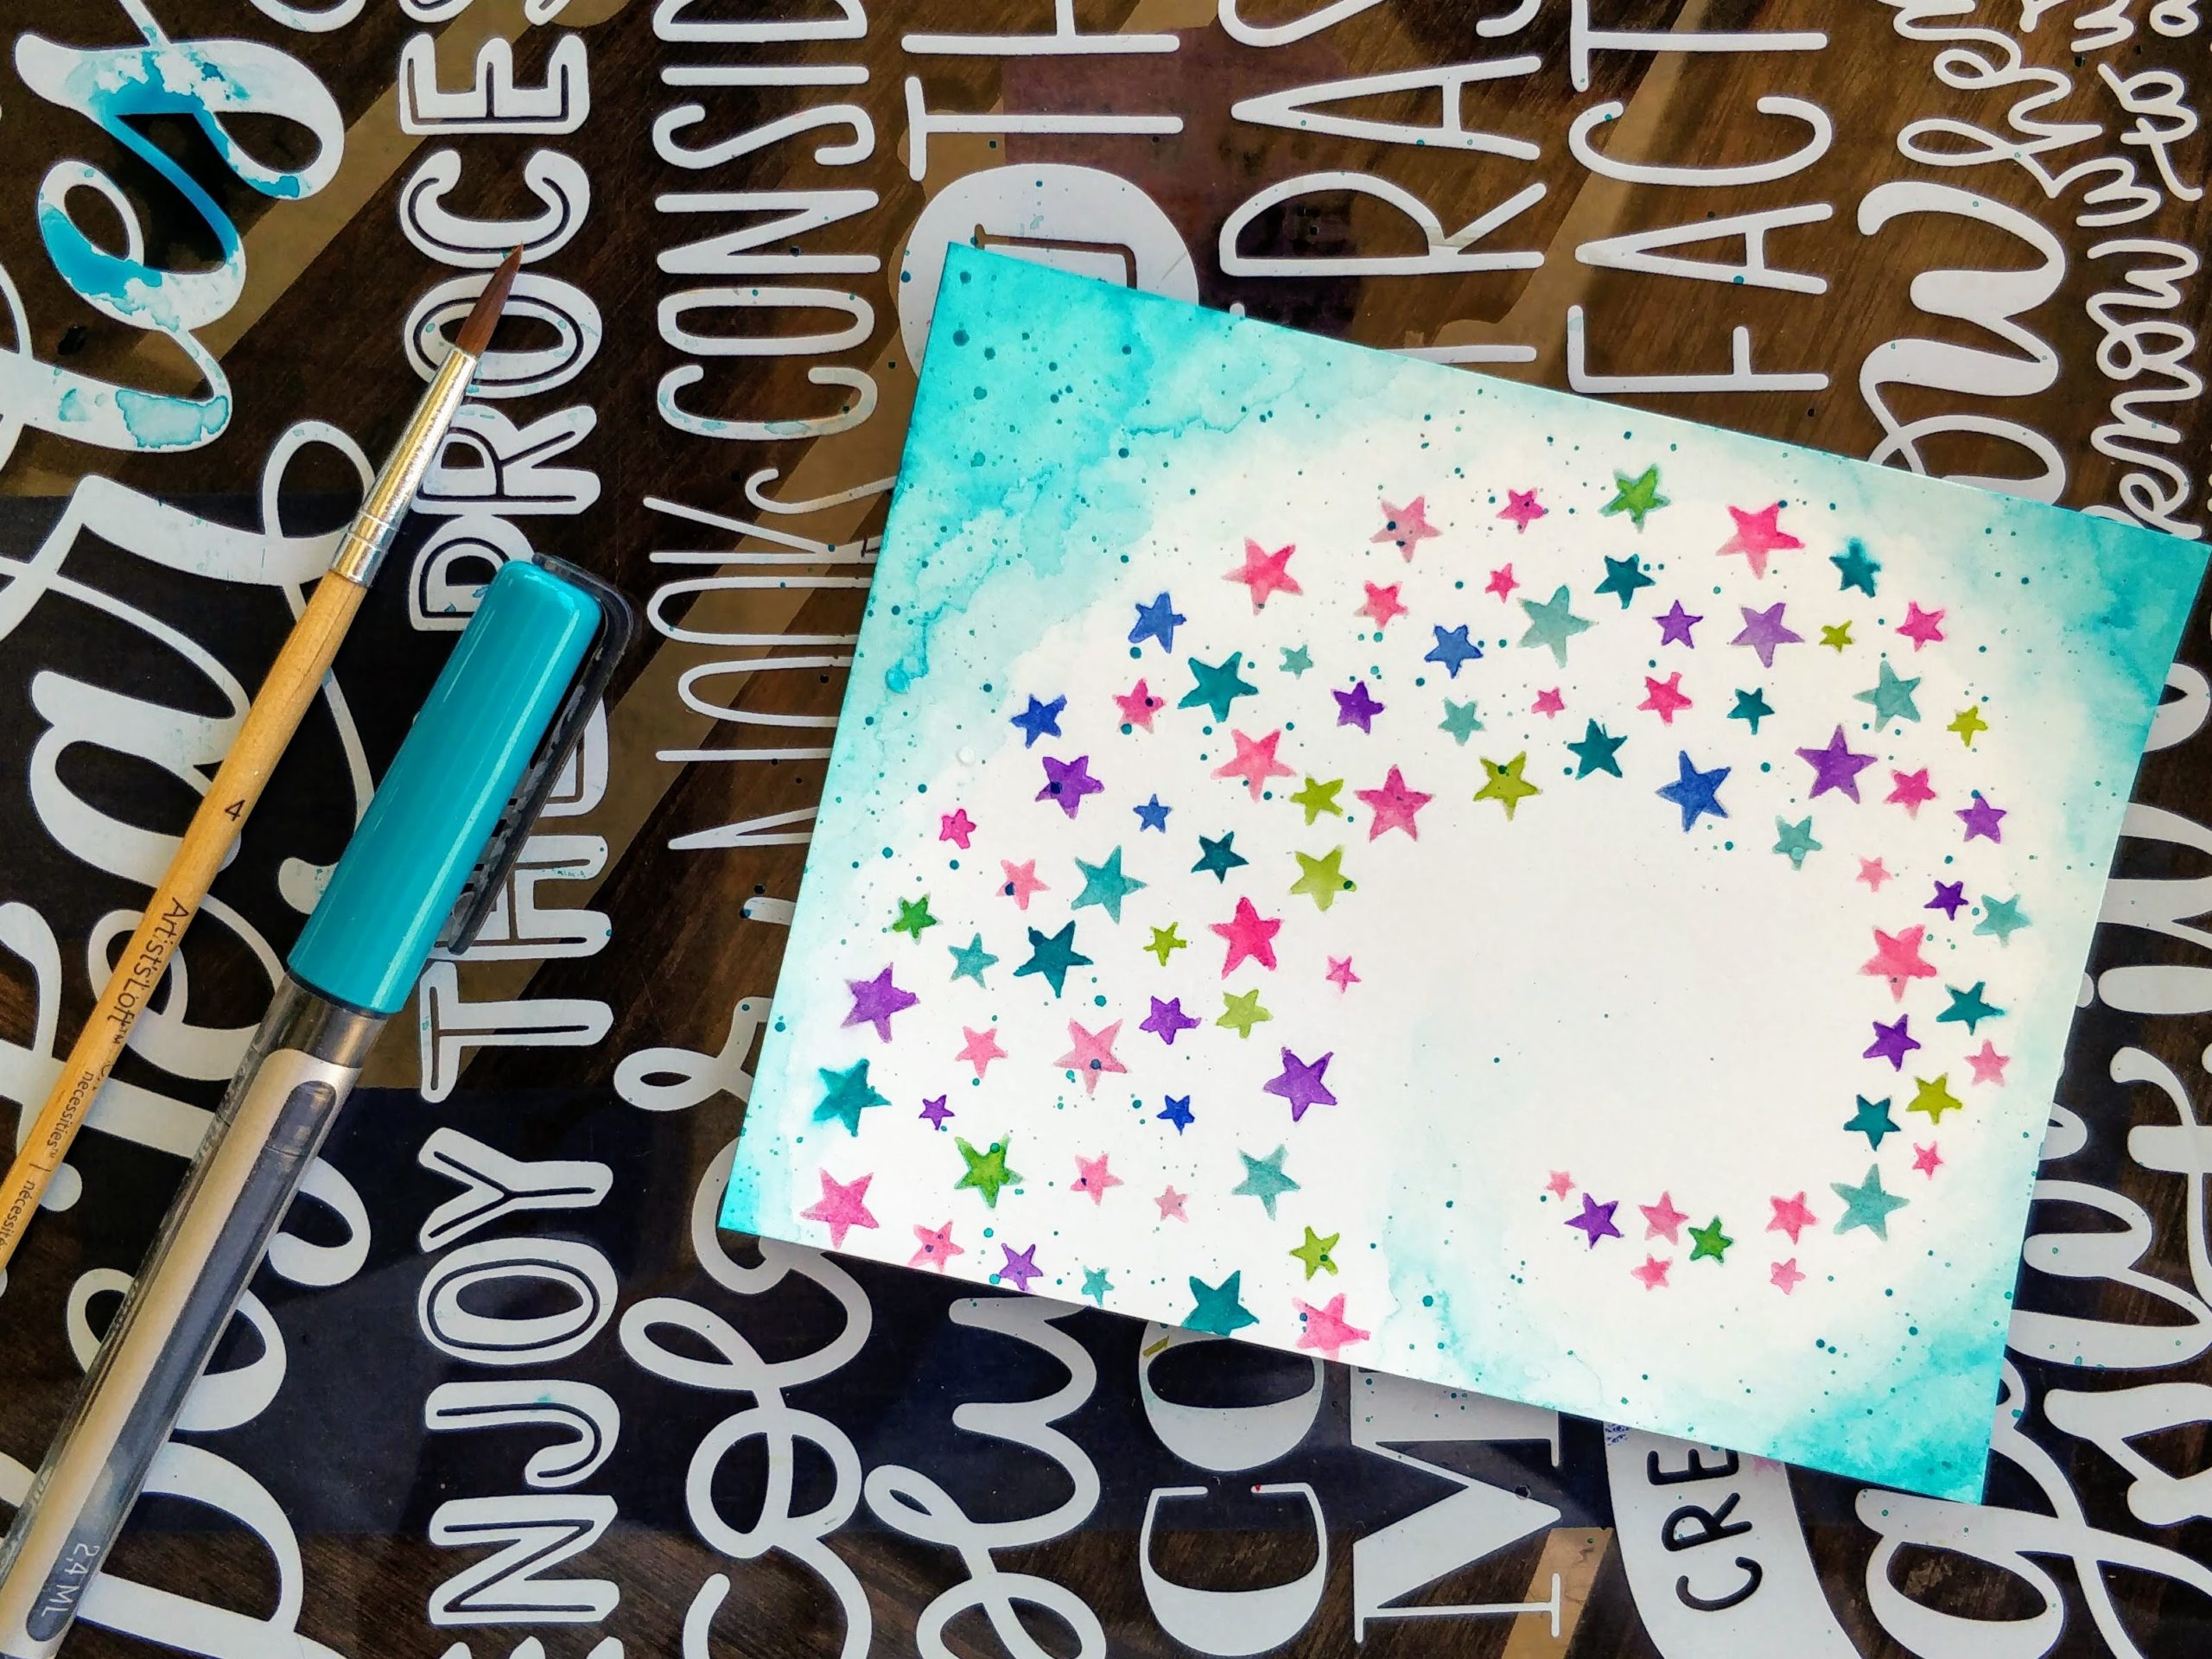
After I stenciled on the Fadeout ink, I scribbled several colors of markers onto my clipboard and picked them up with a waterbrush. I colored over the stars. Then, I added watered down turquoise to the sides (this is where watercolor paper would have been a better idea, but again, it worked just fine). To add interest, I splattered on concentrated color.


While I was rotating and trimming the panel down, the swirl of stars kind of reminded me of a mermaid tail, or waves. So I decided to turn it into an underwater background. Still wanting to play with the new markers, and with the Fadeout ink already out, I stamped the three fish in the Mermaid Hair stamp set to try no-line coloring again. (You may recall this no-line disaster, but I figured fish would be more forgiving images.) I watercolored them in the same way I did the stars, then fussy cut them. 

To pull the card together, I curved and stamped the sentiment YOU'RE SWELL from the Beach Day stamp set (on sale right now!) and embossed it on the background. I popped the panel up on a dark teal card base with fun foam, and popped the fish up with foam tape. Shimmer pen highlights, and flat-backed stars and gems add sparkle.


What do you think? Have you tried coloring a stenciled image? How about the Karin markers? Are you a fan of no-line coloring? I definitely need more practice with all three, but I'm enjoying the learning process. 

Thanks for stopping by today. You can find the sister article to this on my blog. Head on over for more inspiration and links to the specific products I used. I'll be back soon with another fun card to share. 

For more inspiration, updates, and news make sure to check out these awesome places! 

You're a Lifesaver

 Hello there!!! Michelle here.
I'm excited to share today's card with you! Our very adored Niccole, created some amazing
backgrounds using alcohol inks in our favorite color combos!!! She has a true talent for flawless
ink flow!!!! Especially the gold ink...mine always looks like a hot mess!!! 
Thank you Niccole!!! 
I love the color aqua and I was especially drawn to the new Old School Tattoo -Anchor stamp. 
So, pairing them together was a no-brainer.
Plus, I am a Pisces ;)
I gold embossed the anchor with some WOW embossing powder. I colored it up with a few Copic 
Markers in shades BG45, BG49, N5; (blues)
RV52, RV55, RV66; (pinks)
E51, E53, E55 (gold hue)
I fussy cut the image, than adhered to the card base. The sentiment is from the stamp set, Beach Day.
The strip of pattern is paper is soooo old...not sure where it's from. For a finishing touch I
scattered some sequins.

Thanks for stopping by!!!
Stay home and stay safe!!!!

Michelle
💚💙💜

For more inspiration with your The Rabbit Hole Designs Creations, be sure to follow along at these other locations:

Sailboat Rocker Card


Hello my crafty friend, it's Amanda from Pear Blossom Press again! I've got a new rocker card for you today, featuring the sweet little boy from the Beach Day stamp set. I made this one a birthday card, but you could easily change the sentiment and make it a card for a baby boy. I don't have a video tutorial because the card was very simple to make, but I do have a quick video of it in action...


Rather than trying to piece it out myself, I used an inexpensive pattern for the shaped card and cut it out with my ScanNCut. You can find a link to the cut file I used on my blog. Once I downloaded the pattern, I cut all of the pieces from white cardstock. I used a makeup brush to ink blend Distress Oxide inks onto the sailboat parts. Then I used a wood grain texture plate to add a pattern to the lower decorative piece and a basket weave texture plate on the sails. I colored the red flag with Copic markers because it was so small. Then I decided that the boat needed another decorative piece under the sails. I die cut a strip and colored it brown. I colored the round piece for the top of the mast with a copper gel pen and I added a copper line through the center of the brown strip. I glued the sailboat pieces together with PVA glue; it holds the textured pieces to the card base nicely.

For my focal point, I stamped, embossed, and Copic colored the little boy from the Beach Day stamp set. Then, I cut him out with my ScanNCut, leaving a narrow border. I added a few copper gel pen highlights to his hair to carry the copper theme through. I die cut a wide wavy banner from black cardstock, then curved the sentiment in my Misti to stamp it onto the banner. I embossed it with white powder, then popped it onto the boat with a single layer of foam tape. I used a double layer of foam tape behind the little boy to attach him to the card. To finish the card, I added a few sequins that The Rabbit Hole Designs has been including for free in recent orders. They coordinate perfectly!


I hope I've inspired you to give rocker cards a try! They are fun to make and such an easy way to add an interactive element. If you'd like to see another rocker card, check out this article. For more inspiration with the Beach Day stamp set, you might like this article. Also, the sister post to this article can be found on my blog, along with links to the products I used. I'll be back soon with another great card for you. Until then my friend, stay crafty!

Stalked Ya Til You Liked Me

Hello The Rabbit Hole Designs fans!  Maria here again on the blog with you with a super funny (or creepy?) card, showcasing the Beach Day and Sassy Sentiment stamp sets.


Here's how I made the card:
  • stamp the images on Neenah solar white card stock and color the images in with Spectrum Noir alcohol markers (or any medium of your choice).
  • cut the images using Brother Scan N Cut 2.
  • to create the water, I used a scene building stamp.  I also used a clouds stencil to create the clouds on the background.
  • on another A2 size panel, use a die to cut the window.  Use an embossing folder to emboss this piece.
  • use a palm tree die to die-cut the coconut tree on smooth white card stock.  Color the pieces with Spectrum Noir markers.
  • stamp the sentiment from the Sassy Sentiments stamp set on a piece of black card stock with Versamark ink.  Sprinkle white embossing powder and heat-set using my heating tool.
  • assemble the card.
  • finish the design by adding the enamel dots on the coconut tree.


The Sassy Sentiments stamp set is one of my all-time favorites and when I saw the Beach Day stamp set, I knew I needed to create this card design.  


Here's a closer look:


If you are looking for further details about my project including supplies used, I would be so grateful if you can stop by my blog today at:


I hope you like my card and got inspired.  Have an amazing day and happy crafting!

For more inspiration, updates, and news make sure to check out these places.

Beach Day Comic Strip Style Card


Hi, everyone it's Lynnea with a quick and simple comic strip style card using the Beach Day stamp set! This style of card is great for when you have a bunch of images you want to use on your card! Let's dive in to the card!


How - To

  • Die cut comic strip frame from kraft cardstock and glue onto dark teal/blue cardstock. 
  • Stamp, color, and cut images from the Beach Day stamp set.
  • Glue images into die cut windows. 
  • Stamp and white heat emboss sentiment. 


Products Used


For more inspiration, updates, and news make sure to check out these places


Thank you all so much for joining me! See you soon!

Whale Hello there!


Hi everyone! Shanna here from Caffeinated Craftiness today with another adorable card featuring TRHD's Beach Day stamp set.  I thought the whales in the set were cute enough to have their own card, and thus this card was born!

I started by cutting out die cut circle out of a panel I had previously stenciled some clouds on with distress ink.  I took an acrylic block, that happened to have a wavy edge to it and smooshed on a decent amount of Salty Ocean distress ink.  I spritzed it and then played it over the bottom half of the circle.  I sat a glass of water on top for some weight, and then let it dry.  I find that if I don't rush it and lift the block off sooner, I don't get the deeper color I am wanting.  
While it was drying I stamped, colored, and cut out my Beach Day images using my Scan n' Cut.  I thought the whale would enjoy having a few friends, so the seagulls joined him while he visited his own little uncharted island.  
Next I dry embossed a solid white A2 panel and added a couple strips of nautical and gold washi.  After the circle had fully dried, I affixed it to the panel and then glued my images on it.  I had a sentiment all ready to go (Whale Hello! of course) but at the last minute decided I wanted to leave the card open to other possibilities if I needed a quick card to grab.  That is the beauty of a genuinely versatile stamp set, it can literally pull off any occasion from Thank you, Happy Birthday, I miss you, or just a plain Hello!  I like having options some times, and will leave the sentiment off for that reason.


I love visiting the ocean, being a California girl.....That's exactly where this card transports me!  Are you more of a lake or ocean type of person?  Does your crafting style ever reflect your preference?  


For more inspiration, updates, and news make sure to check out these places:


See you all again soon, and thanks for stopping by!!
~Shanna

Beach Day by Martha Lucia

Hi there, Martha Lucia here with you! My creation of today is  highlighting the Beach Day stamp set.


I stamped some of the images included on the stamp set Beach Day with Memento Tuxedo Black Ink onto whisper white card stock. I colored the images with Spectrum Noir Alcohol Markers and fussy cut them with scissors.


The base of the card is whisper white card stock. I partially inked the top of card base using Crumb Cake and Marina Mist Classic Ink. I just take care of don’t ink the area out of the second layer. Then I die cut the second layer from whisper white card stock using the Oval Burst Elle-Ments die cut from Avery Elle. To create the vintage look, I sponged all the die cut surface with Crumb Cake Classic Ink and pasted over the inked card base with double sided foam tape. This is the reason because you see the top layer like an old piece.
I pasted all the colored images overt the center of the card and finalized with a stamped sentiment.


Inspiration Hop for June ~ Day 1 ~ Beach Day


Hello and welcome to Day 1 of the Inspiration Hop. We are so excited for you to join us as we present to you our June release.  Our fabulous Design Team will be sharing their projects over the next 3 days, so be sure to visit their blogs and leave them some crafty love.

 The 4 (Four) new stamp sets are available to purchase right now in the shop.
~
FREE SHIPPING 
on orders of $25 or more before taxes and shipping
(applies to US orders only)
No code necessary, exclusions apply
ends 05-30-2019


The stamp set that is being highlighted today is:

Beach Day


**Giveaway**
To celebrate day 1 of the release The Rabbit Hole Designs is giving away the stamp set Beach Day to One lucky winner.  Winner will be chosen at random from the comments left on participating blogs, so make sure to visit each stop and leave a comment.  Leave comments by 11:59 pm PST 05-30-2019 on all participating blogs. Winner will be announced on The Rabbit Hole Designs blog 05-31-2019


Here is the line up for the hop:


Thank you so much for stopping by today!