Pages

Showing posts with label 1 Line Reindeer Stamp Set. Show all posts

Reindeer Shaker Fun

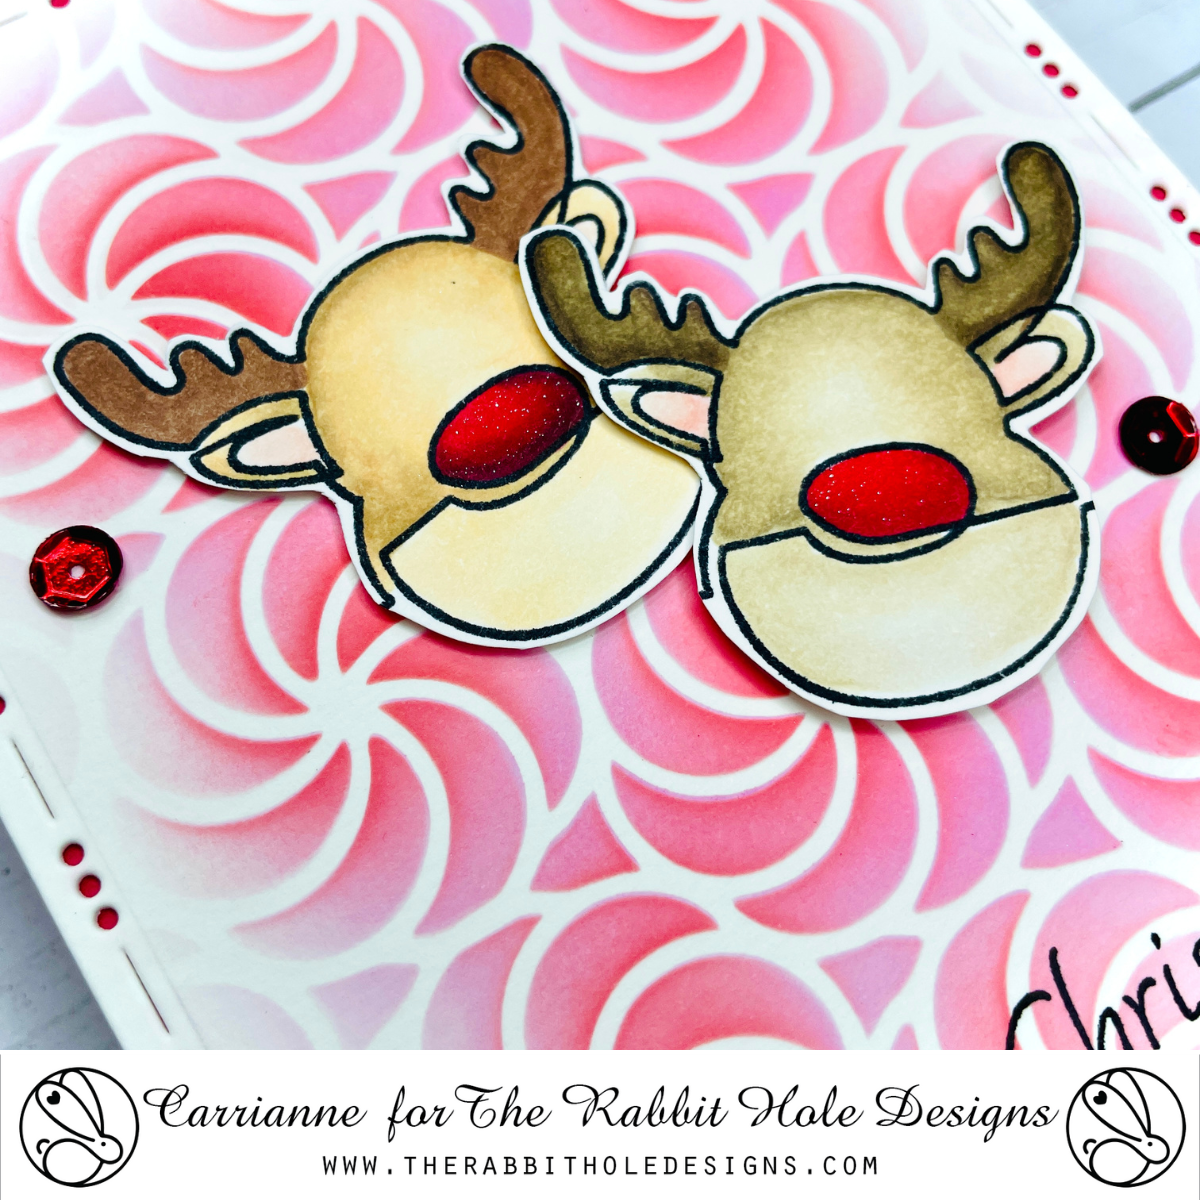
Hi friends! Carrianne here! I've got a fun reindeer shaker card to share with you today on the blog featuring the 1 Line Reindeer Stamp Set.

I started with an A2 size white panel and stamped the image in the center. After coloring the image with alcohol markers, I added a winter scene behind it and added snow with a white gel pen.


Next, I layered another panel on top and used a stitched circle die in the center to create the shaker window. I adhered acetate to the back with liquid adhesive, then stamped the sentiment in black ink onto the panel. To add dimension, I used two layers of foam tape. I filled the shaker window with a mix of blue sequins and carefully placed the top panel over the image to seal it all together and complete the shaker effect.

For added sparkle, I added clear iridescent sequins to the front of the card.


Thanks for shaking up some time to visit! I hope you have a DEER-lightful day.

~ Carrianne ~ 

For more inspiration, news, and updates, make sure to check out these places.


DISCLOSURE: THIS POST CONTAINS AFFILIATE LINKS, MEANING I GET A SMALL COMMISSION WHEN A PURCHASE IS MADE THROUGH THAT LINK AT NO ADDITIONAL COST TO YOU. THANK YOU FOR SUPPORTING ME SO THAT I MAY CONTINUE TO SHARE MY CREATIONS WITH YOU!


Merry Christmas, Reindeer Style!

Hi friends! Carrianne here sharing a festive duo, lighting up the night with holiday spirit featuring The Rabbit Hole Designs 1 Line Reindeer Stamp Set.


I began with a panel of white cardstock, placed the Candy Twist Stencil, and secured it with masking tape. I blended Picked Raspberry Distress Oxide ink then cut it with the largest frame from the You've Been Framed Layering Dies. It was then attached to a red card base.


I then stamped the images from the 1 Line Reindeer Stamp Set and colored them with alcohol markers. I fussy cut the images and adhered them to the panel with foam tape for dimension. The sentiment is from the same set and was directly stamped onto the panel with black ink. I finished the card by adding a few red sequins. 


Thank you for stopping by and have a DEER-lightful day!

~ Carrianne ~


For more inspiration, news, and updates, make sure to check out these places.


DISCLOSURE: THIS POST CONTAINS AFFILIATE LINKS, MEANING I GET A SMALL COMMISSION WHEN A PURCHASE IS MADE THROUGH THAT LINK AT NO ADDITIONAL COST TO YOU. THANK YOU FOR SUPPORTING ME SO THAT I MAY CONTINUE TO SHARE MY CREATIONS WITH YOU!


Merry Christmas

Hi crafty friends! Carrianne here with a festive card featuring the 1 Line Reindeer stamp set from The Rabbit Hole Designs.

I began by preparing a panel of Kraft cardstock with the Cottontail Embossing Powder Tool. I then masked off the image with tape, revealing only the head, and repeated stamping with Versamark ink. I then heat embossed it with white embossing powder.


I cut it out with a stitched die and added red ink to the edges to add texture. A second panel of red cardstock was cut with a scalloped stitched frame and then assembled to a white A2 card base with liquid glue.


The sentiment is from the same set and was stamped with red ink and then trimmed. I added a strand of twine behind it, then adhered it to the panel with foam tape. I then decided to color the nose of the center image red, adding shimmer crystal effects to make it shine. I completed the card by adding red sequins.


Thanks for dropping in with me today! Have a Deer-lightful day!!
~ Carrianne ~


For more inspiration, news, and updates, make sure to check out these places.


DISCLOSURE: THIS POST CONTAINS AFFILIATE LINKS, MEANING I GET A SMALL COMMISSION WHEN A PURCHASE IS MADE THROUGH THAT LINK AT NO ADDITIONAL COST TO YOU. THANK YOU FOR SUPPORTING ME SO THAT I MAY CONTINUE TO SHARE MY CREATIONS WITH YOU!


Classic Merry Christmas


We are celebrating Christmas in July all month long! My first card using the 1 Line Reindeer set was this one. I wanted to create a look of an ornament with the classic red/green combination. 
This is how I created this card: Prepare the card base using the Cottontail Embossing Powder tool, and white heat embossed the 1 Line Reindeer stamp. Stamp the reindeer one more time on masking paper and cut the mask. Apply mask over the embossed image. Cut two more masks, one that goes above the horizontal stamped image and one that goes below it. Remove the top horizontal mask and using a circular motion blend the green ink to create the top of the ornament. Place the mask back on and remove the bottom mask and repeat now with the red ink. Wait for the ink to dry and then remove the reindeer mask. Color nose and add highlights after dried. To finish the card stamp the sentiment and apply golden bling. As a last minute decision, I decided to use a notching tool to create notches on all 4 corners of the card and wrap a red embroidery cord around it.

Merry Christmas Shaker Card


Hello! It's Lauren here today sharing this full panel shaker card featuring the new Mid Century Modern #2 stencil and the sentiment from the 1 Line Reindeer stamp set. I went with a non-traditional soft color palette that I thought went well with the retro stencil.

I created a video tutorial showing how I created this card. Here's the link to the YouTube video: 

https://youtu.be/jYT-mHklrNo

This was a fun card to create. I hope it inspires you to create your own pretty holiday cards using this fun new release. 

For more inspiration, updates, and news make sure to check out these places
 

Here are the links to the products used for this card:

Mid Century Modern #2, 4 Layers stencil: 


1 Line Reindeer stamp set: