Pages

Showing posts with label Infinity Shaker. Show all posts

A Look Beneath the Surface - In-FIN-ity Shaker Card

Hello crafty friends, Jenn here, you can also catch me on social media @journeycoachjenn.  Today I am sharing an A2 infinity shaker card using The Rabbit Hole Designs new Fin-tastic stamp set.  It is paired with the Harmony stamp set and coordinating dies an A2 Shaker Acetate Sheets, and I have a clever way to use the Clear Enamel Dots. 
1 - I colored the koi image from the Harmony stamp set with OLO marker in Violet and die cut it out with the coordinating dies. 

 2 & 3 - I turned the fish over and added about 8 small dots of liquid glue stratigically to the underside of the tail and body of the fish and added the small Clear Enamel Dots over the glue. 

4 - Adding the Clear Enamel Dots will allow the koi fish to swim/slide in the shaker. The card base is a piece of 4 1/8 x 5 3/8"  printed cardstock.   I attached the A2 Shaker Acetate Sheets to the card base leaving the top open to add shaker bits and the fish slider before sealing it closed.
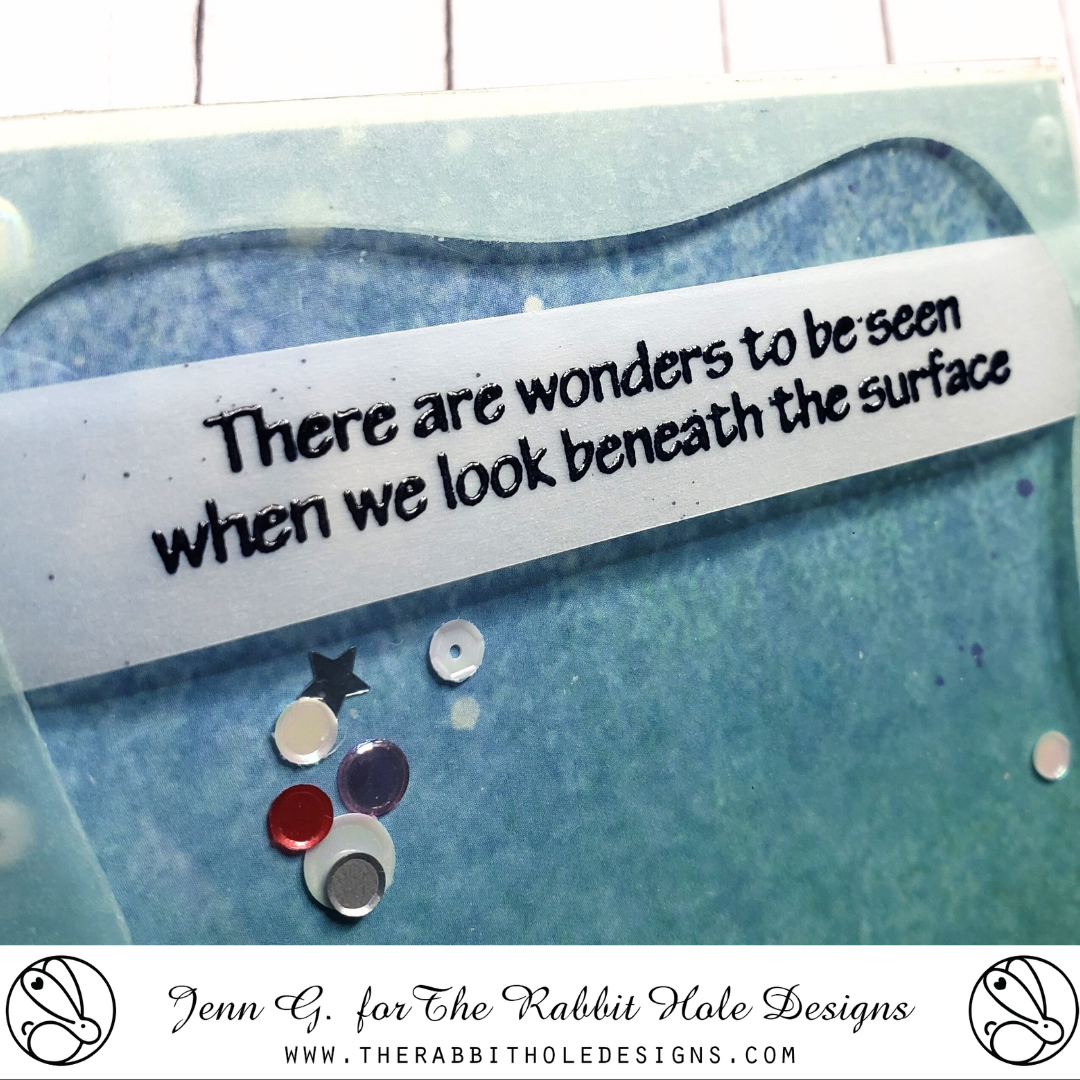
I treated a piece of 5 1/2" x 3/4" Heat resistant vellum with the Cottontail Embossing Powder Tool and stamped the sentiment from the Fin-tastic stamp set ant heat embossed it with black embossing powder.  It is added the sentiment to the card front across the top of the shaker.
The acetate shaker card front is adhered to a white A2 card base. What a fun interactive shaker card with a surprise koi shaker piece.


The Rabbit Hole Design Supplies


Thank you, I appreciate you taking time from your day to stop by and check out today’s The Rabbit Hole Design project.  I hope you are inspired to create something lovely today!


Be Creative ~ Stay Inspired

Jenn Gross


Follow me, Journey Coach Jenn, on 

Instagram - https://www.instagram.com/journeycoachjenn/

YouTube - http://www.youtube.com/c/JourneyCoachJenn

Blog - https://journeycoachjenn.blogspot.com/  


For more inspiration, updates, and news make sure to check out these places


The Rabbit Hole Designs

The Rabbit Hole Designs Instagram

The Rabbit Hole Designs Facebook Page

The Rabbit Hole Designs Pinterest

The Rabbit Hole Designs YouTube


Foxy Fall Infinity Shaker Card


Hello there crafty friend!  Today's inspiration is a foxy fall interactive infinity shaker card using The Rabbit Hole Designs new Fall Foxes stamp and coordinating die set. the Falling Leaves stencil, the Happy Scripty Word with Shadow layer die and an A2 Shaker Acetate Sheet


Have you ever made an infinity shaker card? An infinity shaker spans the entire card front, an A2 card is the size.  Let's check out easy steps to recreate this interactive card.

You will want to start with a card front panel that measures 4 1/8" x 5 3/8".  This will ensure you have the correct fit for the Shaker Acetate Sheet to fold around.
Used the Falling Leaves stencil  over the top of the card front daubbed ink instead of blending.  The colors looks slightly airbrushed instead of blended. I used orange, purple and bright green inks in random daubs.
After the stenciled 4 1/8" x 5 3/8" card front is dry,  I glued a few (5-7) shaker bits to the stenciled panel (see phot above).Take your A2 Acetate Shaker Sheet and remove the protective film from the front of the panel and set it on your work surface with the adhesive tabs facing up (you should feel the the release paper on the tabs).   Place the card panel with the glued embelishments face down on the acetate shaker sheet.  Fold ONLY three of the four shaker sheets tabs over, removing the release paper to adhere them to the back of the card panel.  This creates a pocket with the colored background inside (see photo above).  I added more shaker bits to the pocket and removed the fourth tabs release paper.  I folded the tab to the back of the panel creating the infinity shaker card front.
I colored the fox image from the Falling Foxes stamp set with OLO markers and die cut the image. I die cut the word Happy from a beautiful bronze specialty cardstock in my Your Paper Insider subcription box and the shadow layer from a purple cardstock. Glue the Happy die cut sentiment together. Prep a piece of purple cardstock with the Cottontail Embossing Powder Tool before stamping and heat embossing the "fall y'all" sentiment in copper embossing powder. Cut it in a strip for the card front.

Attached the sentiment and fox to the front of the infinity shaker and secured the shaker panel to a white A2 card base with double-sided adhesive tape completing the Foxy Fall card.


Thank you, I appreciate you taking time from your day to stop by and check out this Foxy Fall Infinity Shaker Card featuring the new Fall Foxes stamp and Coordintaing dies, the Falling Leaves stencil, and A2 Shaker Acetate Sheet from The Rabbit Hole Designs. I hope you are inspired to create something lovely today! 


Be Creative ~ Stay Inspired

Jenn Gross


Follow me, Journey Coach Jenn, on 

Instagram - https://www.instagram.com/journeycoachjenn/

YouTube - http://www.youtube.com/c/JourneyCoachJenn

Blog - http://www.journeycoachjenn.com/


For more inspiration, updates, and news make sure to check out these places


The Rabbit Hole Designs

The Rabbit Hole Designs Instagram

The Rabbit Hole Designs Facebook Page

The Rabbit Hole Designs Pinterest

The Rabbit Hole Designs YouTube

Infinity Shaker- Revisiting a Personal Favorite


Hello. Lauren here. For the month of December, we revisit our personal favorite creations we've made over this past year. One of mine was this sparkly Christmas infinity shaker card using the Mid Century Modern #2, Layered stencil.


Full tutorial can be found on my YouTube Channel: https://youtu.be/jYT-mHklrNo

Thanks for visiting. You can follow me here:

For more inspiration, updates, and news make sure to check out these awesome places!