Pages

Showing posts with label Hex Yeah. Show all posts

A Witch's Wardrobe

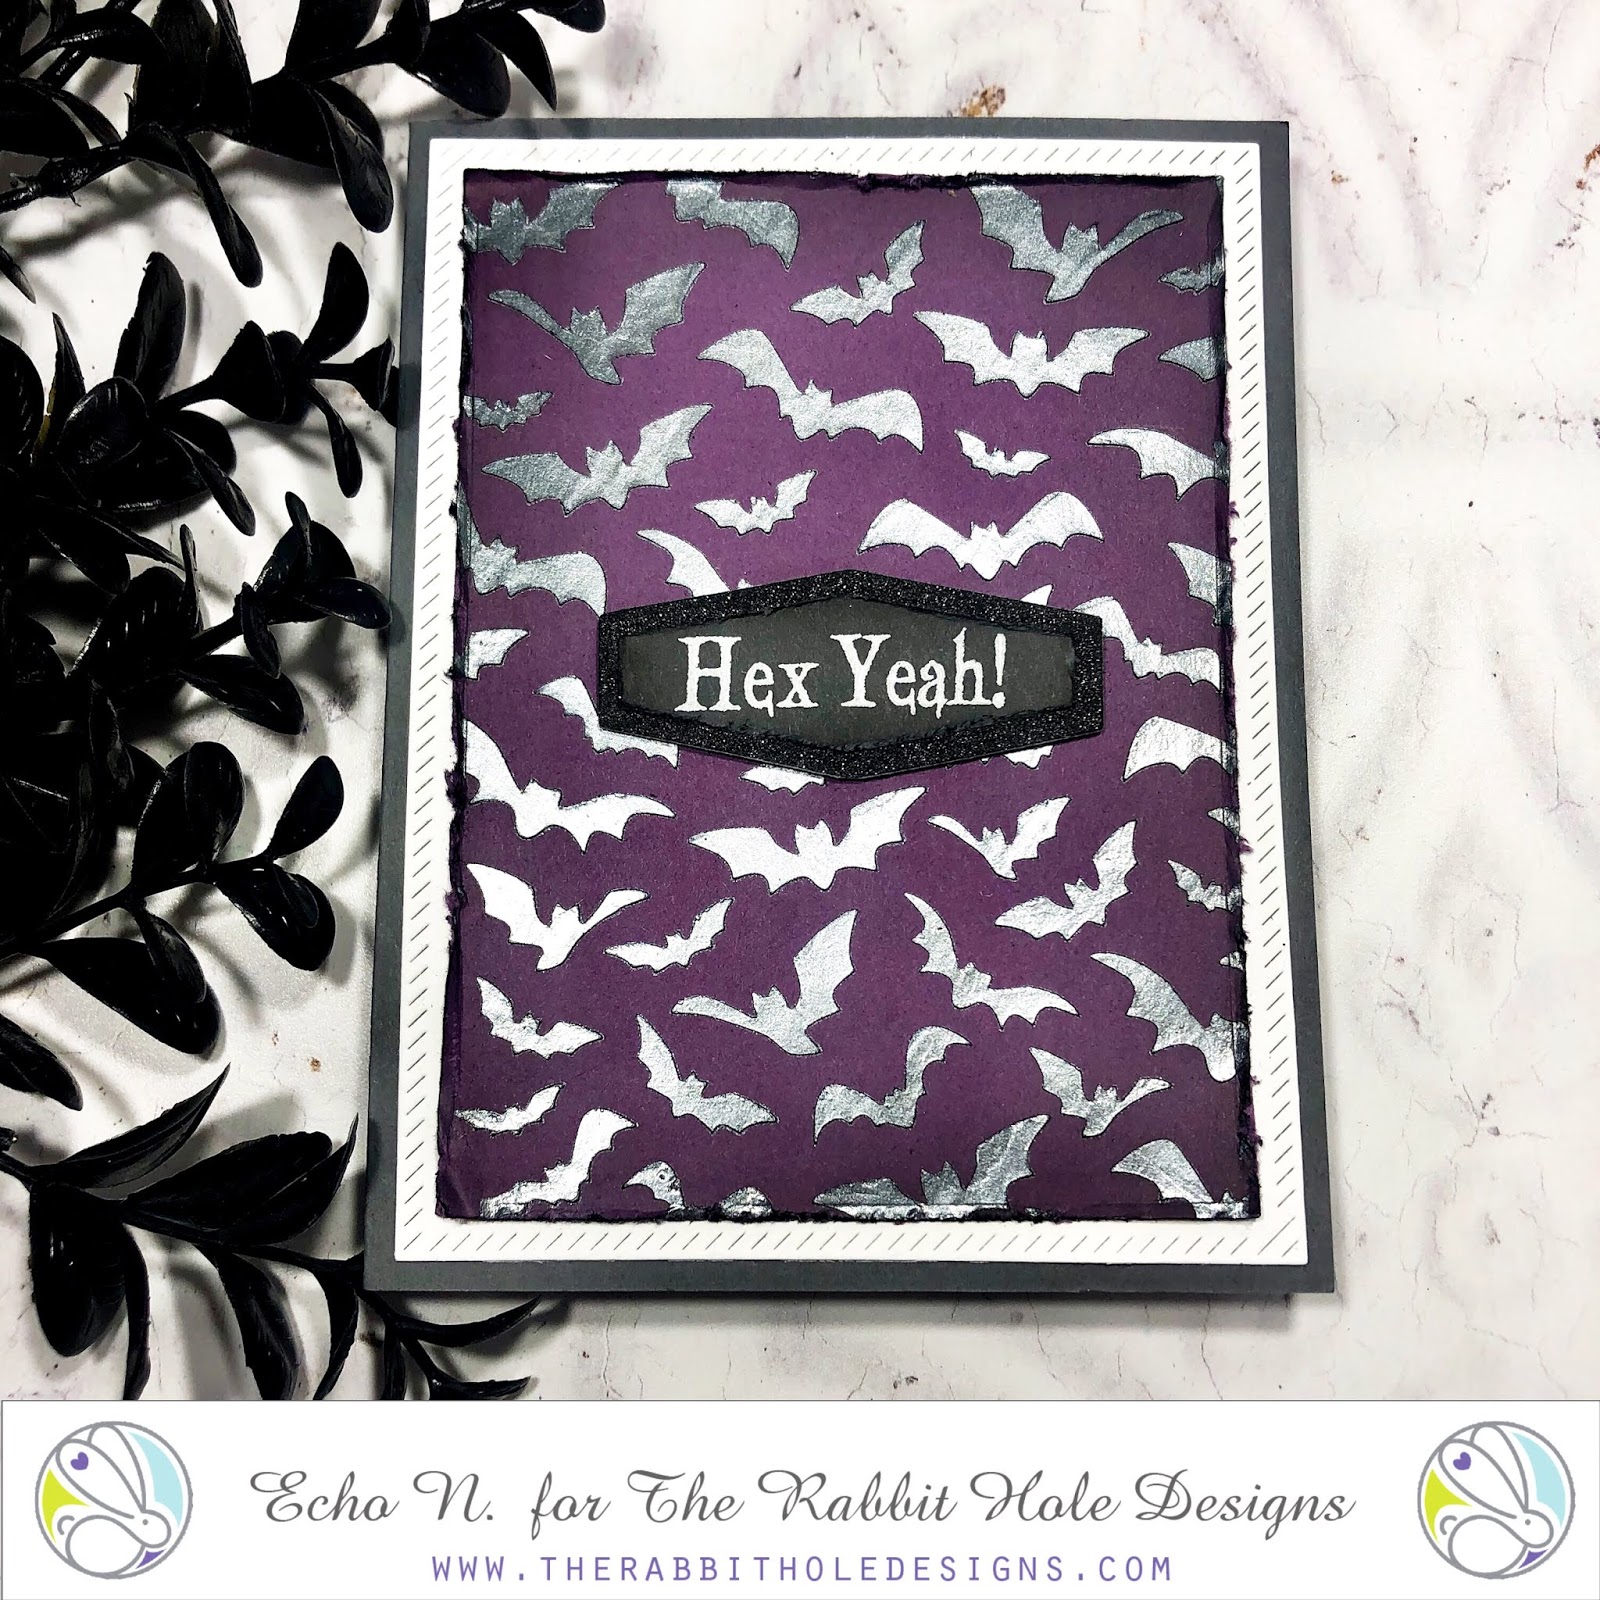
Hello there! Michelle here! The stamp set, Hex Yeah, has been a favorite of mine and I hate the idea of only using her for one season. It was time to update this witch's wardrobe!
A no-line coloring technique did the trick!
I also used the stamp set Kringle, for the sentiment and banner.
You can stamp your image with any light gray or light beige ink. Than have fun coloring! I used Copic markers to color.
Hat and Dress: R35, R46, R59, RV99
Sash and Buckle; Shoes: C7, C8, C10, YR23, YR27
Stocking: G05, G07, E40, N1
Hands: E11, E13, E15
Banner: G05, G09, G28
I embossed the top panel using Diamond Flower Stencil and gold embossing powder. 
For the inside panel I used Light Me Up Stencil and white embossing powder.

For this second card I wanted a winter inspired outfit. Blue, beige and a little leopard pattern. 
The same no-line stamping technique applies with some Copic Marker coloring.
Hat and Dress: B34, B37, B39
Stocking: B34, B37, E41,E41
Leopard Sash and Shoes: E40, E41, E42, E43, E44
Skin: E11, E13, E15

I used Spell It Stencil to spell the word 'WINTER' and used the withes legs for
the letter 'I'. I used distress oxide inks in shades tumbled glass and chipped sapphire. I 
scattered some snowflakes using the stencil Light Me Up and the same distress oxides.
I stenciled the stars using Pumpkin Face Stencil and antique linen and tumbled glass distress oxide inks.
I splattered some white paint. When dried I stamped the sentiment from the stamp set, Krinkle.

I added some finishing touches to both cards: bells, a twine bow, and gems.

Thanks for stopping by for a peek!

Michelle


Thermoweb Collab- Hex yeah!


Hello crafty friends! 

Welcome back the the rabbit hole.
  Echo here for some more crafty inspiration! Today I have a fun collaboration with ThermowebI love making Halloween cards and these products from both companies were a great match up! 


Thermoweb is offering a $25 gift card with this collaboration! Head on over the The Thermoweb blog for details to enter to win.

How I created this card.


Sprayed the back of my stencil with Pixie spray. Then applied deco foil metallix gel in glazed pewter


I used the deco foil stencil pal tool to apply the mettalix gel.


Die cut layers 


Distress edges and ink blend.


Stamped sentiment from Hex Yeah stamp set in VersaMark ink and embossed with white embossing powder on black card stock. Die cut sentiment. 

Image may contain: text


For further details and supplies used visit my blog! 

Thank you so much for stopping by!
Stamp on- Echo

Spooky Front Porch Card


Hello my crafty friend, it's Amanda from Pear Blossom Press again! Now that fall is here, I wanted to revisit the Front Porch Card I made over the summer and give it a Halloween makeover. This time I added lights too! Take a look at it in action...


For the spooky version of the card, I switched up the colors and decorative elements. You can see the original card and how to build the frame here. Instead of a white house, I colored it in shades of grey with Copic Markers. This time around, I kept the cutouts from the door panels and taped them back in place. I added a spooky fence in front of the pillars and swapped the flowers and stars for a jack-o-lantern and bats from the Hex Yeah stamp set. Instead of the kissing couple behind the doors, I've got the Caffeinated Spider swinging from a piece of thread. Notice she's holding candy where her coffee mugs usually are. I just masked off the mugs on the stamp before stamping, then stamped candy in their places, and used a Copic liner to connect the legs lines. I embossed boo and push here onto a die cut banner and tucked it behind the pumpkin.

This card has three different interactive elements to it. First, the doors open. The Impresslit I used both cuts the doors, and embosses the stone pattern around them. So all of the work is done with one pass in the Big Shot. The second interactive element is light! I used one of my EZ-Lights and taped the battery to the back of the bottom step (with the switch lined up under the push here stamp). Then, I simply punched a hole through the step, threaded one of the lights through, and taped it in place behind the pumpkin. I taped the other two lights above the center of the doors to light up the spider and her web. The last interactive element is the swinging spider. To do this, I just taped a piece of thread to the back of her, then sandwiched the top of the thread between two layers of foam tape. By using a double layer of foam tape all the way around the back side of the porch piece, it left her plenty of room to swing, and room for the light to bounce around.


I love how this one turned out! In fact, this card actually inspired the first card, even though it hadn't been made yet. Being on The Rabbit Hole Design's design team, I knew the jack-o-lantern stamps were coming and that got me thinking about creating a front porch to put them on. Since it was early summer, and I had been searching for porch decor on Pinterest, my feed was full of great ideas for summery porch scenes. That's when I realized this card base could be adapted to any season. (I already have a Christmas card in mind.) What kind of scene would you make?

You can find the sister article to this post on my blog today, along with links to the specific products I used. Soon, you'll be able to find my EZ-Lights here at The Rabbit Hole Designs. Until then, you can find them here. Be sure to pick up these items to recreate today's card...

Hex Yeah
Boo to You
Caffeinated Spider (available September 30th)
Liquid Pixie Dust
Diamond Glaze

Thanks for stopping by today! I'll be back soon with more fun cards to share!

Curiosity with Katie

Happy Saturday!  Happy to be here on a Saturday, my fave day of the week, drinking coffee and sharing papercrafts.  What more could a girl ask for?!

So as we sprint into fall (it sure does feel that way to me), I have another fun Halloween card using the September release. 


I love the contrast of colors here and the sharpness of the edges and the background die.   I also love the embossing powder, Metalline Flame, and the sparkly enamel dots, they just complete the intense feel. 

Here's how I made it:
  • I started by stamping my image from the Hex Yeah set and colored it with my Copics.  I fussy cut it out and set it aside. 
  • Next I went about creating the layers.  I knew I wanted to use this die and make the color pop through the black, but I had to be careful about placement so that it didn't take away from her lovely orange dress.  
  • Once I had my layers and colored CS picked, I cut them to the size I wanted.  
  • I mounted my girl on top and set it aside. 
  • Next, I cut a black base.  On the base I stamped this sentiment from my stash with versamark ink and embossed with Metalline Flame embossing Powder from Wow.  I chose this color because it complimented the scene so well. 
  • I came back in and mounted my layers and dress on the card. 
  • Lastly, I added these sparkly enamel dots from Freckled Fawn. 


Well, I hope you like this card!  I truly enjoyed making it. You can head to my blog here for a full list of supplies.  


For even more inspiration, updates, and news make sure to check out these links.

Putting On My Hat

Hello everyone! Shanna here today with another Halloween card featuring Hex Yeah!

  
I have been bitten by the stencil bug recently, and have been playing around with different techniques and stumbled upon a fun one!  I used Distress Oxides on black cardstock for my background with the Puzzle Box stencil from The Rabbit Hole Designs.  The opaque nature of the oxides gives almost a foggy look to the colors when applied on black, and I really like how it blended out!  I used Seedless preserves, Carved Pumpkin, and Mustard Seed oxide inks in random areas over the puzzle box stencil to create my background.  For a bit of glitz, I pulled a spiderweb stencil from my stash and used to Gina K Glitz glitter gel in black for another layer of interest. 


My witch hat was a long forgotten extra I found tucked away in my fall embellishments and I couldn’t resist pairing it with the sassy sentiment from the Hex Yeah stamp set!  I heat embossed the sentiment in gold on the same black cardstock I had used for my base panel.  Last touches were a couple strips of Washi tape from my stash and I was all done.

This card came together fairly easily, and I am in love with the end result.  What is your favorite stenciling technique?  The Rabbit Hole Designs has some pretty neat stencils, if you haven’t seen them yet check them out here.

That wraps up my post for today, I will be back next week for another trip down The Rabbit Hole!  Until then you can find me over on my blog, Caffeinated Craftiness or over on Instagram!  
-Shanna

For even more inspiration, updates, and news make sure to check out these links.

I Put A Spell On You by Niccole

Hello everyone!


It's Niccole from Nic & Viv Designs back again to share another card I made using one of The Rabbit Hole Designs stamp sets. 

For today's card I used the Hex Yeah, Gourd-geous, and Pumpkin Friends stamp sets.


How to create this card:


  • Standard black A2 sized card 
  • Add white piece stamped with the Hex Yeah sentiment, and Pumpkin Friends image
  • Copic color the big pumpkin
  • Stamp the pumpkin from Gourd-geous stamp set and Copic color him on a scrap piece of paper
  • Fussy cut him out or use a Scan-N-Cut like I did
  • Cover up the small pumpkin on your white panel with the Gourd-geous pumpkin
  • I used foam tape to make him pop
  • Add black and white stripe paper to top and bottom of your card
  • Finish with some crystal gems
Here is one more picture of the full card ...


TRHD Products used:

Pumpkin Friends

Hex Yeah

Gourd-geous

For more inspiration, updates, and news make sure to check out these places

The Rabbit Hole Designs YouTube


I have had so much fun playing with the Hex Yeah, Pumpkin Friends, and Gourd-geous stamp sets.

Thank you so much for stopping by and spending some time with me.

Until next time ... Hugs & inky fingers!   -Nic-

The Hat Makes the Outfit by Niccole

Hello everyone!


It's Niccole from Nic & Viv Designs back again to share another card I made using one of The Rabbit Hole Designs stamp sets. 

For today's card I used the Hex Yeah & Boo to You stamp sets.


How to create this card:


  • Black A2 card base
  • Added purple layer 
  • Added my white layer with the sentiment from Hex Yeah
  • Stamped the Hat from Boo To You set.
  • Copic colored the image
  • Fussy cut the hat out because I didn't want to use the cat in the image
  • Raised the hat up with foam tape for dimension
  • Added orange Nuvo Drops randomly
Here is one more picture of the full card ...


TRHD Products used:

For more inspiration, updates, and news make sure to check out these places

The Rabbit Hole Designs YouTube


I have had so much fun playing with the Hex Yeah and Boo To You stamp sets.

Thank you so much for stopping by and spending some time with me.

Until next time ... Hugs & inky fingers!   -Nic-