Pages

Showing posts with label Therm-o-web. Show all posts

Therm-o-Web Mermaid Hair


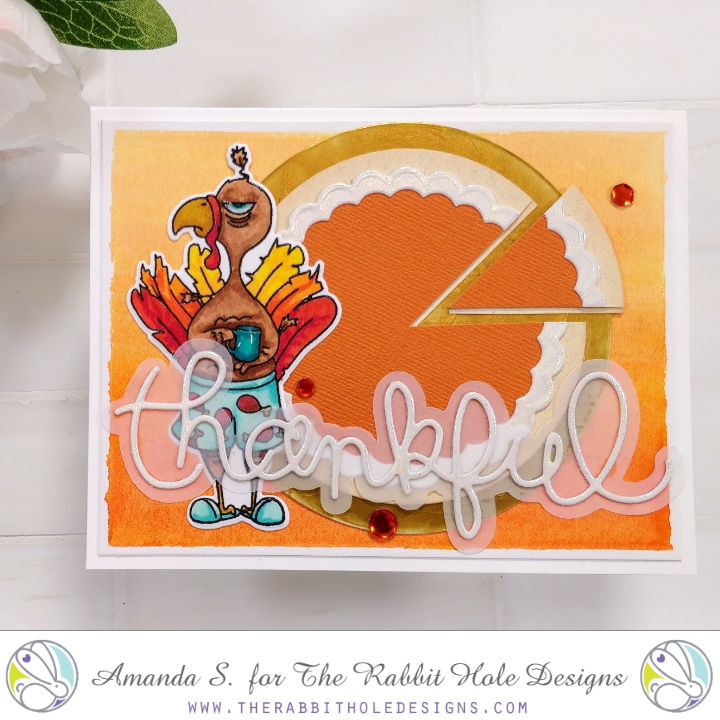
It's Amanda W and I'm really excited to be back today with another collab card featuring The Rabbit Hole Designs and Therm-O-Web products! It's so fun to use them together. Today I'm going all out GLITZ and GLITTER!!!


Here are the details:
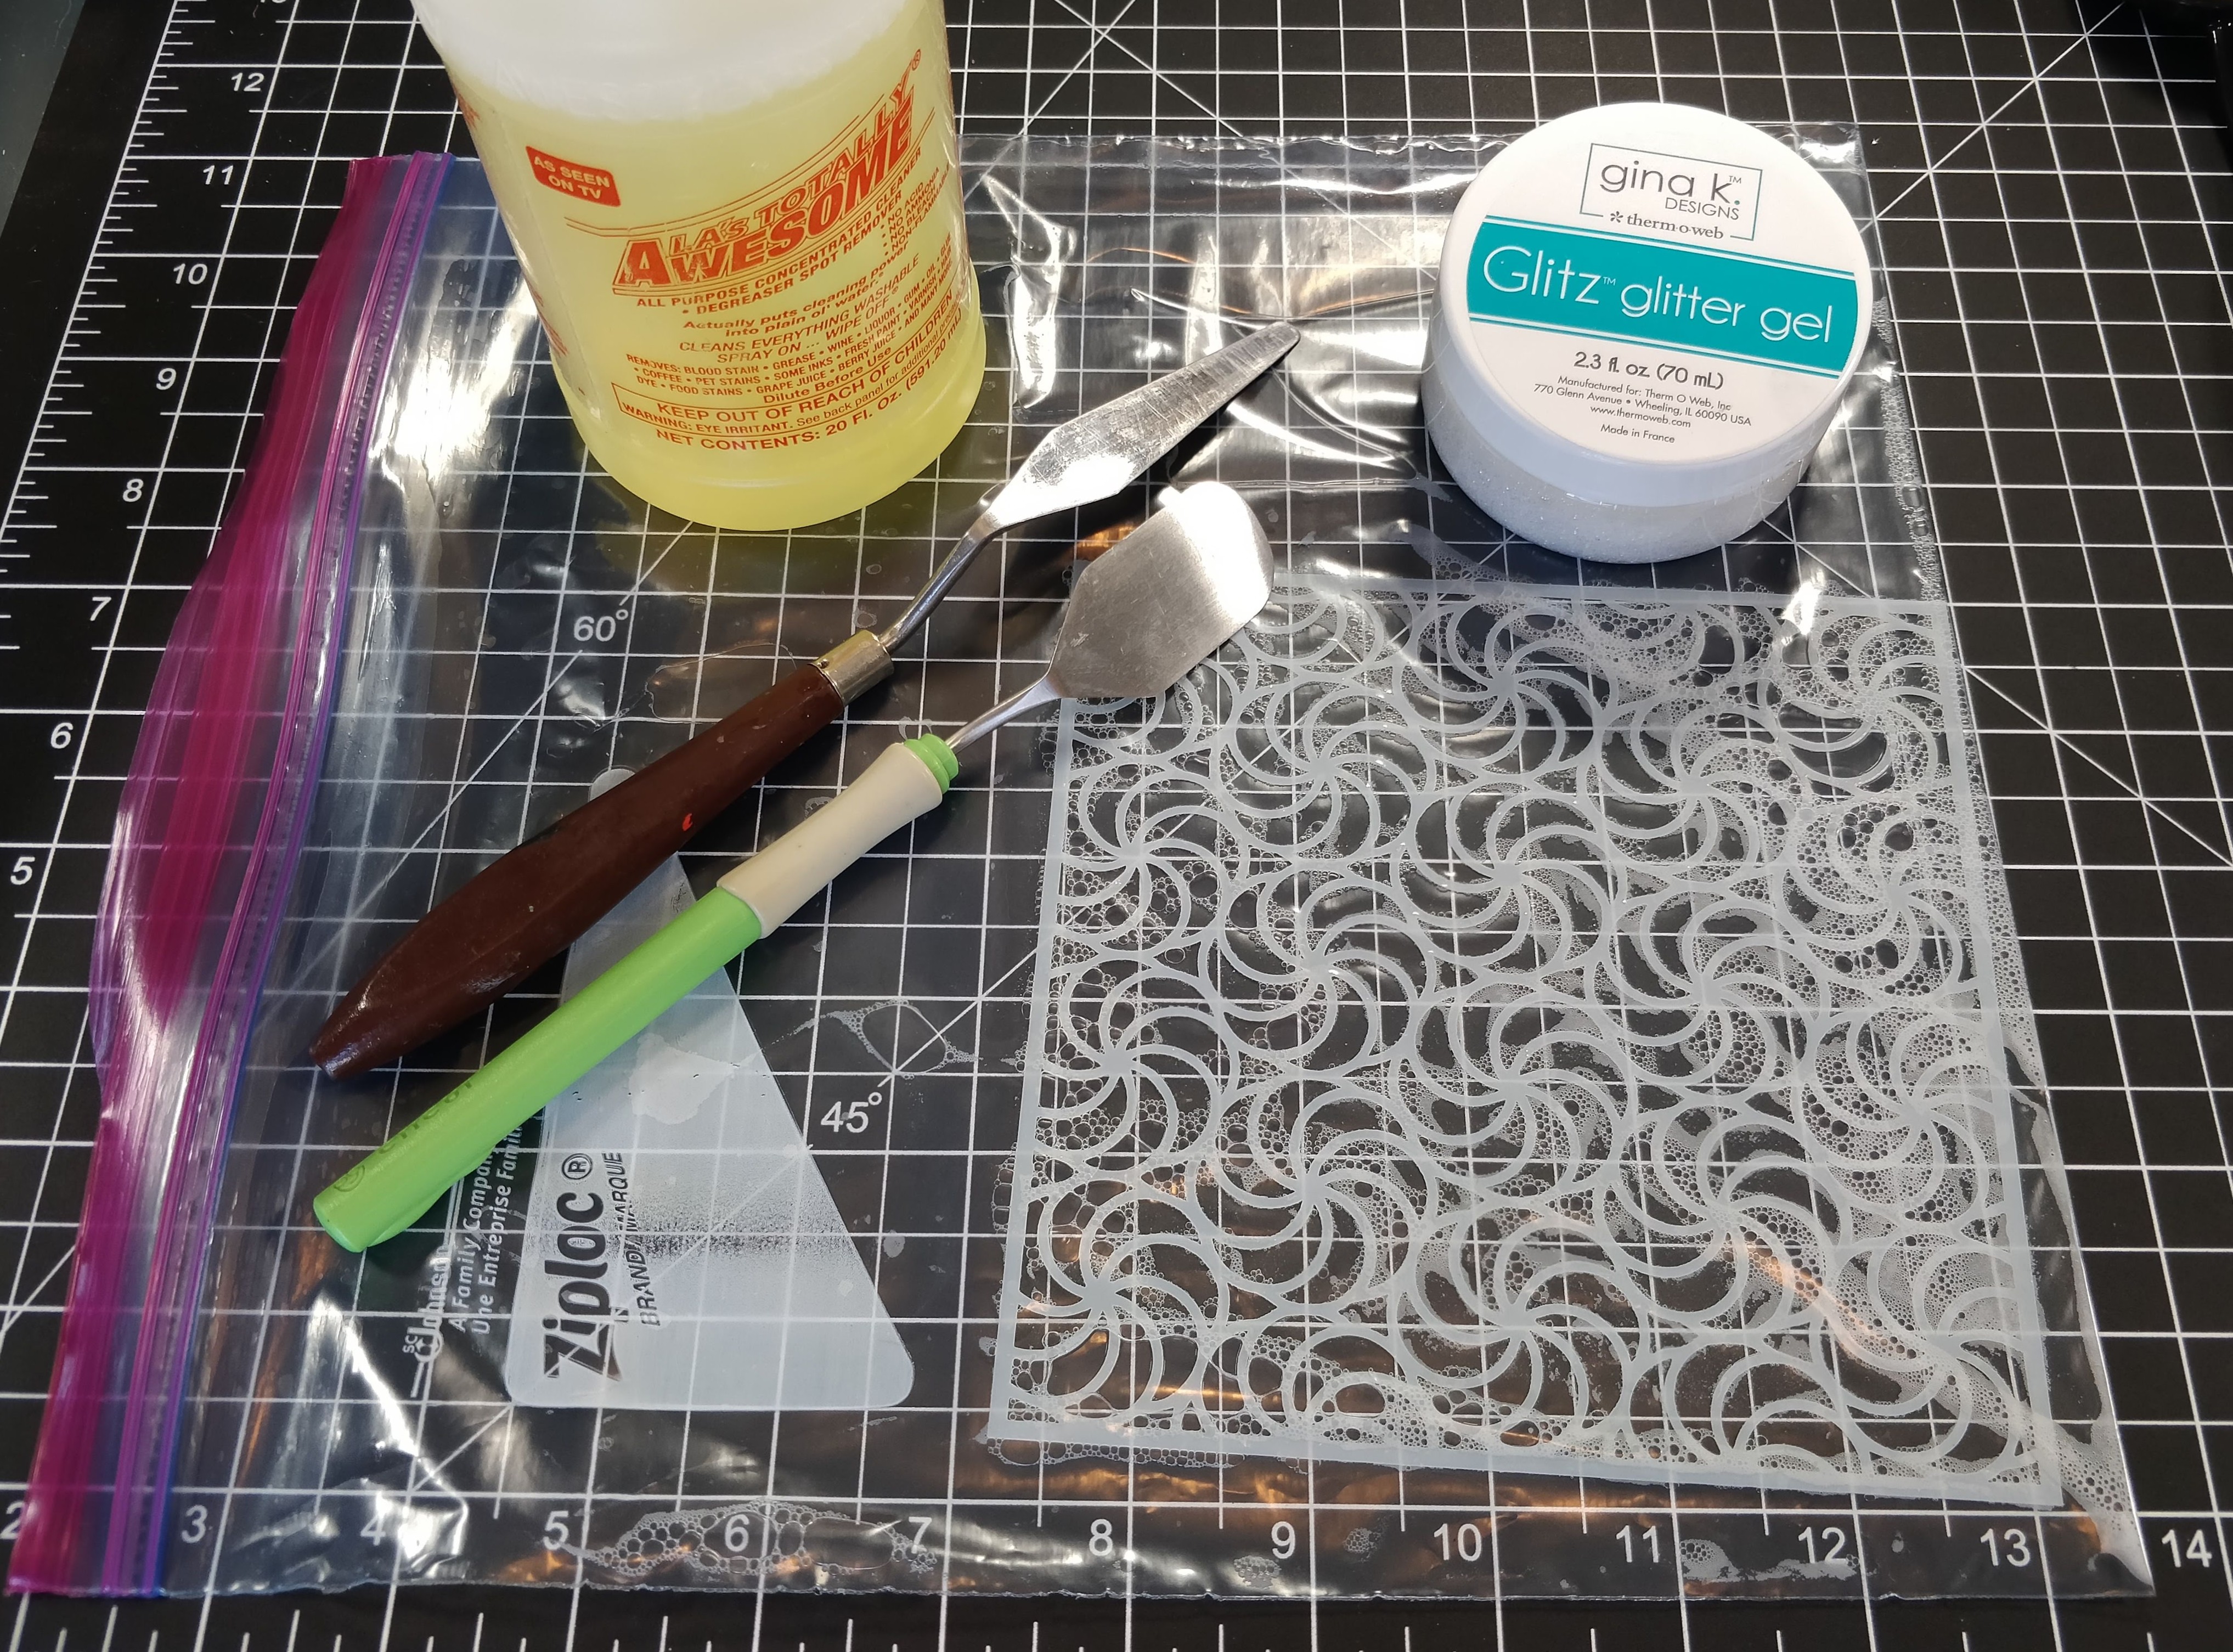
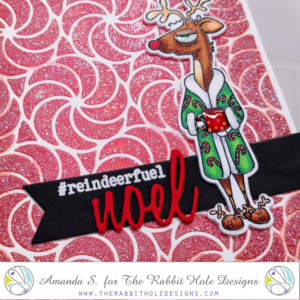
  • Ink blend Twisted Citron, Mowed Lawn and Peacock Feathers Distress inks and then adhered my Candy Twist Stencil with Pixie Spray. Then I covered the stencil with Glitz Glitter Gel in white.
  • While that was drying I pulled out Mermaid Hair and stamped, colored and cut out my images.
  • Then die cut my frame from white cardstock 4 times and glued them together.
  • Last I stamped my sentiment in green ink and cut it apart so I could scatter it in the card design.
  • For assembly I adhered my background glitter panel to the card front, then my frame with liquid glue because of the glitter texture and finally my images and sentiments were adhered with foam squares.
  • Finishing touches on this card were Wink of Stella Glitter Brush on the mermaid tail and fish. You can never have too much glitter when mermaids are involved!

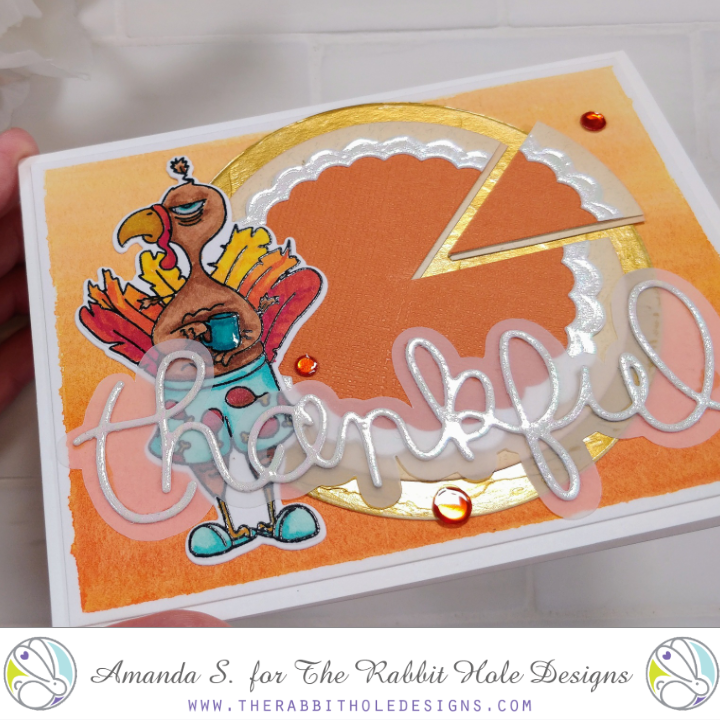
Here's a closer look. Look at all that shimmer! This card is absolutely stunning in the light! The colors bounce off the glitter gel and it's so eye catching! The fun and whimsy of the whole card is fabulous!


I hope you enjoyed it. Remember to head over to the Therm-o-Web blog to see what their design team is creating too.

I appreciate you sharing your time with me. Have a fabulous day!

Here are the products I used:


For more inspiration, news and updates check out these links.


Turkey and Pie - Therm-O-Web Collaboration


Hello again my crafty friend, it's Amanda from Pear Blossom Press! Have you been hopping along with The Rabbit Hole Designs and Term-O-Web for the collaboration this week? I'm back with another fun card, this time for Thanksgiving! I was Pinspired to create a die cut pumpkin pie to go along with the hilarious Caffeinated Turkey. I just love the way this one turned out. And check out the shine of the Opal Foil on the whipped cream layer, and the Gold Metallix on the serving plate at the bottom!


For this card, I started by die cutting several circles to create the pie. I covered the largest one with Gold Metallix gel. For the whipped cream layer and the word thankful, I covered a piece of white cardstock with Deco Foil Liquid Adhesive and foiled it with Opal Foil. Then I die cut the word and nested a pair of scalloped circle dies to cut out the whipped cream. To give the pie the look of depth, I actually cut two kraft circles for the pie crust and slightly offset the bottom layer when I glued it all together.

After I stamped, embossed, and Copic colored the Caffeinated Turkey, I cut him out with the Coordinating Die. The card front was watercolored, with more paint concentrated at the bottom for an ombre effect, and to give the word a darker background to pop off of. As I was layering the pieces, I felt like the word was getting lost with the busy layers behind it, but I didn't want to loose the coloring of the turkey's shorts, so I scanned the word in my Scan N Cut, added a border, then cut it out of vellum. (You can use that trick with any die cut word or shape that doesn't include a halo die.) Once I glued the layers together, I finished the card with a few orange sequins left over from my Halloween blend that came free in my last order from The Rabbit Hole Designs. A little Diamond Glaze over the sequins, and the turkey's eye and mug, give this card some extra sparkle.


I don't send out a lot of Thanksgiving cards, but now that my son has moved to Florida for work, I want to send him a special one. It will be our first Thanksgiving apart. I know, I have to let him grow up, but I was hoping he'd get his first place down the street, not 3000 miles away. Luckily, he came home to visit for a few days last week. And I'll see him again in December, so this card will tide us over. Do you send out Thanksgiving cards?


Thanks for stopping by today, I really appreciate it. Don't forget to keep hopping along with The Rabbit Hole Designs and Therm-O-Web for lots of inspiration and your chance to win! All of the details can be found here. You can find links to the specific products I used in the sister article on my blog.

TRHD & Therm-O-Web Collaboration #2

Happy Friday everyone!

Niccole here; I am back with another collaboration post for The Rabbit Hole Designs and Therm-O-Web. This is my second blog post so if you missed the first one you can catch it ... HERE.


You can enter win $25 in Therm-O-Web product. Head on over to their website to find out how.


I am using another one of my favorite stamps from The Rabbit Hole Designs, which is Caffeinated Owl and the Candy Twist stencil. Both are available at Simon Says Stamp and at The Rabbit Hole Designs stores.
 
This is the Therm O Web Transfer Gel I used for my card along with the Deco Foil Blue Diamond Flock. This flock is so fun to use. It reminds me of those old black fuzzy posters you could color ... remember??

Now onto my card ...
Here is how I made this card:

1. Turn laminator on to really heat it up good
2. Cut and fold a black A2 card base
3.On another black card panel I used my stencil to apply
the Transfer Gel
4. I let the Transfer Gel dry. It's dry when it turns clear
5. Place flock fuzzy side DOWN (very important)
6. Put card with flock on it in carrier sheet
(I use a piece of copy paper folded in half)
7. Run through laminator
8. Peel flock away from card to reveal your FUZZY masterpiece
9. Cut oval to center front of flocked card panel
10. Save cut oval for another fun flocked project
11. Stamp, color, and cut out TRHD Caffeinated Owl image
12. Attach Caffeinated Owl with foam tape
13. Add clear gems around card

*** Make sure not to throw away the negative piece from your flock. You can definitely reuse it . I will be sharing a card really soon using the negative pieces from my foil and my flock.***
 Doesn't this Blue Diamond Deco Foil Flock just make you happy? Like I said earlier ... its like one of those fuzzy posters we'd get as a kid and color.

Here is one more look at the full card. I just want to say ... If you have never played with flock; you really should try it. It is so much fun and there are so many possibilities when using Therm-O-Web products.

  For more inspiration, updates, and news make sure to check out these places.


Until next time ... Hugs & inky fingers!

-Niccole-


Therm O Web Collab with Lisa


Hello Rabbit Hole fans and welcome back to the blog!
It's Lisa here with you today and I am so excited because as you may have seen,
The Rabbit Hole Designs has teamed up with Therm O Web to bring you some awesome
projects! Today I have 2 fun cards to share with you using the Rainbow and Teal Decofoil.
I had so much fun with the Decofoil because I've never used it before.
Once I foiled one or two images I was hooked and the dog and cats were lucky I didn't foil them too!

Here is my first card using the Rainbow Decofoil and the Sofishticated
stamp set from The Rabbit Hole Designs.


For my first card I decided to try foiling an image printed from my laser printer.
Since I knew that the Decofoil would stick to toner I had the idea to stamp an image
in black ink and scan it into my laser printer.  Once the printer printed out the scanned image
I ran it through my laminator with the Rainbow Decofoil and watched the magic happen.
The results were stunning!  As always with foiling on cards, it's so hard to capture the true
shine and magic in a a photograph.  Those of you who have tried foiling and photographing
know what I mean. The Zentangle style of the fish in the Sofishticated stamp set really pick
up the rainbow foil in such amazing detail. I was so impressed with the results of foiling
over the toner, I decided to foil the sentiment as well!


Here is the Seahorse on a bookmark from the same stamp set foiled the exact same way 
and I love it just as much as the pretty fish!


For my second card I decided to try foiling with a different technique.
I used the Decofoil Transfer Gel and the Teal Decofoil.
I used a wavy stencil and layered the transfer gel over top and let it dry over night.
The next morning I took the stenciled panel and laid the Teal Decofoil over it and sent it
through the laminator. Once again, amazing results!
I just love the Inky stamp set from The Rabbit Hole and I thought that
googly eyed octopus would look so good against all that shiny foiling!
I cut out a circular shape from the center of the wavy panel for this card and I used the rest
of the panel for another shaker card I'll share below.


There are so many ways to foil and they're all so much fun!
I used the leftover panel from the above card to make this awesome shaker card
once again using the Sofishticated stamp set.


You can really see the shine in this picture because of the way the light is hitting it.
Once again the shine is so impressive!

This was my first experience with foiling and I was surprised how easy it was to do!
There is plenty of inspiration on the Therm O Web website and tons of YouTube videos
to show you the many ways to achieve that beautiful shiny look!
A big thank you to Therm O Web for supplying our DT with products so 
that we could try out this fun technique!


For more inspiration, updates, and news make sure to check out these links.

Gourd-geous Therm-o-Web Collab


Hey everyone, it's Amanda W and I'm super excited to share this fun card using both The Rabbit Hole Designs and Therm-o-Web products!


Fall is my favorite time of year so I immediately grabbed Gourd-geous! from the September release and started coloring.


Here are the details:
  • Using Pixie Spray, I adhered my Deco Foil Starburst Stencil to my cardstock and covered it with Champagne Mist Metallix Gel.
  • While that was drying I stamped, colored and cut my pumpkin from Gourd-geous!
  • I took the largest label from the Nested Label Dies and cut it from vellum. Then I carefully heat embossed my sentiment in black embossing powder.
  • When the background was dry, I die cut he same label from the background and black cardstock 4 times and glued them all together for a raised look.
  • I glued the "frame" that was left to a card front, then glued the labels back in their spot, added the vellum label to that and popped my pumpkin up with foam squares.
  • For finishing touches I added glossy accents to the pumpkin's eyes and nose.

Here's a closer look at the subtle shimmer the Metallix Gel gives and the glossy eyes of the glowing pumpkin.

Such a fun card. I would love to send this to a girlfriend this fall. I think it would fit in perfect! Don't you?


I appreciate you stopping by! Be sure to check out the Therm-O-Web blog for more inspiration from their design team too.

Here are the products I used:


For more inspiration, news and updates check out these links.

Caffeinated Reindeer - Therm-O-Web Collab


Hello my crafty friends! It's Amanda from Pear Blossom Press and today, I'm sharing this fun Christmas card featuring products from The Rabbit Hole Designs and Therm-O-Web. I really love how this card came together and it was easy enough to mass produce. Look at all of the dimension and shine on it...


To create this card, I taped off a narrow border around the edges of a white A2 top folding card. I sprayed Pixie Spray to the back of my Candy Twist Stencil and stuck it to the front of the card. I used a makeup brush to stencil on Festive Berries, Aged Mahogany, and Vintage Photo Distress Oxide Inks to create a vignette. With the stencil still in place, I applied a coat of Gina K White Glitz Glitter Gel on top. I removed the stencil and tape right away and set the card aside to dry.


Here is a quick tip for working with stencils from MaryAnn (one of the owners of The Rabbit Hole Designs). She suggested I stick dirty stencils into a large Ziploc bag with a squirt of Totally Awesome Spray, or Windex, to help keep the glitter gel from setting and to make clean up easy. It totally works! You only need a little of the cleaning solution to cover the stencil in the bag and you could stack a few up while you are working, to save time and clean them all up at the end. Thank you MaryAnn, great idea! (Side note: Totally Awesome spray is also totally stinky; use in a well ventilated area.)


Back to my card... While the card was drying, I stamped, embossed, and Copic Colored the Caffeinated Reindeer. Isn't he fun? He even has little reindeer slippers! I used the Coordinating Die to cut him out. I also used the same die to cut out a piece of White Foam Adhesive. This is a layer of foam with adhesive on both sides; it die cuts perfectly. I peeled back the top piece of release paper and adhered the colored reindeer to the foam piece. I die cut a fishtail banner and embossed part of my sentiment in white. I die cut three layers of the word NOEL from red cardstock and stacked them together. I glued the word to the banner, then glued the banner to my dry card. Then, I peeled the release paper from the back of the reindeer and placed him on my card. To finish the card, I wanted to add a little shimmer to the reindeer, so he wouldn't be unbalanced, compared to the background. I used a gold gel pen to add dots to his mug, Aqua Shimmer Pen to his eyelid, and Diamond Glaze to his eyeball and mug.


I hope I've inspired you to get a jump on some of your holiday cards. Head on over to my blog for links to the specific products I used for my card. Before you go, check out another fun collaboration project from Shanna. Then hop on over to Therm-O-Web for even more inspiration and all of the details on how to enter to win a gift card! I'll be back at the end of the week with another sparkly card that will have you drooling...

TRHD & Therm-O-Web Collaboration

Happy Monday everyone!
Niccole here ...

I am so excited to be collaborating for The Rabbit Hole Designs with Therm-o-Web this week. I will be sharing not one but two blog posts. So make sure you check back later in the week.

You can enter win $25 in Therm-O-Web product. Head on over to their site to find out how.
I am using one of my favorite stamps from The Rabbit Hole Designs, which is Gourd-geous and the Diamond Flower stencil. Both are available at Simon Says Stamp and at The Rabbit Hole Designs stores.
 
This is the Therm O Web Transfer Gel I used for my card along with the Silver Shattered Glass Deco Foil. Have I told you I LOVE this foil? I do, I really do!

Now onto my card ...

Here is how I made this card:

1. Turn laminator on to really heat it up good.
2. Cut and fold a black A2 card base.
3.On the card front I used my stencil to apply the Transfer Gel
4. I let the Transfer Gel dry. It's dry when it turns clear.
5. Place fold shiny side up on to of card with Transfer Gel
6. Put card with foil on it in carrier sheet
(I use a piece of copy paper folded in half)
7. Run through laminator
8. Peel foil away from card to reveal your masterpiece.
9. Added black circle to center front of card
10. Stamp, color, and cut out TRHD pumpkin image
11. Attach Pumpkin with foam tape.

** Make sure not to throw away the negative piece from your foil. You can definitely reuse it . I will be sharing a card really soon using the negative piece of foil.**

 Doesn't this Silver Shattered Glass Foil just sparkle? I mean it shines here but trust me this picture does NOT even do it justice. I think it definitely is one of my favorite foil.
This cute pumpkin is floating on the top of the card with foam tape. I love how the hat is gray and it adds to the Silver Shattered Glass foil. Wouldn't you agree?
Here is one more look at the full card. I just want to say ... If you have never played with foil; you really should try it. It is so much fun and there are so many possibilities when using Therm-O-Web products. Make sure you come back later in the week ... I will be using Therm-O-Web Flock. It is so fuzzy and bright. It makes me happy every time i use it.

  For more inspiration, updates, and news make sure to check out these places.


Until next time ... Hugs & inky fingers!

-Niccole-