Pages

Showing posts with label Sassy Anti Valentine. Show all posts

Cupid -FND a slimline card


Hello my crafty friends!  Welcome to today's The Rabbit Hole Designs blog!  So a question for you...  Is it Galantine's or Valentine's Day?  Well, either way you look at it, that little cherub is so FND. That is Fat, Naked and Dangerous! So let's put him on a slimline card, right?

My Cupid -FND slimline card features The Rabbit Hole Designs' new Valentine stencil, the Sassy Anti Valentine stamp set and the soon to be retired Marquee Words stamps set

This is one of those cards where you see it in your mind, try it out, change your mind midway thought, and start over.  Sometimes this is the process when you create - trying by trying and learning as we makers make! 
  

I started off with a piece of 3 1/4" x 8 1/4" pink cardstock.  I stamped the word LOVE, from the Marquee Words stamp set in clear pigment ink 7 times  straight down the card front.  This gives the large letters a subtle shadow of the sentiment for the background.  I placed the three striped hearts on the Valentine stencil on the front of the card front about 1/2' below the top of the card front.  Using a Cotton Tail Blending Brush, I started to stencil it with Honeysuckle Ink.  Once I removed the stencil to reveal the image, I found it to be far too much pink.  I used my heat gun to make sure the ink was dry.  I replaced the stencil over the pink heart stripes and re-stenciled the three hearts in Black Soot Distress Oxide ink.   


Much better!  I needed one more black striped heart, so I positioned the striped heart stencil to add a 4th small striped heart at the bottom of the slimline card front. 


 Chubby cupid, from the Sassy Anti Valentine stamp set, is stamped on white cardstock with Versa Mark clear pigment ink and heat embossed with red glittery Oriental Fire embossing powder.  He is fussy cut and added to the card front. I layered the card front on a piece of red cardstock and tied it with some black twine.


I stamped and added the Fat, Naked and Dangerous  sentiment from the Sassy Anti Valentine stamps set and  attached it to the black twine. I mounted the card front on a dark grey slimline card base and added three black gemstone to finish the card.


Thanks you so much for stopping by today.  I hope you enjoyed this Cupid -FND slimline card featuring The Rabbit Hole Designs' new Valentine stencil, the Sassy Anti Valentine stamp set and the soon to be retired Marquee Words stamps set.  Feel free to ask any question or leave a comment below.


Be Creative ~ Stay Inspired

Jenn Gross


Follow me, Journey Coach Jenn, on 

Instagram - https://www.instagram.com/journeycoachjenn/

YouTube - http://www.youtube.com/c/JourneyCoachJenn

Blog - http://www.journeycoachjenn.com/


For more inspiration, updates, and news make sure to check out these places


The Rabbit Hole Designs

The Rabbit Hole Designs Instagram

The Rabbit Hole Designs Facebook Page

The Rabbit Hole Designs Pinterest

The Rabbit Hole Designs YouTube


Tacos Don't... a sassy Valentine card with tutorial

Hello my crafty friends! Welcome to The Rabbit Hole Designs blog.  Have you heard... Tacos don't disappoint?  Just providing a little bit of sass to this pretty pink Valentine card.  I used the fun shaving cream technique with a bit of a twist, I used the Valentine stencil as a mask to create the variegated word "Valentine".  I also added the sentiment  from  the Sassy Anti-Valentine stamps set.

Let's take a closer look at the shaving cream tutorial:
A - I added shaving cream foam to a shallow tray and smoothed it out with a palette knife. (like frosting a cake or spreading butter evenly on toast) 
B - I added drops of ink refill. Liquid colors are the best to use with this technique. I chose a Watermelon pink, Eggplant purple, and Aqua Sky blue
C - I used the palette knife to swirl the colors together in the shaving cream.  I took a 4" x 5 1/4" piece of white cardstock.  I gently pressed it on top of the colored shaving cream, just enough pressure for the shaving cream to make contact with the cardstock.  I lifted the cardstock off. You will find some of the shaving cream will pull away with the paper. I used a squeegee to remove the excess shaving cream from the cardstock and discarded it.  The color will have attached to the cardstock creating  swirls of color. Put the cardstock aside to dry.  This paper is considered the 1st pull (I typically get three pulls  from one coloring)

D - I sprayed the reverse side of the Valentine stencil with Pixie Spray (a light tack, repositionable  adhesive). Adding Pixie Spray to the back of a stencil will help the stencil stay in place and secure the smaller sections of the stencil to the paper  
 E - I positioned the stencil on a piece of  4 " x 5 1/4" rose colored cardstock.  I used a rubber brayer to roll over the stencil and cardstock making sure the entire stencil was sticking to the cardstock.  I added purple tape to two sides securing the stencil to the cardstock edge
F - I gently pressed the stencil side down on top of the colored shaving cream, again with just enough pressure for the shaving cream to make contact with the cardstock. I rubbed my fingers over the cardstock to make sure the colored shaving cream made contact with the stencil and paper. I lifted the cardstock off and pulled a the squeegee across to remove the excess shaving cream.  I  gently removed the Valentine stencil revealing the word Valentine in variegated colors. I put the cardstock aside to let it dry
G - After the card stock dried, I cut it out (the valentine image measures 3 3/16" x 3 3/4") and mounted it on a piece of black glossy cardstock

I hope this inspires  you to try the shaving cream technique with a stencil. It is a fun quick way to create,  I cannot promise it  will not be messy, but it will be fun. 


I hope you enjoyed this sassy valentine - Tacos Don't card featuring the Valentine stencil  and the Sassy Anti Valentine stamps set.   I love hearing from you. tell me... What has been the craziest technique you have tried with a stencil?    


Be Creative ~ Stay Inspired

Jenn Gross


Follow me, Journey Coach Jenn, on 

Instagram - https://www.instagram.com/journeycoachjenn/

YouTube - http://www.youtube.com/c/JourneyCoachJenn

Blog - http://www.journeycoachjenn.com/


For more inspiration, updates, and news make sure to check out these places


The Rabbit Hole Designs

The Rabbit Hole Designs Instagram

The Rabbit Hole Designs Facebook Page

The Rabbit Hole Designs Pinterest

The Rabbit Hole Designs YouTube

Cupid is Stupid


The Spell It Stencil is absolutely one of my favorite stencils, because of it's versatility!  Hey, it's Cassie, back with another card for you today.  I have another anti-Valentine, because honestly I just love making them, lol.

Once again, I put the Spell It Stencil to great use and spelled out the word 'CUPID' all over my background just doing some ink blending.  It was so easy!  Then I stamped out my sentiments using the Sassy Anti Valentine stamp set, and even did some stamping on the inside of my card.


If you'd like to see exactly how I made this card, you can watch it here or head over to my YouTube Channel.


And here is a closer look at the products I used to make this card.


I hope you enjoyed what I made for you today and that you were inspired to go out and get a little crafty.  

For more inspiration, updates, and news make sure to check out these links.

Thank you so much for stopping by!
Cassie

Anti Valentine's Day Dragon


Hi it's Lisa from Oh So Cute by Lisa! Today I am up on blog
with an Anti-Valentine's Day card. Since Valentine's Day is a very unpopular holiday for so many, The Rabbit Hole came up with an Anti-Valentine's Day stamp set and the snarky sentiments are HILARIOUS! When I first colored this Caffeinated Dragon I was not happy with the results and he got filed away with images that I might use one day. Well today is that day!  When I was going through the sentiments in the Sassy Anti-Valentine stamp set I knew that the sentiment I picked was perfect for my diseased looking Dragon.  
Well at least that's what I thought........ green with purple spots.......ick!

Here are the 2 stamp sets I used on today's card:


I love how the brick embossing folder background adds to the "blah" feeling on this card, the whole card just makes me laugh! I hope it gave you a good laugh too!


For more inspiration, updates, and news make sure to check out these places ...


Have a great day, I already am!

🐲Lisa 🐲

Galentine's Day Pizza Easel Card


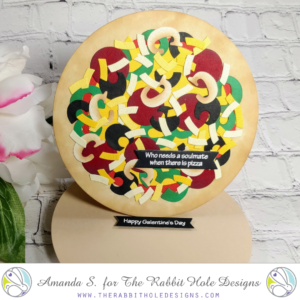
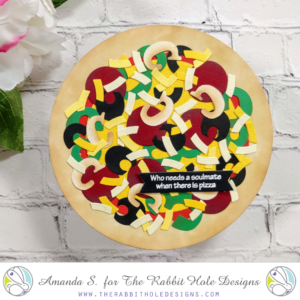
It's almost Valentine's Day, and you know what that means? That it's almost Galentine's Day too! Amanda here, from Pear Blossom Press, and I've got a fun pizza-shaped galentine, inspired by a sentiment in the Sassy Anti-Valentine stamp set


Easel cards are easy to make with large die cut shapes. I cut three 5½" circles and scored one at ½" and 3." The scored circle is the center piece of the card. I glued the ½" flap to the back layer, and the larger bottom flap to the top circle. This creates a Z fold card base.

Die Cut Pizza Galentine's Day Easel Card Die Cut Pizza Galentine's Day Easel Card Die Cut Pizza Galentine's Day Easel Card

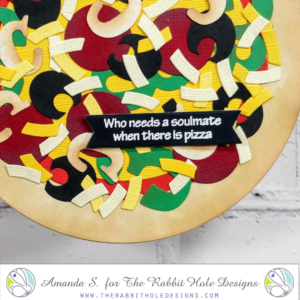
To create the pizza, I searched through my stash and found dies that looked like pizza toppings. I cut them from appropriate colored cardstock and added a little shading with brown ink and a small makeup brush. After the toppings were glued down, I popped up sentiment banners up with foam tape: one on the front of the card, and one inside. The popped up sentiment inside the card allows the easel to stand upright.

The products I used are listed over on my blog, but I encourage you to take a look through your dies and see what you can find. Rotate the shapes, imagine them cut from different colors and see if you can use them in unexpected ways. This is a great way to stretch your supplies and create a card around a sentiment when you don't have a coordinating image stamp.

Thanks for stopping by today. You can find the sister article to this on my blog. Hop on over for links to the specific products I used and more inspiration. I'll be back soon with more fun ways to use your dies in non-traditional ways. 

For more inspiration, updates, and news make sure to check out these places:

Drunken Goat Anti Valentine - Gel Press Tips


Hello my crafty friends! today I am on The Rabbit Hole Designs Blog sharing my Anti Valentine Drunken Goat Card. This card features the Caffeinated Goat and Sassy Sentiments-Anti Valentine stamps sets.  The back ground is created using a gel plate and the coffee mug has be replace with a bottle of... well you can read the sentiment 😂😂😂

If you have not used a Gel Press/plate it is a lot of fun and can be a tad messy, but then again, creativity is not clean.  

A - a gel plate is a solid jelly like plate.   They comes in various sizes.  I am using a 5" x 7" gel plate. You add pigment to the plate (inks, re-inkers, paints, etc...)  and  pull a print from it with a brayer and paper.   You will notice the press is stained, not to worry,  pigments will stain it, but that will not affect the prints you pull.
B - the second gel plate I used has raised heart images
C - I tapped out a yellow, pink, and berry hybrid in in a random pattern on the gel plate
D - I take my soft brayer and roll it over the gel plate blending the inks together and then placed the heart gel plate (heart side down) on top of the inked gel plate, gave it a gentle rub and then lifted it off.  I set the heart plate off to the side as we will be using it in a moment.


A - I place a piece of 4" x 5 1/4" white cardstock on top of the gel plate
B - I added a piece of copy paper on top of the cardstock and gel plate creating a sandwich and keep the back of my card front clean
C - I used the brayer to roll even pressure over the sandwiched paper.  You will see the ink from the brayer  is coming off on the copy paper
D - As the paper is lifted it exposes the background image of hearts
A - We get a second print from the heart gel plate.  I set the heart gel plate down heart side up (the ink is on the hearts from earlier)
B - I added another piece of 4" x 5 1/4" white cardstock on top of the heart gel plate and covered it with a piece of copy paper
C - After rolling it with the brayer, I pulled the print
D - Here you see both pulled prints next to each other.  I chose to use the print pulled from the heart plate for my card.
A - I created a heart stencil using a plastic grid template and one of my heart dies.  I centered it on the heart card front
B - I stenciled the heart in a berry oxide ink
C - I added water droplets to the stenciled heart
D - Using my heat gun to dry the droplets created a distressed heart


A - I blended the outer edges of the card front with a subtle pink oxide ink
B -  Using my stamp positioner, I stamped my Sassy Sentiments - Anti Valentine poem in the upper right part of the stenciled heart with black ink
C - I added the #meh-Meh Sentiment from the Caffeinated Goat sentiment to  the lower right side of the card front using a teal ink
D - I colored the Caffeinated Goat with my alcohol markers. He has a die you can use to die cut him out.  I cut of his coffee mug so he could hold the bottle.  I found a bottle stamp and colored it to look like a adult beverage bottle 😉  The bottle is glued into the goats hand.  He is added to the card front using adhesive foam squares, placing him to the left side on the card front.

A - C - I added nine 1/2 gem embellishments to the card to finish it off before adhering it to the ice blue card base


The Rabbit Hole Designs products use:


Thanks for stopping by!  I has a fun time getting messy and creating  with the Gel Press.  It has been a while since I used it.  I love revisiting techniques and products in my stash.  I hope you enjoyed today's blog and this inspires you to try using a gel plate. As always, please feel free to ask me any questions

Thank you so much for stopping by the blog!

Be Creative ~ Stay Inspired
Jenn Gross
@journeycoachjenn


Love, under the sea

Hello there! Michelle here
With Valentine's Day approaching, love is in the air....and the sea!
I combined a few stamp sets and some masking to create this no line coloring card.
I love this cutie from Mermaid Hair and used her as my focus.
I used the big heart from Sassy Sentiments- Anti Valentine.
After my coloring was complete, I used stars and part of a sentiment from 
Love You More- Christmas Frost. The 'love' sentiment is from Put a Bow on It.


I began with a mask for both the mermaid and heart...
A. Mask the place where you want to stamp your mermaid, than stamp your heart.  
B. Remove the mask and cut along the heart outline on the mermaid body...this is
your second mask.


C. Place the second mask in it's original position and D. Stamp your mermaid.
 Using a Misti makes this a lot easier.


E. Remove the last mask and stamp the heart again. My placement was not
so perfect, but using antique linen distress ink for no line coloring allows
you to color over your mistakes!!
F. Start coloring...and have fun!!!
Here is a list of Copic colors:
fin, bubbles and bikini: BG11, BG13, BG18
body: E000, E00, E11, E93
hair: V000, V01, V12, V17, V17
heart: R24, R27, R29, R39
water: B32, B93, B24, B37
sand: E11, E13, E17
colorless blender for rays.
I stamped the stars with white ink and 'love' with festive berries distress oxide ink.
I added some white accents with a gel pen and shimmer with 
stickles glitter glue.


That's it for today!
Thanks for taking a trip down the rabbit hole!!!

Michelle

For more inspiration, updates, and news make sure to check out these places.


Who Needs a Soulmate When There is a Kitten


Have you ever tried doing some creative masking with your stamps?  That's exactly what I did here using the Heart Dance stamp set and the Sassy Anti Valentine stamp set.  Hey friends, it's Cassie back with another card!

In order to stamp just the girl from the set, I put the stamp into my Misti, and masked off the boy using some masking tape.  I inked it up and then pulled the tape away, and stamped the girl.  I colored her and one of the cats from the Cattitude stamp set using Copic Markers.  My background was made using some more masking paper along with the Diamond Flower Stencil and a couple different colors of Distress Oxide Ink.


I basically stamped the sentiment on the inside in the exact same manner, since I wanted to be creative with my sentiment.  The only difference is that I wrote the letter 'a' in between 'is' and 'kitten'.  If you'd like to see exactly how I did it, I do have a video that you can watch here, or over on my YouTube Channel.


And here are close ups of the products that I used:

Heart Dance stamp set

Cattitude stamp set


I hope you enjoyed what I made for you today and that you were inspired to go out and get a little crafty.  

For more inspiration, updates, and news make sure to check out these links.

Thank you so much for stopping by!
Cassie


Two For One Donut Day

Welcome back to the blog Rabbit Hole fans, I hope everyone enjoyed 
their holidays with friends and family!

It's Lisa here on the blog with you today and I have a special treat!
Two Donut cards for the price of one. I just love the sentiments from the 
More Than Donuts stamp set and I used them to create the 2 cards
I am sharing today. 


For my first card I made a miniature note card.
I started with an 8x4 inch piece of kraft colored card stock and folded
it in half at 4 inches. I covered the bottom half of the front panel
in pink patterned paper and after I adhered it, I rounded the corners of the 
bottom of the front panel.  I then took the heart stamp from the 
Sassy Sentiments - Anti Valentine stamp set and stamped it randomly 
in kraft ink so it would give a tone on tone appearance to the top of the front panel.

I assembled a few cute donuts from my stash to the top of the patterned paper
and stamped my sentiment from More Than Donuts onto a cute tag.

A little pink twine to finish off the top of the card and it was done.
Why are donuts always soooooo darn cute?
🍩🍩🍩


My second card today is a gate fold card with a shaker element on the front.
The shaker element on the front is filled with fun sprinkles
just like you'd see on a donut.
I only adhered the heart shaker to one side of the front panel so
it could be opened to reveal the cute sentiment with donuts
on the inside.
I used 2 more sentiments from the More Than Donuts 
stamp set for this card. 


Here are the 2 stamp sets I used on today's cards:


Thanks so much for stopping by the blog today, I hope
you enjoyed my 2 donut inspired cards.

Make sure to check back in just 2 short days to see all
of the awesome new products included in the new release!
We will be sharing inspiration and as always there will be a chance
to win prizes during the blog hop.


For more inspiration, updates, and news make sure to check out these places


Thanks so much for stopping by today.
Have a great day, I already am!
🍩Lisa 🍩