Pages

Showing posts with label Celebrate With Cake. Show all posts

Clean and Simple Card Template

Hey crafty friend, Amanda from Pear Blossom Press here again. It's my youngest daughter's birthday today, but since she doesn't read this blog, I can share her card with you a little early. She is getting older, and more mature, so I opted for a clean and simple card design. It feels a bit more "grown up" and at age 14, that's important to her now. Plus, it was quick and easy! 

I made a birthday card, but you can use this design as a template for other cards too. You'll want a pair of sentiments, one large, one small. A tiny image, like the candle is optional. Those create the focal point of your card. For the background, you'll want a nice stencil. That's where our color comes in, and it sets the tone of the card. 

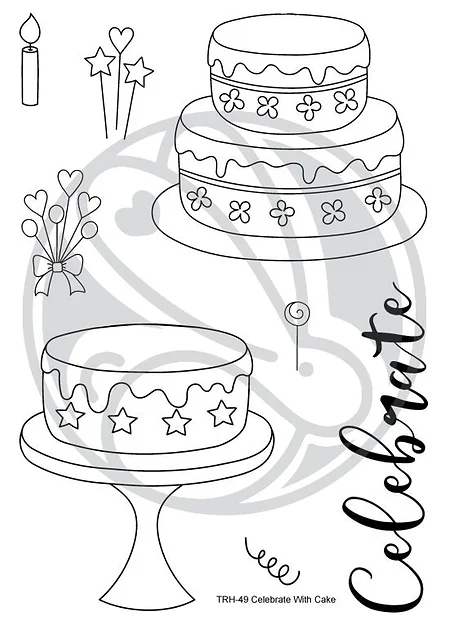
For my daughter's card, I started by blending pink and yellow ink through the new Splish Splash stencil from The Rabbit Hole designs. I didn't cover the whole panel, only part. The ink fades out and leaves plenty of clean, negative space. Next, I stamped and embossed CELEBRATE and three candles on the panel. I embossed them with clear powder to give them a raised, glossy finish. Just a hint of coloring on the candles makes them pop. Next, I trimmed the panel down and layered it onto a pink card base with foam tape. Then I popped the second sentiment up with more foam tape. To help the sub-sentiment stand out, it was embossed with white powder onto black cardstock and cut out with a fishtail banner. To finish the card, and add some shine, I topped each candle flame with a clear raindrop gem. 

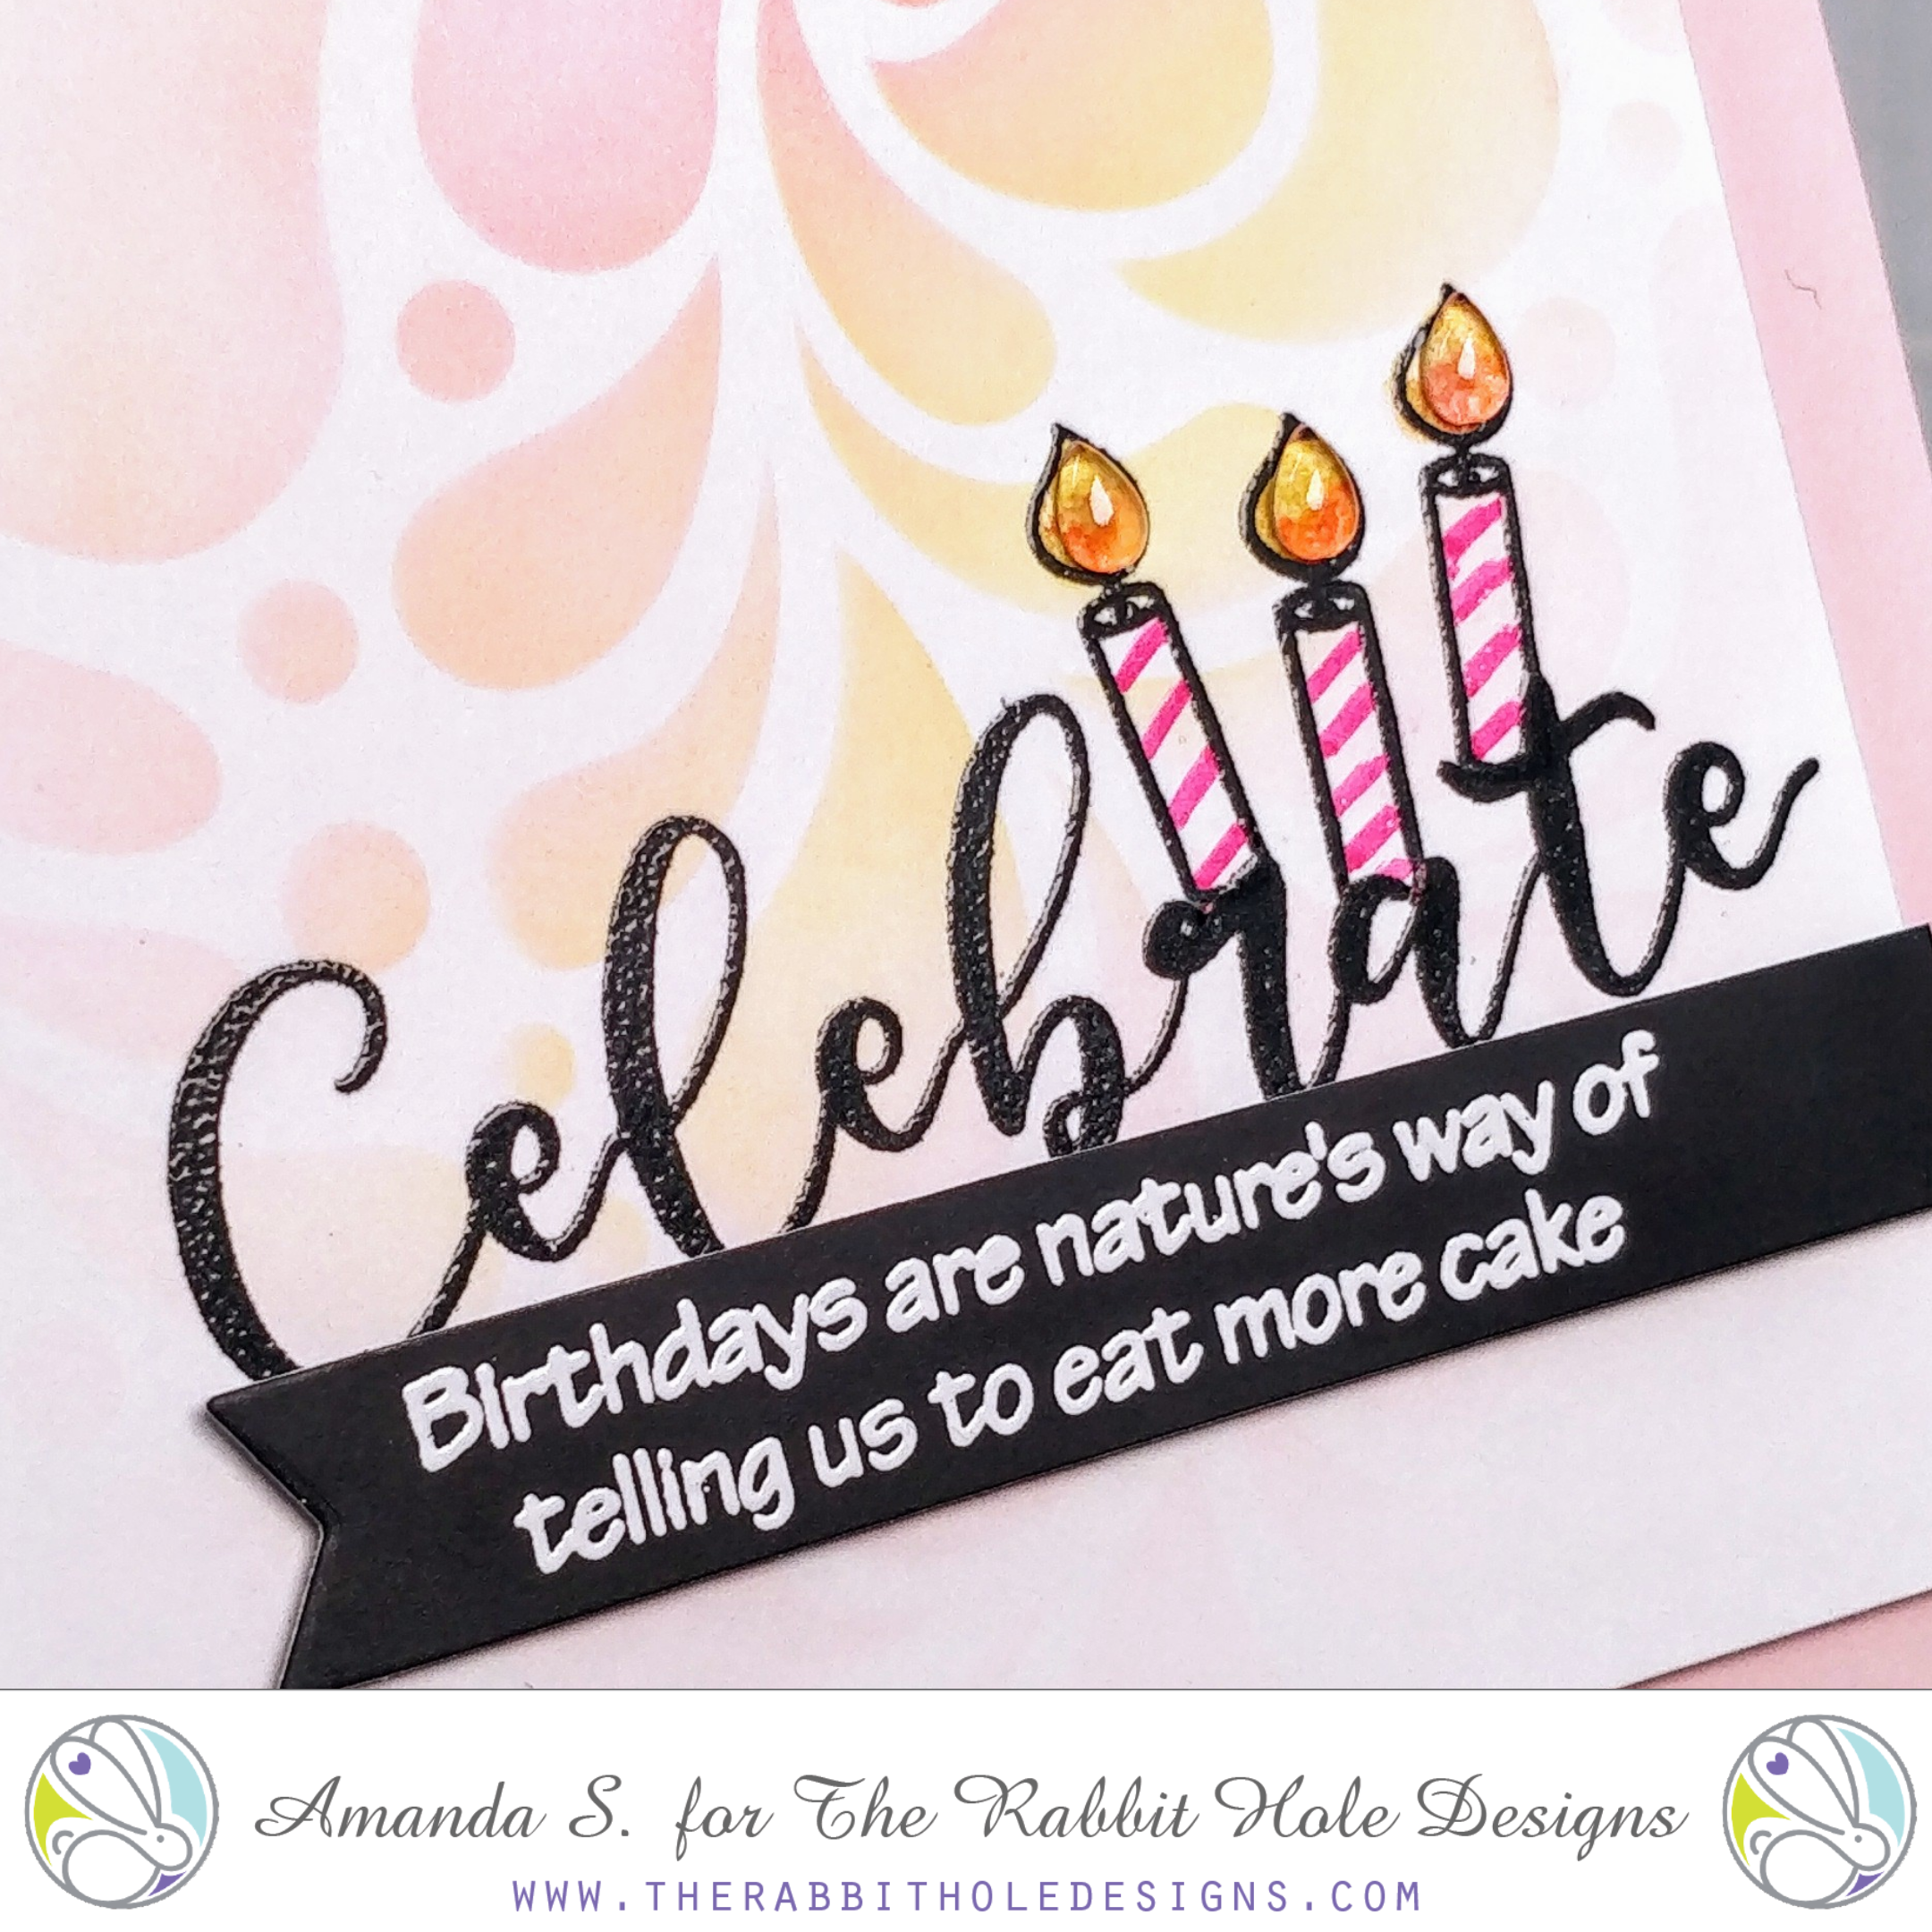
I really like the way this card turned out. If I were to make it again, I'd probably move the sentiments up about 2" and leave more of the white space of the background visible. What do you think of this clean and simple card template? Do you have stamps and stencils you can try it with? I'd love to see if you do! Tag me on social media, so I can cheer you on. 

Speaking of social media, I finished up the stenciling video I was working on last week (altering pattern paper). You can watch it here...


Thanks for stopping by today. For links to the specific products I used, head on over to my blog. I'll be back soon with another fun card to share.

For more news, info and inspiration be sure to check out 

Out of this World Celebration


Welcome back to today's blog!  I have created this fun Out of this World Celebration card using the Space - Infinty and Beyond stamp set. I created a dimensional card with layers, a acetate window and foam tape.  It is like a shaker card, but with out any shaker elements. 


I stamped  and colored the spaceman with the moon balloon (from  Space - Infinity and Beyond stamp set) using waterbrush markers and fussy cut him out.  I found a piece of watercolor paper I colored with watercolor pigments in my stash.  It already had the circle die cut out of it from another project. I trimmed it to 4" x 5 1/4" to create the card front.  I stamped the sentiment "Celebrate" from the Celebrate with Cake stamp set. I cut a piece of  clear acetate 1/4' bigger that the circle opening.  I took some neon silks and splattered colored spots onto the acetate and let it dry. 


The A2 card base is a rich purple cardstock.  I positioned the spaceman's feet just behind the lower area of the cut circle and his balloon in front of the top par of the circle opening and glued it down.  I turned the card front over and added the spotted acetate, gluing it shiny side down towards the front of the card base. When you turn the card from over  you will find the card is acetate window 
is smooth. 


I added foam tape to the back of the card front and attached it to the purple card base.  I added a few dimensional stars to the card to complete the project.


Products use:


Thank you so much for stopping by the blog!  I hope you enjoyed this Out of this Word Celebration card featuring the Space - To infinity and Beyond stamp set.  I love hearing from you. Please leave me a message letting me know what you like most about the June Release for the Rabbit Hole Designs. As always, if you have questions, just ask!

Be Creative ~ Stay Inspired
Jenn Gross

Follow me, Journey Coach Jenn, on 


For more inspiration, updates, and news make sure to check out these places


WISH- Birthday Card

Hi There!  
It's Kelly and today I am sharing a card featuring one of the newest stencils by The Rabbit Hole Designs, "Aim for the Stars".  What a versatile stencil to enhance your focal images. 
I paired it with "Celebrate With Cake"


To make this card I used Glitz Gel with the "Aim for the Stars" stencil on heavy weight blue cardstock.
Once it dried, I added the word "WISH" from the stencil using a dauber and Versamark ink. 
I stamped, colored and fussy the cake with tall plate and added it to the card with dimensional foam.
I also added gloss to the blue star, bow and circles and red glitter to the hearts. 
This color scheme is great for all genders and ages or even a July birthday!


Thanks for joining us today on the blog!
Come back for more inspiration using The Rabbit Hole Design products. 

For more information, news and updates check out these links:


Orange ya Glad its your Birthday??

Knock Knock!!
Who's there?
Orange!
Orange who?????
Orange ya glad....... 
LOL!

Hello Rabbit Hole Designs Fans!! DTM Shanna here today with a cheery and ORANGE card using the Celebrate with Cake stamp set and Twisted Sunshine stencil!  I will definitely be sticking to card making, and leave the jokes for the comedians though!!
Something about the color orange just makes my heart happy.  It never fails to brighten my day (pun intended!)!  I decided to go nearly monochromatic with this card and am in love with the end result!


I started by stenciling the Twisted Sunshine stencil using distress oxides and a blending brush.  I kept the center darker, and worked outwards to a lighter shade.  
Next I stamped and colored the cake with my Nuvo alcohol markers.  I glitzed up the flowers a bit with some orange Stickles from my stash.  It needed a little bit of sparkle!!  The cake was glazed as well with Diamond glaze over the frosting.  Once everything was dry, I adhered it to the stenciled card panel with foam tape.


Lastly I added my sentiment to the card base in black ink.  The sentiment made me giggle and it is from the Sassy Birthday 2 stamp set.  I mounted the entire card panel onto a A2 orange card (you saw that coming, right?!?)  and the card was finished!

That wraps up my post for today, I will be back soon for another trip down The Rabbit Hole!  Until then you can find me over on my blog, Caffeinated Craftiness or over on Instagram-Shanna


For even more inspiration, updates, and news make sure to check out these links.

Celebrate With Cake


Good morning Rabbit Hole fans, It's Lisa here with you and I hope your day is off to a great start! Today I have a shiny birthday card to share with you featuring the elegant birthday cake from the Celebrate With Cake stamp set.


Card Recipe

1) I started off with a white card stock panel and I painted some loose pink watercolor stripes horizontally across the background.

2) I stamped the cake image and heart bows in Versamark embossing ink and then sprinkled both with silver embossing powder. I did the same thing with the "Celebrate" sentiment and then heated them both up until they were dry and shiny.

3) I matted the stamped panel on to a sheet of silver foil card stock and then both panels on to a pink card base.

4) To complete my card and add extra bling I placed some pink sparkling jewels around my card.


Thanks so much for stopping by today!
And don't forget to visit Simon Says Stamp for all your Rabbit Hole needs as well!


For more inspiration, updates, and news make sure to check out these places ...


Have a great day, I already am!
🎂 Lisa 🎂

Let Them Eat {Birthday} Cake...


Hello there!

 Michelle here! Stopping by to share a birthday card with you using one of my favorite
color combos...aqua, violet and gold!!!
I used the stamp sets Celebrate With Cake, and Sassy Birthday, along with Diamond Flower Stencil.
I inked up the background with this sweet stencil and distress oxide inks in peacock
feathers and tumbled glass. Than I added some gold and black paint splatters and set aside to dry.

I stamped the double layer cake than masked the image and stamped the pedestal 
from the single layer cake. I colored the cake with Copic Markers in shades:
cake plate: BG10, BG11
Cake: E50, E51
Icing and Flowers:  V12, V15, V17
Topper: BG11, BG13, BG18
For the sentiment, I shaded a piece of Copic friendly paper with V12, 15, and 17.
I embossed the sentiment with gold powder.
For a finishing touch I added some clear stickles glitter glue and sequins.

Supplies used:
Celebrate with Cake 4x6

Sassy Birthday 4x6

Diamond Flower - Stencil 6x6

Thanks for taking a peek!!!
Check out all the items in the shop and also at Simon Says Stamp!!!

For more inspiration, updates, and news make sure to check out these places ...

See you soon!!!

Michelle


It's an elegant Celebration!

Hello Rabbit Hole Designs Fans!! DTM Shanna here today a clean and simple celebration card using the Celebrate with Cake stamp set and Twisted Sunshine stencil!  


For this card, I opened for a very clean look with white on white with a touch of silver for the sentiment.  I used a micro glass bead gel over the Twisted Sunshine stencil on white cardstock to create my background.  While that was drying, I heat embossed the "celebrate" sentiment in sterling.  I actually heat embossed over the sentiment a total of 3 times, layering more embossing powder for a thicker, smoother finish.


I popped the sentiment onto the card using foam tape and I had a elegant Celebrate card fit for many occasions.  Wedding, baby shower/gender reveals, job promotions....the list goes on!  Celebrate with Cake can be used for SO much more than birthdays!!  


That wraps up my post for today, I will be back soon for another trip down The Rabbit Hole!  Until then you can find me over on my blog, Caffeinated Craftiness or over on Instagram-Shanna


For even more inspiration, updates, and news make sure to check out these links.

Celebrate With Cake: A Shaker Card

We are very excited here at The Rabbit Hole Designs as we prepare
 to celebrate the company's FIRST birthday!  
I am sharing a birthday featuring "Celebrate With Cake"

I colored the images with Copics and cut them out.
I thought it would be fun to create a shaker card for the background.
I embossed the "Celebrate" with silver embossing powder on 
vellum and cut it out.

This cake set is so versatile. You can make it any color for any occasion.
Princesses, super heroes, and young and old alike will love it!  


 I used Nuvo glaze and a glitter pen on the cake:


Thanks for celebrating with me today.
Come back this weekend for all the fun celebration.
for events and giveaways.  
Kelly

For more inspiration, updates, and news make sure to check out these links.


Who want's birthday cake?

I know, silly question huh?  We all want birthday cake,  the kind that doesn't find it's way directly to your hips!  DT Jammie here with another project to hopefully inspire you.... to stamp, not to eat cake.... well, maybe BOTH!


I began by stamping the awesome new "Celebrate with cake" stamp on a scrap of Sweet Sentiment coloring paper. I colored it with my copic markers in fun teals and pinks.  Then I used some Nuvo drops to created that clear yellow glittery icing. .... then it was time to get to work.

I used an A2 size piece of Sweet Sentiment paper and pretty much all of my T, C and W Copic markers to create this little kitchen background.  I used R83, R81, and RV10 to create the little canisters on the counter, and a silver pen to draw in the hardware on everything. Then I then cut a bajillion layers of pinks and grays to mount the background to and used Distress Oxide inks to "distress" the edges. Then, I drank coffee.... no seriously, because I wanted something else but I didn't know what to do, then it totally hit me! I grabbed my entire bin of flowers and found these tiny roses. I grabbed 6 of them and wrapped them in a square of... wait for it.... brown packing paper! lol! Yup, it was the perfect consistency and thickness to wrap the flowers in and tied them with a little bakers twine bow. Then I used foam squares to give the cake a little pop off the page and stamped a sentiment from "Sassy Birthday 1" onto a scrap of paper.  I adhered that to the card and BOOM! Done! Now I can finish my cup of coffee...... mmmmmm.......

I hope that you totally are inspired by this card and that it makes you wanna try using any of these techniques and/or stamps!  Thanks everyone for stopping by today! See you all soon!
Toodles!

Cake for Breakfast


Good morning my crafty friend! It's Amanda from Pear Blossom Press again, and I've got another quick and easy card for you today. I made a birthday card, but you can use this as a template to create different cards for any occasion. Look for stamps sets with a large focal image, and smaller images for the background. A funny sentiment will pull the whole thing together. 

I started by stamping the cake and topper from the new Celebrate with Cake set. I Copic colored the image and cut it out with my ScanNCut. While my markers were still out, I used the same icing colors to color a strip of cardstock for my sentiment banner. I used white powder to emboss a sentiment from Sassy Birthday onto the pink strip and cut it out with a fishtail banner die. 

Next, I stamped smaller images from the cake set, along with presents from the Hoggy Holidays set, across the bottom right corner of a cardstock panel, and embossed them with gold powder. Then I filled in some of the space between the images with gold gel pen dots. I also added gold and white gel pen details to the cake.  

To assemble the card, I trimmed the panel down to 4" x 5¼" and popped it up on a white card base with foam tape. I popped the cake and sentiment strip on with more foam tape. For a little sparkle, I glued a few tiny gold star sequins to the background. I really like the negative space in the upper left corner; it feels clean and simple. I also like the narrow white border around the panel. The extra dimension makes the card seem a bit more weighty and elegant.


I'd love to know what you think of this card. Would you use it as a template for birthday cards, or something else? 

If you're looking for more inspiration with the Celebrate with Cake set, you might like this article. And it's not too late to hop along with the design team for the new release inspiration hop.! Click here to join the fun! You can find the sister article to this on my blog today, along with links to the specific products I used.

Thanks for stopping by today; I'll be back soon with another fun card to share!


For more inspiration, updates, and news make sure to check out these awesome places! 
Thanks again for stopping by today!

January Release Inspiration Hop ~ Day 3

Hello and welcome to Day 3 of the Inspiration Hop. We are so excited for you to join us as we present to you our January release.  Our fabulous Design Team has been sharing their projects over the last couple of days, so be sure to visit their blogs and leave them some crafty love.


 The 4 new stamp sets & 3 Stencils are available to purchase right now in the shop.
~
Every order placed will be eligible for a 10% discount. Discount Code TRHD2019 this code will only be accepted until Friday 01-03-2020 12:01 am PST. There are no exclusions on this code it is applicable to your whole order. Not applicable to previous orders. May be used more than once. Does not apply to shipping and tax.
**Please Note: Free Shipping WILL NOT be available during the time this discount code is in effect. **
~

The stamp set that is being highlighted today is:

Sassy Birthday 2

Celebrate With Cake 

Scripty Happy Birthday

Twisted Sunshine - Stencil

**Giveaway**
To celebrate day 3 of inspiration The Rabbit Hole Designs is giving away the stamp set Scripty Birthday and the Twisted Sunshine stencil to one lucky winner. Winner will be chosen at random from the comments left on participating blogs, so make sure to visit each stop and leave a comment. Leave comments by 11:59 pm PST 01-02-20 on all participating blogs. Winner will be announced on The Rabbit Hole Designs blog 01-03-2020 


Here is the line up for the hop:
Lisa Golzbein
Amanda Stevens

Thank you for joining us the last few days of our Inspiration Hop.


Thank you so much for stopping by today!