Pages

Showing posts with label Sassy. Show all posts

Wishing You the Happiest Adventure!


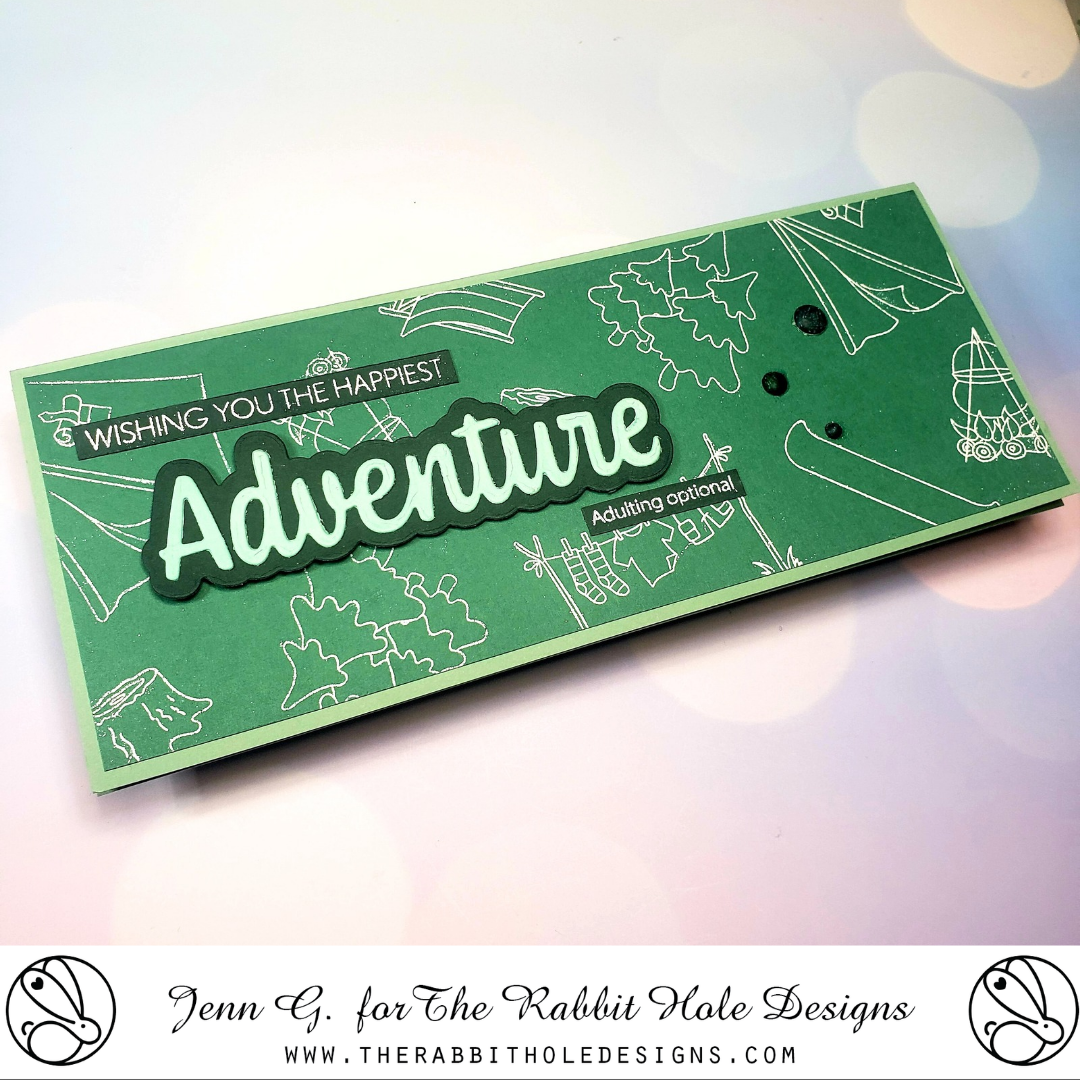
Hello crafty friends!  Jenn Gross here with an easy slimline card created with The Rabbit Hole Designs June Release. I am using these beautiful camping images illustrated by Agota Pop from both the Glamping with Tailette stamp set and Tenting with Tailette stamp set.  I love how stamping and heat embossing the line images create an simple background.

Supply List 


The only thing I colored on this card is (believe it or not) the Matte White Enamel Dots. They take colored pencil beautifully 
The background is a piece of medium green cardstock cut to 3 1/4" x 8 1/4". I treated the paper with the Cottontail Embossing Powder Tool. Once you treat the cardstock, the embossing powder only adheres only to the stamped images. The camping images are stamped in a random pattern using VersaMark Watermark ink then dusted with white embossing powder and heat set to create the background.

The word Adventure is die cut from light green cardstock  and the shadow layer is die cut from dark green cardstock.  The "Wishing You the Happiest" is from the Birthday Word stamp set and the "Adulting optional" is from Sassy Sentiment stamp set.  Both of these are stamped on the dark green cardstock with VersaMark Watermark ink and heat set with white embossing powder. I cut these sentiments into strips.  The sentiments and Adventure word are positioned and glued on to the left side of the card.


I chose a dark green colored pencil and colored a small, medium, and large Matte White Enamel Dots and attached them to the card front.  Attach the completed card front to a slimline card base and you have a finished card. 
Thank you, I appreciate you taking time from your day to stop by and check out today’s The Rabbit Hole Design project.  I hope you are inspired to create something lovely today!


Be Creative ~ Stay Inspired

Jenn Gross


Follow me, Journey Coach Jenn, on 

Instagram - https://www.instagram.com/journeycoachjenn/

YouTube - http://www.youtube.com/c/JourneyCoachJenn

Blog - https://journeycoachjenn.blogspot.com/  


For more inspiration, updates, and news make sure to check out these places 

The Rabbit Hole Designs

The Rabbit Hole Designs Instagram

The Rabbit Hole Designs Facebook Page

The Rabbit Hole Designs Pinterest

The Rabbit Hole Designs YouTube

Head in the Clouds - Interactive Valentine Swing Card


Hello crafty friends!  Jenn Gross here, with and interactive card using stamps and stencils from The Rabbit Hole Designs, You can also find my projects on IG under @journeycoachjenn.  It seems that love is in the air and in the clouds!

Today I am sharing aninteractive Valentine card.  This swinging cupid card is created with The Rabbit Hole Designs' Cupid Clarence stamp set (a Dusting Pike illustration) I used Cottontail Blending Brushes,  Clouds in my Coffee stencil paired with the radiant die from the You've Been Framed die set for the background.

Let's take a look at how this card is created:
A - I stamp the Cupid Clarence image twice.  I colored the head of one of the images  and the body of the other image using blue violet (BV) Olo Markers.   I fussy cut the colored head and body, leaving about 1/2" of paper above the neck of the body piece to attach Clarence's head with a foam square.  I angle the head at a slight upward angle and secured it to the body.

B - I randomly ink blended a cloud background with the Clouds In My Coffee stencil using Cotton Tail Blending Brushes. and Victorian Velvet, Spun Sugar, Kitsch Flamingo and Wilted Violet Distress Oxide ink on a 4" x 5 1/4' piece of white cardstock.

C & D - Using a standard hole punch, I added a hole 5/8" below the top center of the card front.  I positioned the radiant die from the You've been Framed die set about 1/2' below the hole and die cut the design. 
E - I used the standard hole punch to add a hole on each end of a 2' x 1/2" strip of clear acetate. This will be used for an interactive swing bar.

F - I added small jump rings to  the back of  Clarence's envelope and on the bottom of Clarence's shorts to add a small bit of weight for balance. The jump rings are attached with redline tape and a small piece of paper is glued over the top to secure the jumb rings into place.  I used Gem-Tack adhesive to attach a slider snap on side of the back of Clarence's arrow hand. 

G & H - I let the snap dry in place and attached one hole at the end of the acetate strip over the snap on Clarence's hand and snapped it in place. I snapped the other end of the acetate to the hole on the top of the card and tested the swing movement.  I removed the snap and acetate from the top card hole so I could stamp the sentiment at the bottom of the card.
I & J - I snapped the acetate swing bar to the top of the card front  I used a small cloud die cut from my stash to die cut a cloud to hide the snap attachment at the top of the card.  The cloud is placed over the snap with thick double-sided adhesive foam tape on each side of the cloud.  This space allows the acetate bar to swing freely.

K - I attached the card front to a lilac A2 card base using  double-sided adhesive foam tape completing this fun interactive card. 

Products Used

Thank you, I appreciate you taking time from your day to stop by and check out today’s interactive Valentine card featuring The Rabbit Hole Designs' new Cupid Clarence stamp set.  I hope you are inspired to create something lovely today!


Be Creative ~ Stay Inspired

Jenn Gross


Follow me, Journey Coach Jenn, on 

Instagram - https://www.instagram.com/journeycoachjenn/

YouTube - http://www.youtube.com/c/JourneyCoachJenn

Blog - http://www.journeycoachjenn.com/


For more inspiration, updates, and news make sure to check out these places


The Rabbit Hole Designs

The Rabbit Hole Designs Instagram

The Rabbit Hole Designs Facebook Page

The Rabbit Hole Designs Pinterest

The Rabbit Hole Designs YouTube


A Friend Like Blue


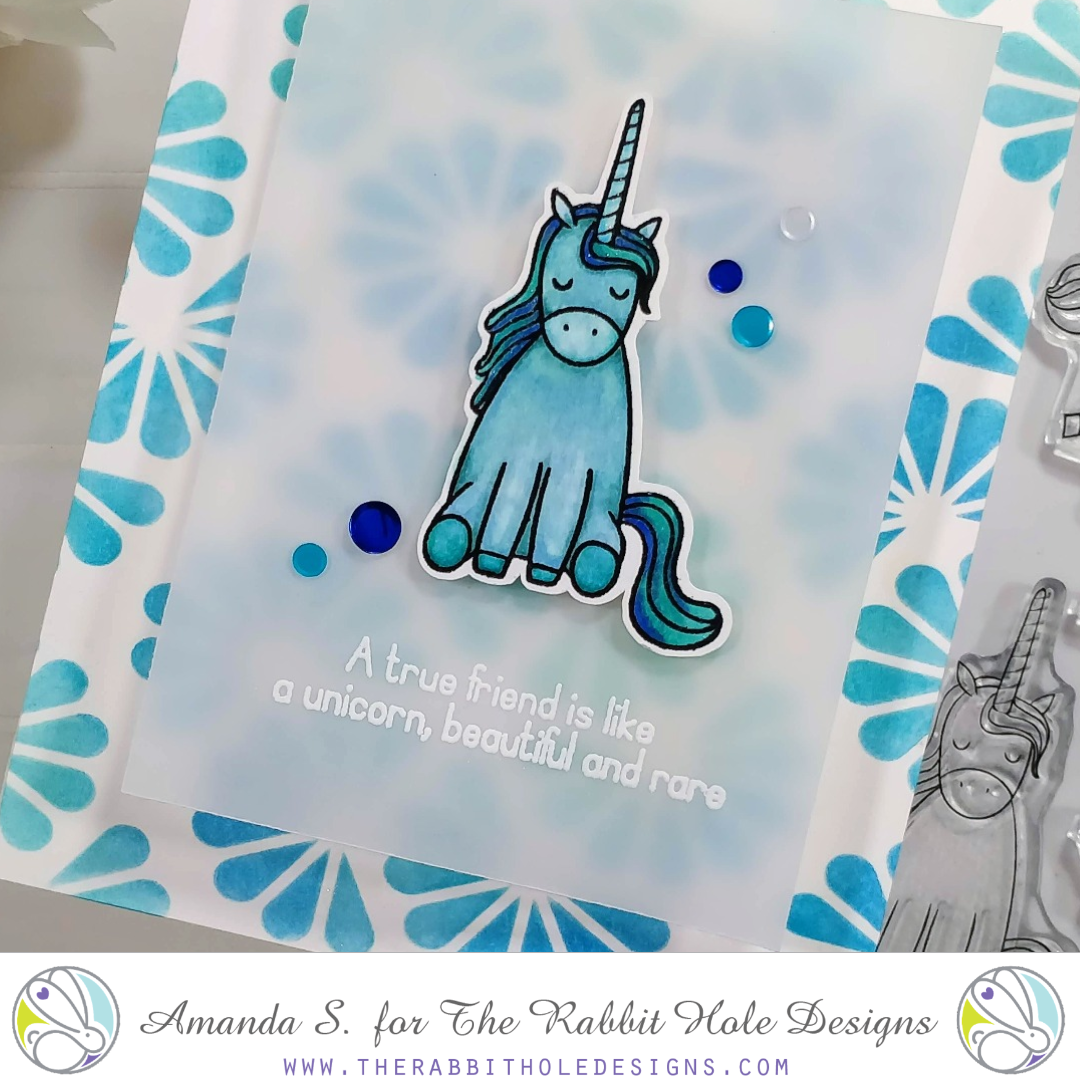
Hello again my crafty friend! It's Amanda from Pear Blossom Press, and I have a quick and easy card to share featuring the Sassy stamp set. I've also got a great tip I picked up at Creativation for a less messy way to apply shimmer to your backgrounds!


For this card, I Copic colored the sweet and Sassy unicorn in shades of blue, and added Aqua Shimmer pen highlights. Cutting her out with my ScanNCut was a breeze (I'm terrible at fussy cutting). I stenciled the background onto my card base using the Twisted Sunshine stencil and three shades of blue ink, then added some shimmer. 


Quick Tip

Here's a quick tip I picked up at Creativation from Fleurette, the inventor of Liquid Pixie Dust. To add shimmer to your backgrounds without splattering or misting it all over the place, try spreading a few drops of Liquid Pixie Dust onto a Gel Plate with a brayer. Then dip your background onto the plate to pick it up. It's similar to ink smooshing, but with shimmer. And there is no splattered mess! I love this new technique!!! 

Assembling the card was quick and easy. The vellum layer is sandwiched between foam tape, hidden under the unicorn. It's a heavier weight vellum that I embossed my sentiment onto. I chose the vellum because it diffused the background enough to allow the unicorn to pop, but didn't hide too much of the pretty stenciling. If the vellum was flat against the background, it wouldn't soften it enough, so the foam tape is important. A few sequins added some more sparkle and finished the card. 


You can recreate this card in any color scheme you like. Wouldn't it be fun to make a whole rainbow of cards and give them as a gift set? If you'd like to see more cards using the Sassy stamp set, check this out. You can also find the sister article to this post on my blog today! Head on over for links to the products I used and even more inspiration!


Thanks for stopping by; I'll be back soon with another super card to share! 


For more inspiration, updates, and news make sure to check out these links.

Roll me in Glitter!


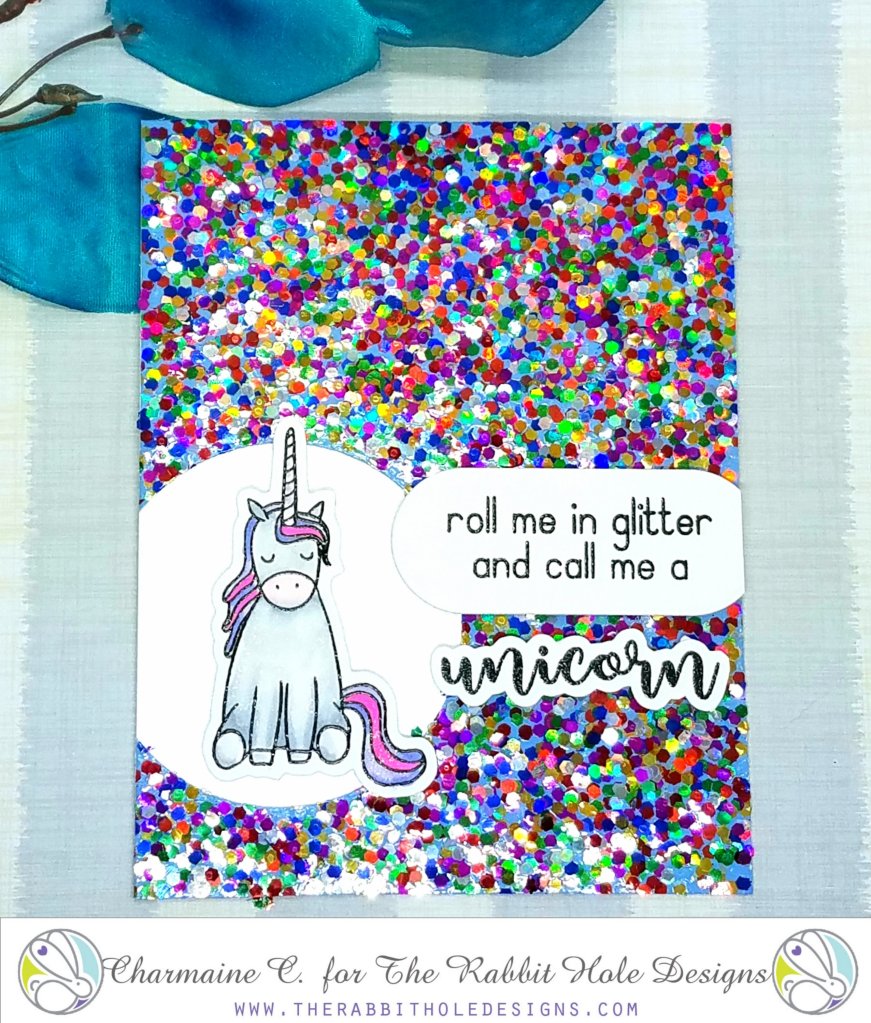
After a very rough week and illness we shared liked M&M's in my house, nothing makes me happier than making a card. And my subject? Our trusty sassy unicorn!


This stamp is available at The Rabbit Hole Designs and at Simon Says Stamp.


Here is what I did:
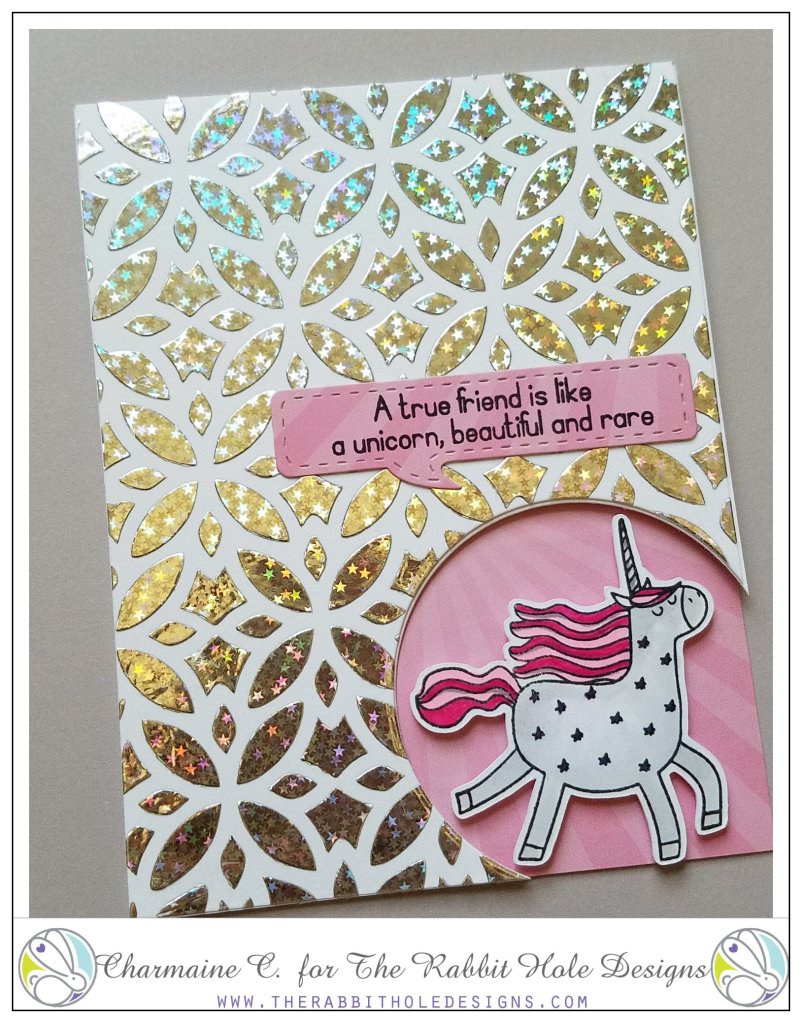
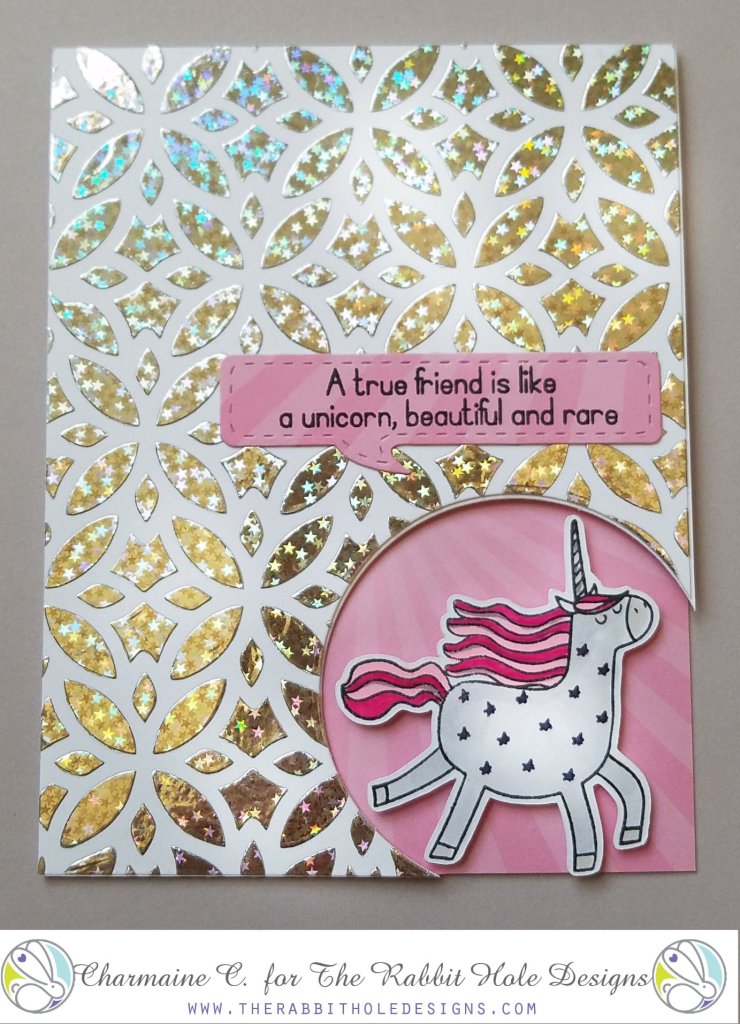
1. I have had this fabulous glitter cardstock for years and decided today was the day to use it. I die cut a circle off center from the left corner.
2. Add silver vellum in the open circle spot.
3. Stamp, cut and color the unicorn.
4. I used my Brother Scan N Cut to cut the unicorn and the word unicorn.
5. This is a top folding card, 4.25 x 5.5.


I hope you can make this easy card that will make a friend's day brighter!
Unicorn kisses,
Charmaine
www.facebook.com/charcards2017

Therm-O-Web, TRHD and Katie

Heyyyy!  We are collaborating with Therm-O-web this week!  Woohoo!  We have fun creations throughout the week, so keep checking back for more. 


I have a fun creation for you today, filled with unicorns, rainbows and foil!


Um... don't you just want to jump into the sparkly, dreamy scene?  Ride a unicorn or two?  Giddy-up! LOL. 

And can I draw your attention to the extra sparkle in the background →


OK, so here is how I made this:
  • I started with die cutting the Thanks border on some sticker paper that I had on hand.  The die is from Top Dog Dies (no longer around). 
  • Next, I peeled of the backing and applied my Deco Foil Rainbow Shattered Glass directly to the sticky portion. I set this aside.  
  • I  repeated this step with the Rainbow Die Set (Trinity).  I die cut the cloud dies from the Cloudy Day Scene Builder Die set in white and set them both aside. 
  • Then I stamped my unicorn from The Rabbit Hole Designs Sassy Stamp set on Copic friendly paper.  I colored it and fussy cut it out.  Again, I set this aside. 
  • The next step was to place my Candy Twist Stencil (TRHD) on a white card base.  I tacked it down with Pixie Spray.  Then I covered it with Glass Bead Glitter Gel and a palette knife.  (I like to rinse this type of thing off immediately when done so it doesn't stick to the stencil forever).
  • Once the background was dry, I came back in and added my elements; frame, rainbows, clouds and unicorn.
Here is another view:


Well I hope you enjoyed this card!  I loved making it and playing with these products!  


PRIZES: Head to Therm-O-Web for your chance at a prize to win a $25 gift card. 


Here are a few of the supplies used, feel free to head to my blog for the full list.  


 Thermoweb Deco Foil- Rainbow Shattered Glass     Pixie Spray
Thermoweb Foil- Rainbow Shattered Glass                    Pixie Spray                                  


                    TRHD- Sassy                              Candy Twist Stencil       


Thanks for visiting and have a wonderful day!  ~Katie


Sassy Mermaid


Good morning Rabbit Hole fans!
Today I have a Sassy Mermaid to share with you.
I absolutely love the look of an ink blended background 
especially on a sea themed card!

I used the following 2 Rabbit Hole stamp sets on my card today:


Mermaid Hair

Sassy

Card Recipe

I started with a piece of smooth card stock cut from a distressed edge
rectangle die so I could do some Distress Ink blending.

Next I took 3 different color Distress Inks and blended them down the 
die cut panel.  I sprayed some water on the panel to give it a distressed look
when I was all done.

I colored the Mermaid from Mermaid Hair and her 3 fish friends and cut
them out with my Scan N Cut and popped them up on the front of the card.

The sentiment from Sassy was the perfect way to finish off this card.
I masked off the sentiment "born to be a" so that the "a" didn't stamp and
then I added the word Sassy.  I heat embossed the sentiment with white
embossing powder so that it would stand out.

A few sparkly sequins and my card was done.

Thanks so much for stopping by the blog today!

Don't forget you can now purchase The Rabbit Hole stamps at


For more inspiration, updates, and news make sure to check out these links.

Have a great day, I already am!
🧜🏻‍♀️ Lisa  🧜🏻‍♀️

Sassy Skates Magnetic Slider


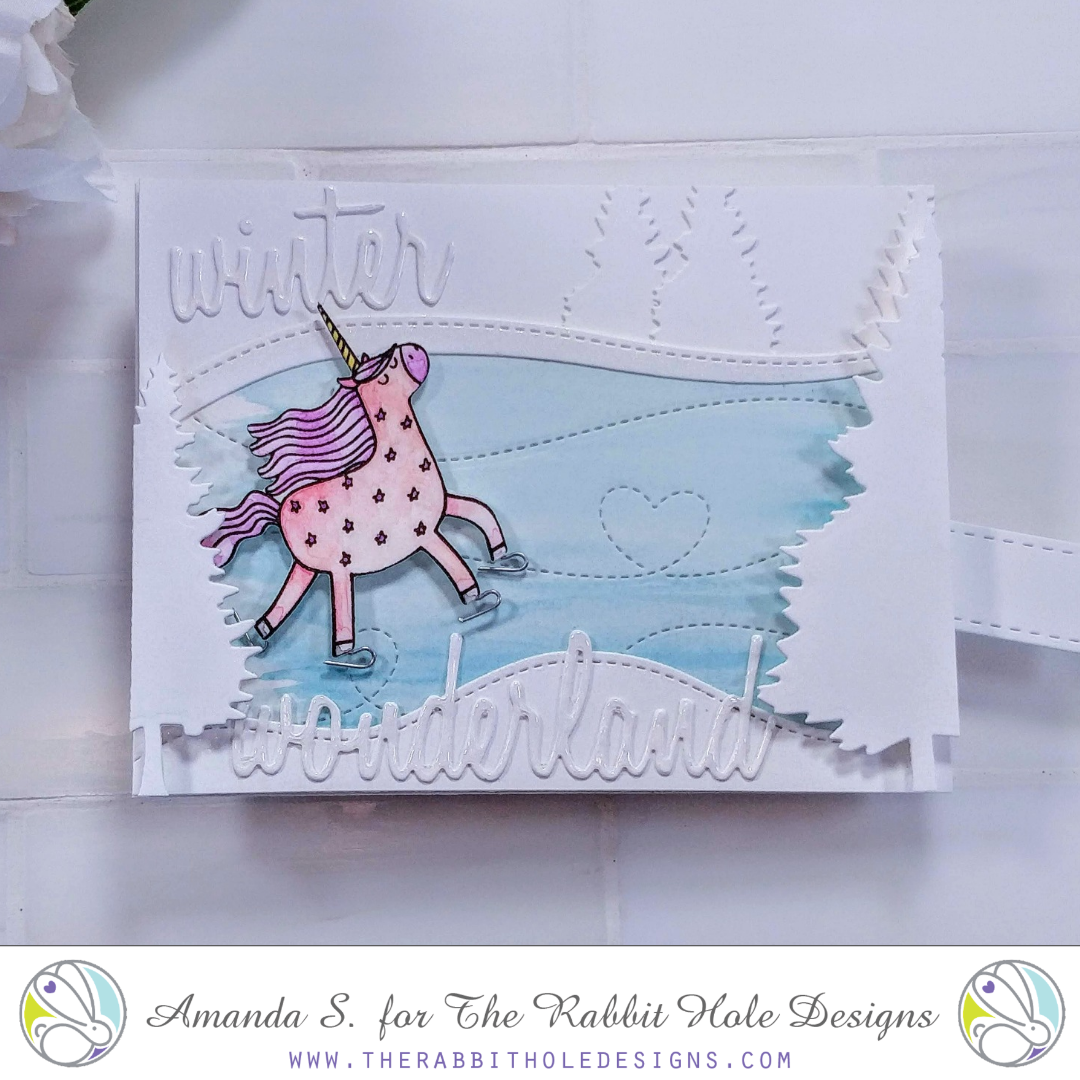
Hello my crafty friend, it's Amanda from Pear Blossom Press again. Today, I've got a fun new-to-me technique. It's not a new idea mind you, I just haven't ever tried it before. I have to say, I am having a blast playing with it too. So what's the technique? A magnet slider! I'm telling you, this is so much fun, you're not going to want to give it away. Luckily, I made this card in September, so I have plenty of time to play with it before I give it to my five year old niece for Christmas. It features a Sassy unicorn on ice skates and she can glide around the frozen pond by moving the tab.


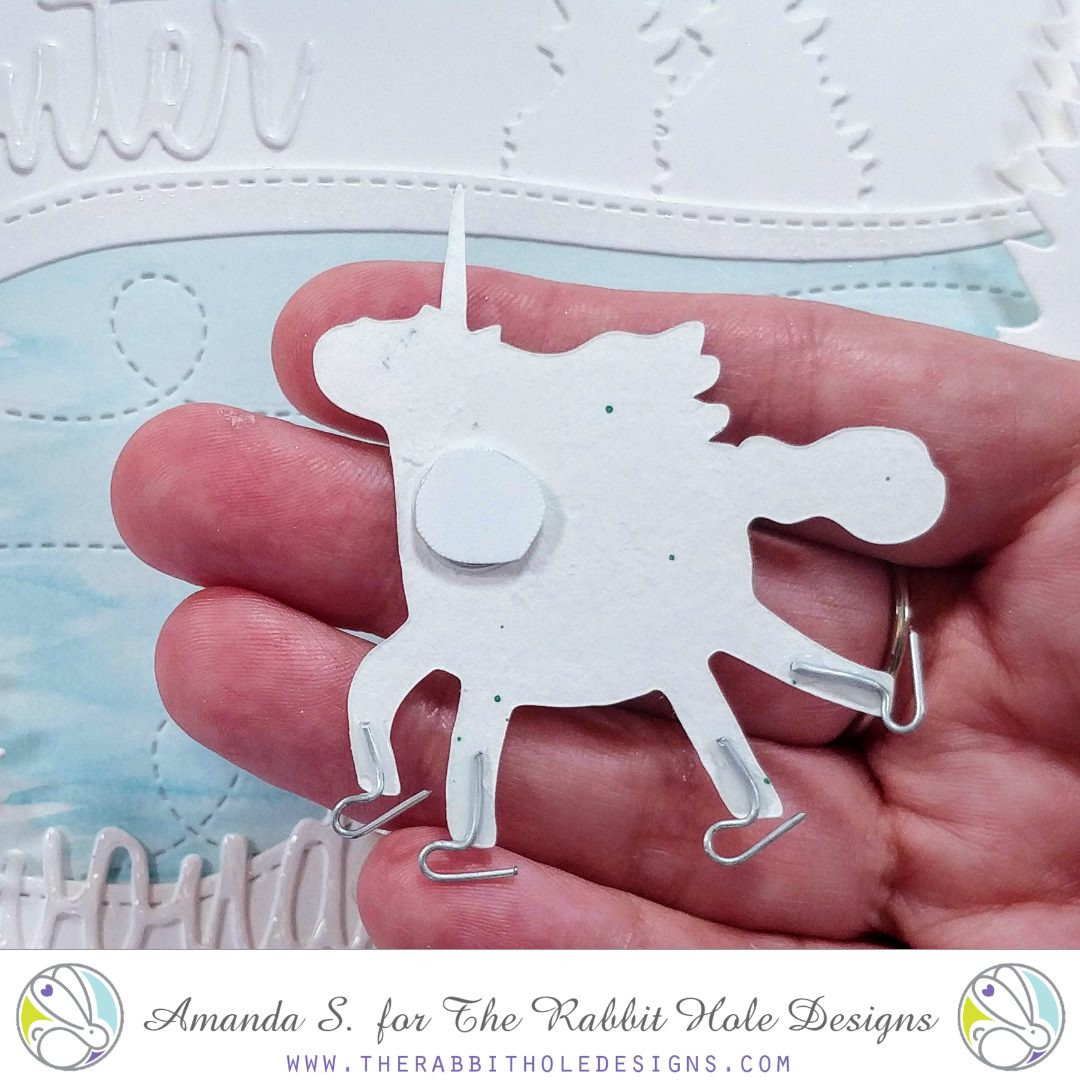
For this card, I wanted to create a simple scene and keep the focus on the Sassy unicorn. I stamped and embossed her onto watercolor paper and painted her in pink and purple. Then, I fussy cut her with my ScanNCut. To give her ice skates, I folded my wire pieces in half with round pliers (you can achieve the same round curve if you fold the wire around the end of a small paintbrush), then curved one end up. This gave me the weird "L" shape you see in the photo above. I started with about 2" lengths of wire because longer pieces are easier to work with. Then I trimmed the pieces down at the end so all four were the same size. I glued the skates onto her feet and added a small magnet near her neck. I covered the magnet with a scrap of white cardstock to keep the magnet from transferring any grey residue to the pond as it glides around.

For the background, I added a little blue paint to a watercolor paper panel to create the ice area, then used a die to cut swirls into the blue ice. I die cut the scenic elements and sentiment from white cardstock. Then, I assembled the scene using stitched hillside pieces and pine trees around the pond area. I made sure to layer the larger trees on top with a double layer of foam tape and make them hang off the bottom and side edges, to look like they are in the foreground; smaller trees went in the background. The sentiment is only one layer, not stacked like I often do, and glued flat to the background. Once the scene was created and the unicorn was ready, it was time to make the slider bar to go underneath.


I die cut three stitched strips and glued them together with another magnet between the top two layers. This created a sturdy bar that can slide around without accidentally buckling or folding up. I added a ¼" x 1½" strip to the back side of the end with the magnet, to form a "T" shape. The small strip will act as a stop, to keep the bar from pulling all the way out. I added a layer of foam tape around the perimeter of a card base, leaving an opening for the bar, and dusted the edges of the tape with my powder tool to ensure they wouldn't stick to the slider bar as it moves around. Then I sandwiched the bar in between the card base and the background piece. To finish the card, I applied Diamond Glaze to the words and Aqua Shimmer accents to the trees, edges of the snowbanks, and unicorn horn. When everything was dry, I attached the unicorn to the card and tested it out. Look! It's so much fun to play with!


Now, before you give a card like this to a child, please consider that the ends of the wire skates can be sharp, and if the child somehow accidentally ingests both magnets, that could be harmful. Just in case, younger children should be supervised when playing with it.

So what do you think? It's fun right?! I think the star covered Sassy unicorn is the perfect fit for this card. I chose soft pinks and purples for my color scheme specifically for my niece, but it would be adorable in other color schemes too. What colors would you use? If you'd like to see a few more projects featuring this stamp set, check out Unicorn Crush and Candy Twist. You can also hop on over to my blog to find the sister article with links to the other specific items I used for this card. Thanks for stopping by today; I'll be back soon with another new interactive card.

Miss Your Face!

Hello everyone!


It's Niccole from Nic & Viv Designs back again to share another card I made using one of The Rabbit Hole Designs stamp sets. 

For today's card I used the Diamond Flower Stencil, The Sassy stamp set, and the Sassy Sentiment stamp set.  


How to create this card:


  • Cut an A2 size black card base
  • Stencil image with fuchsia ink on a white piece of paper
  • Die cut large circle from stenciled image (circle die from my stash)
  • Die cut small white circle (circle die from my stash)
  • Die cut cloud image out of white paper (cloud die from my stash)
  • Glue circles to black base
  • Stamp sentiment from Sassy Sentiments to the front of cloud
  • Add cloud to card with foam tape
  • Copic color Unicorn and fussy cut
  • Add Liquid Pixie Dust to Unicorn
  • Add Unicorn to white circle with foam tape
  • Add crystal gems to card
Here is one more picture of the full card ...


TRHD Products used:

Diamond Flower Stencil

For more inspiration, updates, and news make sure to check out these places

The Rabbit Hole Designs YouTube


I have had so much fun playing with the 

Thank you so much for stopping by and spending some time with me.

Until next time ... Hugs & inky fingers!   -Nic-

Rare and Beautiful- with Katie

Happy Tuesday!  Are you having a good week? So far so good here.  

Today I have another fun card using the Sassy Stamp set


Isn't it cute?  I just love this color combo, it is so magical, especially with those sparkly stars. 

Here is how I made it: 
  • Stamped out the unicorn from the Sassy set and colored it using my Copics (RV02, RV14, V04, V17, YG23, C1, C3).  I added some highlights with my white gel pen and then fussy cut it out. 
  • Next I die cut this scene using this die from my stash, it is inclusive of the clouds and rainbow.  I used colored paper for the rainbows and added a little blue distress ink to my clouds. 
  • I added a blue sky behind and mounted on a white base, then I added the clouds and rainbow, popping some of them out.  
  • Next, I added my unicorn in front of the rainbow.  
  • I stamped the sentiment on an extra bit of white and put it up front. 
  • Lastly, I die cut these stars out of some sparkly pink paper and placed them on my scene.  


A pretty simple card to make.  Here is the close up of the unicorn with those bright and fun colors.  The sentiment is lovely too- "A true friend is like a unicorn, beautiful and rare."


Well that's it for today. I hope you enjoyed this post and will share your thoughts below.  You can visit my blog for a full list of supplies.

Please come back tomorrow to see what our Guest DT Tanya has in store!

For even more inspiration, updates, and news make sure to check out these links.

Miss Sassy Pants August 2019 Release

This image has an empty alt attribute; its file name is 20190717_0918567505515136284030525.jpg

Hi Sassy friends! 

My name is Charmaine from CharCards and I this will be my first time designing for The Rabbit Hole Designs blog. I am very honored to have been chosen for the team as these stamps speak to my sassy, sarcastic inner wild child. This was a definitely a match made in heaven!

Let me show you how I made Miss Sassy Pants sparkle using heat and foil!


This image has an empty alt attribute; its file name is sassy.jpg
Click on image for store


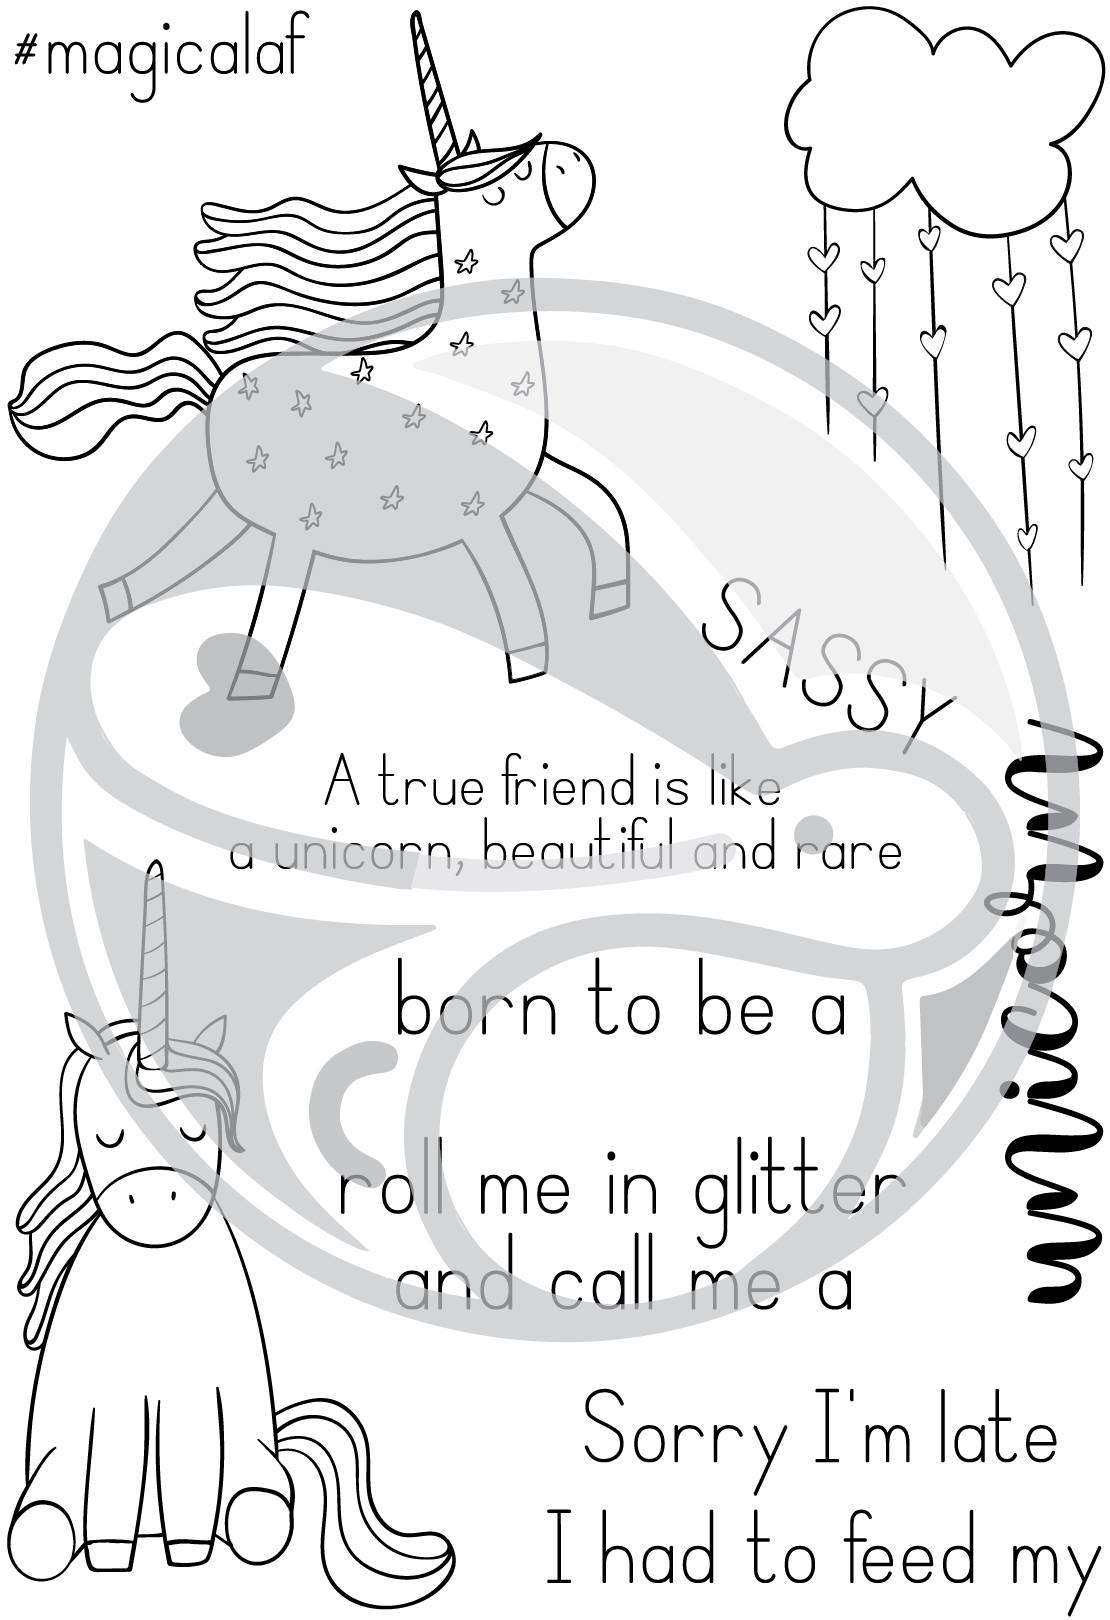
This magical stamp set can be used to make funny, sweet and silly cards. I chose to make a friendship card with the flying unicorn.


No photo description available.
Click on image for store


The front of the card is made by using one of the newly released stencils, Diamond Flower stencil, Deco Foil Transfer gel and foil similar to Deco Foil Silver Star foil available at The Rabbit Hole Designs store.


Before we start getting shiny, switch on the laminator. Give it a good 20 minutes before using.
Place the 6x6 stencil over a sheet of Neenah cardstock 110lb paper, or any other heavy duty cardstock. I use washi tape to keep everything in place but Pixie Spray is pretty handy here. Smear the transfer gel evenly across the stencil and paper using a craft knife or old credit card. Immediately wash the stencil in warm soapy water to avoid hardening of the gel. Set this aside and allow the gel to dry for about an hour. 

Stamp and fussy cut the unicorn. I use a Brother Scan n Cut to save some time. To avoid from distracting  from the beautiful foil, I kept the coloring of the unicorn to a minimum. I used two shades of pink for the hair and Copic markers C1 and C3 for the "white" of Sassy's body. Adhere a few pieces of dimensional tape to the back to give her some pizzaz!

This image has an empty alt attribute; its file name is pixlr4378736624258735886.jpg

This is a 4.25 x 5.5 top folding card. Adhere patterned paper on the inside of the card, same size as the card.  For the sentiment, I used a dialogue box die and the sweet friend sentiment.

Place Silver Star foil or similar foil over the dried gel on cardstock. Sandwich both pieces between parchment paper and feed it through the laminator. Set the dial to 5mm. Cut the beautiful, shiny result the same size as the card, 4.25 x 5.5.

Place a circle die big enough on the bottom corner of the result and position the unicorn in such a way that the unicorn doesn't get hung up as the card is opened. Use the shiny result card stock sans the circle and draw a pencil mark on the front of the white card to make an additional circle die cut. Two cuts are necessary because the gel result with two layers of cardstock might not make a smooth, clean cut. Adhere the shiny piece to the front, adhere Miss Sassy and there you are!

Pretty, shiny unicorn card!

Image may contain: text
For more inspiration, updates, and news make sure to check out these places.The Rabbit Hole Designs The Rabbit Hole Designs InstagramThe Rabbit Hole Designs Facebook PageThe Rabbit Hole Designs PinterestThe Rabbit Hole Designs YouTubeThanks for reading and I hope you can use this stamp set with us soon!
Charmaine Canham
Thank you so much for stopping by today!