Pages

Showing posts with label Valentine. Show all posts

Head in the Clouds - Interactive Valentine Swing Card


Hello crafty friends!  Jenn Gross here, with and interactive card using stamps and stencils from The Rabbit Hole Designs, You can also find my projects on IG under @journeycoachjenn.  It seems that love is in the air and in the clouds!

Today I am sharing aninteractive Valentine card.  This swinging cupid card is created with The Rabbit Hole Designs' Cupid Clarence stamp set (a Dusting Pike illustration) I used Cottontail Blending Brushes,  Clouds in my Coffee stencil paired with the radiant die from the You've Been Framed die set for the background.

Let's take a look at how this card is created:
A - I stamp the Cupid Clarence image twice.  I colored the head of one of the images  and the body of the other image using blue violet (BV) Olo Markers.   I fussy cut the colored head and body, leaving about 1/2" of paper above the neck of the body piece to attach Clarence's head with a foam square.  I angle the head at a slight upward angle and secured it to the body.

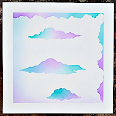
B - I randomly ink blended a cloud background with the Clouds In My Coffee stencil using Cotton Tail Blending Brushes. and Victorian Velvet, Spun Sugar, Kitsch Flamingo and Wilted Violet Distress Oxide ink on a 4" x 5 1/4' piece of white cardstock.

C & D - Using a standard hole punch, I added a hole 5/8" below the top center of the card front.  I positioned the radiant die from the You've been Framed die set about 1/2' below the hole and die cut the design. 
E - I used the standard hole punch to add a hole on each end of a 2' x 1/2" strip of clear acetate. This will be used for an interactive swing bar.

F - I added small jump rings to  the back of  Clarence's envelope and on the bottom of Clarence's shorts to add a small bit of weight for balance. The jump rings are attached with redline tape and a small piece of paper is glued over the top to secure the jumb rings into place.  I used Gem-Tack adhesive to attach a slider snap on side of the back of Clarence's arrow hand. 

G & H - I let the snap dry in place and attached one hole at the end of the acetate strip over the snap on Clarence's hand and snapped it in place. I snapped the other end of the acetate to the hole on the top of the card and tested the swing movement.  I removed the snap and acetate from the top card hole so I could stamp the sentiment at the bottom of the card.
I & J - I snapped the acetate swing bar to the top of the card front  I used a small cloud die cut from my stash to die cut a cloud to hide the snap attachment at the top of the card.  The cloud is placed over the snap with thick double-sided adhesive foam tape on each side of the cloud.  This space allows the acetate bar to swing freely.

K - I attached the card front to a lilac A2 card base using  double-sided adhesive foam tape completing this fun interactive card. 

Products Used

Thank you, I appreciate you taking time from your day to stop by and check out today’s interactive Valentine card featuring The Rabbit Hole Designs' new Cupid Clarence stamp set.  I hope you are inspired to create something lovely today!


Be Creative ~ Stay Inspired

Jenn Gross


Follow me, Journey Coach Jenn, on 

Instagram - https://www.instagram.com/journeycoachjenn/

YouTube - http://www.youtube.com/c/JourneyCoachJenn

Blog - http://www.journeycoachjenn.com/


For more inspiration, updates, and news make sure to check out these places


The Rabbit Hole Designs

The Rabbit Hole Designs Instagram

The Rabbit Hole Designs Facebook Page

The Rabbit Hole Designs Pinterest

The Rabbit Hole Designs YouTube


You Are a Little Quirky - Fun Little Valentine's Day Card

 Hello crafty friends, and welcome back to the Rabbit Hole Designs Blog; It's Rick back with you today to share a fun little Valentine's Day card that's perfect for that quirky person in your life.  For my card I used the brand new Cupid Clarence 4 x 4 Stamp Set designed by Dustin Pike for the Rabbit Hole Designs.  I also used the Triangle Mosaic 6 x 6 Stencil for the background.  

Cupid Clarence Valentine's Day Card by Rick Adkins

To add more color to the Cupid Clarence stamp set I used my alcohol markers to color him in and added some fun little gold details with a gold gel pen.  I also added some other little gold foil details as well.  But I thought the fun little gold gel pen accents to his arrow, strings on his head band, and the hearts on his boxers was a fun little touch.  So, don't forget those little details when it comes to making your projects.  Sometimes it's those little touches that takes your cards to the next level. 

Cupid Clarence Valentine's Day Card by Rick Adkins Second view


When I am designing a card I love to take one of the stencils that you normally wouldn't think of for the occasion and add it to the backgrounds of my cards.  For example here I used the Triangle Mosaic Stencil which is not your typical Valentine themed stencil.  But the geometric pattern mixed with the fun Cupid Clarence just works and adds that little whimsical touch to the card.  To finish off the card all I had to do was add a sentiment to the card on a coordinating piece of cardstock.  

I hope this post has given you a little inspiration about combining products that you normally wouldn't put together to create a fun card.  


Remember, it's all about experimentation and finding what resonates with you. And don't forget to share your creations on social media and tag The Rabbit Hole Designs to spread the card-making love.


Thanks for dropping by today I hope you have a wonderful day and that you found this post helpful. You can find all the supplies that I used on today's cards on my blog post by clicking here! 


You can find me on the following Social Media Channels with more crafty inspiration: 

Blog:  https://www.rckinsmonstudio.net/rickadkinscards

Facebook Page:  https://www.facebook.com/rickcraftycorner

YouTube:  https://www.youtube.com/@RickAdkins

TikTok:  https://www.tiktok.com/@rickadkinscardmaker

Instagram:  https://www.instagram.com/rickadkinsdesigns/


I hope that you have a crafty day.  For more inspiration, updates, and news make sure to check out these places.  


The Rabbit Hole Designs

The Rabbit Hole Designs Instagram

The Rabbit Hole Designs Facebook Page

The Rabbit Hole Designs YouTube


Have a crafty day!

Rick 


Your Such a Sweet Friend! - A Sassy Thank You Card

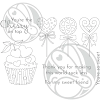
Hello there my crafty friends and welcome to today's blog!    I am so glad you stopped by today!  I am sharing this sassy Thank You card featuring The Rabbit Hole Designs' Sweet Wishes stamp set paired with the Optical-Mesh stencil.  

This is such a fun sweet stamp set!  I used Masking Magic to help create a row of fanned out suckers.  I stamped five of  the heart shape sucker on to the Masking Magic.  You may die cut or fussy cut the suckers depending if you have the coordinating dies.  I set these aside.

Using a light pink ink, and starting with the middle sucker on a 3 3/4" x 5 " piece of coloring cardstock.  I stamped out five suckers masking each stamped sucker before stamping the next. 

I carefully removed the masking suckers and setting them aside to use again later.

I colored the suckers using Olo Markers.  You will find the shading chart and color combos in the photos below so you can follow along.
Olo Markers used for the two outer violet suckers:
V1.1 / V2.4 / V2.3 / V2.6
For the ribbon
R0.3 / R0.4 / R 1.5 / R1.7
For the sucker stick
O7.1 / WG1 / RG3
I used a white gel pen for highlights
For the 2nd and 4th suckers:
R0.1 / R0.2 / R0.3 / R0.4
For the middle dark red sucker:
R5.3 / R5.5 / RV0.6 / R1.7

Once your images are colored,  place a Magic Mask sucker mask over each sucker image. Place the Optical-Mesh stencil over the card front using either a low tack adhesive or a magnetic board.  I colored the stencil with a pale blue ink and a Bitty Blendin Brush. I blended over the stenciled fading it out the color to frame the images.  I removed the stencil and the Masking Magic suckers for the reveal.
I stamped the sentiment in the middle of a 3/4" x 5" strip of red cardstock with clear embossing ink and heat set the sentiment with white embossing powder.   I added three of the new Matte White Enamel Dots to frame the sentiment. It is glued directly below the suckers on the card front.  I attached the card front to a 4" x 5 1/4" light blue cardstock and next attached this full card front to a white A2 card base to complete this sweet sucker card.

Products used


Yui are so sweet to take time from your day to stop by  to see this sassy The Rabbit Hole Designs card. I hope you enjoyed the tutorial,  Olo marker coloring steps and you are inspired to create something lovely today! 


Be Creative ~ Stay Inspired

Jenn Gross


Follow me, Journey Coach Jenn, on 

Instagram - https://www.instagram.com/journeycoachjenn/

YouTube - http://www.youtube.com/c/JourneyCoachJenn

Blog - http://www.journeycoachjenn.com/


For more inspiration, updates, and news make sure to check out these places


The Rabbit Hole Designs

The Rabbit Hole Designs Instagram

The Rabbit Hole Designs Facebook Page

The Rabbit Hole Designs Pinterest

The Rabbit Hole Designs YouTube

Cupid -FND a slimline card


Hello my crafty friends!  Welcome to today's The Rabbit Hole Designs blog!  So a question for you...  Is it Galantine's or Valentine's Day?  Well, either way you look at it, that little cherub is so FND. That is Fat, Naked and Dangerous! So let's put him on a slimline card, right?

My Cupid -FND slimline card features The Rabbit Hole Designs' new Valentine stencil, the Sassy Anti Valentine stamp set and the soon to be retired Marquee Words stamps set

This is one of those cards where you see it in your mind, try it out, change your mind midway thought, and start over.  Sometimes this is the process when you create - trying by trying and learning as we makers make! 
  

I started off with a piece of 3 1/4" x 8 1/4" pink cardstock.  I stamped the word LOVE, from the Marquee Words stamp set in clear pigment ink 7 times  straight down the card front.  This gives the large letters a subtle shadow of the sentiment for the background.  I placed the three striped hearts on the Valentine stencil on the front of the card front about 1/2' below the top of the card front.  Using a Cotton Tail Blending Brush, I started to stencil it with Honeysuckle Ink.  Once I removed the stencil to reveal the image, I found it to be far too much pink.  I used my heat gun to make sure the ink was dry.  I replaced the stencil over the pink heart stripes and re-stenciled the three hearts in Black Soot Distress Oxide ink.   


Much better!  I needed one more black striped heart, so I positioned the striped heart stencil to add a 4th small striped heart at the bottom of the slimline card front. 


 Chubby cupid, from the Sassy Anti Valentine stamp set, is stamped on white cardstock with Versa Mark clear pigment ink and heat embossed with red glittery Oriental Fire embossing powder.  He is fussy cut and added to the card front. I layered the card front on a piece of red cardstock and tied it with some black twine.


I stamped and added the Fat, Naked and Dangerous  sentiment from the Sassy Anti Valentine stamps set and  attached it to the black twine. I mounted the card front on a dark grey slimline card base and added three black gemstone to finish the card.


Thanks you so much for stopping by today.  I hope you enjoyed this Cupid -FND slimline card featuring The Rabbit Hole Designs' new Valentine stencil, the Sassy Anti Valentine stamp set and the soon to be retired Marquee Words stamps set.  Feel free to ask any question or leave a comment below.


Be Creative ~ Stay Inspired

Jenn Gross


Follow me, Journey Coach Jenn, on 

Instagram - https://www.instagram.com/journeycoachjenn/

YouTube - http://www.youtube.com/c/JourneyCoachJenn

Blog - http://www.journeycoachjenn.com/


For more inspiration, updates, and news make sure to check out these places


The Rabbit Hole Designs

The Rabbit Hole Designs Instagram

The Rabbit Hole Designs Facebook Page

The Rabbit Hole Designs Pinterest

The Rabbit Hole Designs YouTube


Tacos Don't... a sassy Valentine card with tutorial

Hello my crafty friends! Welcome to The Rabbit Hole Designs blog.  Have you heard... Tacos don't disappoint?  Just providing a little bit of sass to this pretty pink Valentine card.  I used the fun shaving cream technique with a bit of a twist, I used the Valentine stencil as a mask to create the variegated word "Valentine".  I also added the sentiment  from  the Sassy Anti-Valentine stamps set.

Let's take a closer look at the shaving cream tutorial:
A - I added shaving cream foam to a shallow tray and smoothed it out with a palette knife. (like frosting a cake or spreading butter evenly on toast) 
B - I added drops of ink refill. Liquid colors are the best to use with this technique. I chose a Watermelon pink, Eggplant purple, and Aqua Sky blue
C - I used the palette knife to swirl the colors together in the shaving cream.  I took a 4" x 5 1/4" piece of white cardstock.  I gently pressed it on top of the colored shaving cream, just enough pressure for the shaving cream to make contact with the cardstock.  I lifted the cardstock off. You will find some of the shaving cream will pull away with the paper. I used a squeegee to remove the excess shaving cream from the cardstock and discarded it.  The color will have attached to the cardstock creating  swirls of color. Put the cardstock aside to dry.  This paper is considered the 1st pull (I typically get three pulls  from one coloring)

D - I sprayed the reverse side of the Valentine stencil with Pixie Spray (a light tack, repositionable  adhesive). Adding Pixie Spray to the back of a stencil will help the stencil stay in place and secure the smaller sections of the stencil to the paper  
 E - I positioned the stencil on a piece of  4 " x 5 1/4" rose colored cardstock.  I used a rubber brayer to roll over the stencil and cardstock making sure the entire stencil was sticking to the cardstock.  I added purple tape to two sides securing the stencil to the cardstock edge
F - I gently pressed the stencil side down on top of the colored shaving cream, again with just enough pressure for the shaving cream to make contact with the cardstock. I rubbed my fingers over the cardstock to make sure the colored shaving cream made contact with the stencil and paper. I lifted the cardstock off and pulled a the squeegee across to remove the excess shaving cream.  I  gently removed the Valentine stencil revealing the word Valentine in variegated colors. I put the cardstock aside to let it dry
G - After the card stock dried, I cut it out (the valentine image measures 3 3/16" x 3 3/4") and mounted it on a piece of black glossy cardstock

I hope this inspires  you to try the shaving cream technique with a stencil. It is a fun quick way to create,  I cannot promise it  will not be messy, but it will be fun. 


I hope you enjoyed this sassy valentine - Tacos Don't card featuring the Valentine stencil  and the Sassy Anti Valentine stamps set.   I love hearing from you. tell me... What has been the craziest technique you have tried with a stencil?    


Be Creative ~ Stay Inspired

Jenn Gross


Follow me, Journey Coach Jenn, on 

Instagram - https://www.instagram.com/journeycoachjenn/

YouTube - http://www.youtube.com/c/JourneyCoachJenn

Blog - http://www.journeycoachjenn.com/


For more inspiration, updates, and news make sure to check out these places


The Rabbit Hole Designs

The Rabbit Hole Designs Instagram

The Rabbit Hole Designs Facebook Page

The Rabbit Hole Designs Pinterest

The Rabbit Hole Designs YouTube