Pages

Showing posts with label Diamond Flower. Show all posts

It's Who You Travel With

 Hello Rabbit Hole Fans! Kelly here and I am sharing a card I made using the new  "Turtle Botanical" stamp set along with their stencil "Diamond Flower"


I made this card by first stamping and coloring the turtle image with Copics (R85, E04, RV000, G40, G43, G28)

I fussy cut him out and then stamped the sentiment from the set and made a frame.

I used the Cotton Tail Blending brushes on the stencil with ink ink. 

I wrapped the top stenciled panel with the green twine to give the turtle some balance so it wouldn't look like he's floating so much.   I attached him to the card with foam tape.  I added some clear Nuvo drops for added interest.


Thank you for stopping by,

Kelly


For more inspiration, updates, and news make sure to check out these places.


Reindog

Hello Rabbit Hole Fans! Alison here with a shaker card that uses the new Pawlidays stamp set. This card is super cute and festive!
I decided to work only with the pup in the reindeer costume, so after I stamped and colored him with Copics, I carefully fussy cut him out.

I made my shaker next, simply by die cutting several oval frames out of red cardstock, stacking them together and adding acetate. I filled it with the new Merry Mint Sparkle Blend from Doodles Paper Playground, which was created specifically for a collaboration with The Rabbit Hole Designs. Be on the lookout for that collaboration starting next week!
I backed the window with some old patterned paper that reminded me of the TRHD stencil called Diamond Flower, which is one of my favorites from TRHD. I inked it up with Mowed Lawn Distress Ink and of course one of the new Cotton Tail Blending Brushes. They work incredibly well! You can see the varying depth of color I was able to get on my background. Then I added my sentiment and a few additional Sparkle Blends to the top layer of my card. I popped the Reindog up on the left so that he would be even with the shaker window.

Making this card was fun, and you can easily switch out the focal image to anything you want, as this card is easy to duplicate. You can get more information over on my blog HERE. Thanks so much for stopping by. Have an inspiring day!

I used the following products from The Rabbit Hole Designs:


For more information, news and updates check out these links:

Earthy Mantis Card


Hey Everyone! Justin here, and I am buzzing with excitement to share today's project, which uses the adorable Praying Mantis from the new Buggy for Caffeine set!

I wanted to do something that had a lot of earthy tones, so I knew it was time to break out some kraft cardstock!

First, as always, I colored up my Praying Mantis with alcohol markers and fussy cut them out. Next, I used some glossy accents to give the Praying Mantis's eye pop and a little shine! I set my bug aside to dry.

Next, I took a 4.125" x 5.375" piece of kraft cardstock and placed the Diamond Flower Stencil over top. I took 3 shades of an earthy green ink and blended them onto the cardstock to give them a light to dark ombré. I then took this panel and mounted it onto an A2-sized piece of grassy colored cardstock.

I also wanted to create a striped piece out of cardstock as well. So I cut (3) strips of light green cardstock and (2) strips of that grassy green cardstock, all cut at .25" x 4.25". I took a piece of kraft cardstock and carefully adhered each of the strips in a careful pattern to create almost a striped banner. I placed this going horizontally across the center of the card.

I could now begin to finish up my card. I adhered my Mantis onto a piece of dark green paper, and fussy cut them out so they had a little bit of a dark green frame. I also stamped the sentiment "#deadbeforecaffeine" in green ink onto kraft cardstock, framed it in light green cardstock and cut it into a strip. I adhered my mantis and sentiment with foam tape, and some sequins. I adhered my whole panel onto an A2-sized card base and I was finished!

The products I used in this card are:


For more inspiration with your The Rabbit Hole Designs Creations, be sure to follow along at these other locations:


For more details about products used in this post, you may also follow along at my personal blog, Just a Note by Justin, as well!

I hope you're loving these new critters and are finding some amazing inspiration for your next crafty project!

Happy Crafting!

Diamond Flower Girl Card


Hey Everyone! Justin here, and today I'm featuring an A2-sized card made with the new set Beautiful Disaster, part of the March Release!

What I love about the girl in this set is there are so many variables to color up and entirely change the feel of the image. There are so many skin and hair tones to pick from, and that slouchy sweater can be any color or pattern you want (and could be really fun to pattern paper piece together with the right print)!

For this card, I was inspired by a Pinterest swatch I saw for inks, and decided to use those colors (they're also pretty close to the Rabbit Hole Designs Colors too!).

First, I took a 4.125" x 5.375" panel of white cardstock and stamped my girl in Alcohol Ink Compatible Black Ink in the lower left corner. I colored up my girl with a vibrant purple sweater and some dusty brown hair. I loved how she turned out!

Next, I knew I wanted to use a stencil with this project as well. Instead of fussy cutting out my colored image, I decided I wanted to stencil directly onto that panel. So, I stamped my girl again on a piece of scrap paper for a mask, and left a little bit of blank paper at the bottom of my image for how I was going to adhere it. I fussy cut my mask out and covered my image in a way I hadn't done before. Because my colored image was at the very bottom of the panel, I took a piece of washi tape and stuck it to the back side of the card, so that some of the sticky side was visible on the bottom edge of the panel (maybe about .25" worth of a strip). I took my mask, positioned it, and adhered the bottom portion to my washi tape. I knew I was going to use a light tack spray adhesive for my stencil, which would help keep the mask in place, so long as I didn't move it around too much.

So, following my plan, I applied my Diamond Flower stencil with the light tack adhesive over the masked panel. I then took blending brushes and applied ink in diagonal lines, repeating 3 colors in the same order. Before removing my mask, I flicked some specs of the same ink colors all over my card for a little bit of texture.

I removed my stencil and mask, and was so happy with how my panel turned out!

I mounted my panel to an A2-sized turquoise panel. I then heat embossed my sentiment in white powder on purple patterned paper (if you clock a splotch on the purple paper, it's actually intentionally there by the patterns design and not an accident!), and mounted the sentiment piece on a turquoise frame.

I finished my card by adhering some Rabbit Hole Designs sequins and mounting the card to an A2-sized card base!

Here are the products I used in this card:


For more inspiration with your The Rabbit Hole Designs Creations, be sure to follow along at these other locations:


For more details about products used in this post, you may also follow along at my personal blog, Just a Note by Justin, as well!

There are so many things to love about this new release! I hope this card sparked some ideas and inspiration for your next project!

Kiss My Grass Card


Hey Rabbit Hole Crafters! Justin here with another project using a set from the latest The Rabbit Hole Designs Release! This Caffeinated- Goat set is so fun, and I'm not "kid"-ding!

For this card, I was inspired by farm life. Pretty simple, right? I felt like this goat is one of the first Caffeinated Critters that you would expect to find on a farm, so I wanted to make this fella right at home.

As always, I started my project with coloring up my goat with alcohol markers and cutting them out. I also wrote a fun little sentiment on their mug, reading "Kiss My Grass". Get It? Because goats eat... oh never mind!

Next I used oxide inks to blend up a daytime blue sky on a 4" x 5.25" white cardstock panel. Once finished, I set it aside.

Because I ink blended the entire sky, I wanted to do something different with the grass. One thing I love to do is use inks on colored cardstock. It's such a different effect from using solely white cardstock! So I grabbed a piece of grassy green cardstock, and trimmed it down to 4" x 5.25" as well, as I want the bottom length to be the same on both panels for when I layer. Next, I used a light tack adhesive to place my Diamond Flower Stencil on top, and ink blended over the stencil with a darker green ink. When I removed the Diamond Flower Stencil, I had a subtle floral pattern on what would soon become my grass! To finish this panel off, I used a grassy border die to give it that grassy top edge at the length I wanted. With my grass done, I set it aside until I needed it next.

I knew that, to give this card the barnyard effect I was going for, I wanted to include a rustic looking wooden fence. I have to be honest, I didn't even look for any sort of fence die. I just took paper bag colored cardstock and cut it into .5" wide strips for the vertical posts and .375" wide strips for the horizontal pieces. I cut all the vertical posts to be the same length, but I could have really skipped this part because a) I was going to tuck the posts under the grass layer to create depth of field and b) if you wanted this farm to look really rustic, different sized posts would totally add to that look!

Next, I needed to do a little bit of figuring out how my elements would be placed for my final result. I took my fence posts and laid them out so they were evenly spaced at the right height. Then, I placed the grass layer on top, as I had planned, to ensure my fence had the proper placement. Once I found out where my fence was going to be, I adhered my fence pieces together so they were 1 unit, and also masked my card to reveal the sections of the fence between the wood slats, as I was going to add some detail there. I took black ink and stamped the Caffeine Molecule included with the Caffeinated- Goat set to make it look like the fence had a chicken wire layer to it as well! I also took some black ink to my blending brush and distressed the edges of my fence to give it some shading. Once the Caffeine Molecule Chicken Wire was dry, I adhered my fence on top, and then applied my grass layer.

I then matted my grass and sky layered panel with an A2-sized cream patterned paper to continue the farmhouse effect. I placed where I wanted my goat, without adhering them yet. Once I knew where I wanted my goat, I was able to find the best spot for my sentiment strip. I took a strip of paper bag cardstock, trimmed it to 4.25" wide, and matted it with brown paper. I stamped the fun sentiment "Caffeine releases my inner kid" and adhered it towards the top of my card. 

I then adhered my goat and wanted to add a few more embellishments. I used a stitched cloud die to get a white cloud, and distressed the edges with a light gray ink and adhered my cloud in the sky. I also used some blue and green TRHD sequins and added those for additional embellishment!

Here are my products I used to make this card:

Caffeinated- Goat


For more inspiration with your The Rabbit Hole Designs Creations, be sure to follow along at these other locations:


For more details about products used in this post, you may also follow along at my personal blog, Just a Note by Justin, as well!

I hope you're loving these new Caffeinated Critters as much as I am, and I hope this card sparked some ideas and inspiration for your next caffeinated project!


Who Needs a Soulmate When There is a Kitten


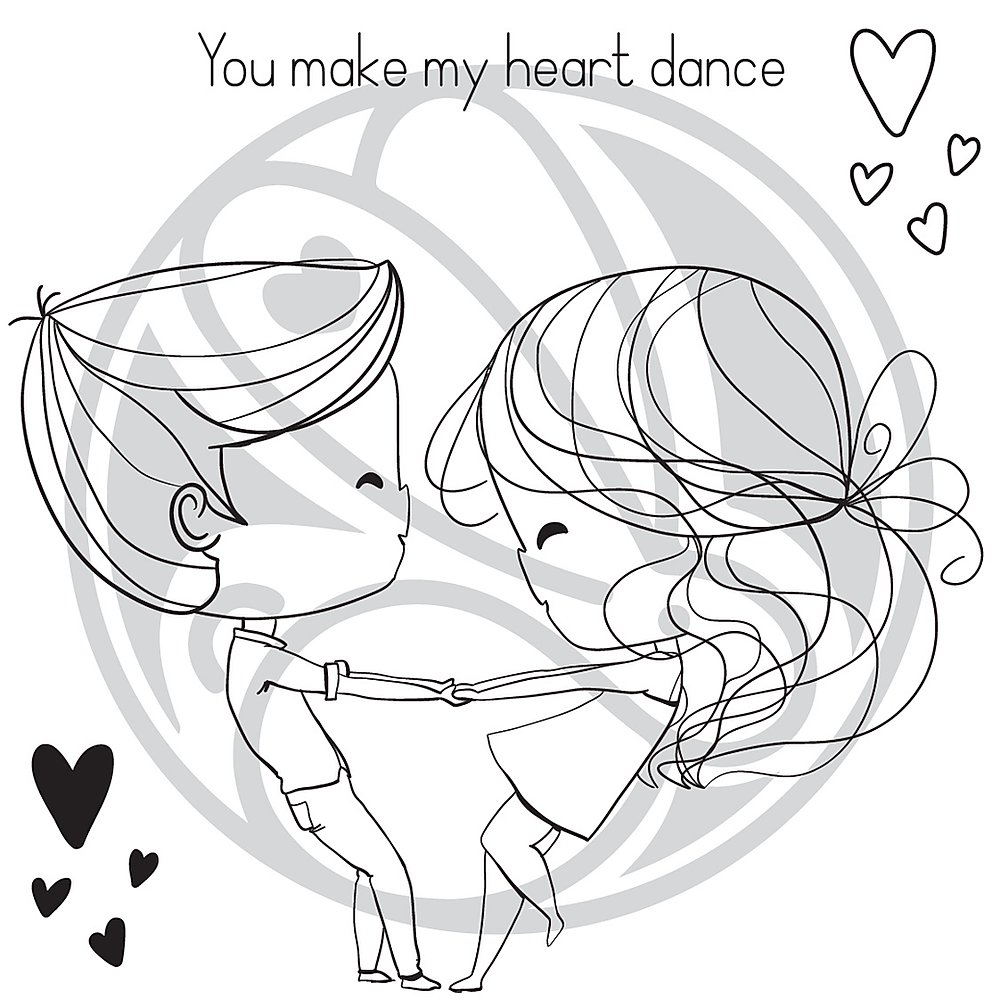
Have you ever tried doing some creative masking with your stamps?  That's exactly what I did here using the Heart Dance stamp set and the Sassy Anti Valentine stamp set.  Hey friends, it's Cassie back with another card!

In order to stamp just the girl from the set, I put the stamp into my Misti, and masked off the boy using some masking tape.  I inked it up and then pulled the tape away, and stamped the girl.  I colored her and one of the cats from the Cattitude stamp set using Copic Markers.  My background was made using some more masking paper along with the Diamond Flower Stencil and a couple different colors of Distress Oxide Ink.


I basically stamped the sentiment on the inside in the exact same manner, since I wanted to be creative with my sentiment.  The only difference is that I wrote the letter 'a' in between 'is' and 'kitten'.  If you'd like to see exactly how I did it, I do have a video that you can watch here, or over on my YouTube Channel.


And here are close ups of the products that I used:

Heart Dance stamp set

Cattitude stamp set


I hope you enjoyed what I made for you today and that you were inspired to go out and get a little crafty.  

For more inspiration, updates, and news make sure to check out these links.

Thank you so much for stopping by!
Cassie


TRHD & Therm-O-Web Collaboration

Happy Monday everyone!
Niccole here ...

I am so excited to be collaborating for The Rabbit Hole Designs with Therm-o-Web this week. I will be sharing not one but two blog posts. So make sure you check back later in the week.

You can enter win $25 in Therm-O-Web product. Head on over to their site to find out how.
I am using one of my favorite stamps from The Rabbit Hole Designs, which is Gourd-geous and the Diamond Flower stencil. Both are available at Simon Says Stamp and at The Rabbit Hole Designs stores.
 
This is the Therm O Web Transfer Gel I used for my card along with the Silver Shattered Glass Deco Foil. Have I told you I LOVE this foil? I do, I really do!

Now onto my card ...

Here is how I made this card:

1. Turn laminator on to really heat it up good.
2. Cut and fold a black A2 card base.
3.On the card front I used my stencil to apply the Transfer Gel
4. I let the Transfer Gel dry. It's dry when it turns clear.
5. Place fold shiny side up on to of card with Transfer Gel
6. Put card with foil on it in carrier sheet
(I use a piece of copy paper folded in half)
7. Run through laminator
8. Peel foil away from card to reveal your masterpiece.
9. Added black circle to center front of card
10. Stamp, color, and cut out TRHD pumpkin image
11. Attach Pumpkin with foam tape.

** Make sure not to throw away the negative piece from your foil. You can definitely reuse it . I will be sharing a card really soon using the negative piece of foil.**

 Doesn't this Silver Shattered Glass Foil just sparkle? I mean it shines here but trust me this picture does NOT even do it justice. I think it definitely is one of my favorite foil.
This cute pumpkin is floating on the top of the card with foam tape. I love how the hat is gray and it adds to the Silver Shattered Glass foil. Wouldn't you agree?
Here is one more look at the full card. I just want to say ... If you have never played with foil; you really should try it. It is so much fun and there are so many possibilities when using Therm-O-Web products. Make sure you come back later in the week ... I will be using Therm-O-Web Flock. It is so fuzzy and bright. It makes me happy every time i use it.

  For more inspiration, updates, and news make sure to check out these places.


Until next time ... Hugs & inky fingers!

-Niccole-


Miss Your Face!

Hello everyone!


It's Niccole from Nic & Viv Designs back again to share another card I made using one of The Rabbit Hole Designs stamp sets. 

For today's card I used the Diamond Flower Stencil, The Sassy stamp set, and the Sassy Sentiment stamp set.  


How to create this card:


  • Cut an A2 size black card base
  • Stencil image with fuchsia ink on a white piece of paper
  • Die cut large circle from stenciled image (circle die from my stash)
  • Die cut small white circle (circle die from my stash)
  • Die cut cloud image out of white paper (cloud die from my stash)
  • Glue circles to black base
  • Stamp sentiment from Sassy Sentiments to the front of cloud
  • Add cloud to card with foam tape
  • Copic color Unicorn and fussy cut
  • Add Liquid Pixie Dust to Unicorn
  • Add Unicorn to white circle with foam tape
  • Add crystal gems to card
Here is one more picture of the full card ...


TRHD Products used:

Diamond Flower Stencil

For more inspiration, updates, and news make sure to check out these places

The Rabbit Hole Designs YouTube


I have had so much fun playing with the 

Thank you so much for stopping by and spending some time with me.

Until next time ... Hugs & inky fingers!   -Nic-