Pages

Showing posts with label bitty blending brushes. Show all posts

Your Such a Sweet Friend! - A Sassy Thank You Card

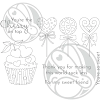
Hello there my crafty friends and welcome to today's blog!    I am so glad you stopped by today!  I am sharing this sassy Thank You card featuring The Rabbit Hole Designs' Sweet Wishes stamp set paired with the Optical-Mesh stencil.  

This is such a fun sweet stamp set!  I used Masking Magic to help create a row of fanned out suckers.  I stamped five of  the heart shape sucker on to the Masking Magic.  You may die cut or fussy cut the suckers depending if you have the coordinating dies.  I set these aside.

Using a light pink ink, and starting with the middle sucker on a 3 3/4" x 5 " piece of coloring cardstock.  I stamped out five suckers masking each stamped sucker before stamping the next. 

I carefully removed the masking suckers and setting them aside to use again later.

I colored the suckers using Olo Markers.  You will find the shading chart and color combos in the photos below so you can follow along.
Olo Markers used for the two outer violet suckers:
V1.1 / V2.4 / V2.3 / V2.6
For the ribbon
R0.3 / R0.4 / R 1.5 / R1.7
For the sucker stick
O7.1 / WG1 / RG3
I used a white gel pen for highlights
For the 2nd and 4th suckers:
R0.1 / R0.2 / R0.3 / R0.4
For the middle dark red sucker:
R5.3 / R5.5 / RV0.6 / R1.7

Once your images are colored,  place a Magic Mask sucker mask over each sucker image. Place the Optical-Mesh stencil over the card front using either a low tack adhesive or a magnetic board.  I colored the stencil with a pale blue ink and a Bitty Blendin Brush. I blended over the stenciled fading it out the color to frame the images.  I removed the stencil and the Masking Magic suckers for the reveal.
I stamped the sentiment in the middle of a 3/4" x 5" strip of red cardstock with clear embossing ink and heat set the sentiment with white embossing powder.   I added three of the new Matte White Enamel Dots to frame the sentiment. It is glued directly below the suckers on the card front.  I attached the card front to a 4" x 5 1/4" light blue cardstock and next attached this full card front to a white A2 card base to complete this sweet sucker card.

Products used

Yui are so sweet to take time from your day to stop by  to see this sassy The Rabbit Hole Designs card. I hope you enjoyed the tutorial,  Olo marker coloring steps and you are inspired to create something lovely today! 


Be Creative ~ Stay Inspired

Jenn Gross


Follow me, Journey Coach Jenn, on 

Instagram - https://www.instagram.com/journeycoachjenn/

YouTube - http://www.youtube.com/c/JourneyCoachJenn

Blog - http://www.journeycoachjenn.com/


For more inspiration, updates, and news make sure to check out these places


The Rabbit Hole Designs

The Rabbit Hole Designs Instagram

The Rabbit Hole Designs Facebook Page

The Rabbit Hole Designs Pinterest

The Rabbit Hole Designs YouTube

THANKS!


 Hi there.  Welcome to The Rabbit Hole Designs blog. It's Kelly here today and I am sharing a card  I made using several new products from the last release.  My card features the "Thanks" stamps and dies as well and the new stencil "Mid Century Modern".

To make this card, I used the following steps:

  • I secured white card stock to  "Mid Century Modern" stencil.
  • I used the Bitty Blending Brushes to apply distress oxide inks to specific places (see below).
  • I embossing "thanks" in white on blue card stock and then used the "Thanks" dies to cut it out.
  • I adhered the stenciled panel to orange card stock.
  • I attached mesh ribbon from my stash and glued the "Thanks" on top.
  • I then adhered the panel to a white card base and added some clear gems.


 Process Photo: Bitty Blending Brushes to use in small areas on a stencil:


 THANKS die set:


THANKS stamp set:


Mid Century Modern Stencil


Bitty Blending Brush


For more inspiration, updates, and news make sure to check out these places.


Thank you so much for stopping by today,
Kelly

Modern Congrats card with Video Tutorial.

Hello my crafty friends and welcome to The Rabbit Hole Designs blog.  Have you seen all the fabulous projects the Brand Ambassadors posted over the last three days?  OMGeee, what an amazing release and what creativity!  

Today's card features the Mid Century Modern stencilBitty Bunny Blending Brushes and the Congrats die set!   This is one of those cards where the photos do not do it justice. I've included a couple different angles, so you can check out the glitter paper, holographic cardstock and the stenciling up close.  Light definitely plays differently with specialty papers.
I have a YouTube video showing how I created the background design using the Mid Century Modern stencil with the Bitty Bunny Blending Brushes to bring out thd detail. Click on the YouTube image to link to the stenciling tutorial.

I love how this photo brings out the glitter paper with much more detail.

The Rabbit Hole Designs Products

I hope you enjoyed this Modern Congrats card and video tutorial featuring Mid Century Modern stencil, Congrats die set and Bitty Bunny Blending Brushes.  Please let me know if you have any questions.


Be Creative ~ Stay Inspired

Jenn Gross


Follow me, Journey Coach Jenn, on 

Instagram - https://www.instagram.com/journeycoachjenn/

YouTube - http://www.youtube.com/c/JourneyCoachJenn

Blog - http://www.journeycoachjenn.com/


For more inspiration, updates, and news make sure to check out these places


The Rabbit Hole Designs

The Rabbit Hole Designs Instagram

The Rabbit Hole Designs Facebook Page

The Rabbit Hole Designs Pinterest

The Rabbit Hole Designs YouTube