Pages

Showing posts with label Watercolor. Show all posts

Inspire, Imagine, Dream


We are bringing back our favorite projects this month here at TRHD! 


Good day everyone, Leah here with another fun project for The Rabbit Hole Designs, using the Succulent Life Stamp Set.


I have created this hexagon-shaped shadow box using the images and sentiments from the Succulent Life clear stamp set.  I watercolored them on 140lb watercolor paper and then fussy-cut them out.  I added them to some "stems" so that I could layer them over the background paper (which I added some ink to with the Triangle Mosaic Stencil) to add depth to the project.  I added some Spanish moss and enamel dots to finish it off.


___________________________

For more inspiration, updates, and news make sure to check out these places:


Embroidered Anemones


A new trend in card making is adding stitched elements to your cards. I gave it a go with some very loose French knots (You can catch a video tutorial at my youTube channel) where the anther or pollen of the flowers would be in the Blooming Anemone stamp (TRH-160). HINT: Use a thicker thread to create the knots. A thicker thread will stay in place and not go through the hole you create in the card to accommodate these.


This card features "Blooming Anemone" (TRH-160), which was stamped on Bristol smooth white cardstock and watercolored.  For the sentiment, we have a combination of "You Scripty" 3x4 stamp and it's coordinating die with shadow. This bridge card was stenciled with the Mesh - Optical Illusion Stencil and then splattered with gold watercolors.

Be-you-tiful Floral Shift

Welcome to The Rabbit Hole Designs blog!  I am using the One Line Flower stamp set to create today's card. 

I used a  stencil for a background I created a few months ago.  I thought these two would pair together nicely.  I stamped the One Line Flower image with VersaMark watermark stamp pad and heat embossed  the stamped image in black embossing powder.  I did the same with the Be-you-tiful sentiment.
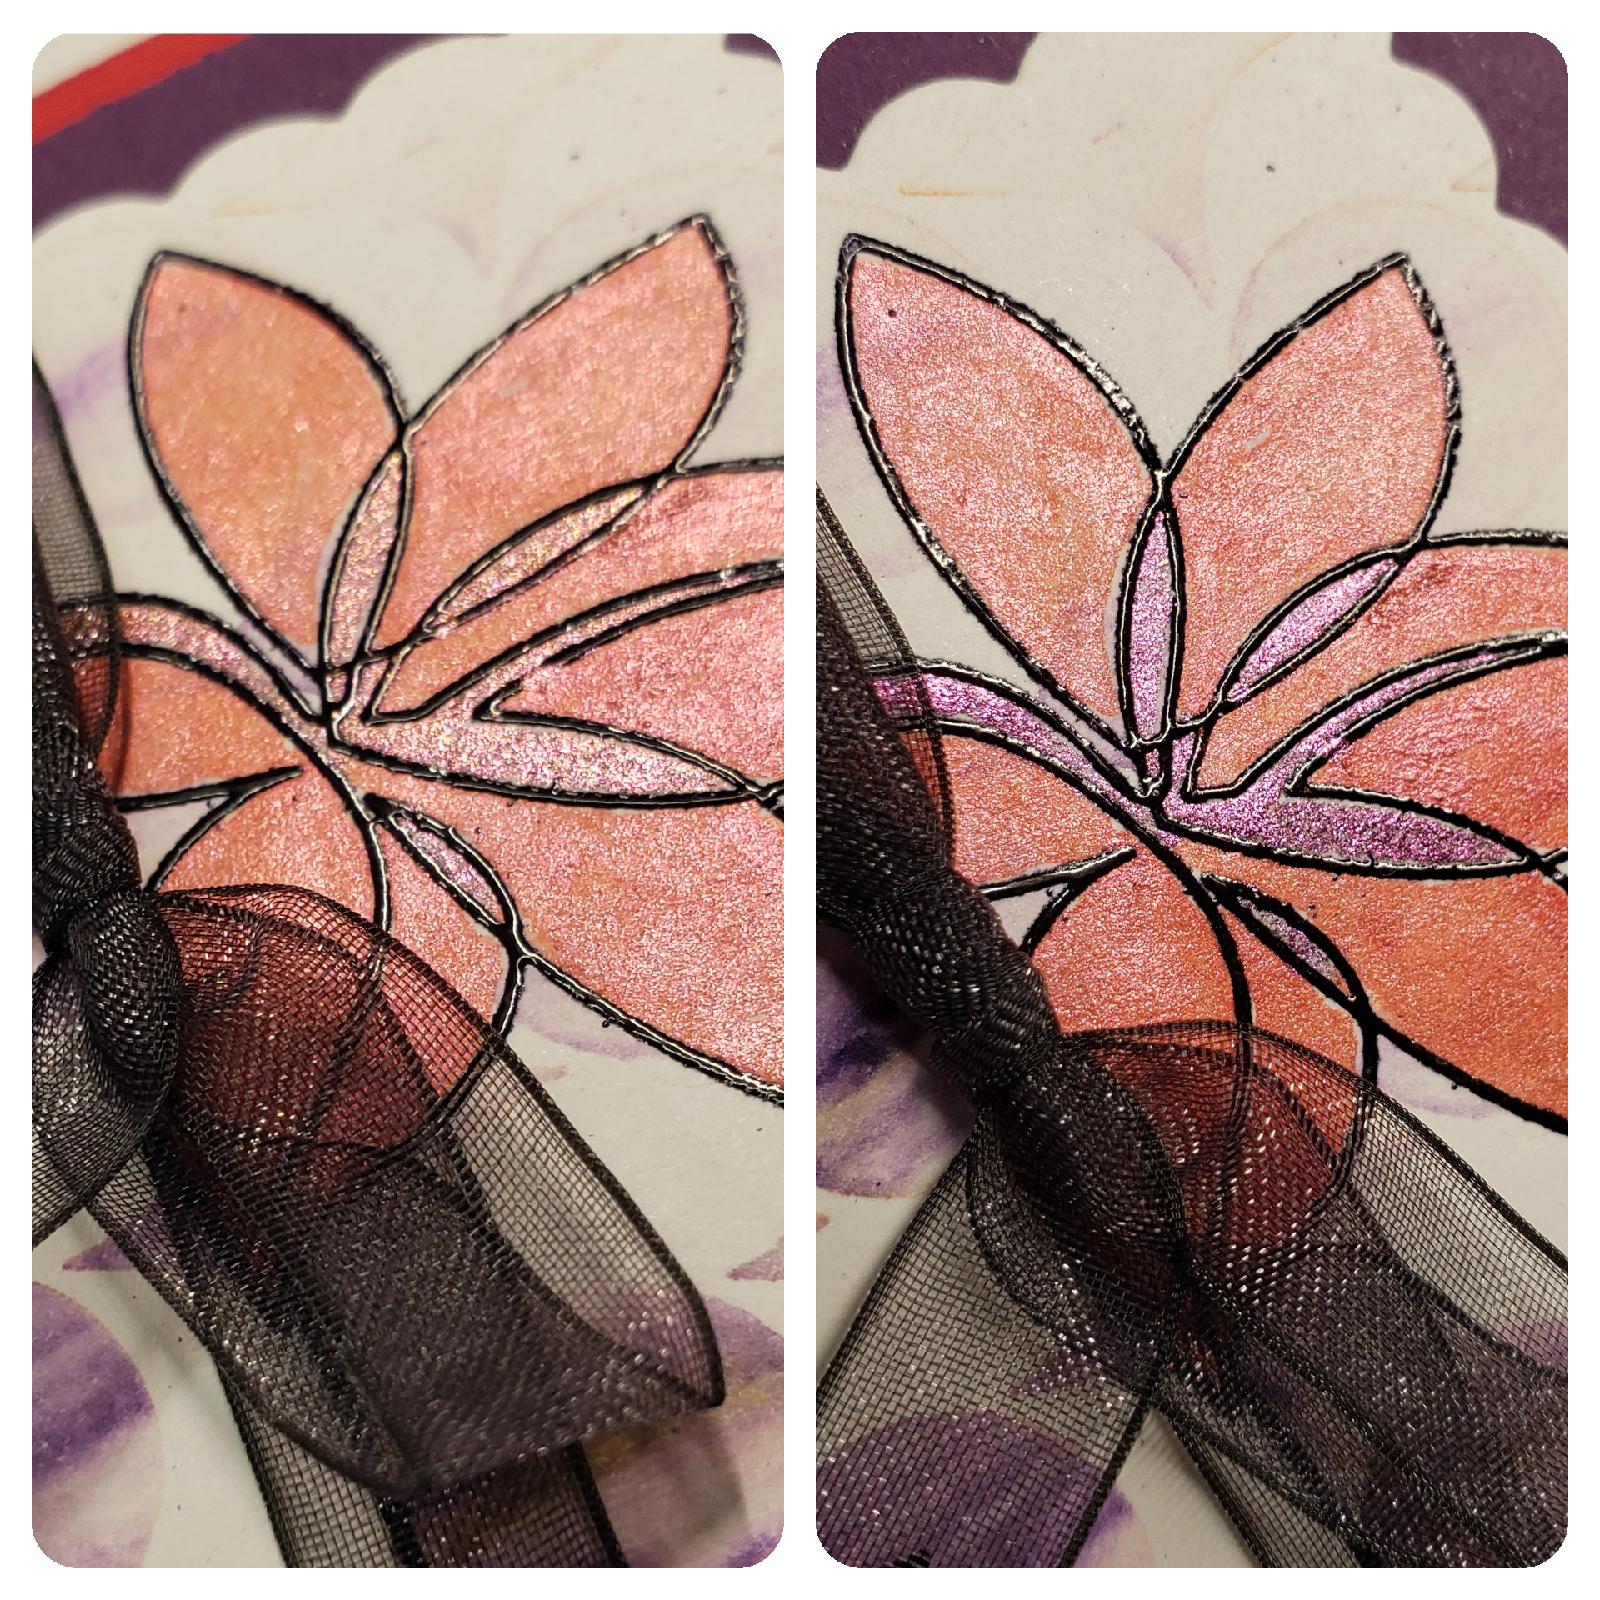
I have recently discovered shift watercolor paints. I am mesmerized by the way the color changes (shifts) as you move the cards so the light hits it at different angles. I painted the petals in Scarlet Red very fine glitter watercolor and in the areas that overlap, I used a color shift paint called Oil Slick.
You can see the how the color shifts from a rusty pink to a purple in this photo.  I think it adds just the right amount of interest to this card
I die cut the panel with a scallop edge border die and tied a thin black organza ribbon in a bow around this layer.  I attached this to a layer of dark purple cardstock and attached these two layers to a red A2 card base to complete the card.

Here are The Rabbit HoleDesigns products used in this card:

One Line Flower Stamp set


I hope you enjoyed this Be-you-tiful Floral Shift card featuring the One Line Flower stamp set.      


Be Creative ~ Stay Inspired

Jenn Gross


Follow me, Journey Coach Jenn, on 

Instagram - https://www.instagram.com/journeycoachjenn/

YouTube - http://www.youtube.com/c/JourneyCoachJenn

Blog - http://www.journeycoachjenn.com/


For more inspiration, updates, and news make sure to check out these places


The Rabbit Hole Designs

The Rabbit Hole Designs Instagram

The Rabbit Hole Designs Facebook Page

The Rabbit Hole Designs Pinterest

The Rabbit Hole Designs YouTube


Missing You Always

 Hi TRHD Fans! I have a fun card to share today featuring the awesome Corner Mandala Stencil  from the February release at The Rabbit Hole Designs!


For this design I used shimmer powders with this awesome new stencil. I sprayed some pixie spray on the back of the stencil to temporarily hold it down on the paper. 


I carefully tapped out little bits of the shimmer powder across the panel in the openings of the stencil. Then I spritzed it with a water bottle to really activate the powder and let it spread around the panel. I sopped up some of the extra water with a paper towel before I removed the stencil. It's hard to see in the picture but there is a beautiful shimmer in these pigments. 

I chose a sentiment from a different older set by TRHD called Space - Miss You. I stamped that on some colored cardstock that matched the design and die cut them out with fancy circle dies. I popped the sentiment up on the panel and attached the panel to the card base and that's it. 

I hope that you enjoyed the card today. Be sure to check out all the fabulous products that The Rabbit Hole Designs carries. You can follow this link HERE to see their whole product line. 

Thanks for stopping by!
If you want to check out additional information on the products that I used to create this card you can visit my blog at amyswares.com 

-Amy

For more inspiration, updates, and news make sure to check out these places.


Love Buns Slimline

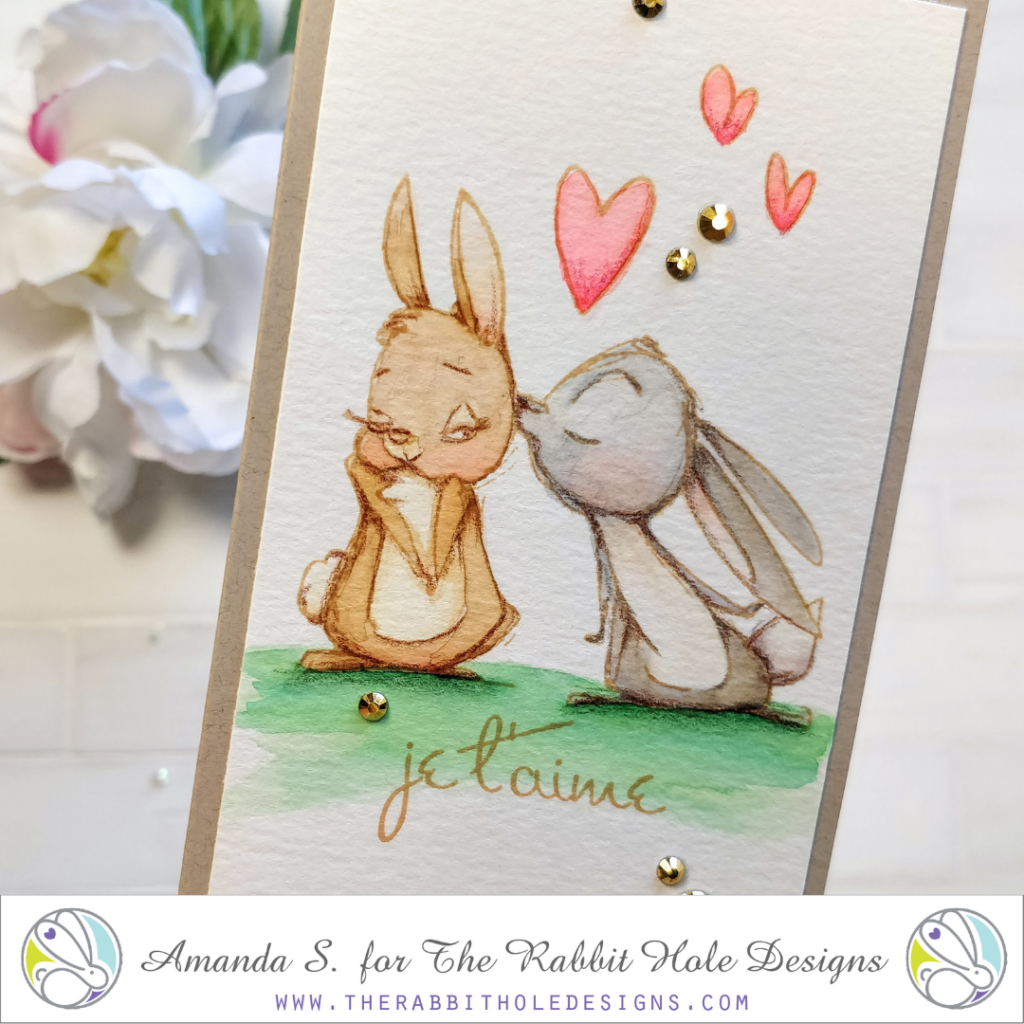
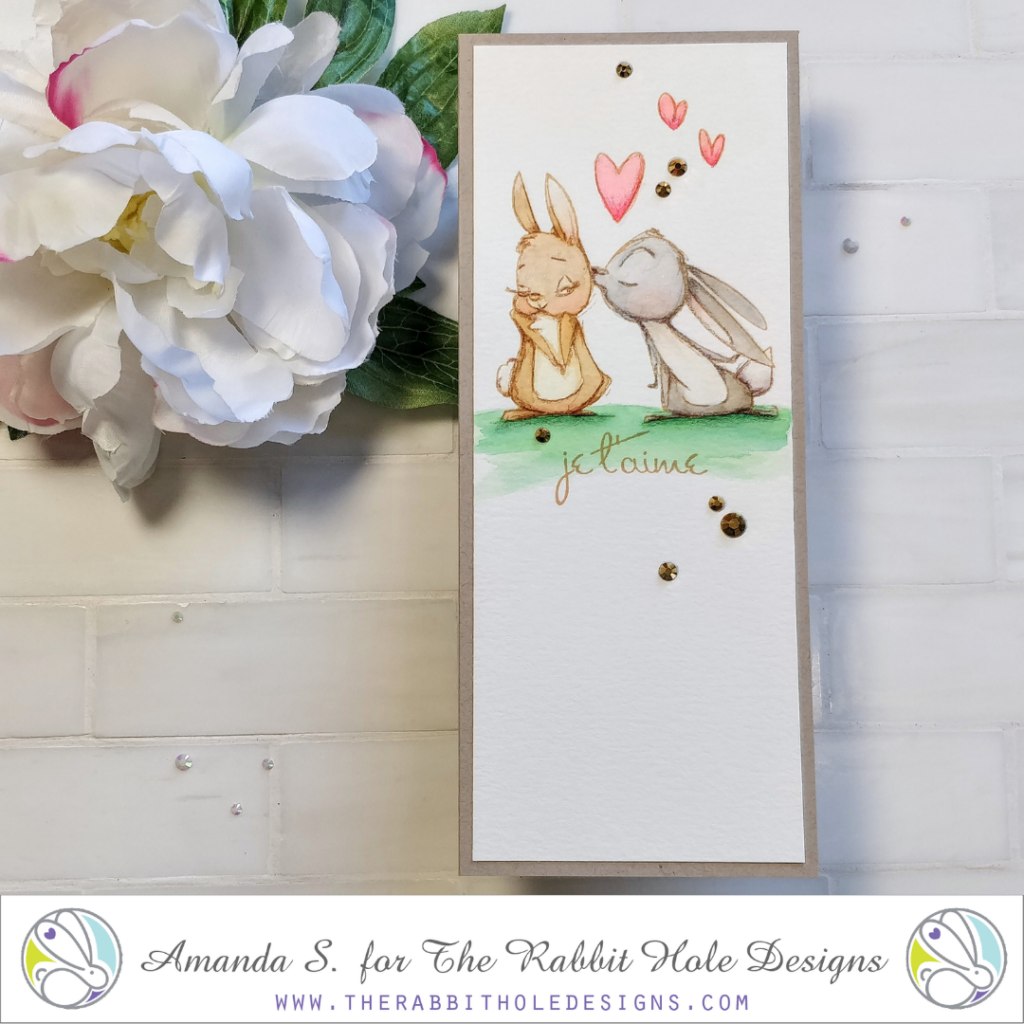
Hello my crafty friend, Amanda here from Pear Blossom Press again. Can you keep a secret? If so, I'll show you the Valentine I made for my husband. It features the new Je t'aime stamp set. Have you seen these sweet little love buns yet? So cute!!! I adore this set, and not just because I'm a bun mom. 

Head on over to my blog for tips on how to no-line watercolor this image, and turn it into a lovely slimline card. I've also got pictures of my real life love buns!

Thanks for stopping by today! If you'd like to see more cards featuring the Je t'aime stamp set, check this out. I'll be back soon with more fun cards to share. Until then, find me on Instagram, and in the Facebook Fan Page

Follow me, Amanda at Pear Blossom Press, on
Instagram - https://instagram.com/pearblossompress
YouTube - https://youtube.com/pearblossompress
Blog - https://pearblossompress.com

For more inspiration, updates, and news make sure to check out these places


The Rabbit Hole Designs

The Rabbit Hole Designs Instagram

The Rabbit Hole Designs Facebook Page

The Rabbit Hole Designs Pinterest

The Rabbit Hole Designs YouTube

Adulting is Hard


Hello everyone it's Lauren here on the blog today. When I saw this Caffeinated Parrot stamp set I knew I had to have it! So hilarious. I love how one of his eyes is partially closed! 

Today's card was created with my oldest son in mind and I cannot wait to give it to him! He would love to own a McCaw someday so I colored up this guy as a Blue and Gold McCaw. 

I started this card by stamping the parrot image onto watercolor paper. I then colored the image using Derwent Inktense pencils. I love these water coloring pencils because they dry like ink so there is very little bleeding. 

I then used the Clouds In My Coffee stencil to create tops of trees to resemble a jungle. I placed the stencil in the position I wanted then traced it with my pencil. I did that with all the tree layers, then did the coloring. Making sure to alter the shades of green so that they wouldn't look like all one tree.


When I colored the tree layers I also made sure that the layer next to the one I was about to color was dry before I colored it. That keeps the colors from running  together and mixing.


Then I finished off the coloring on the parrot. On the coffee cup I wrote "Tims" to stand for Tim Hortons, our favorite coffee place in Canada. 


For the sky, I lightly swept Mermaid Lagoon distress oxide across the top above the trees. When dry I stamped my sentiment. This one is from the Blended Sentiments 2 set. 


Finally, I trimmed the panel down using a stitched rectangle die from my stash, backed it with a 4.25x5.5 blue cardstock panel then adhered to my A2 top folding card base.

I am so happy with how this card turned out and I know my son is going to love it! Thanks so much for visiting! Have a great day.
Lauren


Harmony and Balance...yes please!

Hola Rabbit Hole Fans! Amy here with another card to share featuring some of the awesome products that TRHD carries! Read on for more details!!


Today's card features the stunning Turtle Botanical Stamp set that came out in the September release. These stamp sets are just so stunning aren't they? I love florals and I think pairing them with animals is just so clever and beautiful. 


For this card I stamped the bloom flower by itself as well as the bloom that's on the turtle around the edge of an A2 size piece of watercolor paper. I used a sticky clear embossing ink and heat embossed the flowers with silver embossing powder. I then used watercolors and filled in the blooms. I find that having those raised embossed edges really helps contain the watercolor and lets it flow beautifully. If you have the patience to do so, don't heat set it, just let it dry on it's own. That's where the real magic is with watercolor! 

I also die cut out a shape and stamped and heat embossed a sentiment from the Flamingo Botanical Stamp Set as well as another one of the blooms. I incorporated some beige colored card stock and popped the sentiment up with some foam tape for added dimension. I assembled all the pieces together and that finishes my card today. These stamps are just so beautiful on their own, you don't really need much in terms of the design to really have that WOW factor. 


I hope that you found some inspiration here today. Be sure to check out all the  fabulous products that The Rabbit Hole Designs carries. You can follow this link HERE to see their whole product line. 


Thanks for stopping by!
If you want to check out additional information on the products that I used to create this card you can visit my blog at amyswares.com 

-Amy


For more inspiration, updates, and news make sure to check out these places.


Current Mood: Caffeinated and Feisty

Hi TRHD Fans! Amy here and I'm so excited to share a card with you today featuring the Rory-Caffeinated Racoon Stamp set from the November 2020 Release at The Rabbit Hole Designs


She is just so cute with her big eyes and sassy sentiments. This is a large stamp too, so she's really fun to color and makes for a great focal point on a card.


For this card I wanted to use some watercolor brush pens to color her in and also to create the background. I chose Bristol smooth paper because it could hold up to the water that I was using. 


I stamped Rory out using a waterproof crisp black ink and colored her in with my watercolor markers. I added some white with my gel pens and then fussy cut her out. To create the background I did the water smooshing technique. I scribbled some of the watercolor pen down onto my glass mat and added some water. I used a piece of acetate to pick up the ink and apply it to the background panel. I find that I have a little more control with this method rather then when I put the panel down directly into the ink. 


For the sentiment, I actually had to choose one from the new amazing Blended Sentiments 2 stamp set. I LOVE LOVE LOVE the sassy snarky sentiments on this set and they pair so well with all my caffeinated critters that I have amassed over the last year or so lol. I white heat embossed one of the sentiments from the set on some black cardstock. All that was left was to assemble the pieces and attach them to my A2 size card base. I used some pattern paper for the back and added some bling and That's it! A cute, fun, sassy caffeinated card ready to bring a smile to someone's face!


 I hope that you enjoyed this card and found some inspiration. Be sure to check out all the items from the new release as well as all the other fabulous products that The Rabbit Hole Designs carries. You can follow this link HERE to see their whole product line. 


Thanks for stopping by!
If you want to check out additional information on the products that I used to create this card you can visit my blog at amyswares.com 

-Amy


For more inspiration, updates, and news make sure to check out these places.

Botanical Turtle-Be Your Own Kind Of Beautiful


Hello all! It's Lauren and today I am up on the blog sharing my latest card featuring the gorgeous Botanical Turtle from this months release. I think the look of pink and green is so pretty together so I decided it would be perfect for this flower toting turtle!


What I did first was stamp the turtle onto water colour paper with black water colour friendly ink. To colour the image I used water colour pencils that I have had in my stash for years. After I had coloured the turtle I waited for it to completely dry before working on the background.


Once it was dry, I added water to Mermaid Lagoon Distress Oxide ink and with a small paintbrush to create the blue behind the turtle. I had water in mind but it could also be sky.

When the water had dried, I watered down Antique Linen Distress Oxide to paint on the ground/sand. Making sure to have it darker underneath the turtle to create some shadowing. Then left it to dry, then stamped the sentiment in black.

Next, I die cut pink patterned paper with an A2 stitched rectangle die and adhered it to an A2 card base. Then using a smaller curved, stitched rectangle I cut a green rectangle and also the turtle. I adhered them onto the base with the green panel underneath and offset.
For the embellishment, I used fishtail banner dies to create a larger pink one, then smaller green polka dot one. I trimmed them and adhered it to the card.


To add a finishing touch, I placed 3 pink self adhesive dots onto the banner.

Thanks so much for visiting! Hope you have a wonderful day!
-Lauren