Pages

Showing posts with label Twisted Sunshine Stencil. Show all posts

Cookin' Up a Brew

Hello Everyone! Justin here, and today I am sharing a project I created using the Spellcaster Witch set and the Things a Witch Might Say set, part of the August Halloween Release!

To make this project, I stamped the witch and cauldron from the Spellcaster Witch set, colored them with Copic Markers and fussy cut them out.

For my backgrounds, I cut a 4.25" and 5.25" square piece of white cardstock, and then a 4.5" and 5.5" square piece of black cardstock.

For the 4.25" piece, I used a wreath creator tool to help use the detail stamps and create a circular pattern. I colored all the elements with Copic markers and then masked them all. I ink blended over them using purple die inks and then removed the masks. I adhered this panel to the 4.5" square piece to give it a black frame.

For the 5.25" piece of white cardstock, I created an ombré using red, pink and purple dye inks. I spritzed this layer with water, let it dry, and then placed the Twisted Sunshine stencil over top. Using a black dye ink, I applied a solid layer over the stencil. I removed the stencil and adhered this panel directly to the 5.5" piece of black cardstock to give it a frame.

I then took the smaller square panel and adhered it to the center of the larger square panel.

Using the Things a Witch Might Say, I heat embossed the sentiment "You had the power all along my dear", in white powder on black cardstock, trimmed it to a strip and then framed it with hot pink cardstock.

I now was able to finish up my card. I adhered my witch, cauldron and sentiment using foam tape, and then adhered a few Rabbit Hole Designs sequins to the card for embellishment. I adhered my panel to a 5.5" square card base and my project was finished!

This project uses the following Rabbit Hole Designs products:


For more inspiration with your The Rabbit Hole Designs Creations, be sure to follow along at these other locations:


For more details about products used in this post, you may also follow along at my personal blog, Just a Note by Justin, as well!

I hope this project leaves you inspired for your next witchy project!

Happy Crafting!

Look at you ... you little FLOCKSTAR you!

Hello everyone!


It's Niccole from Nic & Viv Designs back again to share another card I made using one of The Rabbit Hole Designs stamp sets.

For today's card I used the Caffeinated Flamingo stamp set and the Twisted Sunshine stencil.


How to create this card:

Here is one more picture of the full card ...


TRHD products used:

For more inspiration, updates, and news make sure to check out these places:


I have had so much fun playing with the Caffeinated Flamingo stamp set and the Twisted Sunshine stencil.

Thank you so much for stopping by and spending some time with me.

Until next time ... Hugs & inky fingers! -Nic-

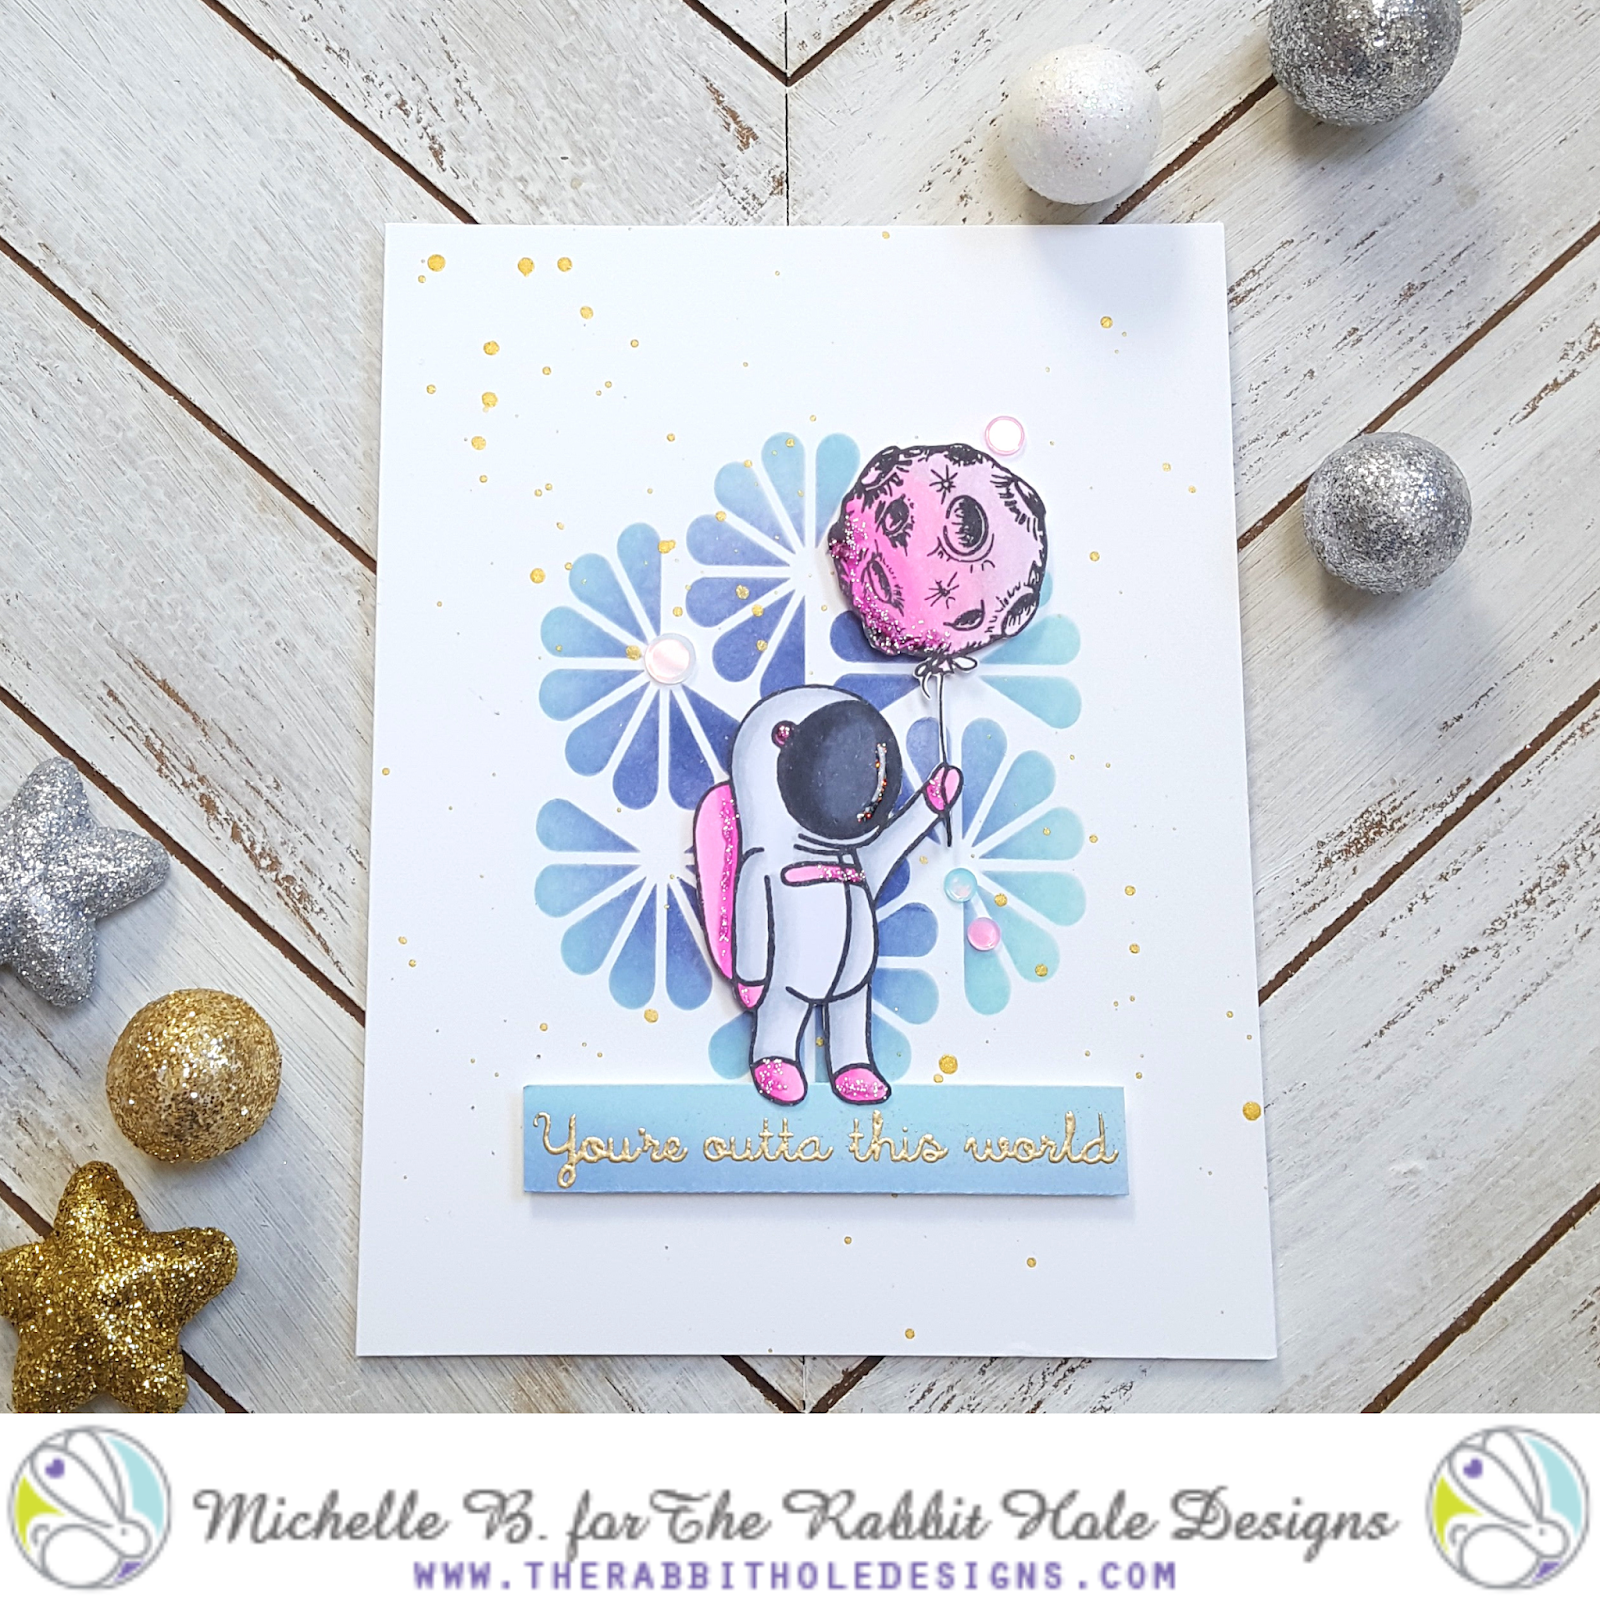
You're Outta This World

Hello there Rabbit Hole Fans!!! Hope all is well with you. Michelle here, sharing a card 
I created using the stamp set Space- Infinity & Beyond. I love giving these astronauts a female spin...
like the color pink. 

I paired it up with the stencil Twisted Sunshine. I used tumbled glass and chipped sapphire distress
oxide inks than I splattered some white and gold paint. I colored the astronaut with Copic Markers in shades C0, C1, C3, C5, C7, C9, 0, RV000, RV00, RV10, RV02, RV04.

I embossed the sentiment with gold powder over a piece of cardstock I colored
with the same inks.  For a finishing touch I scattered some cupped sequins and added
some shimmer with stickles glitter glue.

Space - Infinity & Beyond  4x6

Twisted Sunshine - 6x6 Stencil
Thanks for stopping by for a peek!
Enjoy your weekend!

Michelle

For more information, news and updates check out these links:


The Power of Love


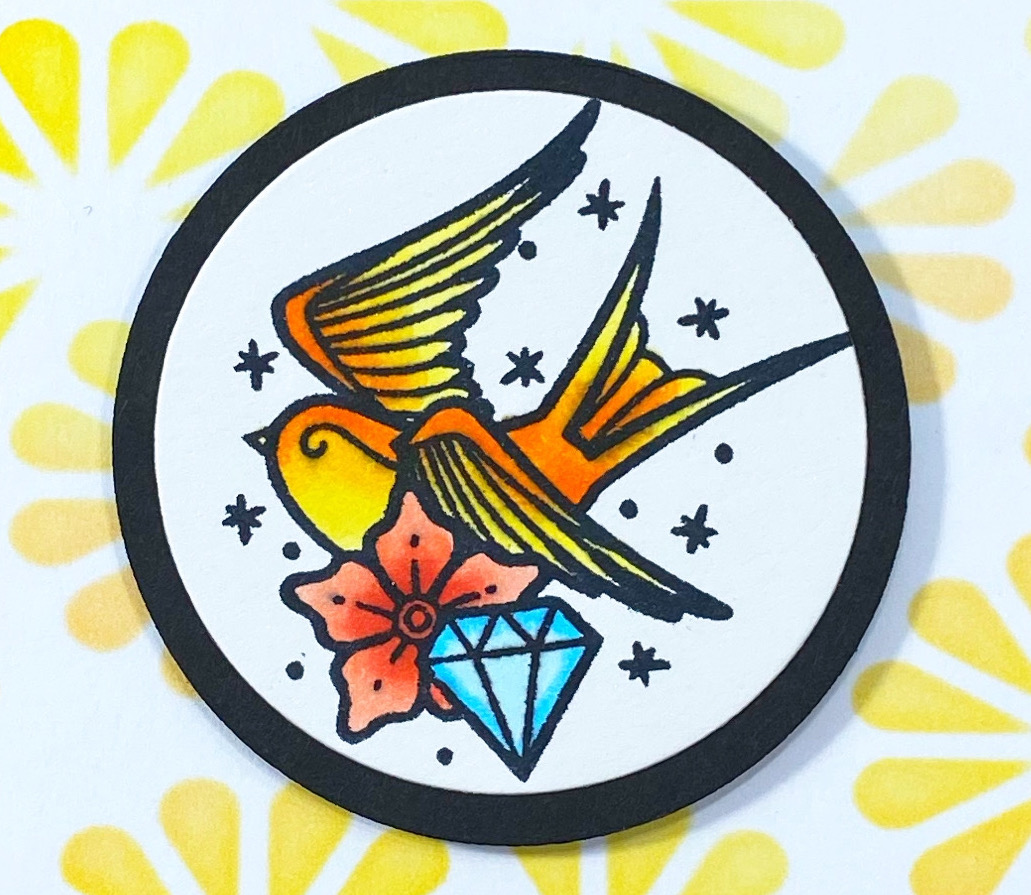
Helly everyone, It's Lisa here with you today from Oh So Cute By Lisa with another card using one of the fabulous Old School Tattoo stamps from the April release.
This card features the Old School Tattoo - Affirmation stamp set and the Twisted Sunshine stencil.


I just love the bright color scheme on this card and the black background really makes everything pop off the page. I also love the pretty font that the sentiment is written in!
The focal image of the bird is so whimsical and I love the look of layering on 2 circle die cuts to really focus the attention on the detail and coloring.


Make sure to check out the rest of the April release at The Rabbit Hole Designs and stay tuned at the end of April for the awesome May release being launched!

For more inspiration, updates, and news make sure to check out these places ...


Have a great day, I already am!
🐦  Lisa  🐦 

The Perfect Blend


Sometimes you just don't feel like coloring, but you want to make a card, am I right?!  It's Cassie back with another card to share with you all.  Today I'm using the new Beautiful Disaster stamp set, and I think the she is just gorgeous!  Instead of coloring her, I inked her up with a couple of Distress Oxide inks in blues and purples.  


Because those are a form of pigment ink, I embossed her with a clear embossing powder.  My background was made using spray inks and the beautiful Twisted Sunshine stencil.  I also have a video to share with you, if that is something you'd be interested in watching.  You can watch it here, or over on my YouTube channel.


And here's a closer look at the products I used today.


I hope you enjoyed what I made for you today and that you were inspired to go out and get a little crafty.  

For more inspiration, updates, and news make sure to check out these links.

Thank you so much for stopping by!
Cassie

Twisted Dino Sunshine Card


Hey Rabbit Hole Crafters! Justin here, and I'm back again with another card using some of my favorite The Rabbit Hole Designs Products!

This card uses the Caffeinated-Dino Stamp Set, along with the Twisted Sunshine Stencil!

I was inspired to make this card by all the colorful citrus fruits out there, and definitely wanted to use those colors with both my Dino and the stenciled background!

I always start with coloring up my image first with my alcohol markers. Because I was using the citrus colors of Green, Yellow and Orange, I wanted to use those colors for my dinosaur! So I made my dino green, his mug yellow, and his slippers orange. One item of the Caffeinated Critters I've had a lot of fun with is their eyes. I've really been trying to use a color you don't find anywhere else on the project, so their eye sticks out. For this guy, I went with a light blue!

After cutting my Caffeinated Dino out, I started to work on my background. I cut a piece of white cardstock down to 4" x 5.25. I adhered the Twisted Sunshine Stencil with a light tack adhesive so my stencil stayed in place. Next, I came up with a pattern for the order of my colors, just to add a bit of cohesiveness to the card instead of a random order.

I used a torn up post-it note to mask each individual partial circle, and used my blending brushes to blend the respective ink color. I then repeated until the entire panel was covered!

I used a stitched scalloped die to cut out a respective scalloped circle from a yellow wood-print paper. I adhered that to the center of my stenciled panel.

I matted my stenciled pattern on an A2-sized orange wood-print-patterned paper.

I trimmed down a sentiment strip on white cardstock, matted it with leftover yellow wood print paper, and stamped my sentiment in green.

I adhered my sentiment and dino on foam tape. To finish the project, I placed green and orange enamel dots for some extra embellishment. And that's how I made my card!

I used the following products to create this project:


For more inspiration with your The Rabbit Hole Designs Creations, be sure to follow along at these other locations:

For more details about products used in this post, you may also follow along at my personal blog, Just a Note by Justin, as well!

I hope this citrus-filled card sparked some fun ideas for your future projects, and maybe sparked a craving for orange juice or lemonade! 

Thanks for reading, and happy crafting!

It's an elegant Celebration!

Hello Rabbit Hole Designs Fans!! DTM Shanna here today a clean and simple celebration card using the Celebrate with Cake stamp set and Twisted Sunshine stencil!  


For this card, I opened for a very clean look with white on white with a touch of silver for the sentiment.  I used a micro glass bead gel over the Twisted Sunshine stencil on white cardstock to create my background.  While that was drying, I heat embossed the "celebrate" sentiment in sterling.  I actually heat embossed over the sentiment a total of 3 times, layering more embossing powder for a thicker, smoother finish.


I popped the sentiment onto the card using foam tape and I had a elegant Celebrate card fit for many occasions.  Wedding, baby shower/gender reveals, job promotions....the list goes on!  Celebrate with Cake can be used for SO much more than birthdays!!  


That wraps up my post for today, I will be back soon for another trip down The Rabbit Hole!  Until then you can find me over on my blog, Caffeinated Craftiness or over on Instagram-Shanna


For even more inspiration, updates, and news make sure to check out these links.

Caffeine Saves Lives!


Hello crafty friends!  I am so glad you popped by today to see my newest creation for The Rabbit Hole Designs - Design Team blog.  I am smitten with the new Twisted Sunshine Stencil!  I have glitter glazed it,  foiled it and in this card -  I am blending with Distress Oxide inks. 

Here is the amazing Twisted Sunshine Stencil
6" x 6" stencil


Don't you just love the attitude of the Caffeinated Flamingo?
It is a 3' x 4" clear stamp set


And for those not so into fussy cutting, there is the Caffeinated Flamingo matching die!


Perfectly Blended is additional sassy coffee and tea sentiments you can add to any coffee related card you make!
This is a 4" x 6" clear stamp set


The background stencil is so simple to recreate.  Here are the steps with photos to follow along:

A - I found the center of a 4" x 5 1/4" piece of white cardstock using a ruler from corner to corner.  I marked the X gently with a pencil so I can erase it later
B - I place the middle area of the stencil over the pencil mark X. 
C - I taped the side of the stencil with Purple Tape and masked of the rest of the stencil with post it notes
D - Using a three blender brushes, I blended my three desired colors of distress oxide inks over the stencil
E - I removed the stencil to reveal the design.  You must let the ink dry before erasing the pencil mark  

See how cool this blended Twisted Sunshine stencil turned out?  I see so many possibilities!

I colored the the whimsy Caffeinated Flamingo using my Triblend alcohol markers and fussy cut him out. (I like fussy cutting, but you may not - great news it there is a Caffeinated Flamingo Die availbel too) It make me laugh to see him standing on one foot with his bumble bee slipper!


I assembled the card as shown in the first photo , I stamped the sentiment  "Caffeine saves lives , mostly yours" (from the Perfectly Blended stamp set) at the top of the card front.  I added a 4 1/8" x 5 3/8" pieces of peach-ish cardstock for a mat and attached it to a white card base.  I used foam squares to attach the flamingo to the front of the card.  

I hope this inspires you to create your own background with stencils.  It save time looking though printed paper and you make it uniquely your own, especially since no background comes out the same.

Thank you so much for stopping by the blog!

Be Creative ~ Stay Inspired
Jenn Gross
@journeycoachjenn

For more inspiration, updates, and news make sure to check out these places


Ready to Par-Tea!!!

Hello there!
I hope you are all getting excited for 
The Rabbit Hole Designs' First Birthday Bash!!!

But today we celebrate our very own, Heather Ferguson's birthday!!!
We wish you a very happy birthday, Heather!!!

Michelle here! I started off with my chosen stencil, Twisted Sunshine, and layered
some distress oxide inks beginning with the darkest shade: black soot, 
picked raspberry and worn lipstick. Than I added some splattered white and gold paint.
Set aside to dry.

Next, I stamped and colored this hilarious flamingo!!!
I used Copic Markers in shades RV13, RV14, RV25; R21, R22;  
W3, W5, W6, W7; BG10, BG11, BG15; Y19.
For the sentiments, I used the stamp set Perfectly Blended! This stamp
set is full of fun caffeine puns!!! I embossed the sentiments with
gold embossing powder.

I adhered the flamingo, sentiments and gold thread with some foam tape.
I scattered some sequins and added some clear stickles glitter glue.

I hope you enjoyed this post!!!
Thanks for stopping by!!

For more inspiration, updates, and news make sure to check out these places.The Rabbit Hole DesignsThe Rabbit Hole Designs InstagramThe Rabbit Hole Designs Facebook PageThe Rabbit Hole Designs PinterestThe Rabbit Hole Designs YouTube


January Release Inspiration Hop ~ Day 3

Hello and welcome to Day 3 of the Inspiration Hop. We are so excited for you to join us as we present to you our January release.  Our fabulous Design Team has been sharing their projects over the last couple of days, so be sure to visit their blogs and leave them some crafty love.


 The 4 new stamp sets & 3 Stencils are available to purchase right now in the shop.
~
Every order placed will be eligible for a 10% discount. Discount Code TRHD2019 this code will only be accepted until Friday 01-03-2020 12:01 am PST. There are no exclusions on this code it is applicable to your whole order. Not applicable to previous orders. May be used more than once. Does not apply to shipping and tax.
**Please Note: Free Shipping WILL NOT be available during the time this discount code is in effect. **
~

The stamp set that is being highlighted today is:

Sassy Birthday 2

Celebrate With Cake 

Scripty Happy Birthday

Twisted Sunshine - Stencil

**Giveaway**
To celebrate day 3 of inspiration The Rabbit Hole Designs is giving away the stamp set Scripty Birthday and the Twisted Sunshine stencil to one lucky winner. Winner will be chosen at random from the comments left on participating blogs, so make sure to visit each stop and leave a comment. Leave comments by 11:59 pm PST 01-02-20 on all participating blogs. Winner will be announced on The Rabbit Hole Designs blog 01-03-2020 


Here is the line up for the hop:
Lisa Golzbein
Amanda Stevens

Thank you for joining us the last few days of our Inspiration Hop.


Thank you so much for stopping by today!